Soundcast VG5 User manual

VG5

9771-E Clairemont Mesa Blvd., San Diego, CA 92124 USA
Gesworenhoekseweg 4
5047TM Tilburg, the Netherlands

VG5 USER MANUAL
ENGLISH....................4
ESPAÑOL...................7
FRANCAIS................10
PORTUGUÊS...........13
DEUTSCHE..............16
NEDERLANDS.......19
中文........................... 22

DC IN
AUX IN 15V 1.5 A USB/
SERVICE RESET
4
ENGLISH | How to use VG5
Installing Battery
1. Using a Phillips #3 screwdriver, unscrew and
remove battery cover located on bottom of VG5
2. Connect the battery to the VG5 connector which
will only fit in the proper direction
3. Route the battery wires
4. Re-install battery cover
Charging Battery
Before initial use, charge battery for at least 5 hours to
full capacity. To ensure battery longevity and maximum
performance of the system, the battery should always
be charged prior to mobile operation.
1. Plug-In the included AC Wall Charger to AC power
and connect the other end to the VG5 DC In port
located behind the port protection cover of the VG5.
2. The VG5 can be operated from AC Wall Current
even when battery is fully discharged
3. Charge time is approximately 4-5 hours from fully
discharged battery
4. Playtime varies from depending upon volume level
Box Includes:
Quick Start Guide
Congratulations and thank you for your purchase of the Soundcast VG5.
Please read the operation instructions carefully before use.
3.5mm
analog
audio
cable
AC Wall
Charger
with
Adaptor
clips
Battery
Pack
Orange Power/
Charging
Indicator LED
USB Power Bank
Charging Output
Capacitive Touch Control Keypad
Weather Resistant
Charging & Access
Ports Location
Battery access panel
NFC (Near Field
Communication)
Location
Comfort-Grip
Carry Handle
Power ON
Power OFF
Battery Low
Charging
Fully Charged
Fully Charged
Error- Cannot Charge
Solid Orange
Off
Slow Blinking Red
Solid Red
Off (if power off)
Solid Orange (if power on)
Fast Blinking Red
Status Power LED
Ports, Connections and Inputs
Charging & Access Ports

5
Mute indicator
Mute button
Yellow AUX
indicator
LED
Bluetooth
indicator LED
Bluetooth
button
TWS button
Blue and orange LEDs
indicate current
TWS state
Eleven
LEDs for
volume and
fuel guage
display
Power
button
Volume
up
button
Orange
power
LED
Volume
down
button
Play/
Pause
button
Control Panel Keypad
Capacitive Touch Keypad
The VG5 features an advanced capacitive touch keypad
and backlighting technology. User functions are
accessed by a single press or press and hold over the
appropriate button area of the keypad
surface as indicated.
Powering On/Off: The VG5 is turned on and off using
the large button located in the center of the keypad
Turn On: Press and hold the power button for (2)
seconds until the backlights illuminate and then release
within (2) seconds, a confirmation beep will confirm unit
is turned on
Turn Off: Press and hold the power button for (2)
seconds then release within (2) seconds, a confirmation
beep will confirm unit is turning off
Connecting and Pairing
*The VG5 power must be turned on before trying to
pair (as well as aux input disconnected)
Press and hold the TWS (TWS icon) for (2) seconds until
a confirmation beep is heard. The TWS LED will start to
blink slowly. Repeat with the second VG5 unit.
3. When paired, the TWS LED on both units will show
both blue and orange (purple)
➤ When in TWS mode and you turn off one unit, the
other unit will turn off automatically
4. Reconnecting: The TWS-paired units will re-connect
to each other automatically after turning both units on.
A short press of the TWS button on either unit allows
cycling through the TWS modes (stereo, left/right, off)
as indicated below;
• LED blue and orange: left/right
from each speaker
• LED orange only: left from primary speaker,
right from secondary speaker
• LED off: TWS off
➤ To clear all devices from TWS memory and return to
single device operation, press and hold the TWS button
for (10) seconds until third beep is heard and the TWS
LED double blinks, then turn the unit off. When unit is
turned on again, the TWS LED will not be on, indicating
that TWS is disabled.
➤ If you experience any difficulty with either standard
Bluetooth pairing or TWS operation, the VG5 Bluetooth
system can be reset by clearing pairing memory of both
Bluetooth and TWS by using the (10) second press and
hold function (third beep) of each button and then power
cycling the unit.
➤ No music or intermittent dropouts? VG5 primary and
secondary units may be too far away
from each other.
Bluetooth pairing with NFC
1. Enable Bluetooth and NFC functions on
your mobile device
2. Hold phone near the NFC logo (logo) on VG5 unit
until mobile device connects and Bluetooth
LED blinks slowly
3. Press OK/Connect on your mobile device
to complete pairing
4. Play audio
Standard Bluetooth Pairing
1. Enable Bluetooth on your mobile device
2. Pair a new device: press the VG5 Bluetooth button
(Bluetooth LED will blink slowly)
3. From Bluetooth menu on mobile device settings,
select “VG5 by Soundcast_xxxxxx”
4. Once paired, the Bluetooth LED becomes solid blue
➤ Press & Hold Bluetooth button for (2) seconds and
beep is heard to re-enter pairing mode to pair a new or
additional device.
➤ To clear all devices from memory, press and hold the
Bluetooth button for (10) seconds until the Bluetooth
LED double blinks and second confirmation beep is
heard.
Aux Input Mode
Plug external audio source into 3.5mm jack to
automatically switch to Aux Input mode as indicated by
Aux LED turns yellow. Remove 3.5mm plug to switch
back to Bluetooth operation.
TrueWireless Stereo (TWS) Pairing
With TWS, two VG5 units may be paired for synchro-
nous Bluetooth playback. Power off, volume and TWS
mode will by synchronized and may be controlled from
either unit.
1. Both speakers must be powered on in Bluetooth
mode (no Aux input connected)
2. At least one of the speakers must be paired to audio
source (as described above)

6
Other Controls and Features
Volume Control:
The VG5 volume can be adjusted when playing music
or during speakerphone operation by pressing or press
and holding the + (up) or – (down) volume adjustment
buttons on the keypad. The current volume level will be
displayed with blue LED’s on the volume bar graph.
➤ Mobile devices that support the AVRCP protocol
can adjust the volume from the mobile devices
volume slider control.
Fuel Gauge:
Press the Power button for (1) second and beep is
heard to display the current battery level bar graph us-
ing a combination of RED=Low, YELLOW=OK, GREEN=-
Full LEDs. The bar graph will move counter-clockwise as
the battery discharges.
➤ The fuel-gauge and amber low battery LED indicators
will NOT be accurate until at least two full charging/
discharging cycles have been completed.
Blue LEDs
illuminate in
clockwise direction
to indicate
volume level.
Volume Level Indication
Battery Status Indication
Volume
up
button
Orange
Power
LED
Volume
down
button
Red
(Low
Battery)
Yellow
(Ok
Battery) Green
(Charged
Battery)
Keyboard Lock
The VG5 has two different keypad lockout mechanisms
to prevent un-intended or accidental operation. Both are
disabled by default. When enabled, all keypad functions
except for power on/off will be ignored.
Child Lock:
To Enable or Disable, press and hold the mute button
for (5) seconds and release. The top most BLUE LED
will flash indicating the keypad is locked and child lock
is active. Power cycling the unit will disable the keypad
child lock.
Auto Lock:
Keypad Lock Indicator:
Flashing Blue:
Child Lock Active
Flashing Green:
Auto Lock Active
Slide finger from power
button to any function
button, and release.
Mute
button
Troubleshooting
Temporary Unlock
Swipe Action
To Enable or Disable Auto-Lock, press and hold the
mute button for (10) seconds and release. The volume
bar graph will blink twice when enabled and once when
disabled. When enabled, the keypad will “Auto-Lock”
after (3) minutes of no keypad interaction. The top
GREEN LED will blink indicating the keypad is locked The
Auto-Lock will remain enabled or disabled when power
cycling the unit.
Temporarily unlock the keypad for use while Auto-Lock is
activeby conducting an “Unlock Swipe”. This can be done
by sliding your finger quickly between the power button
and any other function button, being sure to release your
finger while it is still over the “other function” button.
The volume bar graph will blink indicating that the keypad
is unlocked. Keypad will auto-lock again after (3) minutes
of no interaction.
VG5 does not
turn on
Difficulty with
Bluetooth or
TWS pairing
process
Keypad has
un-intended
operation due
to moisture
Keypad
backlights
are changing
brightness or
turn off
Keypad is not
responding
to button
presses
Unit is
misbehaving or
not responsive
• Be sure unit is fully charged
• Be sure keypad is clear of any dirt,
dust or moisture
• Disconnect / Re-connect battery
• Power cycle VG5 unit(s) and retry
• Clear both Bluetooth and TWS pairing
history by holding the Bluetooth button
for 10 seconds (third beep), repeat
by pressing the TWS buttons for a full
10 seconds (third beep) and try your
pairing again
• Disable/Enable Bluetooth function
on your music source device (phone or
computer) and retry
• Wipe down keypad to remove any
excess moisture or dirt
• Utilize Child Lock or Auto Lock features
described above
• The VG5 utilizes an ambient light
sensor to adjust the LED backlights
and status LED indicators based on the
ambient light. This is normal operation
Power cycle the unit and be certain
that Child Lock and Auto-Lock functions
are Disabled
* Perform factory reset by
Disconnecting & Reconnecting battery
* Clear both Bluetooth and TWS
memory (refer to instructions above)
* Power cycle unit
Problem Solution

7
DC IN
AUX IN 15V 1.5 A USB/
SERVICE RESET
ESPAÑOL | Cómo usar el VG5
Instalación de las Baterías
1. Con un destornillador Phillips #3, destornille y
retire la cubierta de la batería ubicada en la parte
inferior del VG5
2. Conecte la batería al conector del VG5, e cual
ingresará solamente en la dirección correcta
3. Enrute los cables de la batería
4. Reinstale la cubierta de la batería
Carga de la Batería
Antes del uso inicial, cargue la batería al menos por
5 horas a su máxima capacidad. Para garantizar la
larga vida útil de la batería y el máximo rendimiento del
sistema, la batería siempre debe cargarse antes de la
operación móvil.
1. Enchufe el cargador de pared de CA incluido a
la alimentación de CA y conecte el otro extremo
al puerto de entrada VG5 de CC ubicado
2. El VG5 puede operarse desde la corriente CA
de la pared incluso cuando la batería está
totalmente descargada
3. El tiempo de carga es de aproximadamente
4-5 horas si se tiene una batería
completamente descargada
4. El tiempo de reproducción varía dependiendo
del nivel de volumen
La caja incluye
Guía de Inicio Rápido
Felicitaciones y gracias por su compra del Soundcast VG5. Lea las
instrucciones de operación cuidadosamente antes de usar.
Cable
de audio
análogo
de 3.5
mm
Cargador de
pared de CA con
sujetadores para
el adaptador
Bloque de
baterías
LED indicador
naranja de
carga/encendido
Salida de carga del
cargador de baterías USB
Teclado por control táctil capacitivo
Ubicación de los
puertos de carga y
acceso resistentes
a las condiciones
climáticas
Battery access panel
Ubicación de la
comunicación de
campo cercano (NFC)
Asa de transporte de
agarre cómodo
Encendido
Apagado Apagado
Batería baja
Cargando
Totalmente cargado
Totalmente cargado
Error- No Puede Cargar
Naranja sólido
Rojo parpadeando lento
Rojo sólido
Apagado
(si la corriente está apagada)
Naranja sólido
(si la corriente está encendida)
Rápido parpadeando rojo
Estado LED de encendido
Puertos, Conexiones y Entradas
Puertos de Carga y Acceso

8
Indicador de
silencio
Botón de
silencio
LED indicador
del AUX
amarillo
LED indicador
del Bluetooth
Botón del
Bluetooth
Botón TWS
Los LED de color azul
y naranja indican el
estado actual del TWS
Once
LED para
volumen y
medidor de
carga de la
batería
Botón de
encendido/
apagado
Botón para
subir el
volumen
LED de
encendido
naranja
Botón para
bajar el
volumen
Botón de
reproducción
/pausa
Teclado del Panel de Control
Teclado Táctil Capacitivo
El VG5 presenta un teclado táctil capacitivo avanzado y
tecnología de luz de fondo. Se accede a las funciones de
usuario mediante una sola presión o presione y manten-
ga presionada
el área del botón apropiado de la superficie del teclado
como se indica;
Encendido/Apagado: El VG5 se enciende y se apaga
usando el botón grande ubicado en el centro del teclado
Encendido: Presione y mantenga presionado el botón de
encendido/apagado por (2) segundos hasta que la luz
de fondo se ilumine y luego suelte dentro de (2) segun-
dos; un sonido de confirmación indicará que la unidad
está encendida
Apagado: Presione y mantenga presionado el botón de
encendido/apagado por (2) segundos y luego suelte
dentro de (2) segundos; un sonido de confirmación
indicará que la unidad está apagada
Conexión y Emparejamiento
➤ La corriente del VG5 debe estar encendida antes de
tratar de emparejar (y la entrada Aux, desconectada)
1. Ambos altavoces deben encenderse en modo
Bluetooth (sin conexión de entrada Aux)
2. Al menos uno de los altavoces debe emparejarse
a la fuente de audio (como se describe anteriormente)
Presione y mantenga presionado el TWS (ícono de
TWS) por (2) segundos hasta que se escuche un
sonido de confirmación. El LED del TWS empezará a
parpadear lentamente. Repita con la segunda
unidad del VG5.
3. Cuando se empareje, el LED del TWS en ambas
unidades se mostrará azul y naranja (morado)
➤ Cuando esté en modo TWS y apague una unidad, la
otra unidad se apagará automáticamente
4. Reconexión: Las unidades emparejadas del TWS
se reconectarán entre sí automáticamente después
de encender ambas unidades. Una corta presión del
botón del TWS en cada unidad permite desplazarse
por los modos del TWS (estéreo, izquierda/derecha,
apagado) como se indica a continuación;
• LED azul y naranja: izquierda/derecha
de cada altavoz
• LED naranja solamente: izquierda del altavoz
primario, derecha del altavoz secundario
• LED apagado: TWS apagado
➤ Para eliminar todos los dispositivos de la memoria del
TWS y regresar a la operación de un único dispositivo,
presione y mantenga presionado el botón TWS por
(10) segundos hasta que se escuche un tercer sonido
y el LED del TWS parpadee dos veces, luego apague la
unidad. Cuando la unidad se vuelve a encender, el LED
del TWS no estará encendido, indicando que el TWS
está deshabilitado.
➤ Si experimenta alguna dificultad con el emparejamien-
to estándar del Bluetooth o la operación del TWS, el
sistema Bluetooth del VG5 puede reiniciarse eliminando
la memoria de emparejamiento, tanto del Bluetooth
como del TWS, usando la función de presionar y man-
tener presionado por (10) segundos (tercer sonido) de
cada botón y luego reiniciando la unidad.
➤ ¿No hay música o hay cortes intermitentes? Las
unidades primaria y secundaria del VG5 podrían estar
demasiado lejos una de la otra.
Emparejamiento del Bluetooth con el NFC
1. Habilita las funciones de Bluetooth y NFC en
su dispositivo móvil
2. Sostenga el teléfono cerca del logo del NFC (logo)
en la unidad del VG5 hasta que el dispositivo móvil se
conecte y el LED del Bluetooth parpadee lentamente
3. Presione OK/Conectar en su dispositivo móvil para
completar el emparejamiento
4. Reproduzca el audio
Emparejamiento Estándar del Bluetooth
1. Habilita el Bluetooth en su dispositivo móvil
2. Empareje un nuevo dispositivo: presione el botón
de Bluetooth del VG5 (el LED del Bluetooth
parpadeará lentamente)
3. Del menú del Bluetooth en las configuraciones
del dispositivo móvil, seleccione
“VG5 por Soundcast_xxxxxx”
4. Una vez emparejado, el LED del Bluetooth
se vuelve azul sólido
➤ Presione y mantenga presionado el botón por (2)
segundos hasta oír un sonido para reingresar al modo
de emparejamiento para emparejar un dispositivo nuevo
o adicional
➤ Para eliminar todos los dispositivos de la memoria,
presione y mantenga presionado el botón Bluetooth por
(10) segundos hasta que el LED del Bluetooth parpadee
dos veces y se escuche un segundo sonido
de confirmación.
Modo de Entrada Aux
Enchufe la fuente de audio externa en la clavija de 3.5
mm para pasar automáticamente al modo de entra-
da Aux, como se indica cuando el LED Aux se torna
amarillo. Retire el enchufe de 3.5 mm para regresar a la
operación del Bluetooth.
Emparejamiento del Estéreo TrueWireless (TWS)
Con TWS, dos unidades de VG5 pueden emparejarse
para reproducción sincrónica del Bluetooth. El apagado,
el volumen y el modo TWS serán sincronizados y pueden
ser controlados desde cualquier unidad.

9
Otros Controles y Características
Control de Volumen:
El volumen del VG5 puede ajustarse cuando se repro-
duce música o durante la operación del teléfono altavoz
presionando o presionando y manteniendo presionados
los botones de ajuste de volumen + (alto) o – (bajo) en el
teclado. El nivel de volumen actual se mostrará con LED
azules en el gráfico de barras de volumen.
➤ Los dispositivos móviles que tienen soporte para el
protocolo AVRCP pueden ajustar el volumen desde el
control deslizador de volumen de los
dispositivos móviles.
Medidor de Carga de la Batería:
Presione el botón de encendido/apagado por (1) segun-
do hasta oír un sonido para mostrar el gráfico de barras
del nivel de batería actual usando una combinación de
ROJO=Bajo, AMARILLO=Bien, VERDE= LED completos.
El gráfico de barras se moverá en sentido antihorario a
medida que la batería se descarga.
➤ Los indicadores de carga de la batería y LED ámbar
de batería baja NO serán precisos hasta que se hayan
completado por lo menos dos ciclos completos
de carga / descarga.
Los LED azules se
iluminan en sentido
horario para indicar
el nivel de volumen.
Indicación del Nivel de Volumen
Indicación del Estado de la Batería
Botón para
subir el
volumen
LED de
encendido
naranja
Botón para bajar
el volumen
Rojo
(Batería
baja)
Amarillo
(Batería}
Verde
(Batería
cargada)
Bloqueo del Teclado
El VG5 tiene dos mecanismos de bloqueo del teclado
para evitar una operación no intencionada o accidental.
Ambos vienen deshabilitados de fábrica. Cuando se
habiliten, se ignorarán todas las funciones del teclado,
excepto encendido/apagado.
Bloqueo de Niños:
Para habilitar o deshabilitar, presione y mantenga presio-
nado el botón de silencio por (5) segundos y suelte. El
LED azul que está más arriba parpadeará indicando que
el teclado está bloqueado y que el bloqueo de niños está
activo. Reiniciar la unidad deshabilitará el bloqueo de
niños del teclado.
Azul parpadeante:
Bloqueo para
niños activo
Verde parpadeante:
Bloqueo automático activo
Deslice el dedo desde el botón
de encendido/apagado hacia
cualquier botón de función
y suelte.
Botón de
silencio
Indicador del bloqueo del teclado:
El VG5 no se
enciende
Dificultad con
el proceso
de empare-
jamiento del
Bluetooth o
TWS
El teclado tiene
una operación
no intencionada
por humedad
Las luces de
fondo del teclado
cambiande brillo
o se apagan
El teclado no
responde a cuan-
do se presiona
un botón
La unidad se
está com-
portando mal o
no responde
• Asegúrese de que la unidad esté
completamente cargada
• Asegúrese que el teclado no
presente suciedad, polvo o humedad
• Desconecte/Reconecte la batería
• Reinicie la(s) unidad(es) del
VG5 y reintente
• Elimine el historial de emparejamiento
del Bluetooth y del TWS presionando
el botón del Bluetooth por 10 segun-
dos (tercer sonido) y repita presion
ando los botones del TWS por 10
segundos completos (tercer sonido) e
intente emparejar otra vez.
• Deshabilite/Habilite la función del
Bluetooth en su dispositivo de fuente
de música (teléfono o computadora)
y vuelva a intentar
• Limpie el teclado para eliminar
cualquier exceso de humedad osuciedad
• Utilice las funciones del bloqueo de niños
o bloqueo automático descritas
anteriormente
• El VG5 utiliza un sensor de luces de
fondo de ambiente para ajustar las
luces de fondo del LED y los indicadores
LED de estado en base a la luz
ambiente. Así es la operación normal
Reinicie la unidad y asegúrese que las
funciones del bloqueo de niños y del blo-
queo automático estén deshabilitadas
• Realice un reinicio de fábrica
desconectando y reconectando la batería
• Elimine la memoria del Bluetooth y del
TWS(consulte las instrucciones anteriores)
• Reinicie la unidad
Problema Solución
Detección y Solución de Problemas
Acción de Pase Para Desbloqueo Temporal
Bloqueo Automático:
Para habilitar o deshabilitar el bloqueo automático,
presione y mantenga presionado el botón de silencio por
(10) segundos y suelte. El gráfico de barras de volumen
parpadeará tres veces cuando esté habilitado y una
vez cuando esté deshabilitado. Cuando esté habilitado,
el teclado se bloqueará automáticamente luego de (3)
minutos de no interacción del teclado. El LED VERDE
de arriba parpadeará indicando que el teclado está blo-
queado. El bloqueo automático permanecerá habilitado
o deshabilitado cuando se reinicie la unidad.
Desbloquee el teclado para usar mientras el blo-
queo automático está activo realizando un “Pase de
desbloqueo”. Esto puede hacerse deslizando su dedo
rápidamente entre el botón de encendido/apagado y
otro botón de función, asegurándose de soltar el dedo
mientras todavía se encuentre sobre el botón de “otra
función”. El gráfico de barras de volumen parpadeará y
se escuchará un sonido de confirmación de que el tecla-
do está desbloqueado. El teclado se volverá a bloquear
automáticamente luego de (3) minutos
de no interacción.

10
DC IN
AUX IN 15V 1.5 A USB/
SERVICE RESET
FRANÇAIS | Comment utiliser VG5
Installation de la batterie
1. À l’aide d’un tournevis cruciforme #3, dévisser et
retirer le couvercle de la batterie situé au
bas du VG5
2. Raccordez la batterie au connecteur VG5 qui ne
sera compatible que dans le bon sens.
3. Acheminez les fils de la batterie
4. Réinstallez le couvercle de la batterie
Chargement de la batterie
Avant la première utilisation, charger la batterie
pendant au moins 5 heures à pleine capacité. Pour
assurer la longévité de la batterie et les performances
maximales du système, la batterie doit toujours être
rechargée avant le fonctionnement mobile.
1. Branchez le chargeur mural CA fourni au secteur
et connectez l’autre extrémité à la prise d’entrée CC
du VG5 située derrière le capot de protection des
ports du VG5
2. Le VG5 peut fonctionner à partir d’un courant
mural alternatif, même lorsque la batterie est
complètement déchargée
3. Le temps de charge est environ 4-5 heures
pour une batterie entièrement déchargée
4. La durée de lecture varie en fonction
du volume sonore
La boîte inclut:
Guide de démarrage rapide
Félicitations et merci pour votre achat du haut-parleur Soundcast VG5.
Lire attentivement toutes les instructions avant utilisation.
Câble
audio 3,5
mm
Chargeur
mural CA
avec pinces
d’adaptation
Bloc
batterie
Voyant lumineux
orange d’alimentation/
chargement
Sortie de chargement de
chargeur portable USB
lavier de commande par
touches capacitives
Emplacement des
ports de chargement
et d’accès résistant
aux intempéries
Panneau d’accès batterie
Communication
en champ proche
(CCP)
Poignée de
transport confortable
Ports, connexions et entrées
Ports de chargement et d’accès
Marche
Arrêt
Battery Low
En chargement
Pleinement chargé
Pleinement chargé
Erreur- Impossible de charger
Orange fixe
Éteint
Batterie faible
Rouge fixe
Éteint (si éteint)
Orange fixe (s’il est allumé)
Rouge clignotant rapidement
Statut Voyant d’alimentation

11
Indicateur sourdine
Bouton
sourdine
Voyant
lumineux
AUX jaune
Voyant
Bluetooth
Bluetooth
button
TWS button
Voyants lumineux bleu
et orange indique l’état
TWS actuel
Onze voyants
lumineux pour
le volume et
la jauge de
carburant
écran
Bouton
d’alimentation
Bouton
volume
haut
Voyant
d’alimentation
orange
Bouton
volume
bas
Bouton
lecture/
pause
Clavier du panneau de contrôle
Clavier à touches capacitives
Le VG5 est équipé d’un clavier à touche capacitive
et d’une technologie avancée de rétroéclairage. Les
fonctions utilisateur sont accessibles en appuyant sur
une seule touche ou en maintenant la touche enfoncée
surla zone appropriée de la surface du clavier telle
qu’indiquée.
Mise en marche/arrêt : Le VG5 est activé et désactivé
à l’aide du gros bouton situé dans le centre du clavier.
Allumer: maintenez enfoncée la touche d’alimentation
(2) secondes jusqu’à ce que le rétro-éclairage s’allume
et puis relâchez (2) secondes, un bip de confirmation
confirmera que l’appareil est sous tension.
Éteindre: Appuyez sur le bouton d’alimentation et main-
tenez-le enfoncé pendant 2 secondes, puis relâchez-le
dans les 2 secondes, un bip de confirmation confirmera
que l’appareil est éteint.
Connexion et appairage
➤ Le VGx doit être mis sous tension avant d’essayer
d’appairer (et l’entrée aux doit être débranchée)
1. Les deux haut-parleurs doivent être sous tension
en mode Bluetooth(pas d’entrée auxiliaire connectée)
2. Au moins un des haut-parleurs doit être appairé
à une source audio (comme décrit ci-dessus)
Appuyez sur la touche TWS (icône TWS) et
maintenez-la enfoncée pendant 2 secondes jusqu’à
ce que un bip de confirmation est émis. Le voyant
lumineux TWS commencera à clignoter lentement.
Répéter avec la deuxième unité VG5.
3. Lorsqu’il est jumelé, le voyant TWS des deux
unités affichera à la fois le bleu et l’orange (violet)
➤ Lorsque vous êtes en mode TWS et que vous
éteignez une unité, l’autre unité
s’éteindra automatiquement.
4. Reconnexion: Les deux TWS se reconnectent
automatiquement après avoir mis les deux appareils
sous tension. Une courte pression sur le bouton TWS
de l’un ou l’autre des appareils permet de parcourir
les modes TWS (stéréo, gauche/droite, arrêt)
comme indiqué ci-dessous;
• Voyant bleu et orange: gauche/droite
de chaque enceinte
• Voyant orange uniquement: à gauche
du haut-parleur principal, à droite du
haut-parleur secondaire
• Voyant éteint: TWS éteint
➤ Pour effacer tous les appareils de la mémoire TWS
et revenir au fonctionnement avec un seul appareil,
appuyez sur le bouton TWS et maintenez-le enfoncé
pendant 10 secondes jusqu’ à ce que le troisième bip
sonore retentisse et que le TWS Le voyant clignote deux
fois, puis éteint l’unité. Quand l’unité est allumée de
nouveau, le voyant TWS ne s’allume pas, indiquant que le
TWS est désactivé.
➤ Si vous éprouvez des difficultés avec l’appairage
Bluetooth standard ou TWS, le système Bluetooth VG5
peut être réinitialisé en effaçant la mémoire d’appairage
Bluetooth et TWS en utilisant la fonction en appuyant et
tenant enfoncé (10) secondes (troisième bip) de chaque
bouton et puis en redémarrant l’unité.
➤ Pas de musique ou perte de signal intermittente? Les
unités primaires et secondaires VG5 peuvent être trop
éloignées les unes des autres.
Appairage Bluetooth® simple avec CCP
1. Activez les fonctions Bluetooth et CCP
sur votre appareil mobilee
2. Tenez le téléphone près du logo CCP (logo) sur
l’unité VG5 jusqu’ à ce que l’appareil mobile
se connecte et que le voyant lumineux
Bluetooth clignote lentement
3. Appuyez sur OK/Connect sur votre appareil
mobile pour terminer l’appairage
4. Lecture audio
Appairage Bluetooth standard
1. Activez Bluetooth sur votre appareil mobile
2. Appairer un nouvel appareil: appuyez sur le
bouton Bluetooth VG5 (le voyant lumineux
Bluetooth clignote lentement)
3. Dans le menu Bluetooth des réglages de l’appareil
mobile, sélectionnez “VG5 by Soundcast_xxxxxxxx”
4. Une fois l’appairage complété, le voyant
lumineux Bluetooth devient bleu
➤ Appuyez et maintenez le bouton Bluetooth enfoncé
pendant 2 secondes et un bip se fait entendre pour
ré-entrer en mode appairage pour appairer un nouveau
ou un dispositif supplémentaire.
➤ Pour effacer tous les périphériques de la mémoire,
appuyez sur le bouton Bluetooth et maintenez-le enfoncé
pendant 10 secondes jusqu’ à ce que l’indicateur
Bluetooth double clignote et que le deuxième bip de
confirmation soit émis.
Mode entrée Aux
Branchez la source audio externe dans une prise jack
de 3,5 mm pour basculer automatiquement en mode
d’entrée auxiliaire, comme indiqué par le voyant Aux
devenant jaune. Retirez la prise de 3,5 mm pour revenir
au mode Bluetooth.
Appairage TrueWireless Stereo (TWS)
Avec le TWS, deux VG5 peuvent être appairés pour la
synchronisation Bluetooth. La mise hors tension, le vol-
ume et le mode TWS sont synchronisés et peuvent être
commandés à partir de n’importe quel appareil.

12
Autres contrôles et
caractéristiques
Contrôler le volume :
Le volume du VG5 peut être réglé pendant la lecture
de la musique ou pendant le fonctionnement du haut-
parleur en appuyant sur les boutons de réglage de vol-
ume + (haut) ou - (bas) du clavier ou en les maintenant
enfoncés. Le niveau de volume actuel sera affiché avec
des voyants bleus sur le graphique à barres de volume.
➤ Les appareils mobiles prenant en charge le protocole
AVRCP peuvent régler le volume à partir du curseur de
volume des appareils mobiles.
Jauge de carburant :
Appuyer sur le bouton d’alimentation pendant (1) sec-
onde et un bip sonore retentit pour afficher le graphique
à barres actuel du niveau de charge de la batterie - une
combinaison de ROUGE=Faible, JAUNE=OK, VERT=
LEDs complètes. Le graphique à barres se déplace dans
le sens antihoraire comme suit
la batterie se décharge.
➤ Les indicateurs DEL de jauge de carburant et de
pile faible jaune ambré ne seront PAS précis tant qu’au
moins deux cycles complets de chargement/décharge-
ment n’auront pas été complétés.
Les voyants bleus
s’allument dans le
sens des aiguilles
d’une montre pour
indiquer le niveau
du volume.
Indication du
volume sonore
Indication du
statut de
la batterie
Bouton
volume
haut
Orange
Voyant
d’alimentation
Bouton
volume
bas
Rouge
(batterie
faible)
Jaune
(batterie
Ok) Vert
(batterie
chargée)
Verrouillage du clavier
Le VG5 dispose de deux mécanismes de verrouillage
du clavier pour éviter tout fonctionnement involontaire
ou accidentel. Les deux sont désactivés par défaut. Lor-
squ’ils sont activés, toutes les fonctions du clavier, à l’ex-
ception de la mise sous et hors tension, sont ignorées.
Verrouillage parental:
Pour activer ou désactiver, appuyez et maintenez la
touche sourdine enfoncée
pendant 5 secondes et relâcher. Le voyant bleu le plus
haut clignotera, indiquant que le clavier est verrouillé est
que le verrouillage enfant est activé. Le fait de mettre
l’appareil sous tension désactive le verrouillage enfant
du clavier.
Bleu clignotant :
Verrouillage
enfant actif
Vert clignotant :
Verrouillage
automatique actif
Faites glisser votre doigt de
la touche marche/arrêt à
toute touche fonction,
puis relâchez.
Bouton
sourdine
Le VG5 ne
s’allume pas
Difficulté avec
le processus
d’appairage
Bluetooth ou
TWS
Le clavier a
opération non
intentionnelle
en raison de
l’humidité
Clavier changent
luminosité ou
éteindre
Le clavier ne
répond pas aux
pressions des
boutons
L’unité se com-
porte mal ou ne
réagit pas bien
• Assurez-vous que l’appareil est
complètement chargé.
• Assurez-vous que le clavier est
exempt de toute saleté, poussière
ou humidité.
• Débranchez/rebranchez la batterie
• Redémarrez l’unité VG5 et
essayez à nouveau
• Effacez l’historique des appairages
Bluetooth et TWS en maintenant
le bouton Bluetooth enfoncé pendant
10 secondes (troisième bip), répétez
en appuyant sur les boutons TWS pour
un 10 secondes complètes (troisième
bip) et essayez votre appairage
à nouveau.
• Désactivez/Activez la fonction
Bluetooth sur votre appareil source de
musique (téléphone ou ordinateur)
et réessayez
• Essuyez le clavier pour retirer toute
humidité ou saleté excédentaire
• Utiliser les fonctionnalités
de verrouillage enfant ou verrouillage
automatique décrite ci-haut
• Le VG5 utilise un capteur de lumière
ambiante afin d’ajuster le
rétroéclairage DEL et les indicateurs
de statut basés sur la lumière
ambiante. Ceci est un
fonctionnement normal
Redémarrez l’unité et assurez-vous
queLes fonctions de verrouillage enfant
et de verrouillage automatique
sont désactivées
• Effectuez la réinitialisation d’usine en
débranchant et reconnectant la batterie.
• Effacez la mémoire Bluetooth et TWS
(voir instructions ci-dessus)
• Redémarrer l’unité
Problème Solution
Dépannage
Déverrouillage temporaire par
action de glissement
Verrouillage automatique :
Pour activer ou désactiver le verrouillage automatique,
appuyez sur la touche de sourdine et maintenez-la enfon-
cée pendant 10 secondes, puis relâchez-la. Le graphique
à barres de volume clignotera deux fois lorsqu’il est
activé et une fois lorsqu’il est désactivé. Lorsqu’il est
activé, le clavier se verrouille automatiquement après
trois (3) minutes sans interaction avec le clavier. Le
voyant vert du haut clignote pour indiquer que le clavier
est verrouillé. Le verrouillage automatique reste activé
ou désactivé lorsque l’appareil est sous tension.
Déverrouiller temporairement le clavier pendant que
le verrouillage automatique est actif en effectuant un
«Déverrouillage par glissement». Pour ce faire, glissez
votre doigt rapidement entre le bouton d’alimentation
et tout autre bouton de fonction, en vous assurant de
relouer votre doigt pendant qu’il est encore au-dessus
du bouton «autre fonction». Le graphique à barres du
volume clignotera et un bip de confirmation sera émis
pour indiquer que le clavier est en position de marche.
Le clavier se verrouille automatiquement après (3)
minutes sans interaction.
Voyant de verrouillage du clavier :

13
DC IN
AUX IN 15V 1.5 A USB/
SERVICE RESET
PORTUGUÊS | Como utilizar o VG5
Instalação da bateria
1. Com uma chave de fendas Phillips n.º 3,
desaparafuse e retire a tampa do compartimento
das pilhas na parte inferior do VG5
2. Ligue a bateria ao conector do VG5, que só
encaixa na direção correta
3. Encaminhe os fios da bateria
4. Volte a colocar a tampa do compartimento
das pilhas
Carregamento da bateria
Antes da primeira utilização, carregue a bateria
durante pelo menos cinco horas até à capacidade total.
Para garantir a longevidade da bateria e o desempenho
máximo do sistema, a bateria deve ser sempre
carregada antes da operação móvel.
1. Ligue o carregador de parede de CA incluído à
alimentação de CA, e ligue a outra extremidade
da porta de entrada de CC do VG5, que se encontra
atrás da tampa de proteção da porta do VG5
2. O VG5 pode ser operado com corrente de CA
mesmo quando a bateria está totalmente carregada
3. O tempo de carregamento é aproximadamente
entre quatro a cinco horas com uma bateria
totalmente descarregada
4. O tempo de reprodução varia consoante
o nível do volume
Conteúdo da caixa:
Guia de início rápido
Parabéns e obrigado por ter adquirido o Soundcast VG5. Leia
atentamente as instruções de utilização antes da utilização.
Cabo de
áudio
analógico
de 3,5 mm
Carregador de
parede de CA
com grampos
para adaptador
Bateria
de pilhas
LED indicador
laranja de
alimentação/
carregamento
Saída de carregamento
do power bank USB
Teclado tátil de controlo
Localização das portas de
acesso e carregamento
resistente a intempéries
Painel de acesso
à bateria
Zona NFC (Near
Field Communi-
cation)
Pega para
transporte confortável
Alimentação ligada
Alimentação desligada
Bateria fraca
A carregar
Totalmente carregado
Totalmente carregado
Erro. Não é possível carregar
Laranja constante
Desligado
Vermelho intermitente lento
Vermelho constante
Desligado
(se a alimentação estiver desligada)
Laranja-escuro
(se a alimentação estiver ligada)
Vermelho intermitente rápido
Estado LED de força
Portas, ligações e entradas
Portas de acesso e carregamento

14
Indicador de
Sem Som
Botão Sem
Som
LED indicador
AUX amarelo
LED indicador
do Bluetooth
Botão do
Bluetooth
Botão TWS
Os LED azul e laranja
indicam o estado atual
do TWS
Onze LED
para volume
e medidor
de energia
Botão de
alimentação
Botão de
aumento do
volume
LED de
alimentação
laranja
Volume de
diminuição
do volume
Botão
Reproduzir/
Pausa
Teclado do painel de controlo
TECLADO TÁTIL
O VG5 possui um teclado tátil e tecnologia de retroilumi-
nação. O acesso às funções do utilizador é feito através
de um premir breve ou um premir longo da área do
botão apropriada do teclado da superfície do teclado
como indicado.
Ligação/desligamento: o VG5 é ligado e desligado
utilizando o botão de grandes dimensões no centro do
teclado.
Ligar: mantenha o botão de alimentação premido du-
rante dois (2) segundos até a retroiluminação acender
e solte em dois (2) segundos. É emitido um sinal sonoro
de confirmação quando a unidade estiver ligada.
Desligar: mantenha o botão de alimentação premido
durante dois (2) segundos e solte em dois (2) segundos.
É emitido um sinal sonoro de confirmação quando a
unidade estiver desligada.
Ligação e emparelhamento
➤ A alimentação do VG5 tem de ser ligada antes de
tentar realizar o emparelhamento (e a entrada aux tem
de ser desligada)
2. Pelo menos um dos altifalantes tem de
ser emparelhado com a fonte de áudio
(conforme descrito acima)
➤ Mantenha premido TWS (ícone TWS) durante dois
segundos (2) até é emitido um sinal sonoro de confir-
mação. O LED do TWS começa a piscar lentamente.
Repita com a segunda unidade VG5.
3. Após o emparelhamento, o LED do TWS em
ambas as unidades apresenta azul e laranja (roxo)
➤ No modo TWS, se desligar uma unidade, a outra
unidade desliga automaticamente.
4. Voltar a ligar: as unidades emparelhadas por TWS
voltam a ligar-se uma à outra automaticamente
depois de ligar ambas as unidades. Um breve premir
do botão TWS em cada unidade permite mudar os
modos de TWS (estéreo, esquerda/direita, desligado)
como indicado abaixo.
• LED azul e laranja: esquerda/direta
de cada altifalante
• LED apenas laranja: esquerda do altifalante
principal, direita do altifalante secundário
• LED desligado: TWS desligado
➤ Para apagar todos os dispositivos da memória do
TWS e voltar à operação de dispositivo único, mantenha
premido o botão TWS durante dez (10) segundos até
ser emitido um terceiro sinal sonoro e o LED TWS
piscar duas vezes. A unidade desliga. Quando a unidade
é ligada novamente, o LED do TWS não está ligado,
indicando que o TWS está desativado.
➤ Se tiver dificuldades com o emparelhamento por
Bluetooth padrão ou a operação de TWS, o sistema
de Bluetooth do VG5 pode ser reposto ao apagar a
memória de emparelhamento do Bluetooth e TWS uti-
lizando a função de premir longo de dez (10) segundos
(terceiro sinal sonoro) de cada botão e desligando e
ligando a unidade.
➤ Sem música ou perdas intermitentes? As unidades
VG5 principal e secundárias podem estar
demasiado afastadas.
Emparelhamento por Bluetooth com NFC
1. Ative o Bluetooth e as funções de NFC no
seu dispositivo móvel
2. Aproxime o telefone do logótipo NFC (logótipo)
na unidade VG5 até o dispositivo móvel se ligar
e o LED do Bluetooth piscar lentamente
3. Prima OK/Ligar no seu dispositivo móvel para
concluir o emparelhamento
4. Reproduza áudio
Emparelhamento por Bluetooth padrão
1. Ative o Bluetooth no seu dispositivo móvel
2. Para emparelhar um novo dispositivo:
prima o botão Bluetooth do VG5 (o LED do
Bluetooth pisca lentamente)
3. No menu Bluetooth nas definições do dispositivo
móvel, selecione “VG5 by Soundcast_xxxxxx
4.Após o emparelhamento, o LED do Bluetooth
fica azul constante
➤ Mantenha premido o botão do Bluetooth durante
dois (2) segundos. É ouvido um sinal sonoro para voltar
a entrar no modo de emparelhamento e emparelhar um
dispositivo novo ou adicional.
➤ Para apagar todos os dispositivos da memória, man-
tenha premido o botão do Bluetooth durante dez (10)
segundos até o LED do Bluetooth piscar duas vezes e
ser emitido um segundo sinal sonoro de confirmação.
Modo de entrada auxiliar
Ligue a fonte de áudio externo à tomada de 3,5 mm
para mudar automaticamente para o modo de entrada
auxiliar como indicado pelo LED AUX amarelo. Retire a
ficha de 3,5 mm para voltar à operação Bluetooth.
Emparelhamento TrueWireless Stereo (TWS)
Com TWS, é possível emparelhar duas unidades VG5
para reprodução síncrona por Bluetooth. O desligamen-
to, volume e modo TWS serão sincronizados e podem
ser controlados a partir de qualquer unidade.
1.Ambos os altifalantes têm de ser ligados no modo
Bluetooth (sem a entrada Aux ligada)

15
Outros controlos e funcionalidades
Controlo de volume:
O volume do VG5 pode ser ajustado ao reproduzir
música e durante a operação da alta voz ao premir ou
manter premido os botões de ajuste do volume + (cima)
ou – (baixo) no teclado. O nível atual do volume é apre-
sentado com o LED azul no gráfico de barras do volume.
➤ Os dispositivos móveis que suportam o protocolo
AVRCP podem ajustar o volume com o controlo desli-
zante do volume dos dispositivos móveis.
Medidor de energia:
Prima o botão de alimentação durante um (1) segundo
e é emitido um sinal sonoro para apresentar o gráfico
de barras do nível atual da bateria utilizando uma com-
binação de VERMELHO=fraca, AMARELO=OK, VERDE=
CHEIA. O gráfico de barras move-se para a esquerda à
medida quea bateria descarrega
➤ Os LED indicadores de bateria fraca e medidor de en-
ergia NÃO serão exatos até à conclusão de pelo menos
dois ciclos completos de carregamento/descarga.
Os LED azuis iluminam
para a direita para
indicar o
nível de volume.
Indicação do nível de volume
Indicação de estado da bateria
Botão de
aumento do
volume
LED de alimentação laranja
Volume de
diminuição
do volume
Vermelho
(bateria
fraca)
Amarelo
(bateria
OK) Verde
(bateria
carregada)
Bloqueio do teclado
O VG5 tem dois mecanismos de bloqueio do teclado
diferentes para evitar uma operação não intencional ou
acidental. Ambos estão desativados por predefinição.
Quando ativados, todas as funções do teclado, exceto
ligar/desligar, serão ignoradas.
Bloqueio para crianças:
Para ativar ou desativar, mantenha premido o botão
Sem Som durante cinco (5) segundos e solte. O LED
AZUL mais acima pisca indicando que o teclado está
bloqueado, e que o bloqueio para crianças está ativo. De-
sligar e ligar a unidade desativa o bloqueio para crianças
do teclado.
Azul intermitente:
bloqueio para
crianças ativo
Verde intermitente:
bloqueio automático
ativo
Passe o dedo do botão
de alimentação para
qualquer botão de
função e solte
Botão
Sem Som
O VG5 não liga
Dificuldade
com o
processo de
emparelhamen-
to por Bluetooth
ou TWS
Operação
qualquer não
intencional do
teclado devido
a humidade
Mudança
de brilho ou
desligamento
da retroilu-
minação do
teclado
O teclado não
responde ao
premir de
botões
Unidade
anómala ou não
responsiva
• Certifique-se de que a unidade
está completamente carregada
• Certifique-se de que o teclado
não está sujo, empoeirado ou húmido
• Desligue/volte a ligar a bateria
• Desligue e ligue a(s) unidade(s)
VG5 e tente novamente
• Apague o histórico de emparelhamento
por Bluetooth e TWS mantendo o botão
do Bluetooth premido durante 10
segundos (terceiro sinal sonoro).
Repita premindo os botões TWS durante
10 segundos (terceiro sinal sonoro)
e tente o emparelhamento novamente
• Desative/ative a função Bluetooth
no dispositivo de fonte de música
(telefone ou computador) e
tente novamente
• Limpe o teclado para remover
excesso de humidade ou sujidade
• Utilize as funcionalidades Bloqueio
para Crianças e Bloqueio Automático
descritas acima
• O VG5 utiliza um sensor de luz ambiente
para ajustar a retroiluminação LED
e os indicadores LED de estado com
base na luz ambiente. É a
operação normal
Desligue e ligue a unidade e certifique-se
de que o bloqueio para crianças e o
bloqueio automático estão desativados
• Faça a reposição ao desligar e
ligar a bateria
• Apague a memória do Bluetooth
e TWS (consulte as instruções acima)
• Desligue e ligue a unidade
Problem Solution
Resolução de problemas
Ação de passagem para
desbloqueio temporário
Bloqueio automático:
Para ativar ou desativar o bloqueio automático, man-
tenha premido o botão durante dez (10) segundos e
solte. O gráfico de barras do volume pisca duas vezes
quando está ativado e uma vez quando está desativado.
Quando ativado, o teclado bloqueia automaticamente
depois de três (3) minutos sem interação no teclado. O
LED VERDE superior pisca indicando que o teclado está
bloqueado. O bloqueio automático permanece ativado ou
desativado após o desligamento e ligação da unidade.
Desbloqueie automaticamente o teclado para utilização
quando o bloqueio automático está ativo ao efetuar uma
“passagem para desbloqueio”. Isto pode ser feito ao
passar o dedo rapidamente entre o botão de alimen-
tação e qualquer outro botão de função, certificando-se
de que solta o dedo enquanto ainda está sobre o botão
da outra função. O gráfico de barras do volume pisca e é
emitido um sinal sonoro de confirmação indicando que o
teclado está desbloqueado. O teclado bloqueia automati-
camente depois de três (3) minutos de interação.
Indicador de bloqueio do teclado:

16
DC IN
AUX IN 15V 1.5 A USB/
SERVICE RESET
DEUTSCH | Wie man den VG5 verwendet
Einlegen des Akkus
1. Mithilfe eines Nr. 3 Kreuzschraubendrehers
lösen Sie die Schrauben an der Abdeckung
des Akkufachs (siehe Unterseite des VG5) und
entfernen Sie die Abdeckung
2. Verbinden Sie den Akku mit dem VG5-Stecker,
der nur in eine (die richtige) Richtung passt
3. Führen Sie die Akkukabel durch
4. Setzen Sie die Akkuabdeckung wieder ein
Aufladen des Akkus
Laden Sie den Akku vor der ersten Anwendung mind-
estens 5 Stunden, bis er vollständig aufgeladen ist. Um
die Langlebigkeit des Akkus und die maximale Leistung
des Systems sicherzustellen, sollte der Akku vor dem
mobilen Betrieb immer aufgeladen werden.
1. Stecken Sie das mitgelieferte AC-Ladegerät
in die Steckdose, um die AC-Netzversorgung
sicherzustellen, und verbinden Sie das andere
Ende mit dem DC-Eingangsanschluss des VG5,
der sich hinter der Anschlussschutzabdeckung
des VG5 befindet
2. Der VG5 kann mit AC-Strom aus der
Wandsteckdose betrieben werden, selbst wenn
der Akku vollständig entladen ist
3. Die Ladezeit beträgt ca. 4-5 Stunden, wenn
der Akku vollständig entladen ist
4. . Die Laufzeit variiert, abhängig von der Lautstärke
Lieferumfang:
Kurzanleitung
Glückwunsch und vielen Dank für Ihren Kauf des Soundcast VG5. Bitte lesen
Sie die Betriebsanweisungen vor der Anwendung sorgfältig durch.
3,5 mm
analoges
Audiokabel
AC-Lade-
gerät mit
Adapterklem-
men
Akku
Orange Power-/
Ladeanzeige-LED
USB-Ladegerät
Ladeausgang
Capacitive Touc Kapazitives
Touch-Bedienungs-Tastenfeld
Lage der wetter-
beständigen Lade- &
Zugangsanschlüsse
Akkufachdeckel
NFC (Near Field
Communication)
Location
Komfort-
Tragegriff
Strom EIN
Strom AUS
Akkustand niedrig
Lädt
Voll aufgeladen
Voll aufgeladen
Fehler - kann nicht laden
Durchgehend orange
Aus
Blinkt langsam rot
Durchgehend rot
Aus
(wenn Strom aus)
Durchgehend orange
(wenn Strom an)
Blinkt schnell rot
Status Power LED
Ports, Anschlüsse und Eingänge
Lade- & Zugangsanschlüsse

17
Stumm-Indikator
Stumm-Taste
Gelb AUX
anzeige LED
Bluetooth-
Anzeige-LED
Bluetooth-Taste
TWS-Taste
Blaue und orange LEDs
zeigen den aktuellen
TWS-Status an
Elf LEDs für die
Lautstärke-und
Akkuanzeige
Power-Taste
Lauter-Taste
Orange
power-
LED
Leiser-Taste
Play-/
Pause-
Taste
Bedienungs-Tastenfeld
Kapazitives Touch-Bedienungs-Tas-
tenfeld
Der VG5 verfügt über ein fortschrittliches, kapazitives
Touch-Bedienfeld und eine Backlight-Technologie. Die
Nutzerfunktionen werden über einfaches Drücken oder
Drücken und Halten der entsprechenden Taste auf der
Tastenfläche, wie angegeben, ausgeführt.
Ein-/Ausschalten: Der VG5 wird mittels der großen
Taste in der Mitte des Tastenfelds ein-
und ausgeschaltet.
Einschalten: Drücken und halten Sie die Power-Taste
zwei (2) Sekunden lang, bis die Hintergrundbeleuchtung
leuchtet, und lassen Sie die Taste innerhalb von zwei
(2) Sekunden los. Ein Piepton bestätigt, dass die Einheit
eingeschaltet ist.
Abschalten: Drücken und halten Sie die Power-Taste
zwei (2) Sekunden lang, und lassen Sie die Taste inner-
halb von zwei (2) Sekunden los. Ein Piepton bestätigt,
dass sich die Einheit abschaltet.
Anschließen und Koppeln
➤ Der VG5-Strom muss eingeschaltet sein, bevor Sie
versuchen, die Geräte zu koppeln (außerdem muss der
Hilfseingang getrennt sein)
2. Mindestens einer der Lautsprecher muss mit einer
Audioquelle gekoppelt sein (wie oben beschrieben)
Drücken und halten Sie TWS (das TWS-Symbol)
zwei (2) Sekunden lang, bis ein Piepton zur
Bestätigung ertönt. Die TWS-LED beginnt
langsam zu blinken. Wiederholen Sie den Vorgang
für die zweite VG5-Einheit.
3. Nach der Kopplung, leuchtet die TWS-LED an
beiden Einheiten blau und orange (violett)
➤Wenn Sie sich im TWS-Modus befinden und eine
Einheit abschalten, schaltet sich die andere Einheit
automatisch ab.
4. Wiederverbinden: Die TWS-gekoppelten Einheiten
werden sich automatisch wieder miteinander verbin
den, nachdem Sie beide Einheiten eingeschaltet
haben. Ein kurzes Drücken der TWS-Taste an
einer der Einheiten ermöglicht ein Schalten durch die
TWS-Modi (Stereo, links/rechts, aus),
wie unten angegeben;
• LED leuchtet blau und orange: links/
rechts vom Lautsprecher
• LED leuchtet nur orange: links vom
Hauptlautsprecher, rechts vom
Sekundärlautsprecher
• LED aus: TWS aus
➤ Um alle Geräte aus dem TWS-Speicher zu löschen
und zu einem Einzelgerätebetrieb zurückzukehren, drück-
en und halten Sie die TWS-Taste zehn (10) Sekunden
lang, bis der Piepton ertönt und die TWS-LED doppelt
blinkt, dann schalten Sie die Einheit ein. Wenn die Einheit
wieder eingeschaltet ist, leuchtet die TWS-LED nicht,
was anzeigt, dass TWS deaktiviert ist.
➤ Sollten Sie Schwierigkeiten mit der Standard-Blue-
tooth-Kopplung oder mit dem TWS-Betrieb haben, kann
das Bluetooth-System des VG5 zurückgesetzt werden,
indem der Kopplungsspeicher von Bluetooth und TWS
mittels zehnsekündigem (10) Drücken und Halten
(dritter Piepton) jeder der Tasten gelöscht wird und die
Einheit dann aus- und wieder eingeschaltet wird.
➤ Sie hören keine Musik oder hören intermittierende
Aussetzer? Dann könnte es sein, dass die Primär- und
Sekundäreinheiten des VG5 zu weit voneinander ent-
Bluetooth-Kopplung mit NFC
1. Aktivieren Sie die Bluetooth- und NFC-Funktionen
auf Ihrem Mobilgerät
2. Halten Sie das Telefon in die Nähe des NFC-Logos
(Logo) an der VG5-Einheit, bis sich das Mobilgerät
verbindet und die Bluetooth-LED langsam blinkt
3. Drücken Sie OK/Verbinden auf Ihrem
Mobilgerät, um die Kopplung abzuschließeng
4. Spielen Sie den Audioinhalt ab
Standard Bluetooth-Kopplung
1. Aktivieren Sie Bluetooth auf Ihrem Mobilgerät
2. Koppeln eines neuen Geräts: Drücken Sie die VG5-
Bluetooth-Taste (die Bluetooth-LED blinkt langsam)
3. Wählen Sie in Ihrem Bluetooth-Menü in den Einstel
lungen des Mobilgeräts “VG5 by Soundcast_xxxxxx”
4. Sobald das Gerät gekoppelt ist, leuchtet die
LED durchgehend blau
➤ Drücken & halten Sie die Bluetooth-Taste zwei (2)
Sekunden lang bis der Piepton ertönt, um wieder in den
Kopplungsmodus zu schalten und ein neues oder zusät-
zliches Gerät zu koppeln.
➤ Um alle Geräte aus dem Speicher zu löschen,
drücken und halten Sie die Bluetooth-Taste zehn (10)
Sekunden lang, bis die Bluetooth-LED doppelt blinkt und
der Piepton zur Bestätigung ertönt.
Hilfseingangsmodus
Stecken Sie die externe Audioquelle in die 3,5 mm
Buchse, um automatisch in den Hilfseingangsmodus zu
schalten, was dadurch angezeigt wird, dass die AUX-LED
gelb leuchtet. Entfernen Sie den 3,5 mm Stecker, um
wieder in den Bluetooth-Betrieb zu schalten.
TrueWireless Stereo (TWS)-Kopplung
Mit TWS können zwei VG5-Einheiten für die synchrone
Bluetooth-Wiedergabe gekoppelt werden. Strom aus,
Lautstärke und TWS-Modus können von jeder der Ein-
heiten synchronisiert und gesteuert werden.
1. Beide Lautsprecher müssen im Bluetooth-Modus
eingeschaltet sein (kein Hilfseingang verbunden)

18
Andere Steuerungen und Merkmale
Lautstärkeregelung:
Die Lautstärke des VG5 kann während des Abspielens
von Musik oder während des Freisprechbetriebs durch
Drücken oder Drücken und Halten der Einstelltasten +
(lauter) oder – (leiser) auf dem Tastenfeld eingestellt
werden. Die aktuelle Lautstärke wird mittels blauer
LEDs auf der Lautstärkeleiste angezeigt.
➤ Mobilgeräte, die das AVRCP-Protokoll unterstützen,
können die Lautstärke über den Lautstärkeregler am
Mobilgerät regeln.
Akkufüllstandanzeige:
Drücken Sie die Power-Taste eine (1) Sekunde lang, bis
ein Piepton ertönt und die aktuelle Akkufüllstandleiste
mit einer Kombination aus ROTEN=Niedriger Füllstand,
GELBEN=OK, GRÜNEN= Voll LEDs angezeigt wird. Die
Leiste bewegt sich entgegen dem Uhrzeigersinn, wenn
sich der Akku entleert.
➤ Die Füllstandanzeige und die orange LED-Anzeigen
für einen niedrigen Akkufüllstand sind NICHT akkurat,
wenn nicht mindestens zwei volle Lade-/Entladezyklen
abgeschlossen wurden.
Blaue LEDs
leuchten im
Uhrzeigersinn
und zeigen die
Lautstärke an.
Lautstärkeanzeige
Statusanzeige für den Akku
Lauter-Taste
Orange
Power-
LED
Leiser-Taste
Rot
(Niedriger
Akkustand)
Gelb
(Akku
Ok) Grün (Akku
lädt)
Tastenfeldsperre
Der VG5 hat zwei verschiedene Sperrmechanismen
für das Tastenfeld, um eine unbeabsichtigte oder
versehentliche Betätigung zu verhindern. Beide sind
gemäß der Voreinstellung deaktiviert. Wenn sie aktiviert
sind, werden alle Tastenfeldfunktionen, außer „Ein/Aus“
ignoriert.
Kindersicherung:
Zum Aktivieren oder Deaktivieren halten und drücken
Sie die Stumm-Taste
fünf (5) Sekunden lang und lassen Sie sie dann los.
Die oberste BLAUE LED blinkt und zeigt an, dass das
Tastenfeld gesperrt und die Kindersicherung aktiv ist.
Ein Aus- und Einschalten der Einheit deaktiviert die
Kindersicherung des Tastenfelds.
Blinkt blau:
Kindersicherung aktiv
Blinkt grün:
Automatische Sperre
aktiv
Anzeige für die Tastenfeldsperre:
Gleiten Sie mit dem Fin-
ger von der Power-Taste
zu einer beliebigen
Funktionstaste und
lassen Sie dann los.
Stumm-
Taste VG5 geht nicht an
Schwierigkeiten
mit dem Bluetooth-
oder TWS-Kop-
plungsverfahren
Das Tastenfeld
führt aufgrund von
Feuchtigkeit eine
unbeabsichtigte
Betätigung aus
Tastenfeld-Back-
lights ändern die
Helligkeit oder
schalten ab
Tastenfeld
reagiert nicht auf
Tastendruck
Die Einheit zeigt
Fehlverhalten oder
reagiert nicht
• Vergewissern Sie sich, dass das
Gerät vollständig geladen ist
• Stellen Sie sicher, dass das Tastenfeld
frei von Schmutz, Staub oder Feuchtigkeit ist
• Nehmen Sie den Akku heraus/legen Sie
den Akku wieder ein
• Schalten Sie die VG5-Einheit(en) aus
und wieder ein und versuchen Sie es erneut
• Löschen Sie den Bluetooth- und den TWS-
Kopplungsverlauf, indem Sie die Blue
tooth-Taste zehn Sekunden lang (dritter
Piepton) halten, wiederholen Sie dies, indem
Sie die TWS-Tasten volle zehn Sekunden lang
(dritter Piepton) gedrückt halten, und ver
suchen Sie Ihre Kopplung erneut
• Deaktivieren/Aktivieren Sie die Blue
tooth-Funktion auf dem Gerät, das Ihre
Musikquelle abspielt (Telefon oder Computer)
und versuchen Sie es erneut
• Wischen Sie das Tastenfeld ab, um
übermäßige Feuchtigkeit oder Schmutz
zu beseitigen
• Verwenden Sie die Kindersicherung oder
die automatische Sperrfunktion, wie oben
beschrieben eine unbeabsichtigte
Betätigung aus
Der VG5 verwendet einen Umgebungslichtsen-
sor, um die LED-Backlights und Status-LED-An-
zeigen basierend auf dem Umgebungslicht
einzustellen. Dies ist der normale Betrieb.
Schalten Sie die Einheit aus und wieder ein und
stellen Sie sicher, dass die Kindersicherungs-
und die automatischen Tastensperrfunktionen
deaktiviert sind
• Setzen Sie das Gerät zurück, indem Sie den
Akku herausnehmen und wieder einsetzen
• Löschen Sie den Bluetooth- und TWS-
Speicher (beziehen Sie sich auf die
obenstehenden Anweisungen)
• Schalten Sie die Einheit aus und wieder ein
Problem Lösung
Fehlerbehebung
Vorrübergehendes Entsperren durch Wischen
Automatische Sperre:
Um die automatische Sperre zu aktivieren oder zu
deaktivieren, halten Sie die Stumm-Taste zehn (10)
Sekunden lang und lassen Sie sie dann los. Die Laut-
stärkeleiste blinkt zweimal, wenn die automatische
Sperre aktiviert ist und einmal, wenn sie deaktiviert ist.
Wenn sie aktiviert ist, geht das Tastenfeld automatisch
nach drei (3) Minuten ohne Betätigung einer Taste in
die „Auto-Lock”-Funktion (automatische Tastensperre)
über. Die obere GRÜNE LED blinkt und zeigt an, dass
das Tastenfeld gesperrt ist. Die automatische Sperre
bleibt aktiviert oder deaktiviert, wenn die Einheit aus- und
wieder eingeschaltet wird.
Sie können das Tastenfeld vorübergehend für die An-
wendung entsperren, während die automatische Sperre
aktiv ist, indem Sie ein „Entsperren durch Wischen“
durchführen. Dies erfolgt, indem Sie mit dem Finger
schnell von der Power-Taste zu einer beliebigen anderen
Funktionstaste wischen und sicherstellen, dass Sie
loslassen, wenn sich Ihr Finger noch auf der „anderen
Funktion“ befindet. Die Lautstärkeleiste blinkt und es
ist ein Bestätigungston zu hören, der angibt, dass das
Tastenfeld entsperrt ist. Das Tastenfeld wird automa-
tisch nach drei (3) Minuten ohne Betätigung einer Taste
wieder gesperrt.

19
DC IN
AUX IN 15V 1.5 A USB/
SERVICE RESET
NEDERLANDS | Uw VG5 gebruiken
Accu installeren
1. Gebruik een #3 kruiskop en verwijder de
accubedekking aan de onderkant van de VG5
2. Verbindt de accu met de VG5-connector, die
alleen past in de juiste richting
3. Verbind de accudraden
4. Plaats het batterijklepje terug
Accu
Laad voor het eerste gebruik de accu ten minste 5 uur
op tot volle capaciteit. Om de levensduur van de accu
en maximale prestaties van het systeem te waarbor-
gen moet de accu altijd voor mobiele operatie worden
opgeladen.
1. Plug de bijgesloten netstroomadapter in het
stopcontact en verbindt het andere eind aan de
VG5 gelijkstroompoort achter de poortbescherming
van de VG5
2. De VG5 kan worden gebruikt op netstroom,
zelfs wanneer de accu helemaal leeg is
3. De oplaadtijd is ongeveer 4-5 uur vanaf een
volledig lege accu
4. De speeltijd hangt af van het volume
Box Includes:
Snel starten
Gefeliciteerd en bedankt voor uw aankoop van de Soundcast VG5.
Lees a.u.b. de handleiding aandachtig door voor gebruik.
3,5mm
analoge
audiokabel
Netstroom-
adapter met
adapterclips
Accu
Oranje stroom-/
laadindicator-LED
Laadoutput
USB-powerbank
Capacitief aanrakingstoetsenbord
Weerbestendige
locatie laad- en
toegangspoorten
Toegangspaneel accu
NFC (Near Field
Communication)-
locatie
Comfortabel
draaghandvat
Stroom AAN
Stroom UIT
Accu bijna leeg
Opladen
Volledig opgeladen
Volledig opgeladen
Fout - opladen niet mogelijk
Vast orangje
Uit
Langzaam rood knipperen
Vast rood
Uit (als stroom uit is)
Vast oranje (als stroom aan is)
Snel rood knipperen
Status Stroom-LED
Poorten, verbindingen en inputs
Laad- en toegangspoorten

20
Indicator dempen
Dempknop
Gele AUX
LED-indicator
Bluetooth-
LED-indicator
Bluetooth
-knop
TWS-knop
blauwe en oranje
LED’sde huidige
TWS-status
aangeven
Elf LED’s voor
weergave van
de volume- en
brandstofmeter
Aan-
knop
Knop
volume
omlaag
Oranje
stroom-
LED
Knop
volume
omlaag
Afspelen-/
Pauze-knop
Toetsenbord bedieningspaneel
Capacitief aanrakingstoetsenbord
De VG5 heeft een geavanceerd capacitief aanrakings-
toetsenbord en achtergrondverlichting. Gebruikersfunc-
ties kunnen worden gebruikt met een enkele aanraking
of het ingedrukt houden van het correcte gebied van het
toetsenbordoppervlak, zoals aangegeven.
Aan-/uitzetten: De VG5 wordt aan- en uitgezet met
een grote knop in het midden van het toetsenbord
Aanzetten: Hou de aan-knop (2) seconden ingedrukt
tot de achtergrondverlichting oplicht en laat deze dan
binnen (2) seconden los; er wordt een bevestigingstoon
afgespeeld om aan te geven dat de eenheid aan staat.
Uitzetten: Hou de aan-knop (2) seconden ingedrukt en
laat deze dan binnen (2) seconden los; er wordt een
bevestigingstoon afgespeeld om aan te geven dat de
eenheid uit gaat.
Verbinden en koppelen
➤ De VGx-stroom moet aanstaan voordat u probeert te
koppelen (en de aux-input moet ontkoppeld zijn)
2. Hou de TWS (TWS-icoon) (2) seconden ingedrukt
totdat of tot er een bevestigingstoon klinkt.
De TWS LED begint langzaam te knipperen.
Herhaal dit met de tweede VG5-eenheid..
3. Na het paren toont de TWS LED op beide
eenheden zowel blauw als oranje (paars)
➤ Als u in TWS-modus een eenheid uitzet gaat de
andere ook automatisch uit.
4. Opnieuw verbinden: De TWS-gekoppelde eenheden
verbinden automatisch opnieuw met elkaar wanneer
beide eenheden aanstaan. Het kort indrukken van de
TWS-knop op beide eenheden laat u roteren door de
TWS-modi (stereo, links/rechts, uit) zoals
hieronder aangegeven;
• LED blauw en oranje: links/rechts uit
elke speaker
• LED alleen oranje: links uit primaire
speaker, rechts uit secundaire speaker
• LED uit: TWS uit:
➤ Om alle apparaten uit het TWS-geheugen te wissen
en terug te gaan naar een enkel apparaat, houdt u de
TWS-knop (10) seconden ingedrukt totdat er een derde
toon klinkt en de TWS LED dubbel knippert en zet de
eenheid daarna uit. Wanneer de eenheid weer wordt
aangezet staat de TWS LED niet aan, wat aangeeft dat
TWS is uitgeschakeld.
➤ Als u moeilijkheden ervaart met de standaard
Bluetooth-koppeling of TWS-gebruik kan het VG5 Blue-
tooth-systeem worden gereset door het koppelgeheugen
van zowel Bluetooth als TWS te wissen door elke knop
(10) seconden ingedrukt te houden en daarna een
stroomcyclus uit te voeren op het apparaat.
➤ Geen muziek of periodieke onderbrekingen? De
primaire en secundaire VG5-eenheden zijn mogelijk te
ver weg van elkaar.
Bluetooth koppelen met NFC
1. Schakel de Bluetooth- en NFC-functies in op
uw mobiele apparaat
2. Hou de telefoon bij het NFC-logo (logo) op de
VG5-eenheid totdat het mobiele apparaat verbindt
en de Bluetooth-LED langzaam knippert
3. Druk op OK/Verbinden op uw mobiele apparaat
om de koppeling te voltooien
4. Speel de audio af
Standaard Bluetooth-koppeling
1. Schakel Bluetooth in op uw mobiele apparaat
2. Koppel een nieuw apparaat: druk op Bluetooth-knop
op de VG5 (Bluetooth-LED knippert langzaam)
3. Vanuit het Bluetooth-menu in de instellingen
van het mobiele apparaat selecteert u
“VG5 by Soundcast_xxxxxx”
4. Zodra het gekoppeld is wordt de
Bluetooth-LED blauw
➤ Hou de Bluetooth-knop (2) seconden ingedrukt totdat
u een piepje hoort dat aangeeft dat de koppelingsmo-
dus is geactiveerd en u nieuwe of extra apparaten kunt
koppelen.
➤ Om alle apparaten kuit het geheugen te wissen houdt
u de Bluetooth-knop (10) seconden ingedrukt totdat de
Bluetooth-LED dubbel knippert en er een tweede beves-
tigingstoon klinkt.
Aux-inputmodus
Plug de externe audiobron in de 3,5mm jack om autom-
atisch naar de Aux-inputmodus te schakelen, waarbij de
Aux-LED geel wordt. Verwijder de 3,5mm plug om terug
te schakelen naar Bluetooth.
TrueWireless Stereo (TWS)-koppelen
Met TWS kunnen er twee VG5-eenheden worden
gekoppeld voor synchrone Bluetooth-playback. Stroom
uit, volume en TWS-modus worden gesynchroniseerd en
kunnen van beide eenheden worden bestuurd.
1. Beide speakers moeten aanstaan in
Bluetooth-modus (geen verbonden Aux-input)
Other manuals for VG5
1
Table of contents
Languages:
Other Soundcast Speakers manuals
Soundcast
Soundcast VGX Series User manual

Soundcast
Soundcast VG3 User manual
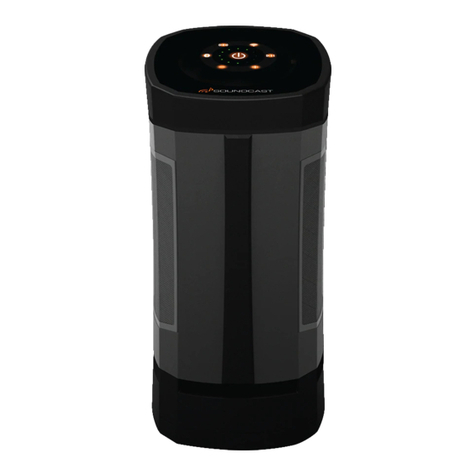
Soundcast
Soundcast VG5 User manual

Soundcast
Soundcast OUTCAST JUNIOR User manual

Soundcast
Soundcast VG3 User manual

Soundcast
Soundcast VG1 User manual

Soundcast
Soundcast VG10 User manual
Soundcast
Soundcast OUTCAST JUNIOR User manual

Soundcast
Soundcast VG1 User manual

Soundcast
Soundcast SpeakerCast User manual


