SoundGate LEXPD2 User manual

LEXPD2
Copyright© 2004-2008 SoundGate®. All Rights Reserved.
SoundGate® is a registered trademark of Stillwater Designs, Inc.
All other trademarks are the property of their respective owners.
www.soundgate.com
Rev 20081216
If you experience problems, call SoundGate Technical Support
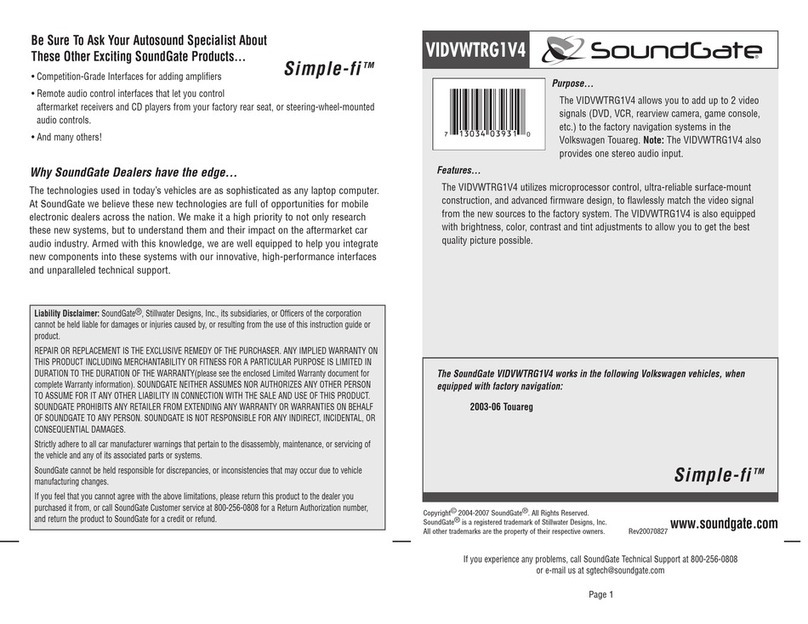
Purpose
The SoundGate LEXPD2 lets you connect and control an Apple
iPod directly from the controls on your factory Lexus radio.
Features
The LEXPD2 uses a simple “Y” harness for installation using
factory connectors. There is no need to cut or splice any wires,
including power and ground!
7<SBDADE=adgjju>9
LEXUS ES300/330* 2002–2006 All
LEXUS ES350 2007–2008 All
LEXUS GS300/430** 2001–2005 All
LEXUS GS300/350/430/450H 2006–2009 All
LEXUS GX470 2003–2008 All
LEXUS IS300** 2001–2005 All
LEXUS IS250/350 2006–2008 All
LEXUS LS430 2001–2006 All
LEXUS LS460 2007–2008 with Navigation
LEXUS LX470** 2001–2003 All
LEXUS LX470 2004–2007 All
LEXUS LX570 2008 All
LEXUS RX300* 2001–2003 with Navigation
LEXUS RX330/350/400H 2004–2008 All
LEXUS SC430* 2005–2008 All
*audio systems without navigation do not display text
**does not display text
NOTE: MP3 emulation mode is available only for 2006-2009 models with mp3 playback supported 5th Gen Navigation
Check www.soundgate.com for the most
current compatibility information.
The LEXPD2 works in the following vehicles:
iPod is a trademark of Apple Computer, Inc., registered in the U.S. and other countries.

2
DO NOT DISASSEMBLE OR ALTER
Do not block your view
Do not block the airbag
Distraction warning
BEFORE WIRING, DISCONNECT THE CABLE FROM THE NEGATIVE BATTERY TERMINAL
DO NOT SPLICE INTO ELECTRICAL CABLES
DO NOT ALLOW CABLES TO BECOME ENTANGLED IN SURROUNDING OBJECTS
DO NOT INSTALL IN LOCATIONS WITH HIGH MOISTURE OR DUST
HAVE THE WIRING AND INSTALLATION DONE BY EXPERTS
USE ONLY SPECIFIED ACCESSORY PARTS
Doing so may result in an accident, fire or electric shock.
Do not mount product or any added audio and/or video equipment where it can block your view through the windshield or
your view of dashboard indicators and displays.
Do not mount product or any added audio and/or video equipment where it can obstruct the operation of the safety device
such as the airbag.
Do not let product or any added audio and/or video equipment to distract you while you are driving.
Never cut away cable insulation to supply power to other equipment. Doing so will exceed the current carrying capacity of
the wire and result in fire or electric shock .
Cables or wiring that obstruct or get caught on the places such as the steering wheel, shift lever, brake pedals, etc. can be
extremely hazardous.
Moisture or dust may result in product failure.
The wiring and installation of this product requires special technical skills and experience.
Use of other than specified parts may damage product internally.
YOU SHOULD READ AND FAMILIARIZE YOURSELF THOROUGHLY WITH THE FOLLOWING INFORMATION PRIOR
TO INSTALLING AND USING THIS UNIT. IN ADDITION, YOU MUST CAREFULLY READ AND FOLLOW THE
INSTALLATION SCHEMATICS/INSTRUCTIONS FOR THE PRODUCT AND THE VEHICLE IN WHICH IT IS BEING
INSTALLED. FAILURE TO FOLLOW INSTALLATION INSTRUCTIONS MAY DAMAGE THE PRODUCT AND THE
VEHICLE, WILL VOID THE PRODUCT WARRANTY, MAY VOID THE VEHICLE WARRANTY
Some States/Provinces or other governmental jurisdictions (such as cities) may have laws that prohibit the operation of a
video screen within the sight of the Driver. If you have purchased such a product, you should use the product only in
locations where it is legal to do so, and if you do use the product, set up the screen so it is only visible to passengers.
Should this product fail to operate properly, please contact your Dealer or SoundGate Technical Support.
FOLLOW THE OPERATIONAL AND INSTALLATION MANUALS.
CHECK YOUR LOCAL LAWS
TROUBLESHOOTING
Before starting any installation work , you must wait 90 seconds after turning the ignition switch to the LOCK position and disconnecting the negative (-) terminal
from the battery. The supplemental restraint system (airbag) is equipped with a backup power source If installation work is started less than 90 seconds after
disconnection of the negative (-)battery terminal, the SRS may deploy. When the negative (-) terminal cable is disconnected from the battery the clock and audio
systems memory will be erased. Before starting installation work make a record of the clock and audio systems memory settings. When installation is complete,
reset the clock and audio systems to their previous settings . Power tilt, power telescopic steering column, front power seats, power mirrors, and power shoulder
belt anchorage are equipped with a memory function .The rear power seat is not equipped with a memory function.
When installation is complete, it is necessary to readjust the features to their previous settings
Never use a backup power supply (such as another battery) during installation work to avoid losing these memory settings.
.
WARNING
!
CAUTION
!
Before You Start

The iPod is charging as long as it’s connected to the LEXPD2 unit and the vehicle’s ignition is “ON” or in the “Acc”
position. The head unit does not have to be “ON”.
The iPod automatically turns ON when you turn the ignition key into the “ON” or “Acc” position.
The iPod automatically turns OFF when the vehicle’s ignition key is turned OFF. (The iPod is paused and does into
Sleep mode after two minutes of inactivity).
iPod interface mode is displayed in the same way as a factory CD-changer or MiniDisc-changer.
“Ok to disconnect” is shown on the iPod display while it is connected to this unit. The keys and wheel on the front of
the iPod are disabled when in this mode.
If the iPod is disconnected from the unit, it will begin normal operation within one minute.
Before You Start
This unit is equipped with:
Built-in Electronic Ground Noise Isolator to eliminate unwanted car engine noise and iPod hard drive noise.
Electronic Source Level Adjustment (allows you to adjust sound level for each source independently)
This unit is an interface adapter for Lexus head unit to control an iPod, iPod mini, iPod Photo, and fifth generation
“Video” iPod.
iPod is a registered trademark of Apple Computer, Inc., registered in the United States and other countries.
This unit supports only iPod software versions after the October 2004 update.
The iPod has NOT been designed to withstand automotive temperature extremes. You may damage your iPod
If you leave it inside the vehicle on a hot or cold day. For further information please refer to the iPod manual.
IMPORTANT
i
We strongly recommend that you organize your songs into playlists for proper operation of this unit .
To avoid improper track number display(Do NOT place more then 99 songs into single playlist )
If iPod does not have playlists/songs it may cause unpredictable outcome and improper operation of the unit.
EMPTY PLAYLISTS MAY ALSO CAUSE UNPREDICTABLE BEHAVIOR, ESPECIALLY EMPTY PLAYLISTS
THAT ARE LOCATED IN THE MIDDLE OF ALL PLAYLISTS.
This unit does not support iPod Equalizer. We recommend that you set the iPod Equalizer to be “OFF”, before
connecting the iPod to the unit to prevent unwanted sound distortions.
We recommend that you set “Sound Check” on the iPod to “ON”.
About iPod Settings
i
About iPod Operation
i
IMPORTANT
i
(1) After a delay of five seconds, this product will automatically bypass the automobile manufacturer's
on-screen warnings concerning use of the onboard navigation system.
These warnings are: ”Caution, Drive safely and obey traffic rules. Watching this screen while vehicle is
in motion can lead to a serious accident. Make selections only while stopped. Some map data may be
incorrect. Read safety instructions in Navigation Manual.”
(2) PLEASE PRE-NOTIFY EVERY DRIVER OF THIS VEHICLE OF THE CONTENT OF
THE AUTOMOBILE MANUFACTURER'S WARNING.
(3) IF YOU PREFER THAT THIS PRODUCT NOT ELIMINATE THE FOREGOING
WARNINGS, YOU MAY DISABLE THIS FEATURE BY FOLLOWING THE
INSTRUCTIONS IN THIS OWNER'S MANUAL, OR CALL SOUNDGATE TECHNICAL SUPPORT.
Important Please Read!
! !
3
goes

4
Connections
To the factory
Audio harness
To the
Head Unit
Audio Wiring Harness
(included)
Apple iPod
Apple iPod
Interface Harness
(included)
(NOT INCLUDED)
Model: LEXPD2
Model: LEXPD2
Connecting the LEXPD2
Connecting the units
Used for
programming Apple iPod interface
harness Power and Audio
wiring harness
Service
Port

5
Connections
Head Unit (Radio Receiver)
Factory Audio
harness
LEXPD2 LEXPD2
To LEXPD2
harness20-Pin
Y-
Plug into
Head Unit
(connector “A”)
A
Connecting the LEXPD2 to head unit (for Lexus vehicles)
20-pin connector
To Un-plu
g
an
y
connector do NOT pull it b
y
the wires.
WARNING
!
Lexus GX 470 Radio Receiver shown.
Locate connector “A” (20-pin connector) on your Radio.
Connector location on the Radio may be
different from shown above.
Audio Harness (36”)

Installation
We strongly recommend that you install the unit in easily accessible location. So you can later upgrade the
unit or re-program it in case of incorrect programming.
IMPORTANT
i
Gain access to the back of you vehicle’s Head Unit.
Find the same port as our Audio Harness (see )
Disconnect the existing connector and plug in our Audio connector into this port, then plug female end of Audio
Harness to the plug in for your factory connector. Audio harness female connector is not used In some vehicles.
Plug the other end of Audio cable into designated port on LEXPD2.
Connect iPod cable as shown in the”Connecting LEXPD2” picture.
Setup proper Emulation Mode for this unit (see )
Turn the car on and check LEXPD2 functionality and (especially Text capability) before the final assembly.
“Connecting LEXPD2 to head unit”
“Emulation Mode Selection”
Installation
Both
switches
“DOWN”
Emulation Mode Selection
MD Changer Emulation Mode programming steps:
Properly install this unit.
Put both programming switches in “DOWN” position.
Put ignition switch into “ACC” position.
Wait for long beep followed by a few short beeps. This take up to one minute.
Put ignition switch into the “OFF” position.
Ignition into
“ACC” or “ON”
position
Ignition into
“OFF” position Both
switches
“UP”
Ignition into
“ACC” or “ON”
position
10 sec
Right
switch
“DOWN”
CD Changer Emulation Mode programming steps:
Properly install this unit.
Put “Right” programming switch in the “DOWN” position.
Put ignition switch into the “ACC” position.
Wait for long beep followed by a few short beeps. This may take up to one minute.
Put ignition switch into the“OFF” position.
Ignition into
“ACC” or “ON”
position
Ignition into
“OFF” position Ignition into
“ACC” or “ON”
position
10 sec
Improper Emulation Mode setting may cause this unit to be unrecognized by head unit.
CD or MD Changer Emulation Mode Programming MUST BE DONE in order for the unit to find proper address
location in the vehicle Audio/Video network.
IMPORTANT
i
Both
switches
“UP”
6

Installation
Left switch
ÏDOWNÓ
CD-MP3 Emulation Mode Selection (CD-MP3 emulation)
CD-MP3 Emulation Mode programming steps:
Properly install this unit.
Put “Left” programming switch in “DOWN” position.
Put ignition switch into the “ACC” position.
Wait for long beep followed by a few short beeps. This may take up to one minute.
LEXPD2
Put ignition switch into the “OFF” position.
Ignition into
ÏACCÓor ÏONÓ
position
Ignition into
ÏOFFÓposition Both switches
ÏUPÓ Ignition into
ÏACCÓor ÏONÓ
position
Wait 10 sec
Wait for long beep
Carpet or car chassis
“Soft” Velcro Fastener
“Hard” Velcro Fastener
Mounting unit using Velcro fasteners
Velcro Fasteners are not included
SoundGate stron
g
l
y
recommends
g
roundin
g
the unit to the car chassis for best results.
NOTE
M4 x 5mm*
(see note below)
7

Activate / Deactivate “I Agree” Automatic Bypass Function
Put your device in Simple Mode by rapidly pressing the [SCAN] button 8 times (MUST BE DONE within 1-2 seconds).
Push DISC REPEAT button to hear a long beep to toggle the “I Agree” Automatic Bypass Function ON and OFF.
(For vehicles not equipped with DISC REPEAT as a physical button, push and hold the REPEAT button until you hear
a long beep to toggle the “I Agree” Automatic Bypass Function ON and OFF.
IMPORTANT
i
(1) After a delay of five seconds, this product will automatically bypass the automobile
manufacturer's on-screen warnings concerning use of the onboard navigation system.
These warnings are: ”Caution, Drive safely and obey traffic rules. Watching this screen
while vehicle is in motion can lead to a serious accident. Make selections only while
stopped. Some map data may be incorrect. Read safety instructions in Navigation
Manual.”
(2) PLEASE PRE-NOTIFY EVERY DRIVER OF THIS VEHICLE OF THE
CONTENT OF THE AUTOMOBILE MANUFACTURER'S WARNING.
(3) IF YOU PREFER THAT THIS PRODUCT NOT ELIMINATE THE
FOREGOING WARNINGS, YOU MAY DISABLE THIS FEATURE BY
FOLLOWING THE INSTRUCTIONS IN THIS OWNER'S MANUAL, OR
CALL SOUNDGATE TECHNICAL SUPPORT FOR MORE INFORMATION.
Important Please Read!
! !
Special Feature
8

Apple® iPod™
Radio Integrated into Navigation System)
CD-Text support
Apple® iPod™
(
CD changer emulation
For Radio Receiver with LCD
For Radio Integrated into Navigation System
Audio input dedicated for Apple iPod can only be used for Apple iPod integration. Control of Apple iPod
This unit supports fourth generation Apple iPod, iPod
Mini, iPod Photo, iPod Nano and fifth generation “Video” iPod.
is done through
your head unit or the steering wheel controls (explained below).
This unit can be programmed in .
Please see attached chart to determine which emulation mode is compatible with your vehicle.
CD changer emulation mode , MD changer emulation mode and Mp3 Emulation
Functionality Description
Apple® iPod™
Direct disc selection
MAY NOT look/operate or be available on different
y
ear and model
(Radio Integrated into Navigation System) Song Title, Artist Name
or Album Name
(see “DISC SCAN” function)
Apple® iPod™
Apple® iPod™ ( MD-TEXT)
MD changer emulation
For Radio Receiver with LCD
For Radio Integrated into Navigation System
Playlist Title
Head Unit:
“DISC” “CD”To switch between the unit sources you need to use or button on the radio
(Diagram below assumes factory CD changer is present).
Steering Wheel control:
To switch between the unit and radio you need to use the “MODE” button on the steering wheel control.
(Diagram below assumes following sources are present).
CD CD1 CD CD1
iPod™
CD MD1 CD MD1
iPod™
OR
AM FM1 FM2 TAPE CD CD1
Select desired source by pressing button on the head unit or on the steering wheel control.
(See diagram below)
DISC MODE
Source Selection
iPod™ iPod™
iPod™
Head Unit Controls
9

TRACK+ TRACK-
and
Select the desired track
(Maximum number of tracks is 99 for CD changer Emulation mode).
You can fast switch through tracks by repeatedly pressing the button.
The track will change after a brief pause when you stop pressing the button.
If a playlist only contains one track, the buttons will not function.
9-MP3
[TRACK+] / [TRACK-]
[TRACK+] / [TRACK-]NOTE:
FOLDER+ FOLDER-
and
Select the desired playlist (Maximum number of playlists is 99).
You can fast switch through playlists by repeatedly pressing the button.
The new playlist will start after a brief pause when you stop pressing the button.
If there are no songs in a playlist the unit will jump to the next playlist.
[FOLDER+] / [FOLDER-]
NOTE:
RPT
Activates iPod “Repeat One” function
RAND
The RAND button activates the playlist randomizer function. All tracks in the current playlist will be placed into a new,
random order. The currently selected track will be renumbered to Track 1, and all subsequent tracks will be random
selections from the playlist. After activating the playlist randomizer, the displayed track number does not map to the
physical track number in the playlist, but rather to the new, randomized order.
Shuffle all songs in the active playlist. iPod starts playing songs from your entire playlist in random order,
skipping audiobooks.
NOTE:
FOLDER RPT
Press and hold the RPT button to activate playlist repeat. This mode will cause the current playlist to start over with
the first track after the last track has been played, instead of moving on to the next playlist.
NOTE: Repeats all songs in active playlist.
Displayed Errors (available only as a TEXT message)
iPod is not connected
Check iPod...
SCROLL UP SCROLL DOWN
and
Fast Forward/Rewind the song
For vehicle not equipped with [DISC+] and [DISC-] buttons, if “SCAN” function is active use
[SCROLL UP] and [SCROLL DOWN] as [DISC+] and [DISC-] to select the desired playlist (in this case [DISC+] and
[DISC-] will work as a [FOLDER+] and [FOLDER-])
NOTE:
DETAIL
Pressing the DETAIL button will bring up details on the current track. It will display Album Title, Track Title, and Artist.
Genre is not supported and will always be blank.
You can switch tracks while in DETAIL view, but it will not display the current track number.NOTE:
FOLDER LIST
The FOLDER button will bring up a new display that allows you to scroll through the playlists and tracks on your iPod
device. [Folder Up] or [Folder Down] will scroll through playlists, wile [File Up] or [File Down] will scroll through tracks.
If a playlist contains a large number of songs, it may take some time for the data to be transferred to the head unit.
This can cause the scroll buttons to become unresponsive during rapid scrolling, until data has been loaded from the iPod.
Some vehicles' head units do not support the Folder/File display function. In this case when you press FOLDER
you will see a blank display in the Folder and File lists.
NOTE:
iPod controls
CD-MP3 changer Emulation
10

TRACK+ TRACK-
and
Select the desired track
(Maximum number of tracks is 99 for CD changer Emulation mode).
You can fast switch through tracks by repeatedly pressing the button.
The track will change after a brief pause when you stop pressing the button.
If a playlist only contains one track, the buttons will not function.
9 -MP3
[TRACK+] / [TRACK-]
[TRACK+] / [TRACK-]NOTE:
FOLDER+ FOLDER-
and
Select the desired playlist (Maximum number of playlists is 99).
You can fast switch through playlists by repeatedly pressing the button.
The new playlist will start after a brief pause when you stop pressing the button.
If there are no songs in a playlist the unit will jump to the next playlist.
[FOLDER+] / [FOLDER-]
NOTE:
RPT
Activates iPod “Repeat One” function
RAND
The RAND button activates the playlist randomizer function. All tracks in the current playlist will be placed into a new,
random order. The currently selected track will be renumbered to Track 1, and all subsequent tracks will be random
selections from the playlist. After activating the playlist randomizer, the displayed track number does not map to the
physical track number in the playlist, but rather to the new, randomized order.
Shuffle all songs in the active playlist. iPod starts playing songs from your entire playlist in random order,
skipping audiobooks.
NOTE:
FOLDER RPT
Press and hold the RPT button to activate playlist repeat. This mode will cause the current playlist to start over with
the first track after the last track has been played, instead of moving on to the next playlist.
NOTE: Repeats all songs in active playlist.
Displayed Errors (available only as a TEXT message)
iPod is not connected
Check iPod...
SCROLL UP SCROLL DOWN
and
Fast Forward/Rewind the song
For vehicle not equipped with [DISC+] and [DISC-] buttons, if “SCAN” function is active use
[SCROLL UP] and [SCROLL DOWN] as [DISC+] and [DISC-] to select the desired playlist (in this case [DISC+] and
[DISC-] will work as a [FOLDER+] and [FOLDER-])
NOTE:
DETAIL
Pressing the DETAIL button will bring up details on the current track. It will display Album Title, Track Title, and Artist.
Genre is not supported and will always be blank.
You can switch tracks while in DETAIL view, but it will not display the current track number.NOTE:
FOLDER LIST
The FOLDER button will bring up a new display that allows you to scroll through the playlists and tracks on your iPod
device. [Folder Up] or [Folder Down] will scroll through playlists, wile [File Up] or [File Down] will scroll through tracks.
If a playlist contains a large number of songs, it may take some time for the data to be transferred to the head unit.
This can cause the scroll buttons to become unresponsive during rapid scrolling, until data has been loaded from the iPod.
Some vehicles' head units do not support the Folder/File display function. In this case when you press FOLDER
you will see a blank display in the Folder and File lists.
NOTE:
iPod controls
CD-MP3 changer Emulation
11

“Simple mode” [SCAN] MUST BE DONE .Enable/Disable - press the button 8 times ( within 1-2 seconds)
You will hear a short beep.
This feature will allow you to control the iPod™ manually. [Track+], [Track-] on your Head Unit will still select the desired
Track,
.
Th unit will keep this mode in memory (even after vehicle ignition is turned OFF and back ON) until this
mode is turned OFF (disabled).
but all other control can only be done through the iPod.
e
Playlist and track information will not be displayed on the head unit in “Simple mode”
iPod Sound Level Adjustment
NOTE: Remember, a high sound level may result in noticeable sound distortion.
Enable
Start playing desired song by pressing the [Play/Pause] button on the iPod
Activate “SCAN” function on the head unit
Set the desired volume on the head unit
While is active use to increase volume and to decrease volume
“Simple mode”
“SCAN” [SCROLL UP] [SCROLL DOWN] .
Simple Mode
iPod controls
Why SoundGate Dealers have
the edge...
The technologies used in today’s vehicles are
as sophisticated as any laptop computer. At
SoundGate we believe these new technologies
are full of opportunities for mobile electronic
dealers across the nation. We make it a high
priority to not only research these new systems,
but to understand them and their impact on
the aftermarket car audio industry. Armed
with this knowledge, we are well equipped to
help you integrate new components into these
systems with our innovative, high-performance
interfaces and unparalleled technical support.
Be sure to ask your
autosound specialist
about these other exciting
SoundGate products...
Auxiliary Input Interfaces and Docking•
Stations which allow you to input
audio from MP3 Players, DVD/Video,
Satellite Radio, and more to OEM and
aftermarket car audio systems
High-performance Radio Replacement•
Interfaces for seamlessly integrating•
new receivers or CD players
into OEM audio systems
Competition-Grade Interfaces•
for adding amplifiers
Remote Audio Control Interfaces that let•
you control aftermarket receivers and CD
players from your factory rear seat, or
steering-wheel mounted audio controls.
And many others!•
Copyright© 2004-2008 SoundGate®. All Rights
Reserved. SoundGate® is a registered trademark of
Stillwater Designs, Inc. All other trademarks are the
property of their respective owners.
www.soundgate.com
Table of contents
Other SoundGate Automobile Accessories manuals
Popular Automobile Accessories manuals by other brands
Kargo Master
Kargo Master 4089P Instruction guide
Whispbar
Whispbar K373 Fitting instructions
Metra Electronics
Metra Electronics 99-7316 installation instructions

STO N SHO
STO N SHO SNS 138 Installation procedures

SuperATV
SuperATV DOOR-CA-DEF-00 installation instructions
American Megatrends
American Megatrends X400 Hardware manual
