7
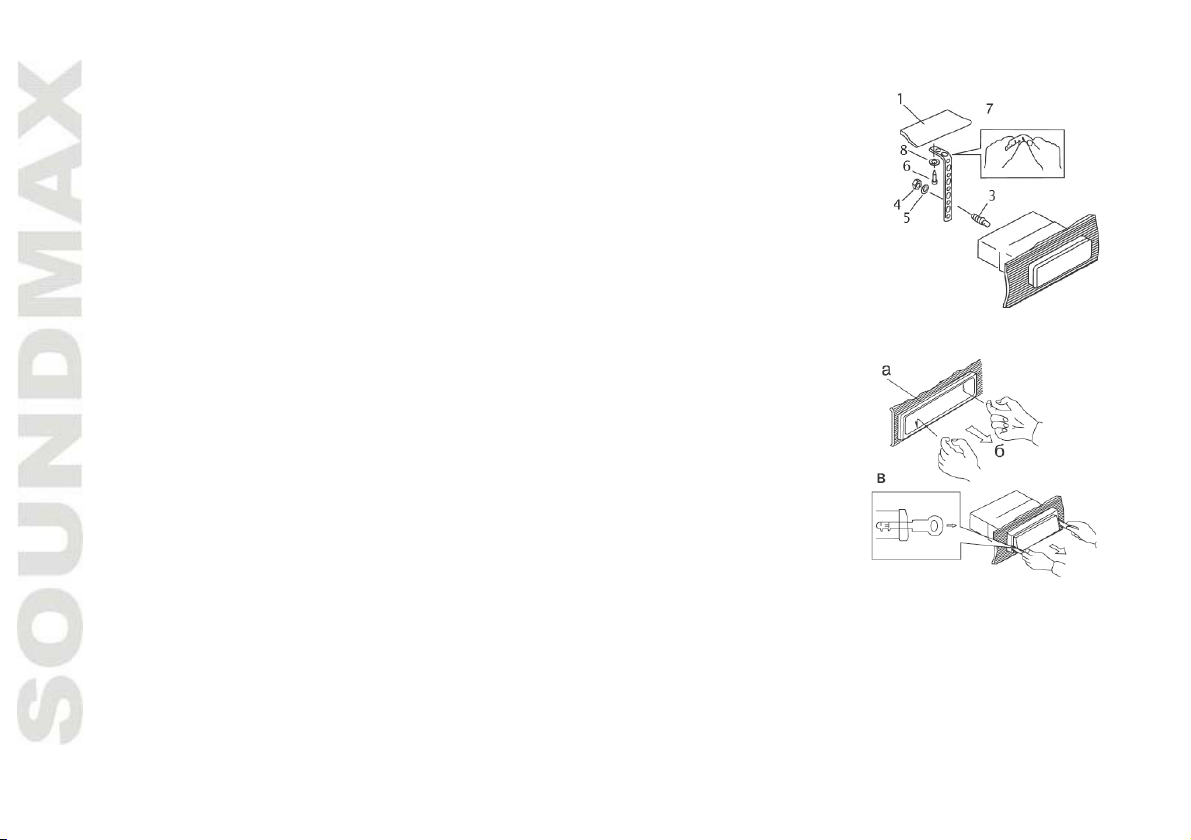
2 . D I N R EA R- M OU N T ( M e t h od B)
For t his m ethod, use the screw holes in t he lat eral sides of t he unit. Fix t he unit w it h t he help of t he fact ory
radio mount ing brackets.
1. Select a position in which t he screw holes of t he brackets (3) are aligned wit h
the screw holes in t he unit body, and screw in tw o screws (2) in each side.
2. Screw.
3. Fact ory radio m ount ing bracket s.
4. Vehicle dashboard.
5. Lock ( r em ove t his par t ).
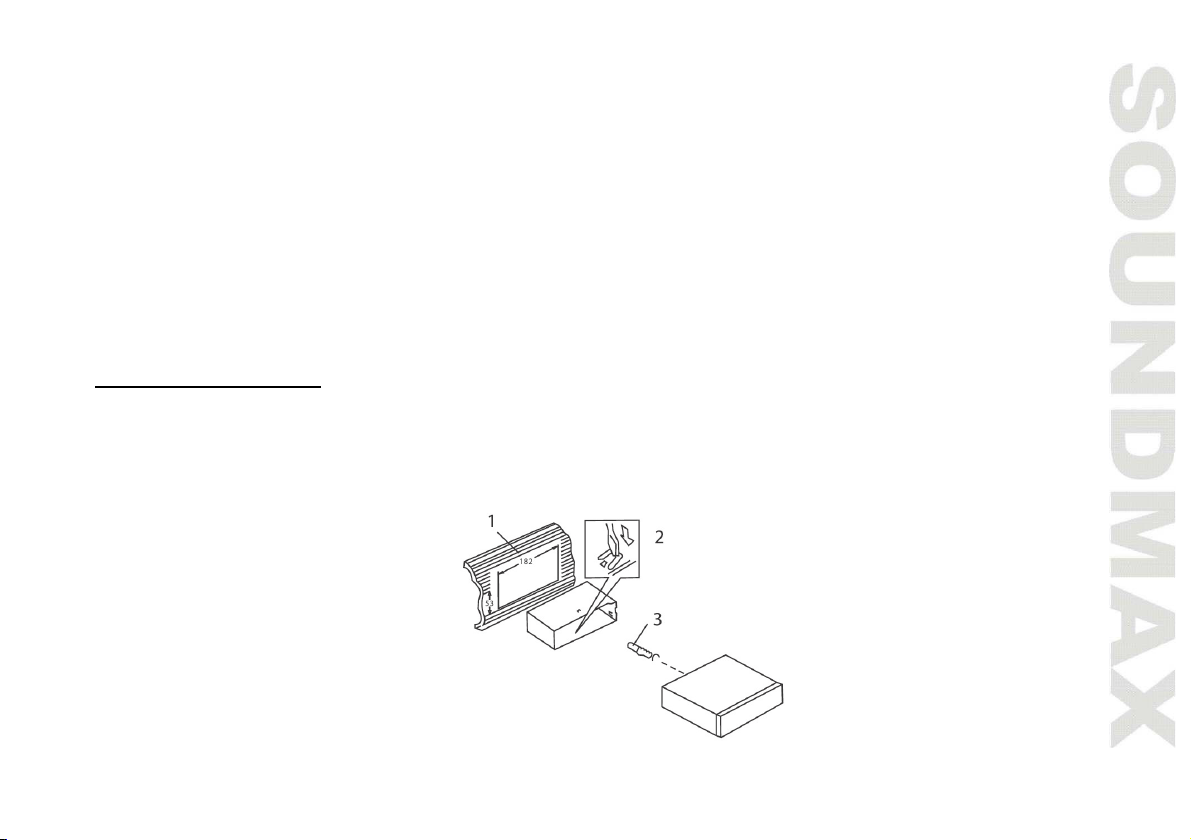
N ot e : The out er t rim fr am e and mounting sleeve are not used for m et hod of
inst allat ion.
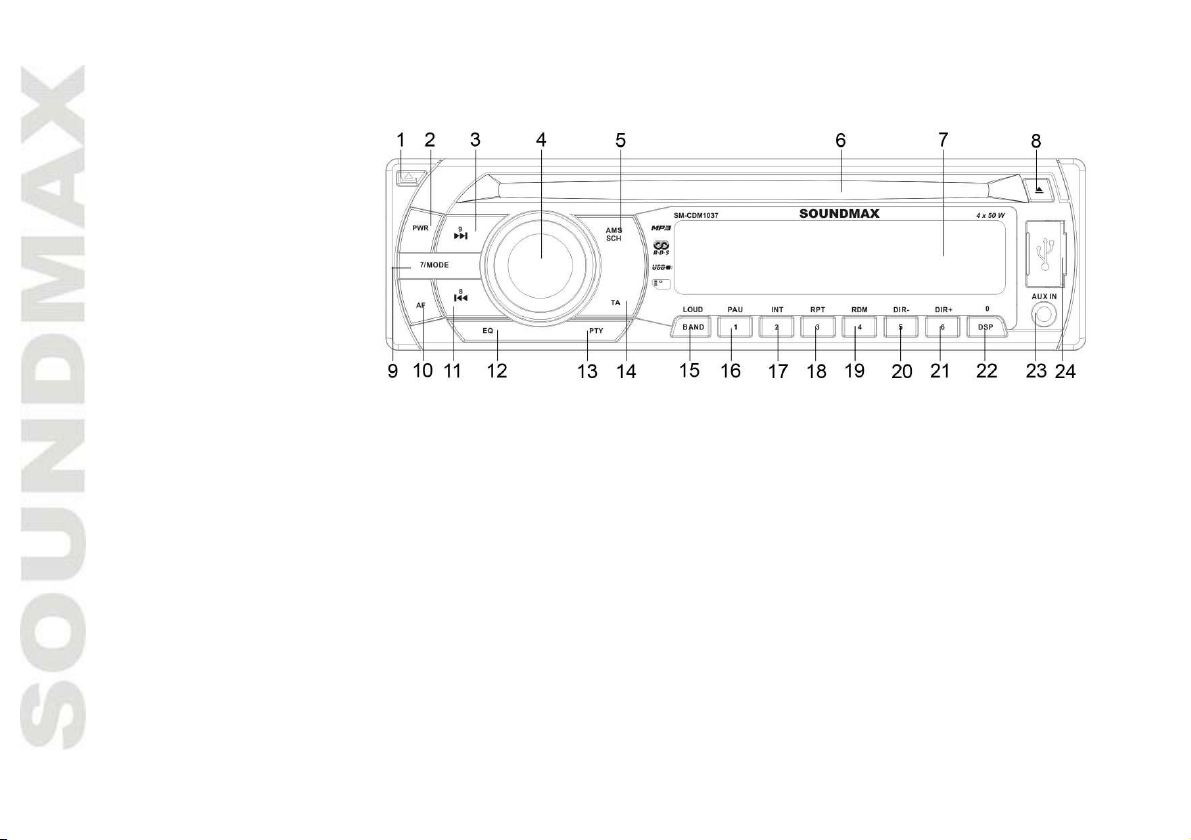
I n st a lling t he fr on t p an el
I nstall t he fast ening hole on t he right side of t he front panel on t he right fastening of t he unit . Aft er t hat ,
press on t he left part of t he panel unt il a click. Ensure that t he panel is properly fixed, ot herwise er ror
sy m bols m ay be displayed and som e but tons m ay not funct ion.
To detach t he front panel, press OPEN but ton, t hen dist ract the right side of t he panel from t he fastening of
the unit.
An t i- t h e ft sy st e m
The front panel of this unit can be st ored in t he included protect ive case when not in used and carried away
when y ou leave t he vehicle t o det er t heft .
Sw it ch off the power of the unit . Detach t he front panel, t hen put it to t he prot ect ive case and t ake it w it h
you.
Cau tions: The cont rol panel can easily be dam aged by shocks. Aft er rem oving it , place it in a pr ot ect ive case
an d be car efu l not t o drop it or subj ect it t o st rong shocks.
The rear connect or t hat connect s t he m ain unit and t he cont rol panel is an ext rem ely im portant par t. Be
careful not t o dam age it by pressing on it wit h fin ger nails, pens, screwd rivers, et c.
N ot e : I f t he cont rol panel is dirt y, wipe off t he dirt wit h soft , dr y clot h only. And use a cott on swab soaked in
isopropy l alcohol t o clean t he socket on t he back of t he cont rol panel.