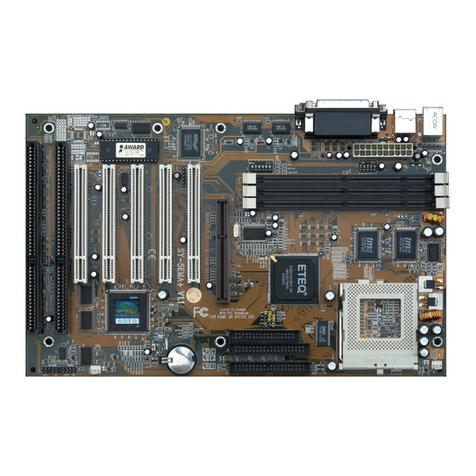
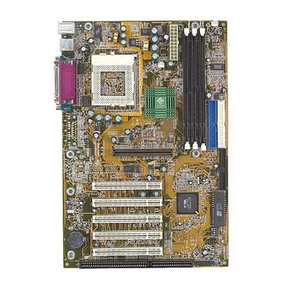
SOYO SY-7IZM User manual

SY-7IZM
Motherboard
Quick Start Guide
Hardware
Installation
Quick BIOS
Setup
Introduction
The SOYO CD

SOYO™
2
SY-7IZM Motherboard
Socket 370 for Intel Celeron
TM
processors
Intel 440ZX AGP/PCI Motherboard
66&100MHz Front Side Bus supported
Micro-ATX Form Factor
Copyright © 1999 bySoyo Computer Inc.
Trademarks:
Soyo is a registered trademark of Soyo Computer Inc. All trademarks are the property of their
owners.
Product Rights:
Product and corporate names mentioned in this publication are used for identification purposes
only and may be registered trademarks or copyrights of their respective companies.
Copyright Notice:
All rights reserved. This manual is copyrighted by Soyo Computer Inc. You may not reproduce,
transmit, transcribe, store in a retrieval system, or translate into any language, in any form or by
any means, electronic, mechanical, magnetic, optical, chemical, manual or otherwise, any part of
this publication without express written permission of Soyo Computer Inc.
Disclaimer:
Soyo Computer Inc. makes no representations or warranties regarding the contents of this
manual. We reserve the right to revise the manual or make changes in the specifications of the
product described within it at any time without notice and without obligation to notify any
person of such revision or change. The information contained in this manual is provided for
general use by our customers. Our customers should be aware that the personal computer field is
the subject of many patents. Our customers should ensure that their use of our products does not
infringe upon any patents. It is the policy of Soyo Computer Inc. to respect the valid patent rights
of third parties and not to infringe upon or assist others to infringe upon such rights.
Restricted Rights Legend:
Use, duplication, or disclosure by the Government is subject to restrictions set forth in
subparagraph (c)(1)(ii) of the Rights in Technical Data and Computer Software clause at
252.277-7013.
About This Guide:
This Quick Start Guide is for assisting system manufacturers and end users in setting up and
installing the Motherboard. Information in this guide has been carefully checked for reliability;
however, no guarantee is given as to the correctness of the contents. The information in this
document is subject to change without notice.
If you need any further information, please visit our Web Site on the Internet. The address is
"http://www.soyo.com.tw".
7IZM Serial - Version 2.0 - Edition: April 1999
*Thesespecificationsaresubjecttochangewithoutnotice

SY-7IZM
Quick Start Guide
3
Introduction
1
1
Introduction
Congratulationsonyourpurchaseofthe
SY-7IZM
Motherboard.ThisQuickStartGuide
describesthestepsforinstallingandsettingupyournewMotherboard.
ThisguideisdesignedforalluserstoprovidethebasicstepsofMotherboardsettingand
operation.Forfurtherinformation, pleasereferto SY-7IZMMotherboardUser'sGuideand
TechnicalReferenceonlinemanualincludedontheCD-ROMpackedwithyour
Motherboard.
Unpacking
*Ifyourboardcomeswithadriverdiscandapapermanual,theQuickStartGuideandtheCD-ROMarenotincludedinthepackage.
WhenunpackingtheMotherboard,checkforthefollowingitems:
u
TheSY-7IZM440ZXAGP/PCIMotherboard
u
ThisQuickStartGuide
u
TheInstallation CD-ROM
u
OneIDEDeviceFlat Cable
u
OneFloppyDiskDriveFlatCable
u
Serialportflatcablewitha9-pinconnectorbracket

SY-7IZM Quick Start Guide
4
Introduction
SY-7IZM Motherboard Layout
Key Features
Ø
SupportsIntelCeleron
TM
processors(300A-
500MHz)
Ø
Easy CPU settings in BIOS with the “SOYO
COMBO Setup”.
Ø
3D YAMAHA YMF740 Audio
Ø
ATI Rage Pro Graphics/Video with 8MB Video
memory on board
Ø
Auto-detect CPU voltage
Ø
PC98, ACPI, Ultra DMA/33
Ø
SupportsWake-On-LAN(WOL)
Ø
Supports onboard hardware monitoring and
includes Hardware Doctor™utility
Ø
Power-on by moden or alarm
Ø
Fan speed control
Ø
3 x 32-bit bus mastering PCI slots
Ø
1 x 16-bit ISA slot
Ø
2 x USB ports onboard
Ø
1 x IrDA port
Ø
Supportsmultiple-bootfunction
Ø
Powerfailureresume
Ø
Supports Hardware Suspend (APM mode only)
Ø
ATX power connector
COM 1
VGA
PRT
USB 1
USB 2
PS/2 KB
Connector
PS/2 Mouse
Connector
PCI Slot #1
PCI Slot #2
PCI Slot #3
3V
Lithium
Battery
1
CPUFAN
Winbond
83977EF-AW
I/O Chipset
IDE 2 IDE 1
1
1
1
FDC
ISA Slot #1
ATX
Power
1
Flash BIOS
LINE-OUT
LINE-IN
MIC JACK
JOYSTICK
JP9
1
3
JP10
13
JP44
WOL
Header
3
1
Intel
82371 EB
Intel
82443ZX
ATI
RAGE
PRO
IR1
1
5
Hardware
Monitoring
Winbond
W83782
Socket 370
1
3
JP5
Jumper
CMOS Clear
DIMM 1
DIMM 2
Speaker
Keylock
Power
LED
Reset
Turbo
LEDHDD
LED
_
+
_
+
_
+
_
+
PWRBT
CHAFAN
COM2
CDIN
1
4
CODEC
CT1297
YMF740-V
YAMAHA
SDRAM
SDRAM
SDRAM
SDRAM

SY-7IZM
Quick Start Guide
5
Hardware
Installation
2
2
Installation
ToavoiddamagetoyourMotherboard,followthesesimpleruleswhilehandling
thisequipment:
l
BeforehandlingtheMotherboard,groundyourselfbygraspinganunpaintedportion
ofthesystem'smetalchassis.
l
RemovetheMotherboardfromitsanti-staticpackaging.Holditbytheedgesand
avoidtouchingitscomponents.
l
ChecktheMotherboardfordamage.Ifanychipappearsloose,presscarefullytoseat
itfirmlyinitssocket.
Followthedirectionsinthissectiondesignedtoguideyouthroughaquickandcorrect
installationofyournew
SY-7IZM
Motherboard.Fordetailedinformation,pleasereferto SY-
7IZMMotherboardUser'sguideandTechnical Reference onlinemanualincludedonthe
CD-ROMpackedwithyourMotherboard.
Gatherandprepareallthenecessaryhardwareequipmenttocompletetheinstallation
successfully:
u
Celeron
TM
processorwithbuilt-inCPUcoolingfan(boxedtype)
u
SDRAMmodule
u
Computercaseandchassiswithadequatepowersupplyunit
u
Monitor
u
PS/2Keyboard
u
PointingDevice(PS/2Mouse)
u
VGACard
u
Speaker(s)(optional)
u
DiskDrives:HDD,CD-ROM,Floppydrive…
u
ExternalPeripherals:Printer,Plotter,andModem(optional)
u
InternalPeripherals:ModemandLANcards(optional)
Notice1:
ThisMotherboardfeaturesonebuilt-inVGAportandthreebuilt-inaudio-stereo
ports.ThereforeyoudonotneedtoinstallneitheraVGAcardnorasoundcard.
Notice2:
Ifyouwanttouseanexternalspeakerconnectedto"Line-out"port,pleasemake
suretousean"amplifiedspeaker"thatcangenerateproperoutputsoundvolume.

SY-7IZM Quick Start Guide
6
Hardware
Installation
Install the Motherboard
Followthestepsbelowinordertoperformtheinstallationofyournew
SY-7IZM
Motherboard.
Step 1. Install the CPU
Mark your CPU Frequency:
RecordtheworkingfrequencyofyourCPU
thatshouldbeclearlymarkedontheCPUcover.
300MHz(66x4.5) 333MHz(66x5.0) 366MHz(66x5.5) 400MHz(66x6.0)
433MHz(66x6.5) 466MHz(66x7..0) 500MHz(66x7.5)
ThisMotherboardisdesignedtobeabletosupportprocessorswith100MHzFSB.However,
Socket370processorswith100MHzFSBarenotavailableyetatthismomentfortesting.
CPU Mount Procedure:
TomounttheCeleron
TM
processorthatyouhave
purchasedseparately,followthese instructions.
1.
Liftthesockethandleuptoaverticalposition.
2.
AlignthebluntedgeoftheCPUwiththematchingpinholedistinctiveedgeonthe
socket.
3.
Seattheprocessorinthesocketcompletelyandwithoutforcing.
4.
ThenclosethesockethandletosecuretheCPUinplace.
RemembertoconnecttheCPUCoolingFantotheappropriatepower
connectorontheMotherboard. Thefanis akeycomponentthatwillensure
systemstability.Thefanpreventsoverheating,thereforeprolongingthelifeof
yourCPU.
1 2
3 4

SY-7IZM
Quick Start Guide
7
Hardware
Installation
Step 2. Make Connections to the Motherboard
ThissectiontellshowtoconnectinternalperipheralsandpowersupplytotheMotherboard.
InternalperipheralsincludeIDEdevices(HDD,CD-ROM),FloppyDiskDrive,ChassisFan,
FrontPanelDevices(TurboLED,InternalSpeaker,ResetButton,IDELED,and KeyLock
Switch.),Wake-On-LANcard,VGAcard,SoundCard,andotherdevices.
FormoredetailsonhowtoconnectinternalandexternalperipheralstoyournewSY-7IZM
Motherboard, pleaserefer to SY-7IZMMotherboardUser'sGuideandTechnicalReference
onlinemanualonCD-ROM.
Connectors and Plug-ins
IrDA(Infrared Device Header):IR1 Wake-On-LAN Header: JP44
Pin1 Pin2 Pin3 Pin4 Pin5 Pin1 Pin2 Pin3
VCC None IRRX GND IRTX 5VSB GND MP-Wakeup
CPU Cooling Fan: CPUFAN ChassisFan:CHAFAN
Pin1 Pin2 Pin3 Pin1 Pin2 Pin3
GND 12V SENSOR GND 12V SENSOR
CDLine-in:CDIN Pin1 Pin2 Pin3 Pin4
ConnecttheCDLine-incordfromtheCR-ROMdevice
tothematchingconnectorCDIN
LGGR
PowerLED Keylock
Pin1 Pin2 Pin3
Pin1 Pin2
5V NC GND
ControlPin GND
Speaker
Pin1 Pin2 Pin3 Pin4
5V NC NC Speakerout
HDDLED TurboLED PWRBT RESET
Pin1 Pin2 Pin1 Pin2 Pin1 Pin2 Pin1 Pin2
LEDAnode LED
Cathode LED
Cathode GND Power
On/Off GND Power
Good GND
ATXPowerOn/Off:PWRBT
Connectyourpowerswitchtothisheader(momentaryswitchtype).
Toturn off thesystem, pleasepress thisswitch and holddown forlonger than 4seconds.
ATXPower Supply: ATXPW
AttachtheATXPowercabletothisconnector.IfyouuseATXpowersupply.
Whenusing the Power-On by PS/2Keyboard function,please make sure the ATXpower supply can
takeat least720mA load on the 5VStandby lead(5VSB) tomeet the standard ATX specifications.
Power LED
Key Lock
Speaker
Reset
PWRBT
Turbo LED
HDD LED
+
+
++
__
_
_

SY-7IZM Quick Start Guide
8
Hardware
Installation
Step 3. Configure Memory
YourboardcomeswithtwoDIMMsockets,providingsupportforupto256MBofmain
memoryusingDIMMmodulesfrom8MBto128MBwithnorestrictiononmemory
configuration.Therefore,youcaninstallmemorymodulesinanycombination.
Memory Configuration
DIMM Banks
MEMORY
CONFIGURATION DIMM 1 DIMM 2
RAM Type SDRAM SDRAM
RAM Module Size (MB) 8/16/32/64/128 8/16/32/64/128
Step 4. Set JP9 for power up FSB clock and AGP bus clock.
JP9isusedtoadjustAGPbusclockfrequencydependingonthevalueofthefrontsidebus
(FSB)clock,alsothesettingoftheJP9determinesthepowerupFSBclockwhichwill
remaineffectiveuntiltheBIOSsettheFSBclocktotheCMOSsetting.
JP9Setting
Powerup FSB Clock 100MHz 66MHz
AGPClock AGPClock=FSBClock÷1.5 AGPClock= FSBClock ÷1
Note:Thespecification ofmaximumAGP bus Clockfrequencyis 66.6MHz.
∗
SetJP9topin2-3shortwhenyouuseaFSB100MHzCPU.
∗
SetJP9topin1-2shortwhenyouuseaFSB66MHzCPU.
∗
SetJP9topin2-3shortwhenyouuseaFSB66MHzCPUbutwant tooverclockthe
FSBclockto100MHzviatheBIOSsetting.
Step 5. Set the CPU Frequency
ThisMotherboarddoesnotuseanyjumperstosettheCPUfrequency;CPUsettingare
changedthroughtheBIOS[SOYOCOMBOSETUP].RefertoChapter3 “QuickBIOS
Setup”fordetailsonhowtosetthe
Celeron
TM
processorfrequency.
2
1
3
2
1
3

SY-7IZM
Quick Start Guide
9
Hardware
Installation
Step 6. Enable/Disable Power-On by Keyboard (JP10)
YoucanchoosetoenablethePower-OnbyKeyboardfunctionbyshortingpin1-2onjumper
JP10;otherwise,shortpin2-3todisablethisfunction.
Power-Onby
Keyboard Enable Disable
JP10Setting
Shortpin1-2toenablethe
Power-OnbyKeyboardfunction. Shortpin2-3todisablethe
Power-OnbyKeyboardfunction.
Important: When using the Power-On by Keyboard function, please make sure
the ATX power supply can take at least 720mA load on the 5V Standby lead
(5VSB) to meet the standard ATX specification.
Step 7. Clear CMOS Data (JP5)
Clearthe CMOSmemoryby momentarilyshortingpin2-3onjumperJP5foratleast5
seconds,andthenbyshortingpin1-2toretainnewsettings. Thisjumpercanbeeasily
identifiedbyitswhitecoloredcap.
CMOS Clearing Clear CMOS Data Retain CMOS Data
JP5 Setting Short pin 2-3 for
at least 5 seconds
to clear the CMOS.
Short pin 1-2
to retain the
new settings.
Note: You must unplug the ATX power cable from the ATX power connector when
performing the CMOS Clear operation.
3
2
1
3
2
1
2
1
3
2
1
3

SY-7IZM Quick Start Guide
10
Hardware
Installation
Note on Over-clocking Capability
TheSY-7IZMMotherboardprovidesover-clockingcapability.Duetotheover-clocking
settingyoursystemmayfailtobootuporhangduringruntime.Ifthisoccurs,pleaseperform
thefollowingstepstorecoveryoursystemfromtheabnormalsituation:
1.
Turnoffsystempower.(IfyouuseanATXpowersupply,anddependingonyour
system,youmayhavetopressthepowerbuttonformorethan4secondstoshut
downthesystem.)
2.
SetJP9topin1-2ifyouuseaFSB66MHzCPU
3.
Pressandholddownthe<Insert>keywhileturningonthesystempower.Keep
holdingdownthe<Insert>keyuntilyouseethemessageoftheCPUtypeandyour
CPUfrequency(66MHzxCPUMultiplier)appearonscreen.
4.
Pressthe<Del>keyduringthesystemdiagnosticcheckstoentertheAwardBIOS
Setupprogram.
5.
FromtheBIOSmainmenu,select[SOYOCOMBOSETUP]andmovethecursorto
the[CPUFrequency]fieldtosettheproperworkingfrequency.
6.
Select[Save&ExitSETUP]andpress<Enter>tosavetheconfigurationtothe
CMOSmemory,andcontinuethebootsequence.
Note: SOYOdoesnotguaranteesystemstabilityiftheuseroverclocksthesystem.
Anymalfunctions dueto over-clocking arenot coveredbythewarranty.

SY-7IZM
Quick Start Guide
11
Quick BIOS
Setup
3
3
Quick BIOS Setup
ThisMotherboarddoesnotuseanyhardwarejumperstosettheCPUfrequency.Instead,
CPUsettingsaresoftwareconfigurablewiththeBIOS
[SOYO COMBO SETUP].
The
[SOYOCOMBOSETUP]menucombinesthemainparametersthatyouneedtoconfigure,
allinonemenu,foraquicksetupinBIOS.
Afterthehardwareinstallationiscomplete,turnthepowerswitchon, thenpress the
<DEL>
key
duringthesystemdiagnostic checksto entertheAwardBIOSSetupprogram.The CMOS
SETUPUTILITYwilldisplayonscreen.Then,followthesestepsto configurethe CPUsettings.
Step 1. Select [STANDARD CMOS SETUP]
Set[Date/Time]and[Floppydrivetype],thenset [HardDiskType]to “Auto”.
Step 2. Select [LOAD SETUP DEFAULT]
Selectthe“LOADSETUPDEFAULT”menuandtype“Y”attheprompttoloadtheBIOS
optimalsetup.
Step 3. Select [SOYO COMBO SETUP]
Movethecursortothe
[CPUFrequency]
fieldtosettheCPUfrequency.
Available[CPUFrequency]settingsonyourSY-7IZMMotherboardaredetailedinthe
followingtable.Ifyousetthisfieldto[Manual],youarethenrequiredtofillinthenexttwo
consecutivefields:(1)theCPUHost/PCIClock,and(2)theCPURatio.
CPU Frequency
300MHz (66 x 4.5)
333MHz (66 x 5.0)
366MHz (66 x 5.5)
400MHz (66 x 6.0)
433MHz (66 x 6.5)
466MHz (66 x 7.0)
500MHz (66 x 7.5)
Select the working frequency of your CeleronTM
processor among these preset values.
Note: Mark the checkbox that corresponds to
the working frequency of your CeleronTM processor
in case the CMOS configuration should be lost.
Note:
ifyouuseBusFrequenciesof75MHz,makesurethatyourPCIcardscancopewith
thehigherPCIclock.
Step 4. Select [SAVE & EXIT SETUP]
Press
<Enter>
tosavethenewconfigurationtotheCMOSmemory,andcontinuetheboot
sequence.

SY-7IZM
Quick Start Guide
12
The SOYO CD
4
4
The SOYO CD
YourSY-7IZMMotherboardcomeswithaCD-ROMlabeled"SOYOCD."TheSOYOCD
containstheuser'smanualfileforyournewMotherboard,the driverssoftwareavailablefor
installation,andadatabaseinHTMLformatwithinformationonSOYOMotherboardsand
otherproducts.
Step 1. Insert the SOYO CD into the CD-ROM drive
TheSOYOCDwillauto-run,andtheSOYOCDStartUpMenuwilldisplayasshownbelow.
(SOYO CDStart UpProgram Menu)
TheSOYOCDStartUpProgramautomaticallydetectswhichSOYOMotherboardyouown
anddisplaysthecorrespondingmodelname.
Step 2. Read SOYO [7IZM] Manual
Clickthe
Read Manual
buttontoopentheuser'smanualfileofyourMotherboard.

SY-7IZM
Quick Start Guide
13
The SOYO CD
PleasenotethatiftheStartUpprogramwasunabletodeterminewhichSOYOMotherboard
youown,themanualselectionmenuwillpopup,asshownbelow.Thenselecttheuser's
manualfilethatcorrespondstoyourMotherboardmodelnameandclick
OK.
(ManualSelectionMenu)
Theuser'smanualfilesincludedontheSOYOCD canbereadinPDF(Postscript
Document)format.InordertoreadaPDFfile,theappropriateAcrobatReadersoftware
mustbeinstalledinyoursystem.
Note:
TheStartUpprogramautomaticallydetectsiftheAcrobatReaderutilityisalready
presentinyoursystem,andotherwisepromptsyouonwhetherornotyouwanttoinstallit.
YoumustinstalltheAcrobatReaderutilitytobeabletoreadtheuser'smanualfile.Follow
theinstructionsonyourscreenduringinstallation,then oncetheinstallationiscompleted,
restartyoursystemandre-runtheSOYOCD.
Step 3. Install Drivers and Utilities
ClicktheInstallDriversbuttontodisplaythelistof driverssoftwarethatcanbeinstalledwith
yourMotherboard.TheStartUpprogramdisplaysthedriversavailablefortheparticular
modelofMotherboardyouown.Werecommendthatyouonlyinstallthosedrivers.
SOYO CD Manuals
Please select your manual in the box below
and click OK.
686 boards:586 boards:
OKBack
7IZM

SY-7IZM
Quick Start Guide
14
The SOYO CD
Thefollowing drivers areavailable forWindows95
(DriverInstallationMenu)
Thefollowing drivers areavailable forWindows98
(DriverInstallationMenu)
However,todisplaythe listofall driverssoftwareavailablewithSOYOMotherboards,click
the
DisplayalldriversontheSOYO CD
button.Pleasemakesuretoinstallonlythe
driversadaptedtoyoursystem,orotherwisethiscausesystemmalfunctions.

SY-7IZM
Quick Start Guide
15
The SOYO CD
A short description of all available drivers follows:
ØIntel Southbridge Drivers
BecauseWindows95 doesnotrecognizethe SouthbridgeofthenewerIntelchipsets(TX,
BX,ZXetc) thisutilityhasto berun,itwillupdatethenecessaryWindowsfiles.(Onlyfor
Windows95)
ØSOYO SpeedPro Busmaster Driver for Win 95/98
WithoutthebusmasterdriverstheCPUwillneedtobeinvolvedeverytimedataisreadfrom
orwrittentotheHarddisk.ThebusmasterdriversmakeuseofDMA(DirectMemoryAccess)
torelievetheCPUofthisburden,thusspeedingupthesystem.
TheSOYOSpeedProdrivermakesuseofanadvancedcachingalgorithm,whichgivesitan
advantageoverother busmasterdrivers.
ØIntel Busmaster Drivers for Windows 95
ØIntel Busmaster Drivers for Win NT
ØIntel Busmaster Drivers for OS/2
Thesearetheofficial busmasterdriversassuppliedbyIntel.
Note:DoNEVER installtwo typesof busmaster driversonyour system, thiswill
leadtoconflicts andsysteminstability. Therefore, ifyou install theSOYO
SpeedProBusmasterdriveryou canNOTinstall theIntel Busmasterdrivers.
Beforeinstallinganewbusmaster driverfirst UNINSTALLtheold busmaster
driver.
ØSOYO CD Xpress Utility
ThisutilitywillenhanceyourCD-ROMDrivedata-thoughputbyusingspaceonthe Harddisk
ascache.Thiswayapplicationprogramscanaccessdatafaster.Thisutilityissuitablefor
Windows95/98.
ØWinbond hardware doctor for Windows xx
YourmotherboardcomeswithahardwaremonitoringIC.ByinstallingthisutilityTemperature,
FanspeedandVoltages canbemonitored.Itisalsopossibletosetalarmswhencurrent
systemvaluesexceedorfallbelowpre-setvalues.
ThisutilitycomeswithapresetmonitoringragefortheCPUvoltage.However,thecore
voltageoftheprocessoryoupurchasedmayfalloutofthispresetrange,soyoumayneedto
adjustthepre-setvalue.PleaserefertotheSY-7IZMMotherboard’sCDmanualforthe
details.

SY-7IZM
Quick Start Guide
16
The SOYO CD
ØYAMAHA 740 Sound Drivers for Win95/98 and Win NT
Withthisapplicationprogramtheusercanmakeuseoftheonboardsoundchip.Before
installingtheYAMHA740SoundDrivers,youMUSTfirstinstalltheYAMAHA740driversfor
Windows9xorNT.
ØATI Rage Pro AGP
SelectthisItemandclickOKtostartuptheATIRagePROAGPdriverscreen.Followthe
instructionsonthescreentoinstallthedriversand/orapplicationprogramsyouneed.
Note:
Onceyouhaveselectedadriver,thesystemwillautomaticallyexittheSOYOCDto
beginthedriverinstallationprogram.Whentheinstallationiscomplete,mostdriversrequire
torestartyoursystembeforetheycanbecomeactive.
Step 4. Check the Latest Releases
Clickthe'CheckthelatestReleases'buttontogotheSOYO Websitetoautomaticallyfind
thelatestBIOS,manualanddriverreleasesforyourmotherboard.Thisbuttonwillonlywork
ifyourcomputeris connectedto the internetthroughanetworkormodemconnection.Make
suretogetyourmodemconnectionupbeforeclickingthisbutton.
VGA Driver Installation notes
ØATI Graphics Driver for Windows NT 4.0
1RuntheDisplayprogramlocatedintheControlPanel,underSettingsintheStartmenu.
Alternatively,positionthecursoronthebackgroundofthedesktop,clicktherightmousebutton,
thenselectPropertiesfromthepopupmenu.

SY-7IZM
Quick Start Guide
17
The SOYO CD
2SelecttheSettingspage.
3SelectDisplayType....
4SelectChange...from thedisplayoptions.
5SelectHaveDisk...
6NT4.0willpromptyouforthecorrectpath.EnterD:\driv-all\ati-pro\winnt whereD:isthedrive
containingtheSOYOCD.
7Alistof[ATI]graphicsacceleratorswillbedisplayed.Selectthe[ATIRAGEPROTURBOAGP
2x],thenclicktheOK button.
8WindowsNT4.0willonceagainpromptforconfirmation. Allappropriatefilesarethencopiedto
thehard disk.
9RestartWindowsNT4.0. WindowsNT4.0willstartupusingtheATIdrivers.
10 NT4.0willbootintoadefaultmodeandstarttheDisplayappletallowingformodeselection.
Note:Ifyouselectacolordepthorresolutionnotsupportedbyyourcard,NT4.0willsubstitute
640x480in256colorsforthedisplay.
ØUninstalling the Windows NT 4.0 drivers
uHow to uninstall the ATI Windows NT 4.0 Device Driver.
Thereare TWO waystodo this withoutre-installingWindowsNT 4.0.
lfirst method:
1. Use Dos mode to go to the following directory:
\winnt\system32\drivers
2. And Rename the following file:
ren ATI.sys ATI.ati
WindowsNT4.0looksforATI.SYSdriversatboottime,soifitcannotfindit,itcannotuseit.
lsecond method:
Whilerunning WindowsNT4.0, executetheWinNT Setup program.SelectaNON-ATIdriver(tryVGA-
compatible).

Edition: April 1999
Version 2.0
SY-7IZM SERIAL
International Headquarters
SoyoComputerInc.,(Taiwan)
Tel:886-2-2290-3300
Fax:886-2-2298-3322
WebSite:http://www.soyo.com.tw
E-mail:[email protected]
USA Branch Office
SoyoTekInc.,(USA)
Tel:(408)452-7696
Fax:(408)573-7696
WebSite:http://www.soyousa.com
E-mail:[email protected]
SOYO Europe
SoyoEuropeB.V.,(Holland)
Tel:31-79-3637500
Fax:31-79-3637575
WebSite:http://www.soyo-europe.com
http://www.soyo.nl
E-mail:[email protected]
Germany Branch Office
SOYODeutschlandGmbH
Tel:49-(0)441-209100
Fax:49-(0)441-203422
WebSite:http://www.soyo.de
Email:sales@soyo.de
Korea Branch Office
SOYOTECHNOLOGYCO.,LTD.
Tel:82-2-3272-6481
Fax:82-2-704-2619
WebSite:http://www.soyo.co.kr/
Email:[email protected]
U.K. Branch Office
SOYO(U.K.)LTD.
Tel:44-(0)181-5694111
Fax:44-(0)181-5694134
WebSite:http://www.soyo.nl
Email:[email protected]
Japan Branch Office
SOYOCOMPUTER
®è¦¡·|ªÀ
Tel:81-3-33682188
Fax:81-3-33682199
WebSite:http://www.soyo.co.jp
E-mail:[email protected]
Hong Kong Branch Office
SoyoHongKongLtd.(H.K.)
Tel:852-2710-9810
Fax:852-2710-9078
WebSite:http://www.soyo.com.hk
E-mail:[email protected]
China
GINGMEIJEILTD.
Tel:86-10-6251-0089/91/92
Fax:86-10-6251-0311
WebSite:http://www.soyo.com.cn
Email:soyo@public.bta.net.cn
Other manuals for SY-7IZM
2
Table of contents
Other SOYO Motherboard manuals

SOYO
SOYO 82430 TX P54C Use and care manual

SOYO
SOYO SY-6BA+ III Use and care manual

SOYO
SOYO SY-D6IBA Use and care manual

SOYO
SOYO Motherboard SY-6BA+ IV User manual

SOYO
SOYO SY-6BE User manual

SOYO
SOYO SY-P4ISR User manual

SOYO
SOYO SY-7VEM User manual

SOYO
SOYO SY-7ISA+ User manual

SOYO
SOYO Super 7 SY-5EMA User manual

SOYO
SOYO SY-7ISA+ User manual

SOYO
SOYO SY-6IZM/3 User manual

SOYO
SOYO 82430 TX P54C Use and care manual

SOYO
SOYO SY-6BE User manual

SOYO
SOYO SY-KT600 DRAGON Plus User manual

SOYO
SOYO 82430 HX Use and care manual

SOYO
SOYO SY-P4I845PE User manual

SOYO
SOYO SY-K7VTA PRO User manual

SOYO
SOYO SY-7VMA-B User manual

SOYO
SOYO 5XBE5 Use and care manual

SOYO
SOYO SY-7VCA User manual