Spark Illuminations Fire-Fly 3 User manual

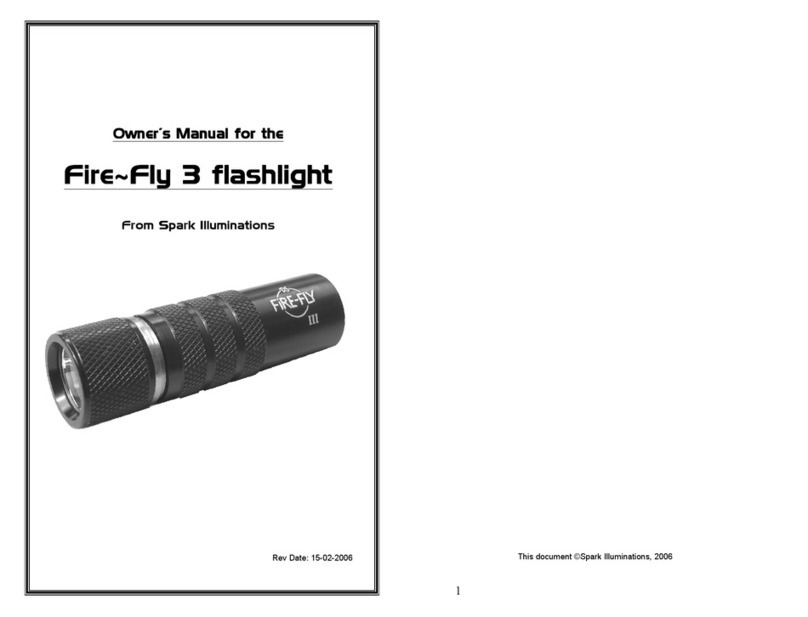
Owner’s Manual for the
Owner’s Manual for the Owner’s Manual for the
Owner’s Manual for the
Fire~Fly 3 flashlight
Fire~Fly 3 flashlightFire~Fly 3 flashlight
Fire~Fly 3 flashlight
From Spark Illuminations
Rev Date: 15-02-2006

1
Fire~Fly 3
Fire~Fly 3Fire~Fly 3
Fire~Fly 3 (FF3) Owner’s Manual
(FF3) Owner’s Manual(FF3) Owner’s Manual
(FF3) Owner’s Manual
Thank you!
Thank you for purchasing a Fire~Fly 3 flashlight from Spark Illuminations
Spark IlluminationsSpark Illuminations
Spark Illuminations. You have purchased a light
that is very compact, yet extremely bright. This light is made of premium materials, with the highest quality
of manufacturing available. It is machined on highly precise N lathes, so that very tight tolerances are
held - this gives it the best fit and finish available today.
Our Philosophy:
The Fire~Fly 3 is designed and intended to be with you every day – right there for you whenever you need a
little more light to see what you are doing, or a lot more light to see where you are going. You never need to
worry about where you left it – it’s in your pocket or purse, or on your keychain.
At Spark Illuminations, we use the best materials, designs and workmanship. We take pride in our design
and manufacturing, and we want you to be proud to carry our products.
Key features of the Fire~Fly 3
Fire~Fly 3Fire~Fly 3
Fire~Fly 3 Flashlight:
- Very compact design – fits pocket or purse
- Very bright output that is white, not yellow/orange like traditional flashlights
- Light weight
- Simple, reliable and easy to use
- Very scratch-resistant Type 3 hard anodized finish – looks good for a long time
- Multiple light levels (dimming), with user-settable low/high level, strobing frequency
- Water-resistant (O-ring seals at all openings)
- User-serviceable, modular design – AD-designed and N -machined
- Ultra-clear glass lens – transmits 99% of light emitted and is very scratch-resistant
- Top quality materials used throughout – high-grade copper, aerospace aluminum
The Fire~Fly 3 flashlight is one of the finest flashlights in the world, with many premium qualities and
features. The Fire~Fly 3 is very tough and durable. The body and bezel are made of high-grade aircraft
aluminum (7075T6), which has nearly the strength of steel, yet one-third the weight. Accidental drops and
falls will result in no (or minimal) damage to the case of the light.
The light source is a Luxeon III® high-powered LED emitter, which, since it is solid-state, has no filament to
break or burn out. The anticipated lifespan of the Luxeon III® emitter is at least 50,000 hours of on-time
(about 5.7 years constantly on), so that in normal use it will never have to be replaced.
The Fire~Fly 3 is rechargeable, which means it is nearly free to use. No need to worry about consuming
expensive single-use batteries, nor about polluting the environment with the used cells. With a second battery
ready, you can have continuous light, as the spent cell is recharged. The Nano® charger is tiny, and is

2
compatible with power worldwide, so it’s easy to keep a spare cell ready to go.
(Spare cells are available
separately.)
The Fire~Fly 3 may be used with a standard, non-rechargeable R123 cell, but this does not give the best
performance. Using the R123 cell will not give full (max) brightness, but if necessary it can provide
sufficient light for some time.
Special precautions:
The Fire~Fly 3 is a high-performance light. There are some things to note about the light that may be
unfamiliar to the newcomer:
Warning: The light will get hot! Due to the high power of the light, when in max mode, and to a lesser
extent in high mode, the light will heat up. This is normal, and means that the heatsinking designed into the
light is working properly. The Luxeon III® emitter needs to be kept under a certain maximum temperature,
and the heatsinking conducts the heat away from the emitter to allow this to happen. For best performance of
the light, and comfort to the user, hold the light in the hand while using it in max mode. The hand provides
additional cooling, and keeps the overall light temperature lower. When picking the light up after it has
been on unatten e for some time, be careful of the heat.
Caution: Limit use of max mo e to 30-45 secon s. Due to the heat produced, and the strain that max mode
places on the battery, it is best to minimize use of max mode. High mode is usually sufficient for most
situations that require a lot of light, and extends the runtime of the charge in the battery.
Caution: Use only the battery supplie with the light or exact replacements. The battery used in the
Fire~Fly 3 flashlight is a high-performance unit. The battery is a protected Lithium-Ion cell (type R R123).
This means that the voltage it produces is higher than a standard non-rechargeable lithium cell ( R123 cell),
so it should not be used to replace a R123 cell in other applications – it can damage them.
Warning: The RCR123 cell must not be overcharge , over- ischarge , or short-circuite . While the
cell included with this flashlight contains a protective circuit to prevent any of these conditions, it is best to
avoid these conditions altogether. The Fire~Fly 3 driver circuit is designed to prevent over-discharge of the
cell, and the included Nano charger prevents over-charging of the cell. Under normal usage conditions, the
user does not need to be concerned about these conditions. For best safety, do not use an unprotected
Lithium-Ion battery in the Fire~Fly 3. Use of an unprotecte cell in the Fire~Fly 3
Fire~Fly 3Fire~Fly 3
Fire~Fly 3 will voi the
warranty.
Warning: General safety concerns with Lithium-Ion (Li-Ion) cells:
- o not overcharge
- o not over- ischarge – this shortens the lifespan of the cell
- o not short-circuit cell
- o not allow cell to get wet
- o not heat or ispose of in fire (can cause explosion)
- o not puncture cell
-recycle battery where proper facilities exist

3
Important: Keep the battery toppe up. Expected lifespan of the Lithium-ion cell is 300 or more full
recharges.. It is better to recharge more often, rather than to use all of the battery’s charge before recharging.
The self-discharge of the Lithium-Ion battery when not in use is 1%-2% per month. That means, even though
it has not been used, the charge in the battery will diminish over time. With limited use of the Fire~Fly 3,
expect to recharge the cell about once per month. Heavier usage may require charging once or twice weekly
for best results.
NEVE use a battery or combination of batteries with a voltage higher than approximately 5.5V with the
stock FLuPI module. To use higher voltages, a different electronics module is required. These can be
purchased separately on special order. Please contact us for further information.
Replacement Parts:
If any parts ever need to be replaced, the Fire~Fly 3 is modular, so that the emitter and electronics can be
easily removed and replaced. Due to the design of the Fire~Fly 3, the light is easily user-serviceable (a rare
choice in today’s manufacturing world!). Any parts that are damaged or broken are available as
replacements. Heatsinks are available separately if you want to build your own custom module (with your
choice of emitter and driver boards). We can also build modules with your choice of board and emitter.
Please contact us for further information.

4
Using your Fire~Fly 3
Fire~Fly 3Fire~Fly 3
Fire~Fly 3:
Operating the
Fire~Fly 3
:
To use the flashlight, simply turn the head clockwise (tightening motion) until the light comes on. Do not
over tighten the head, as it can crush or damage the battery relatively easily. Turn the light off by turning
the head counter-clockwise (loosening /unscrewing motion).
hanging Modes:
To change to a different mode, turn the light off and back on quickly (in less than 800msec (0.8 seconds)).
The light will change to the next mode in the User Interface (UI) each time the light is rapidly turned off and
on. If the light remains in a particular mode for more than 0.8 seconds, it will give a quick blink to show that
it is now too late to change the mode. Once turned off after this, the light will return to the first mode in the
UI. Please see Figure 1 for a clear picture of how the UIs function.
In each UI (except for UI3), the light will begin in mode 1, then progress to mode 2, and so on sequentially.
In UI3, the light will start at mode 1 or mode 2, whichever was last used.
Setting Brightness Levels:
When setting User-set brightness, please keep in mind that there are 20 levels of brightness to choose from.
These begin at dimmest for level 1, and go to brightest at level 20. The default levels from the factory are
Low = level 3, and High = level 15. We feel these choices will provide a good separation of Low and High
brightnesses, but users can easily change the levels to suit their own needs. When setting the brightness, the
light will start at dimmest level and ramp up to the brightest level. Turning the light off at the desired
brightness level will lock in that setting.
Switching User Interfaces (UIs):
When switching from one UI to the next, first advance to the “change UI” setting. While in this mode, the
light will flash once for UI1, twice for UI2, etc. Turning off the light between the flashes will place the
Fire~Fly 3 into the last mode flashed. For example, turning the light off after 3 flashes will leave the light in
UI3.
Important: When the charge in the battery is depleted, the light will shut off abruptly. This means the
protective circuit has activated to prevent the battery from over-discharging. Waiting a few minutes and
using the low mode will extend the amount of runtime, as the battery will recover slightly when it is given a
chance to rest. However, it is best for the battery to be recharged at this time, rather than trying to extend the
runtime in this way. Overall number of recharges can be re uce if the cell is eplete fully before
recharging.

5
Charging your battery in the Nano® charger:
harging the cell is simple:
-unscrew the Fire~Fly 3 head from the body completely
-remove the cell from the body
-place the cell in the charger, carefully observing polarity
-unfold the prongs from the back of the charger
-plug the charger into an electrical outlet.
The LED in the charger will light up in red to show the charger is charging, and will turn green when the
charging is complete. Unplug the charger from the outlet, and remove the cell from the charger. Store the
charger with the prongs folded to avoid damage to them.
To replace the cell in the light, simply drop it negative (flat end) first into the body, then replace the head by
screwing it into place.
Note: When the cell is charged, the material inside it expands. This means that if the cell seems a tight fit in
the flashlight immediately after charging, it will reduce in diameter with use, so that it will come out readily
when it is discharged. This is normal behaviour with a battery of this type.
Or ering custom UIs:
If the default UIs do not meet your specific needs, you can order a custom UI. The modes can be in any
sequence. The modes include low, high, max, strobe, SOS, set userbrightness, set strobe frequency, and no
light. There are a maximum of seven selectable modes per UI. The “switching to other UI” mode is always
the last mode in the UI, and is additional to the seven selectable modes.
Ordering a custom UI can be done by sending an email to Spark Illuminations at
[email protected], with your choice of modes and the order in which you want them. Please
send a Paypal payment of $12.00US to cover the cost of the modification, including return shipping for your
light after it is reprogrammed.
Your light should be sent to us at the Contacting Us address below.

6
Warranty:
This Fire~Fly 3 flashlight is guaranteed to be free of defects in material and workmanship for five (5) years
from date of purchase. Any defects in materials or workmanship occurring during this period will be repaired
or replaced, at the choice of Spark Illuminations. Any replacements required during this period will be
done with a part of equal or greater value, if an exact replacement part is not available.
Exclusions from this warranty:
- finish (anodizing)
- glass lens due to breakage
- O-ring seals, due to their consumable nature.
Important: Repairs require ue to abuse or neglect are not covere by this warranty.
To obtain warranty service, return the flashlight to Spark Illuminations at the Contacting Us address
below.
Return shipping by Airmail postal service will be paid for by Spark Illuminations.
Contacting Us:
Mailing address:
Spark Illuminations
Spark IlluminationsSpark Illuminations
Spark Illuminations
45 Dalbeattie Avenue
Toronto ON
CANADA M9N 2Y6
Phone: 416-525-4327 (10am-7pm EST, Monday-Friday)
Email: info@sparkilluminations.com
Website: http://www.sparkilluminations.com
Technical help:
Email tech-help@sparkilluminations.com , or call 416-525-4327 between 10am-7pm EST, Monday to
Friday.

7
Diagram is © copyright Kevin Lo, 2005-2006
Figure 1

8
Diagram is ©
copyright Kevin Lo, 2005
-
2006
Other manuals for Fire-Fly 3
1
Other Spark Illuminations Flashlight manuals
Popular Flashlight manuals by other brands
Makita
Makita BML800 instruction manual
MAC TOOLS
MAC TOOLS PL120MRC Operation and maintenance manual
Larson Electronics
Larson Electronics EXPRL-91 operating instructions
StreamLight
StreamLight LITEBOX Service manual

Nitecore
Nitecore NPS200 user manual
Abicor Binzel
Abicor Binzel MB ERGO 14 operating instructions
