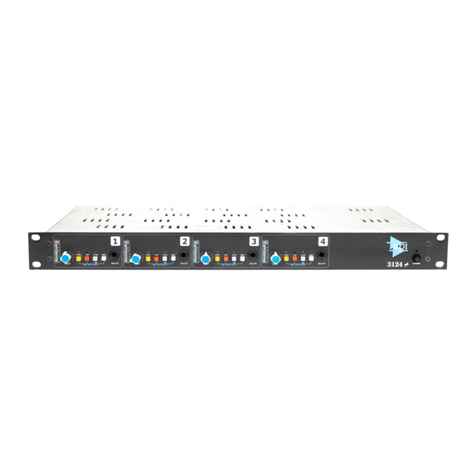
Speck Lilo User manual

LiLo
16 Channel Line Mixer
Reference Manual
24 Channel Line Mixer
speck electronics


Speck Electronics products are warranted to the original owner to be free of
defects in material or workmanship.
This warranty does not apply to any product subject to accident, misuse, neglect
or failure to comply with normal maintenance procedures or if the serial number
has been defaced, altered, or removed; nor will Speck Electronics accept
responsibility for damages resulting from improper installation, alteration or
unauthorized parts or repairs. If the product is modified by the customer without
permission, the customer agrees to pay for parts and labor necessary to remove
the modification before repair. The cause of the defect is in the sole judgment of
Speck Electronics.
Should a defect develop within one year of purchase from Speck Electronics or
an authorized dealer, Speck Electronics will supply the part or parts necessary at
no charge. Labor is covered in this warranty for a period of one year. Outside
service, repairs or pickups are not covered under this warranty.
Any item returned for warranty repair should be sent, if possible, in the original
packing container, prepaid to Speck Electronics, 341 E. Alvarado Street,
Fallbrook, California, 92028. If in our opinion the packing container is
improper for return shipping, we reserve the right to supply a new container at a
minimal charge.
In the interest of improving Speck products; designs and specifications are
subject to change without notice. It should be mentioned that if a change is
necessary for any reason, we make every effort to document
that change and send an "update notice" to all customers at no charge.
Speck Electronics makes no warranty of any kind with regard to this material,
including, but not limited to, the implied warranties of merchantability and
fitness for a particular purpose. Speck Electronics shall not be liable for errors
contained herein or for incidental consequential damages in connection with the
furnishing, performance, or use of this material.
This document contains proprietary information which is protected by copyright.
All rights are reserved. No part of this document may be photocopied,
reproduced, or translated into another language without the prior written consent
of Speck Electronics.
The information contained in this document is subject to change without notice.
All trademarks are the property of their respective owners.
First Printing - June 2004
Edition 2 - June 2008
Speck Electronics
341 East Alvarado Street
Fallbrook, California 92028
USA
760-723-4281
www.speck.com
Warranty
Notice
Edition
ii

Contents
General .................................................................................
Unpacking and inspection ....................................................
Repacking ............................................................................
Standard Accessories.............................................................
Operator safety summary .....................................................
LiLo general description ......................................................
LiLo features.........................................................................
"Dual Path" signal routing feature ........................................
Dimensions .................................................................................
Specifications..............................................................................
Signal flow diagrams.................................................................
General .......................................................................................
Power supply installation .....................................................
Environmental considerations ..............................................
Physical placement of adjacent equipment ..........................
Hooking up the mixer ..........................................................
Removing modules for service ............................................
Cleaning ...............................................................................
General..................................................................................
Default control settings.........................................................
Input Channel Controls ............................................................
Input Channel I/O Connectors.................................................
Master Module Controls...........................................................
Master Module I/O Connectors ...............................................
General .................................................................................
AC Distribution and safety ......................................................
Proper AC grounding ...........................................................
Quality AC system ...............................................................
AC distribution .....................................................................
Clock noise and AC .............................................................
Safety earth connection ........................................................
Audio earth ...........................................................................
Proper audio grounding and shielding ...................................
EMI and RFI .............................................................................
Sources of EMI ....................................................................
Reducing EMI ......................................................................
1
1
1
2
2
2
3
4
5
6
7
9
9
10
10
10
11
12
13
14
15
18
21
26
31
31
31
31
31
32
32
32
32
33
33
33
Chapter 1 Introduction
Chapter 2 Installation
Chapter 3 Operation
iii
Chapter 4 Wiring
and Other

Introduction
Chapter 1Chapter 1Chapter 1 Introduction SectionIntroduction SectionIntroduction Section 111
General Thank you for purchasing our LiLo Mixer. The LiLo has operational features
that are easy to understand and you should be up and running in no time. If
you are unfamiliar with audio equipment or audio signal flow, it is
recommended that you read this manual. If you have any questions regarding
the LiLo or any Speck
product, do not hesitate
to contact Speck
Electronics.
Speck Electronics
341 E. Alvarado Street
Fallbrook, CA 92028
Phone +760-723-4281
email [email protected]
www.speck.com
The LiLo is delivered in
a special, protective
container and was
carefully inspected both
mechanically and electrically before shipment. The power supply, cable, and
manual are packed in a separate container.All items should be physically free
of mars and scratches and in perfect electrical order upon receipt. To confirm
this, the mixer and power supply should be inspected for physical damage that
may have occurred in transit. Any damage should be reported to your dealer
and delivery company as soon as possible.
If the product is to be shipped to Speck Electronics for service or repair, attach
a tag to the product, identifying the owner and indicating the service or repair
to be accomplished. Include the model number and serial number of the
product. Place the product in the original container if available. If the original
container in not available, a suitable one can be purchased from Speck
Electronics.
If the original container is not used, wrap the product in heavy plastic before
placing in an inner container. Use plenty of packing material around all sides
of the product and protect panel faces with cardboard strips. Mark shipping
container with "Delicate Instrument" or "Fragile", and insure the shipment for
the proper amount.
Unpacking & Inspection
Repacking

Chapter 1 Introduction Section 2
The LiLo is supplied with the following list of accessories:
- External regulated power supply:
Model PS5-3 for LiLo-16
Model PS5-5 for LiLo-24
- DC Power supply cable (10 foot, 7 conductor)
- AC Power cord (NAversion only)
- Operations Manual
This product and its power supply are intended to operate from a single phase
AC power source that does not apply more than 240 Volts RMS between the
supply conductors or between either supply conductor and ground.
The external power supply for the LiLo is grounded through the “earth”
conductor of the power cord. To avoid electrical shock, plug the power cord
into a properly wired receptacle before making any connection from the
power supply to the mixer. A protective ground connection, by the way of the
grounding conductor in the power cord, is essential for safe operation.
The three conductor line cord and plug assembly is wired in accordance with
NEMA convention (line - black, Neutral - white, and safety earth - green).
When using the LiLo and its power supply outside North America, it may be
necessary to adapt a different power cord for that specific country.
To avoid a fire hazard, use only a fuse of the correct type, voltage rating and
current rating as specified in this manual. See Figure 7 on Page 10 for fuse
chart.
To avoid personal injury, do not remove the top cover from the power supply,
and never operate the external power supply without the cover properly
installed. If it becomes necessary to service any part of the mixer, always
unplug the AC power and disconnect the DC interface cable before
proceeding.
Short for “Line-in/Line-out”, the LiLo is a high-definition desktop analog line
mixer for routing and blending your external gear. With more than 100
balanced input/output connections, this modular console will mix over 36
signals with unmatched signal routing, generous amounts of headroom, and a
neutral signal path. The LiLo is targeted at recording studios, project studios,
and audio post-production installations.
Operator Safety
Summary
LiLo General
Description
Standard Accessories
Upon loss of the protective ground connection, all accessible
conductive parts, including knobs and controls that may
appear to be insulating, can render an electric shock.

Chapter 1 Introduction Section 3
The LiLo is a modular mixer design with 16 or 24 input channels and a master
module fit into a solid frame.
Each input module is designed with plug-in preamp PC boards for Line-A,
Line-B, and direct out. The master module is also designed with plug-in
preamp PC This type of design will facilitate
rd
future circuit upgrades from Speck Electronics and/or 3 party manufacturers.
All inputs, outputs, and bussing are fully
balanced with transformers on the mix and group outputs. All input channels
have secondary configuration switches as well as configuration jumpers on
the circuit board.
summing amps, and output line amps.
The locations and types of the plug-in preamp cards are shown in Figures 1a,
1b, and 1c below.
boards for most of the critical circuit stages including the mix and
group
LiLo Features
P/N LPCPRE2
Output Amp
(Direct Out)
P/N LPCPRE1
Line Amp
(Line-A)
P/N LPCPRE1
Line Amp
(Line-B)
P/N LPCPRE2
Output Amp
(Aux 1)
P/N LPCPRE2
Output Amp
(Aux 4)
P/N LPCPRE2
Output Amp
(Aux 2)
P/N LPCPRE2
Output Amp
(Aux 3)
P/N LPCPRE2
Output Amp
(Mix Left)
P/N LPCACN
Summing Amp
(Mix Right)
Figure 1a. Input channel PCA
Figure 1b. Master 1 PCA
Figure 1c. Master 2 PCA
P/N LPCPRE2
Output Amp
(Mix Right)
P/N LPCACN
Summing Amp
(Mix Left)
P/N LPCPRE2
Output Amp
(Mon. Right)
P/N LPCPRE2
Output Amp
(Mon. Left)
P/N LPCACN
Summing Amp
(Group 1)
P/N LPCACN
Summing Amp
(Group 2)
P/N LPCPRE2
Output Amp
(Group 2)
P/N LPCPRE2
Output Amp
(Group 1)

An important benefit of the LiLo is the ability to mix 32 line signals in “real
time” from the standard 16 channel mixer (or 48 with the 24 channel LiLo).
You could, for example, have the 16 outputs from D/A converters (Protools,
Radar, etc.) connected to the 16 "Line-B's" and at the same time the "Line-
A's" can be used for 16 other line signals such as mic preamps, samplers, or
additional outputs from D/A converters...all ending up at the stereo and group
mix busses.
The dual path signal routing is possible because the LiLo's input channels use
separate line preamps for Line-A and Line-B rather than switching XLR
inputs into a common preamp stage. This combination of dual channel line
amps, Group Select switch [12], and Aux Select switch [20] can virtually
double the input capacity of the LiLo.
Figure 2 shows one example of the “dual path” signal flow. In this example,
the Group Select switch is pushed to select Line-B as the source for the GRP
1 and GRP 2 assign switches. The group assigns are then routed to their
respective master that are then mixed to the stereo mix output. At the same
time, Line-A is mixed through the channels fader, pan, and mix assign.
Dual Path Signal
Routing Feature
Chapter 1 Introduction Section 4
Figure 2. Dual path signal flow
LINE A
INPUT
AUX 1
INSERT
PAN
TRIM A
OMUTE
LINE B
MIX
GROUP
SELECT
LINE-B
FADER
FADER
SELECT
AUX
FADER
LINE B
GRP 1
GRP 2
S
MONO MONITOR
FADER
MASTER
LEVEL
SWITCH
GROUP
CONFIG.
GROUP
SELECT
TRIM B
MIX
PAN
OUT
SMIX
OUTPUT
LEVEL
AUX 2
AUX 3
AUX 4
INSERT
MIX-L
INSERT
GROUP
OUTPUT
MONITOR
MIX BUS
GROUP BUS
AUX BUS
GROUP
(GSC)
LINE B
LINE A
INSERT
CHANNEL
S
MIX-R
INSERT
S
LEVEL
AUX SEND 4
INSERT
GROUP
S
LEVEL
GROUP
MIX
PAN
GROUP
OUT
LINE-B
LINE-A
A/B SELECT
LINE-B
AUX SEND 3
S
LEVEL
AUX SEND 2
S
LEVEL
AUX SEND 1
S
LEVEL
The signal flow for Line A is as follows:
Line-A input àInput Select “Line-A” àFader àPan à
Mix assign àStereo mix
The signal flow for Line B is as follows:
Line-B input àGrp select “Line B” àGrp 1 or Grp 2
assigned àGroup master àGroup pan àMix assign à
Stereo mix

Chapter 1 Introduction Section 5
7.08" [179.7]
5.50" [139.7]
17.00" [431.8]
24.55" [623.6]
3.74" [95.0]
6.68" [169.5]
10.05" [255.3]
2.34" [59.4]
28.57" [725.6]
28.07" [712.9]
8.59" [218.2]
9.99" [253.7]
2.93" [74.5]
1.91" [48.5]
18.29" [464.6]
3.56" [90.3]
Dimensions
Figure 3. Mixer dimensions
Figure 4. Power supply dimensions

Chapter 1 Introduction Section 6
Line input impedance
Line-A and Line-B
Insert returns
2T, DAW, andAux returns
Maximum input level
Line A
Line B
Channel insert return
Mix insert return
Output Impedance
All Active-balanced outputs
All transformer-balanced outputs
Maximum output level (2k load)
All Active-balanced outputs
All transformer-balanced outputs
Frequency Response (12 dB gain)
(Any line input to mix output)
THD+n
(+4dBu any line input, Gain 0, +4dBu mix out)
(+12dBu any line input, Gain 12, +24dBu mix out)
Crosstalk (1kHz)
Channel to channel
Input to Mix out, channel muted
Input to Mix out, channel fader off
Noise (22Hz-22kHz)
Residual Mix and Group output noise
Mix output - 16 channels routed, faders up
Mix output - 16 channels routed, faders off
Mix output - 16 channels routed, faders off, muted
DC Power Requirements (Mixer)
AC Power Requirements (External supply)
Dimensions (Mixer)
Dimensions (External supply)
Weight (Mixer)
Weight (External supply)
Total shipping weight
15K ohms
30K ohms
20K ohms
+28dBu
+28dBu
+28dBu
+28dBu
60 ohms
600 ohms
+28dBu (Balanced)
+24dBu (Balanced)
10Hz-30kHz (+0/-.5dB)
.0032%
.0024%
-100dBu
-95dBu
-89dBu
-102dBu
-81dBu
-84dBu
-90dBu
+/- 17.5 VDC @ 1.7A
+6.5 VDC @ 3.8A
100-120 VAC 50/60Hz 5 amp
220-240 VAC 50/60Hz 3Amp
WxDxH=28.5" x 24.5" x 10"
(724mm x 645mm x 254mm)
WxDxH=7" x 17" x 5.5"
(178mm x 432mm x 140mm)
50 Lbs (22.7kg)
19 Lbs (8.6kg)
86 Lbs (39kg)
Specifications

Chapter 1 Introduction Section 7
A/B SELECT
DIRECT OUT
RTN
SEND
LINE A
LINE-B
INPUT
AUX 1
INSERT
PAN
TRIM A
Speck Electronics LiLo - Input Channel Signal Flow
OMUTE
LINE B
SOLO
MIX
GROUP
SELECT
LINE-B
FADER
POST/PRE
FADER
SELECT
AUX
FADER
LINE B
GRP 1
GRP 2
PRE FADER
PRE INSERT
LINE-A
LINE-B
LINE INPUT MODULE
SWITCH
GROUP
CONFIG.
DIRECT OUT
CONFIG. JUMPER
LINE A
LINE B
NORMAL
AUX 2
AUX 4
PLUG ACTIVATES RELAY
Speck Electronics
LiLo Line Mixer
INPUT CHANNEL SIGNAL FLOW
Dwg: LILOFLOW INPUT
Date: 4-1-04
Rev. No.
Drawing By: V. M. Poulos
SELECT
RELAY
TRIM B
PAN
AUX
POST/PRE
AUX 2
AUX 3
AUX 4
INSERT
CHANNEL
LINE AMP MODULE
LINE INPUT MODULE
CONFIG. JUMPER
AUX PRE
FOLLOW
GROUP
FOLLOW
PAN
SOLO BUS
MIX BUS
GROUP BUS
AUX BUS
(LINE C)
LEFT
RIGHT
(GSC) (GFP)
(AFP)
TOP PANEL HOLES)
SWITCH
CONFIGURATION
(ACCESSABLE VIA
SWITCH RELAY
RELAY
LEGEND
LOGIC CONTROL SIGNAL
UNBALANCED SIGNAL
BALANCED SIGNAL
PLUG-IN
MODULE
Copyright © 2001-2004 Speck Electronicsby
Figure 5. Input Channel signal Flow

Chapter 1 Introduction Section 8
S
PAN
GRP 1-2
Speck Electronics LiLo - Master Section Signal Flow
RTN
SEND
LEVEL
S
S
SUMMING AMP MODULE
S
MONO MONITOR
FADER
MASTER
LEVEL
MIX
DAW
MIX+DAW
2.T.
GROUP
DAW
MASTER SECTION SIGNAL FLOW
LiLo Line Mixer
Speck Electronics
Drawing By: V. M. Poulos
Rev. No.
Date: 4-1-04
Dwg: LILOFLOW MASTER
SOLO
MIX
MIX
PAN
SOLO
SELECT
METER
FROM GROUP 1-2
FROM MIX L-R
OUT
RELAY
S
S
RELAY
SUMMING AMP MODULE
S
MIX
OUTPUT
LEFT
RIGHT
RELAY
RELAY
RELAY
RELAY
LEVEL
LEVEL
SUMMING AMP MODULE
MONITOR SWITCH LOGIC
LEVEL
INPUTS
INPUTS
2 TRK
LEVEL
SOLO
2 TRK
DAW
DAW DAW+MIX 2.T. SOLO
LEVEL
L
R
R
L
L
AUX RTN
INPUTS
R
MIX-L
INSERT
AUX SEND
INSERT
RTN
MIX-R
SEND
INSERT
RTN
GROUP
SEND
RIGHT
OUTPUT
MONITOR
LEFT
VU
OUT
PLUG ACTIVATES RELAY
PLUG ACTIVATES RELAY
LINE AMP MODULE
LINE AMP MODULE
LINE AMP MODULE
LINE AMP MODULE
LINE AMP MODULE
LINE AMP MODULE
GROUP
AUX BUS
SOLO BUS
MIX BUSGROUP BUS
MIX BUS
GROUP BUS
SOLO BUS
UNBALANCED SIGNAL
LOGIC CONTROL SIGNAL
MODULE
PLUG-IN
BALANCED SIGNAL
RELAY
SWITCH
RELAY
LEGEND
LEFT
RIGHT
GRP 1
GRP 2
MIX BUS
SOLO BUS
SOLO
INDICATOR
S
Typical of 2
Typical of 2
Typical of 4
Copyright © 2001-2004 Speck Electronicsby
PLUG ACTIVATES RELAY
Figure 6. Master Module Signal Flow

Chapter 2 Installation & Setup 9
The following information should give you the basics on how to install the
LiLo mixer and power supply. The proper installation of the LiLo requires a
clear understanding of audio wiring, AC distribution, grounding, and shielding
techniques.
If the LiLo is being installed into a larger studio or as a sidecar/expander to a
host console, it may be necessary to retain the services of someone
experienced in these matters.
One of the primary reasons that the power supply of the LiLo is external is to
insure that the power transformer enclosed within the power supply chassis
maintains a safe distance from the active electronics of the LiLo. For that
matter, any device that has a strong magnetic power field should be kept at a
reasonable distance from the LiLo and its audio cables.
Because the power supply does not use a cooling fan, it is silent and can be
located in the same room as the mixer. It is important that the ventilation
holes are not obstructed and that the unit is operated in free air to prevent
overheating. Allow a minimum of 4”(100mm) of clearance from all
ventilation holes.
The LiLo's power supply can operate with 100 VAC, 120 VAC, 220 VAC,
230 VAC, or 240 VAC 50/60hz. Before switching “on” the power, you should
verify that the voltage setting on your power supply is configured to match the
AC mains requirements of your country. If theAC mains voltage needs to be
changed, this procedure should be performed and checked by a qualified
technician.
Before connecting the DC power supply cable to the LiLo, make certain the
power switch is set to the “off” position.
To connect the power supply to the mixer, fit the circular connectors at each
end of the DC power supply cable to the chassis mount receptacles that are
mounted on the power supply and the rear of the Lilo. The respective
connectors are keyed so the plug and chassis mount receptacle can fit in only
one direction. When the connectors have been mated, rotate the circular
locking ring clockwise until it stops.
General
Power Supply
Installation
Installation
& Setup

Chapter 2 Installation & Setup 10
In the unlikely event that a fuse blows, it is EXTREMELY important that a
fuse of the same type and current rating be replaced. The chart below in
Figure 7 lists the fuse current ratings to be used for your countries mains
voltage. All fuses are 20mm x 5mm slow blow type.
The LiLo will operate satisfactorily over a wide range of ambient
temperatures, and the external power supply will operate from -10º C to
+30 ºC. If the power supply is installed in an equipment rack that also
contains heat producing equipment, adequate ventilation should be provided.
This will prolong component life and maximize operational stability.
While the internal circuitry of the Lilo is fully shielded by the chassis,
installation should nevertheless be planned to avoid locating the LiLo
immediately adjacent to power amplifiers, power supplies, or any source of
Electromagnetic emissions.
Any device that emits a high EMI (Electro Magnetic Interference) or RFI
(Radio Frequency Interference) energy field should be treated with suspicion.
EMI is considered any unwanted signal which adversely affects the operation
of the mixer or the mixing system. This subject is discussed in Chapter 4.
Electronic equipment such as power amplifiers, power supplies (especially
wall mount type), video monitors, computers, certain synths and samplers
must be located away from the LiLo and its associated cables. It may be
necessary to alter the positions of certain equipment that you feel would cause
buzzes or hums in the mixer system.
A quality installation is essential when wiring any audio system. When the
time comes to actually interconnect your equipment, proceed slowly.
Interfacing the many pieces of electronic equipment to your mixer and audio
system should be a logical, methodical process.
Start by connecting only the monitor power amp (or powered speakers) to the
mixer, and then add one line signal to the mixer at a time; carefully listening
and monitoring your progress. If a problem arises, such as a buzz, hum,
intermittent signal, or nonexistent signal, stop at that point and solve the
problem before proceeding.
Environmental
Considerations
Physical Placement of
Adjacent Equipment
Hooking up the Mixer
Fuse Chart for PS5-3 Power Supply
100 VAC 120 VAC 220 VAC 230 VAC 240 VAC
5Amp 5 Amp 3 Amp 3 Amp 3 Amp
Figure 7.

Chapter 2 Installation & Setup 11
Due to the high performance of the LiLo, it is recommended that you use only
the highest quality audio cable. Ahigh quality cable by definition is a cable
that provides good mechanical strength, high microphonic noise immunity,
high frequency response, low crosstalk, and 100% shielding ability. All audio
cable used with the LiLo should be a 3 conductor foil shield type (2 inner
conductors and a shield drain conductor). It is not recommended that the 2
conductor "off the shelf cables" be used.
All wire and cable interfaced to the LiLo should be terminated with high
quality connectors. A¼" plug or XL connector should make a positive
connection to its respective mating jack and provide adequate strain relief to
its cable. All connectors should also have a metal shell to provide 100%
shield for exposed conductors.
Removing the Input Module
To remove an input module for maintenance, remove the Philips screws at the
top and bottom of the module. Carefully pull the input module straight up by
holding the knobs. Once the module is clear of the main chassis, remove the
ribbon cable at the rear of the module by releasing the ejector tabs, and then
remove the larger ribbon cable at the bottom. To re-install the module just
reverse the procedure being certain than the ribbon connectors have been
inserted completely into the receptacles and that the ejector tabs “snap” back
into position.
Removing the Master Module
Before removing the master module, it is recommended that some kind of
protective material is laid over the input modules adjacent to the master
module. Asmall towel would work fine.
To remove the master module, remove the Phillips screws (4) at the top and
bottom of the module. The module will need to be lifted up and the front tilted
up slightly until the module completely clears the main chassis. Once the
module is clear of the chassis, lay the module on its side. Remove the (6)
ribbon cables that are identified “A through E” by releasing the ejector tabs.
Next, remove the (2) larger ribbon cable connectors at the bottom of each
circuit board.
To re-install the module just reverse the procedure being certain that the
ribbon connectors have been inserted completely into the receptacles and that
the ejector tabs “snap” back into position. All cables are labeled to match the
label on the module's receptacles.
Removing Modules
for Service
Always turn the power supply “off” and disconnect
the DC power cable before servicing the LiLo mixer.
!

Chapter 2 Installation & Setup 12
The module and chassis are a high quality painted surface and the panel
lettering is applied using a silkscreen printing technique.
To clean the top or rear panel, wipe the surface gently using a soft lint-free
cloth to avoid scratching the panel or markings. Paper towels are not
recommended. Commercially available window cleaner solutions may be
used; however, the solution should be applied to the cloth and not the panel to
avoid the seepage of liquid to the inside of the enclosure.
Do not use brushes or feather dusters to remove dust. This may cause dust to
fall into the openings around the pushbutton switches.
Cleaning

Chapter 3 Operation Section 13
In this section we hope to give you basic
information on the operation of the LiLo
and adequately describe its controls,
switches, and connectors.
The information in this section of the
manual is intended to help with the
technical process when using your LiLo.
Words alone could not adequately
describe how to adjust the controls for
every situation you might encounter with
the Lilo. You should experiment with
settings and routing techniques to achieve
the best results for any particular
situation. Your ears should be your best
gauge of how to adjust the settings on the
LiLo to make the sound fit your
requirements.
Before any attempt is made to operate the
mixer, it would be a good idea to set all
the mixers controls to their neutral
positions. This gives you a reference
point to work from when adjusting
controls and switches.
All volume controls, including aux sends,
aux returns, and master level controls
should be set to their full counter-
clockwise setting. All pan controls
should be set centered. All pushbutton
switches on the input channels and master
module should be set to the out position.
When any future reference is made to the
controls or switches of the LiLo, it will
be assumed that they have been set to
their neutral positions.
Overview
Default Control
Settings
Mixer Operation

A/B SELECT
DIRECT OUT
RTN
SEND
LINE A
LINE-B
INPUT
AUX 1
INSERT
PAN
TRIM A
OMUTE
LINE B
SOLO
MIX
GROUP
SELECT
LINE-B
FADER
POST/PRE
FADER
SELECT
AUX
FADER
LINE B
GRP 1
GRP 2
PRE FADER
PRE INSERT
LINE-A
LINE-B
LINE INPUT MODULE
SWITCH
GROUP
CONFIG.
DIRECT OUT
CONFIG. JUMPER
LINE A
LINE B
NORMAL
AUX 2
AUX 4
PLUG ACTIVATES RELAY
SELECT
RELAY
TRIM B
PAN
AUX
POST/PRE
AUX 2
AUX 3
AUX 4
INSERT
CHANNEL
LINE AMP MODULE
LINE INPUT MODULE
CONFIG. JUMPER
AUX PRE
FOLLOW
GROUP
FOLLOW
PAN
SOLO BUS
MIX BUS
GROUP BUS
AUX BUS
(LINE C)
LEFT
RIGHT
(GSC) (GFP)
(AFP)
TOP PANEL HOLES)
SWITCH
CONFIGURATION
(ACCESSABLE VIA
SWITCH RELAY
RELAY
LEGEND
LOGIC CONTROL SIGNAL
UNBALANCED SIGNAL
BALANCED SIGNAL
PLUG-IN
MODULE
Use this input channel signal flow diagram shown below in Figure 8 as a
reference when reading the descriptions of the controls, switches, and
connectors [1] through [24] in this chapter.
Input Channel Signal
Flow Diagram
Chapter 3 Operation Section 14
Figure 8. Input module signal flow
21
2
3
22
154
689
15 12
7
10
11
14
13 17
16
18
20
19
23
24

Chapter 3 Operation Section 15
The Lilo has separate line amp modules for each input as well as
separate trim controls. This switch selects the Line-A or
Line-B line amp module. Two yellow LED's display the
status of the switch.
This control provides up to 12dB of gain for the Line-A
input. The factory setting is fully counter-clockwise (0 dB).
A small flat blade screwdriver can be used to adjust this pot.
This control provides up to 12dB of gain for the Line-B
input.
Each input channel on the LiLo has a balanced send and return
available via separate ¼” TRS jacks on the rear connector panel.
The insert signal path is immediately after the Polarity switch and
just before the fader. When this insert switch is depressed, any
audio device connected to the insert connectors is inserted in the
channel's audio path. If the insert switch is pushed in and nothing is
plugged into the send/return jacks, the signal will pass through the
channel since the jacks have switching (normaling) contacts that are
only broken by the insertion of a plug. Agreen LED on this switch
illuminates indicating that the insert is enabled.
This switch reverses the polarity of the Line-A and Line-B input
signal by 180 degrees.
This 100mm slider adjusts the level for the input channel.
The operation of the slide fader will control the level to the
stereo mix, aux sends, group assigns, and the direct output.
A good starting position for this slide fader is to align the
slider knob to the #10 mark on the panel.
Depressing this switch allows you to isolate any input
channel to the monitor outputs while maintaining stereo
perspective.
Any combination of input channels, group assign, or aux
returns may be soloed without interrupting the flow of the
signal to the main mix feed. Ared LED on this switch as well as
the master Solo indicator will illuminate if a channel is soloed.
Depressing this button eliminates all signal flow to the channels
left/right mix, group assigns, as well as the aux sends.
This center detent pan control places the channel anywhere in the
stereo left/right mix when the Mix Assign is enabled.
1. Line Input Select
3
2. Line-A Gain Trim
3. Line-B Gain
4. Insert Select
5. Polarity
Input Channel
6. Slide Fader
7. Solo
8. Mute Switch
9. Pan Control
2
1
5
4
7
8
6
9

Chapter 3 Operation Section 16
The Mix Assign switch, in conjunction with the Pan control, allows
an input channel to be mixed to the left/right main output.
The GRP 1 and GRP 2 pushbutton switches allow an input channel
to be assigned and mixed to the two individual subgroups. The
group assigns normally operate independent of the channel's pan
and L-R mix assign, although when the "GFP" configuration
switch [14] is set, the group assigns will follow the pan control.
This switch selects the source for the GRP 1 and GRP 2
assigns. In the "Fader position, the source for the group
assigns are the channels fader. When depressed to the
"Line-B position, the source for the group assign
switches is “exclusively” the channel's Line-B line amp.
The GSC switch [15] will change the “Line-B” designation
to “A/B select”.
When the “GFP” switch is pushed, the pan control allows
the signal to be panned across the 1 and 2 group. The "GFP"
function is described below.
AFP, GFP, GSC Configuration Switches
Each input channel on the LiLo has a secondary level of
signal routing that is made possible with three push switches
that are accessible via small holes in the panel. These
switches change the configuration of the aux sends and
group assigns. Any small diameter object (like a paper clip)
can be used to push this switch.
When this switch is pushed to the down position, the levels set at
Aux Send 1 and Aux Send 2 will follow the position on the
channels pan control. The AFPswitch does not affect
Aux Sends 3 & 4.
When this switch is pushed to the down position, GRP 1 and
GRP 2 assign will follow the position on the channels pan control.
á"
â"
This switch changes the operation of the Group Select switch.
When the GSC switch is pushed to the down position, the Group
Select is no longer “Fader á/ Line-B â” but instead becomes
"Fader á/ A-B Select â” What this means is that when the group
switch is pushed to the “Line-B” position, it is no longer
exclusively Line -B, but rather the opposite input selected at the
Line Select. Example: If the Input Select is set to “Line-B”, then
the Group Select will function as "Fader á/ Line-A â".
10. Mix Assign
11. Group Assigns
12. Group Select
13. AFP
(Aux Follow Pan)
14. GFP
(Group Follow Pan)
15. GSC
(Group Switch
Configuration)
15
13
11
12
14
10
Table of contents
