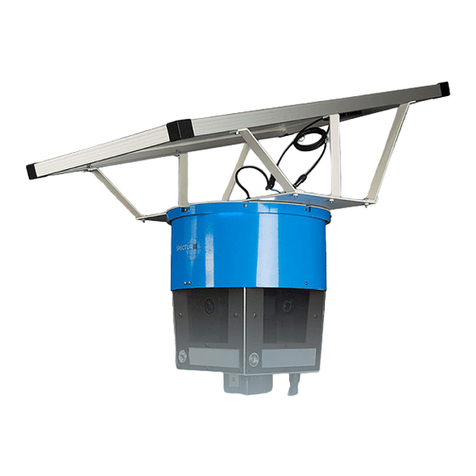
Spectur HD5 Programming manual

Spectur Assembly & Installation Instructions
P01-1112-GD-2 HD5
HD5
Assembly & Installation
Instructions

Spectur Assembly & Installation Instructions
HD5
Page 2 of 23
Contents
1 Introduction .................................................................................................................................. 3
2 System contents .......................................................................................................................... 3
3 Setup Instuctions ......................................................................................................................... 4
3.1 Recommended tools ............................................................................................................. 4
3.2 Assembling your Spectur system .......................................................................................... 4
3.2.1 Solar Panel Assembly .................................................................................................... 5
3.2.2 Solar Panel Assembly .................................................................................................... 9
3.2.3 HD5 Assembly.............................................................................................................. 11
3.3 Testing ................................................................................................................................ 16
3.3.1 System Login ............................................................................................................... 17
3.4 Installation ........................................................................................................................... 19

Spectur Assembly & Installation Instructions
HD5
Page 3 of 23
1 Introduction
The purpose of this document is to present instructions for a user to set up the Spectur HD5 security
camera system. This document encompasses product assembly, testing and installation. For further
advice or information, please contact your nominated Spectur representative, or call directly on 1300
802 960.
2 System contents
The Spectur HD5 system is delivered in three boxes as detailed below:
Box (A)
HD5 system enclosure
LTE antennas (x2)
Mounting bracket
Solar panel mounting bracket
Solar panel braces
Fastener pack (see Appendix 1 for pack contents)
Box (B)
12VDC 50AH sealed lead acid battery
Terminal screws and washers
Battery connector leads
Box (C)
Solar Panel

Spectur Assembly & Installation Instructions
HD5
Page 4 of 23
3 Setup Instuctions
3.1 Recommended tools
Please have the following tools handy to complete assembly and installation. NOTE: tools are NOT
included with your Spectur system.
Utility knife
Spanners (metric) – 10mm, 13mm, 17mm
3.2 Assembling your Spectur system
i. Unpack contents of each box.

Spectur Assembly & Installation Instructions
HD5
Page 5 of 23
3.2.1 Solar Panel Assembly
ii. Set aside the following parts needed for assembling the Solar Panel and bracketing.
iii. Unpack the fastener pack and check contents as follows:

Spectur Assembly & Installation Instructions
HD5
Page 6 of 23
iv. Prepare solar panel mounting bracket by fixing panel braces to panel bracket as shown
below using the M6 bolts and washers provided.
v. Lay the solar panel on a flat, clean surface as shown below. NOTE: Take care to ensure
solar panel glass is protected during assembly. Do not fasten any bolts for now.

Spectur Assembly & Installation Instructions
HD5
Page 7 of 23
vi. Arrange the solar panel bracket assembly as shown below. NOTE: there are 3 holes on
each side of the solar panel for mounting the bracket assembly to the panel.
vii. Secure the solar panel bracket assembly to the solar panel as indicated below. NOTE:
the larger M6 washer is installed on the outside of the panel and the smaller M6 washer
installed on the inner side of the panel with an M6 nut.

Spectur Assembly & Installation Instructions
HD5
Page 8 of 23
viii. Mount panel to bracket assembly using 10mm fixings and brace hole positions
indicated below for reference. NOTE: pay attention to the solar panel connectors relative
to bracket assembly position to ensure correct installation.
ix. Ensure process is repeated for both sides. NOTE: after assembly the panel and bracket
will appear symmetrical. To complete panel and bracket assembly, tighten all M6 nuts
and bolts.
IMPORTANT NOTICE: Failure to properly tighten nuts and
bolts as instructed may cause serious injury.

Spectur Assembly & Installation Instructions
HD5
Page 9 of 23
3.2.2 Solar Panel Assembly
x. Set aside the following parts needed for assembling the enclosure.
xi. Remove the 50W LED flood light from its packaging and prepare as shown below. The
LED light will secure to the enclosure using the pre-installed M6 fasteners indicated
below.

Spectur Assembly & Installation Instructions
HD5
Page 10 of 23
xii. Connect LED light cable as shown below. NOTE: connector and socket has a 1-way fit;
very little force is required to ensure proper connection. Secure LED light to bottom of
enclosure as shown below. Ensure M6 nuts are firmly secured.

Spectur Assembly & Installation Instructions
HD5
Page 11 of 23
3.2.3 HD5 Assembly
xiii. Open the HD5 enclosure using the keys provided. Inside you will find 2x LTE High Gain
antennas, remove packaging ahead of installation.
xiv. Install antennas by gently screwing to external ports located on the right side of the
enclosure as shown below. NOTE: Please handle these antennas carefully as they can be
easily damaged, resulting in poor network reception. Either antenna can be installed in
either external port.

Spectur Assembly & Installation Instructions
HD5
Page 12 of 23
xv. Remove and dispose of the protective plastic film covering the Perspex viewing window.
xvi. If your system has a pre-installed SIM or Spectur SIM, please skip to section 3.3. If you
plan to use your own SIM card, please locate the SIM tool and proceed with the SIM
installation steps below. If you are unsure, please contact your nominated Spectur
representative or call 1300 802 960 for further assistance.

Spectur Assembly & Installation Instructions
HD5
Page 13 of 23
xvii. Insert the pointed end of the SIM tool into the hole next to the router’s SIM card tray as
shown below, pushing gently until the tray releases. NOTE: Be careful not apply excessive
force or the SIM tray may be damaged.
xviii. Remove the SIM card tray as shown below.

Spectur Assembly & Installation Instructions
HD5
Page 14 of 23
xix. Insert a full size SIM card into the SIM tray, aligning the SIM as shown.

Spectur Assembly & Installation Instructions
HD5
Page 15 of 23
xx. Gently re-insert the SIM tray with card into the slot, paying close attention to the
orientation as shown below. NOTE: Please take extra care when fitting the SIM card and
tray into the router. Incorrect insertion can damage these components which will not be
covered by warranty. If you are unsure or require additional guidance, please contact your
nominated Spectur representative or call 1300 802 960 for further assistance.

Spectur Assembly & Installation Instructions
HD5
Page 16 of 23
3.3 Testing
Congratulations! You have successfully assembled your Spectur HD5 camera system and it is now
ready to be installed.
Before doing so, we recommend activating your system to ensure proper operation prior to
installation.
To activate your Spectur system, simply connect the battery as shown below. Please allow up to 10
minutes while the camera boots up and establishes a connection to the Spectur cloud server.

Spectur Assembly & Installation Instructions
HD5
Page 17 of 23
3.3.1 System Login
i. On your personal computer, open a web browser such as Microsoft Edge or Google Chrome
and navigate to www.spectur.com.au, then click on ‘Login’ as indicated below.
ii. Once on the login screen, enter the Username and Password provided to you by Spectur. If
you have not received these or are unsure, please contact your nominated Spectur
representative, or call 1300 802 960 for assistance.

Spectur Assembly & Installation Instructions
HD5
Page 18 of 23
iii. Once logged in, you should see live images refreshing on your ‘Live View’ tab. When you are
satisfied that Live View is working and the system is online, please disconnect the battery to
avoid draining it before installation.
iv. Finally, log out by using the ‘Log Out’ button found in the top right of screen.
You are now ready to install your system on-site.

Spectur Assembly & Installation Instructions
HD5
Page 19 of 23
3.4 Installation
Once assembly and testing is complete, you can install your Spectur system.
i. Attach the mounting bracket to the mounting surface. Note that the M10 bolt should be
positioned towards the bottom of the mounting support. Removed the 17mm nuts from the
bracket and enclosure prior to installation.
IMPORTANT NOTICE: Ensure that the pole or supporting infrastructure that
will be used for mounting the Spectur camera is fit for purpose.
During installation it is the customers responsibility to comply with all
relevant OH&S regulations.
Spectur cannot accept any responsibility for unsafe product installation.

Spectur Assembly & Installation Instructions
HD5
Page 20 of 23
ii. Lift the enclosure onto the mounting bracket, guiding the M10 thread on the enclosure and
mounting bracket into the respective mounting holes. Use the supplied M6 bolts, washers
and nuts to lock the enclosure to the desired rotation angle.
iii. Attach the solar panel to the enclosure using the following steps:
1. Remove the 2x M8 bolts and washer from the top of the box. Then remove the M24
locking nut and washer from the solar cable assembly in the middle of the box as
indicated below.
Other manuals for HD5
2
Table of contents
Other Spectur Security Camera manuals
