Speed Passion Carrera 2 User manual
Instruction Manual
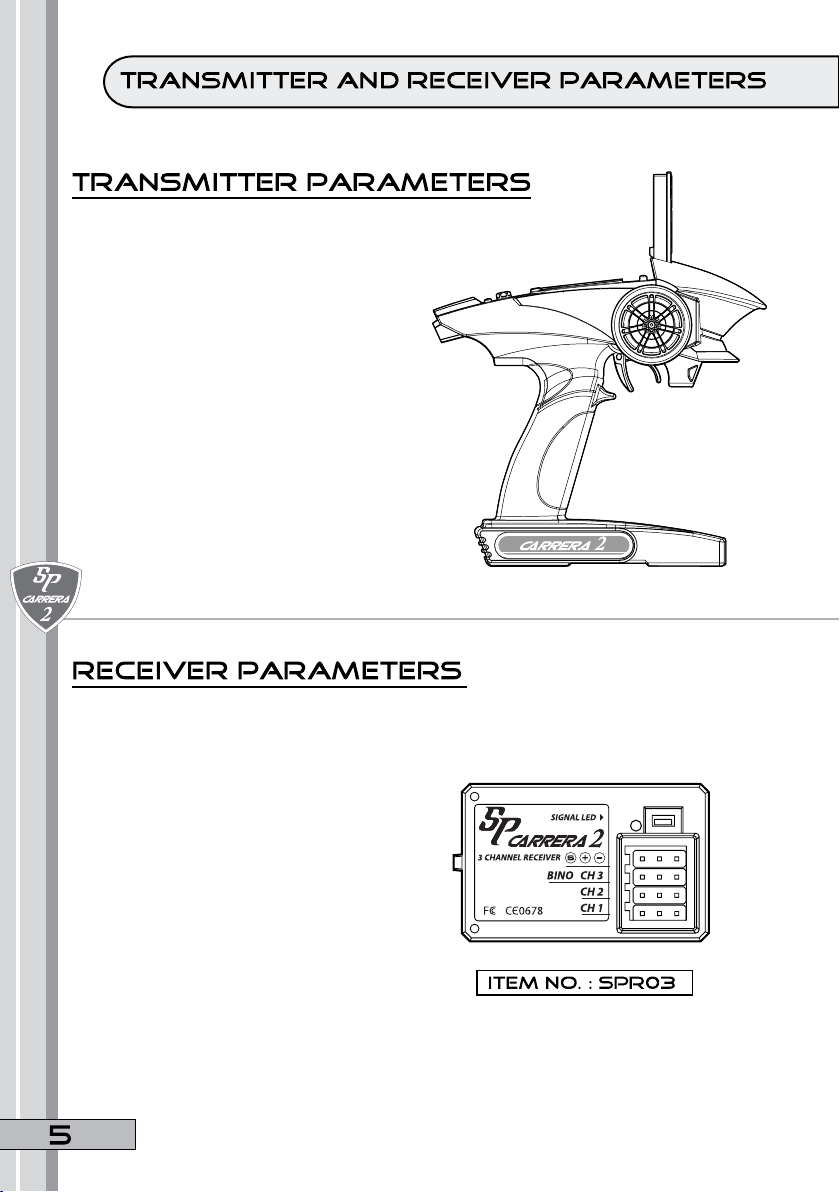
item no. : SPR0113

1. Introduction .......................................................... p.2
2. Safty Guides ......................................................... p.3
3. Battery Charging notes ........................................ p.4
4. Transmitter and Receiver parameters.........p.5 - p.6
5. Receiver Connectivity ..........................................p.7
6. 2.4G Operation notes ..................................p.8 - p.9
7. Transmitter Function notes .......................p.10 - p.12
8. Memo ........................................................p.13 - p.14

Thank you for choosing our 2.4G digital radio control
products, Please read through this manual to familiarize
yourself with the operation of the transmitter before use.
Keep this manual for future troubleshooting if you have
any problems during operation. Once again, thanks for
buying our products,
If you nd any problems during operation, please
refer to this manual for a solution. If the problem still exists,
please visit www.speedpassion.net
This product is warranted against manufacturing defects
for a period of one year after purchase. This warranty
does not cover abuse or physical damage caused by
the user. Please visit www.speedpassion.net for warranty
service contact information in your region and return
instructions.
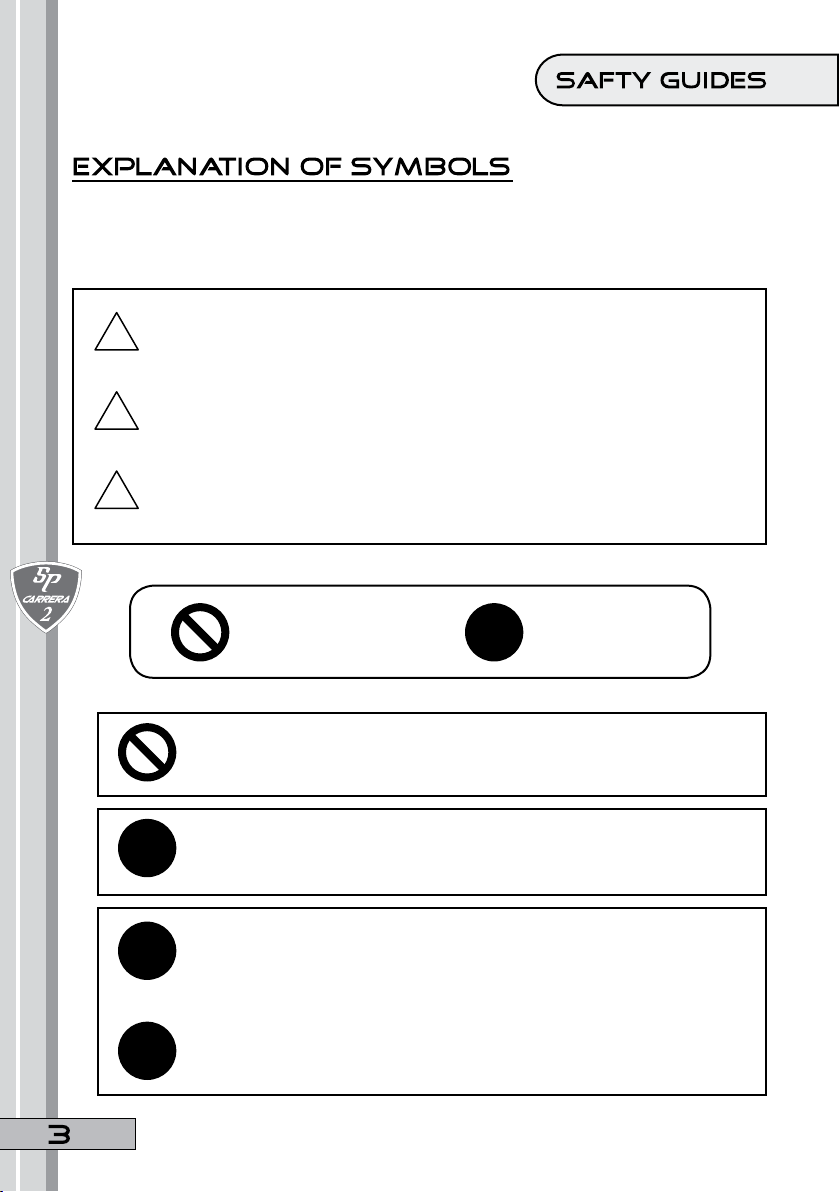
Please pay attention to the following symbols when they
appear in the manual, and please read carefully.
Failure to follow these instructions, may lead to serious
injuries or mortal danger.
Failure to follow these instructions, may lead to serious
injuries or mortal danger.
Failure to follow these instructions, may lead to minor
injuries.
!Danger:
!Warning:
!Attention:
Do not operate in bad weather such as rain or thunderstorms
to assure the safety of you and others.
Before you operate, please make sure the direction of the
radio movements match with the direction of car movements.
If not, please adjust before driving.
!
Always turn on the transmitter rst, then turn on the receiver.
Always turn off the receiver power rst, then turn off the
transmitter power.
!
If the above operations are reversed, it might lead to an
uncontrolled vehicle and accident.
!
Prohibition Mandatory
!
Check your transmitter batteries before each use. Low
battery power will cause poor range, slow response,
inconsistent response and loss of control. If your battery
power is low, please charge before use.
If you are using a nickel-cadmium, nickel-metal hydride
batteries for recharging, please use the supplied charger.
Other chargers may overcharge the batteries and
lead to re. Please turn off the power immediately after
recharging. Remove batteries from the transmitter before
storing it for long periods.
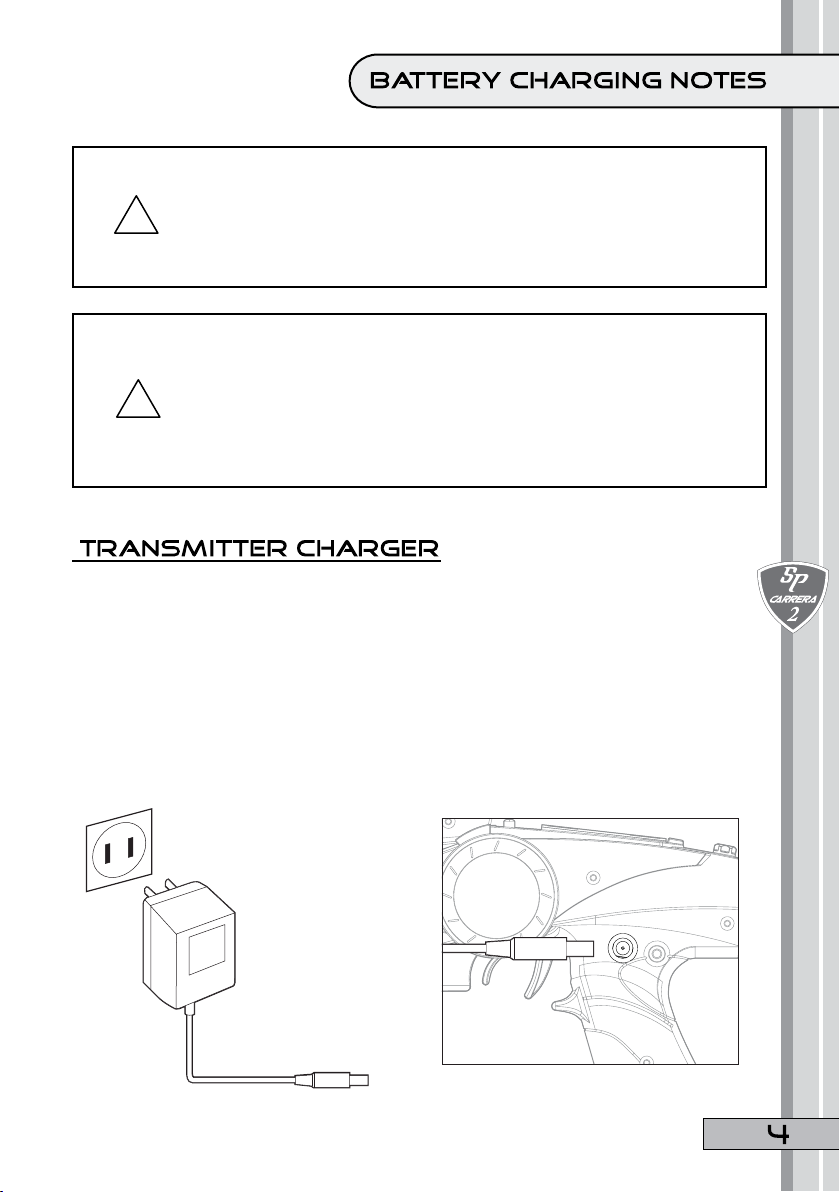
1. Install the transmitter batteries with correct polarity, and replace the
cover.
2. Connect the charger to the AC Outlet.
3. Connect the charger to the transmitter AC Jack.
4. Cut off the power supply immediately after recharge completed.
Charger
AC Outlet
!
!
Specifications:
- Channels: 2 Channels
- Model type: Car/Boat
- RF power: less than 20dbm
- Modulation: GFSK
- Code type: Digital
- Sensitivity: 1024
- Low voltage warning: Yes(less than 9W)
- DSC port: Yes(3.5mm)
- Charger port: Yes
- Power: 12vdc(1.5aa*8)
- Weight: 357g
- ANT length: 26mm
- Size: 227 X 268 X 97mm
- Certicate: CE FCC
Specifications:
- Channels: 3 Channels
- Model type: Car/Boat
- Frequency bank: 2.4G
- Modulation: GFSK
- Sensitivity: 1024
- RF. receiver sensitivity: -100dbm
- Power: 4.5-6vdc
- Weight: 6g
- ANT length: 26mm
- Size: 36.5 X 23.3 X 13.3mm
- Certicate: CE FCC
NOR REV NOR
RADIO
BIND
REV
POWER
LEDG:FULL
F:LOW
ST.TRIMTH.TRIM ST.D/R
0
2
3
1
2
3
0
1
2
3
1
2
3
3
2
1
0
4
5
6
CHG
DSC
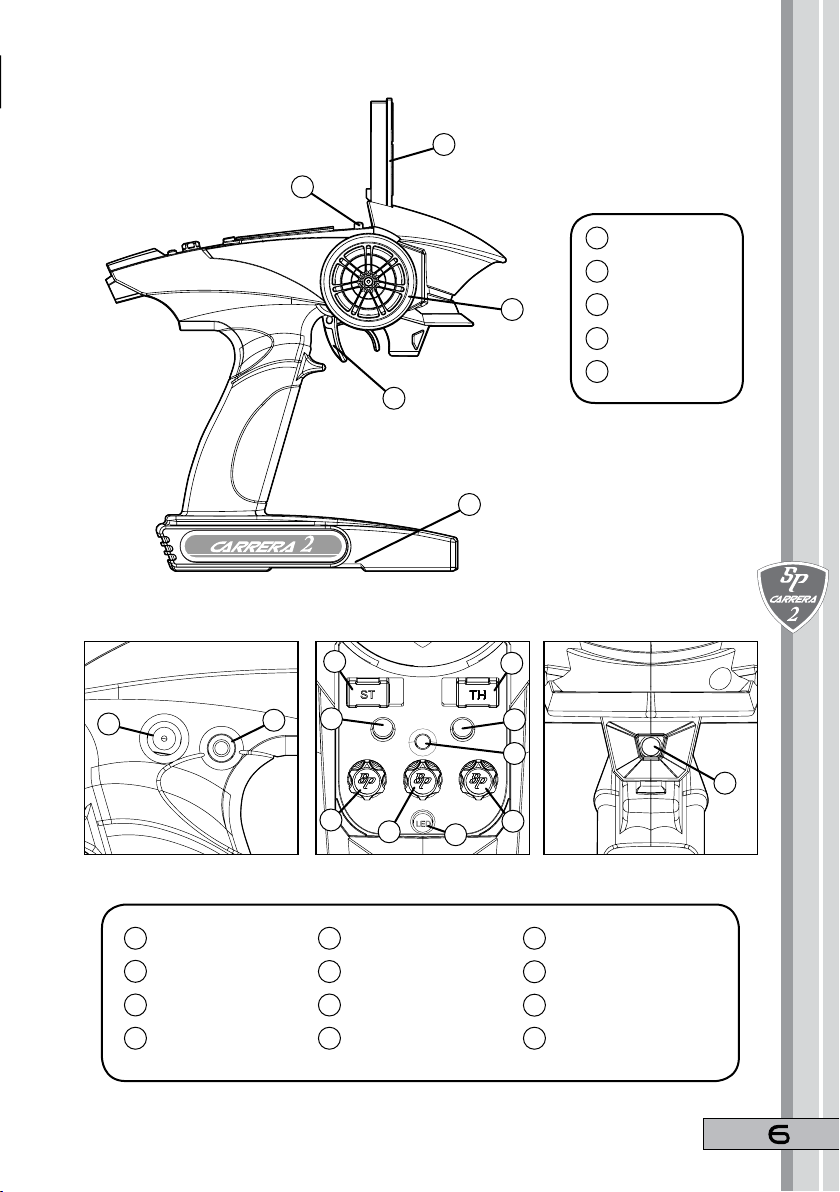
On/Off Switch
2.4G Antenna
Steering Wheel
Throttle Trigger
Battery Box
Charger Jack
DSC for Simulate
Steering Revise
Throttle Revise
Power LED
Battery Indicator LED
Radio Bind
Steering Trim
Throttle Trim
Steering Dual Rate Dail
Head LED Switch
Head LED
17
16
15
14
13
12
11
10
9
8
7
6
5
4
2
3
1
1
2
3
4
5
67
89
10 11
12
13 14 15
16
17
1
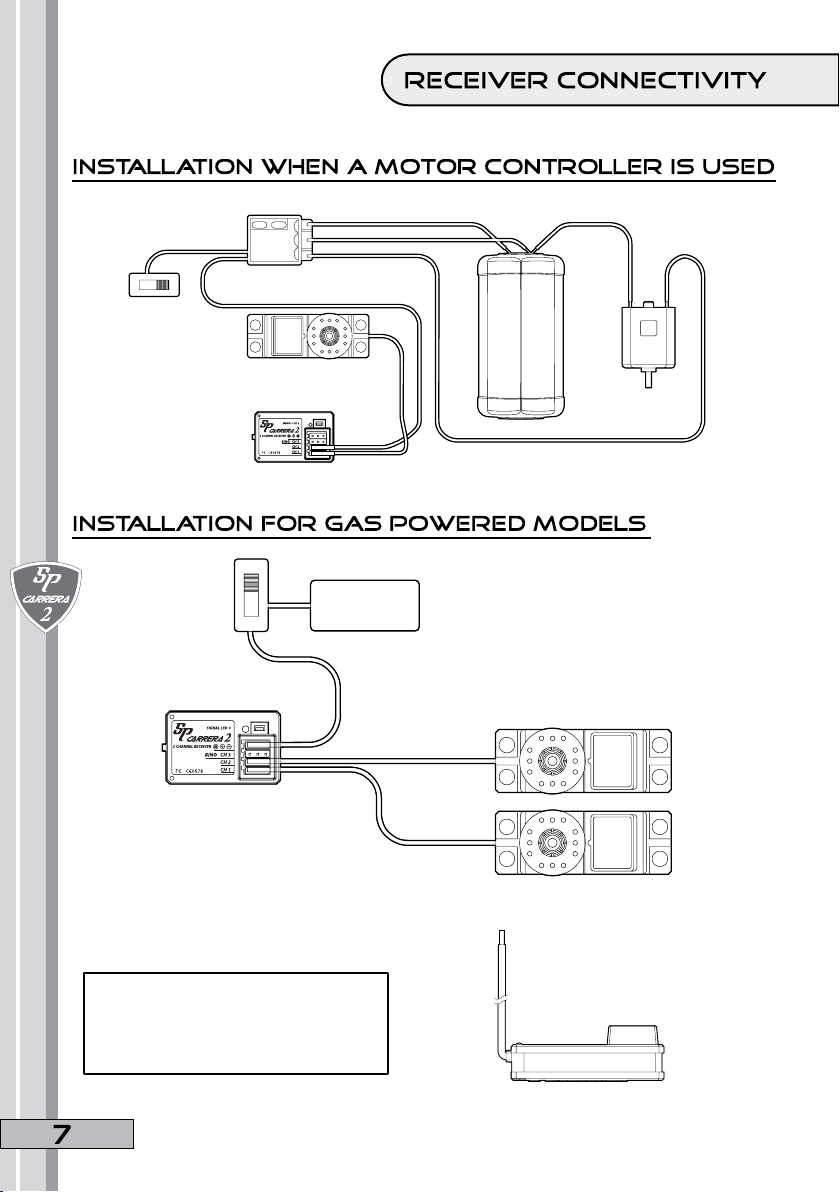
Note: Route the antenna of the
receiver straight up, and avoid
metal or wires to assure its sensitiv-
ity.
Switch
ESC
Servo
Receiver
Battery
Motor
Receiver
Switch Battery
(1.5AA X4)
Servo
Receiver
Throttle
Steering System
Antenna
NORREV NOR
RADIO
BIND
REV
POWER
LEDG:FULL
F:LOW
ST.TRIMTH.TRIM ST.D/R
2
2
0
31
13
0
31
13
2
2
3
1
02
4
5
6
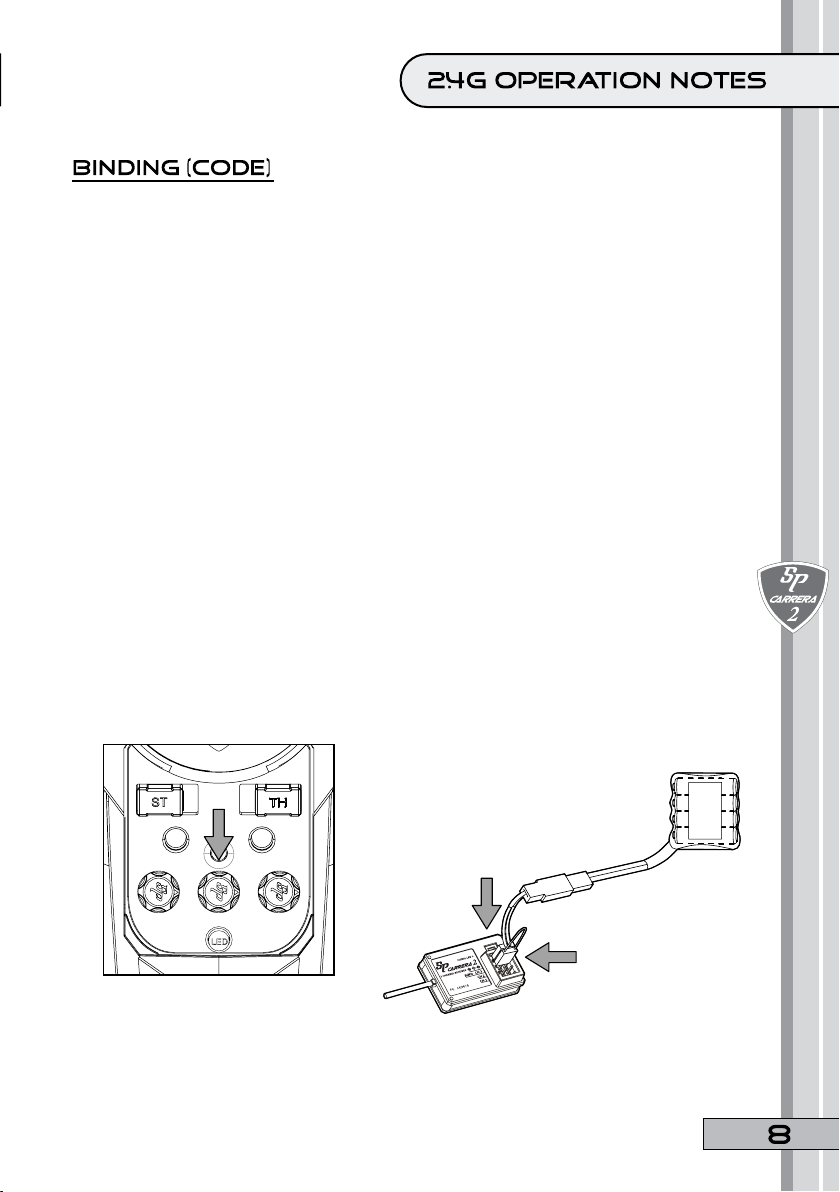
Our products are bound from the factory, so you do not need to bind them
yourself. To bind the receiver with another transmitter, please follow the
following steps:
A. Install the battery to 2.4G transmitter
B. Insert the bind plug to the channel BIND /CH3 port of the receiver.
C. Connect the receiver battery to VCC port of the receiver. The two LED will
be ashing and this means the receiver is ready to bind.
D. Press and hold the bind button on the transmitter, and then switch on the
power.
E. Observe the LED on the receiver, if the LED is not ashing, the bind was
successful.(May take about 5s )
F. Release the bind button on the transmitter, and remove the bind plug from
the receiver.
G. Install a servo and test.
H. If the test fails, please repeat the process above.
I. If the tests succeeds, the bind is complete. (The above ways of match is
only suitable on this products)
Bind Plug
LED
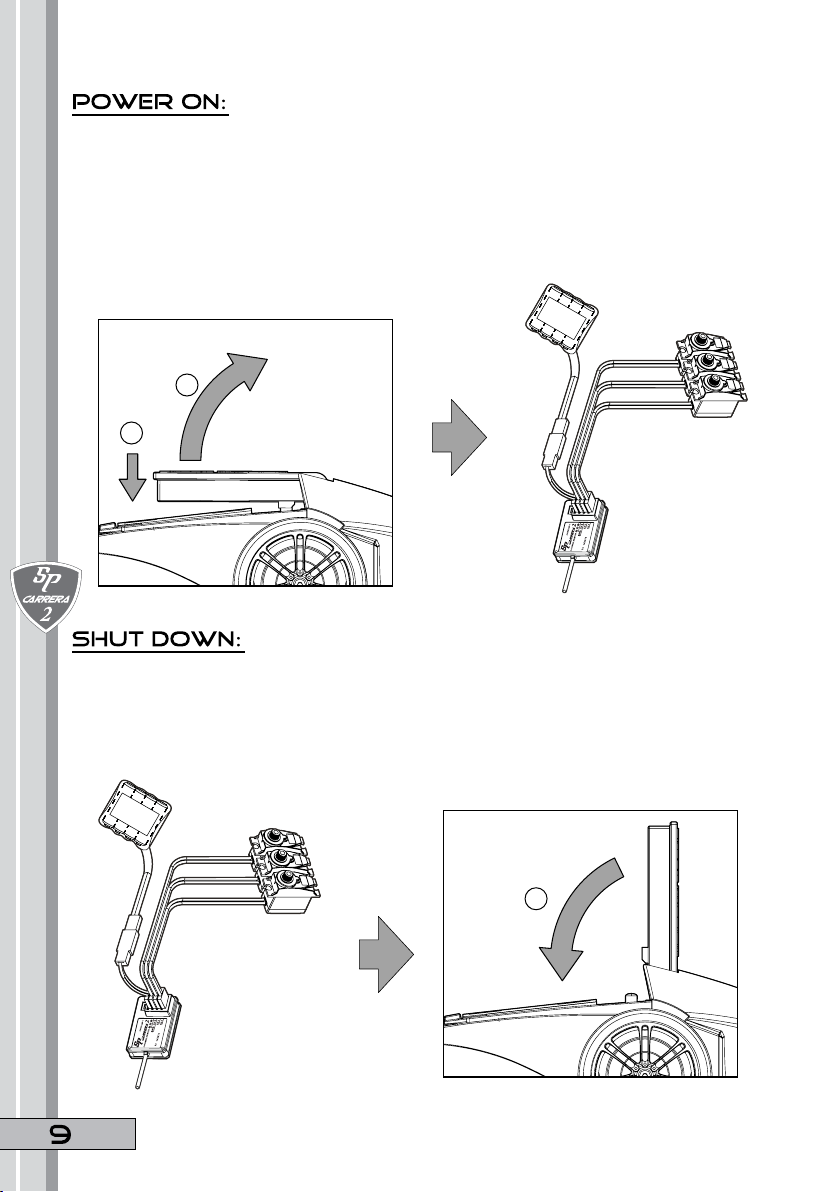
A. Complete installation.
B. Turn on transmitter.
- 1. Press the antenna untill it press the
On/Off switch.
- 2. Flip the antenna to vertical position.
C. Turn on receiver.
D. Receiver LED light should be solid.
E. Ready to use.
A. Turn off the receiver.
B. Turn off transmitter.
- 1. Flip the antenna down untill it press the
On/Off switch.
1
2
1

g.1
g.2

g.4
g.3

NORREV NOR
RADIO
BIND
REV
POWER
LEDG:FULL
F:LOW
ST.TRIMTH.TRIM ST.D/R
2
2
0
31
13
0
31
13
2
2
3
1
02
4
5
6
LED Button

USA Toll Free line: 866-369-0636
Email: [email protected]
Tel: (852) 3586-2398 Fax: (852) 3586-2148
www.speedpassion.net
Table of contents


