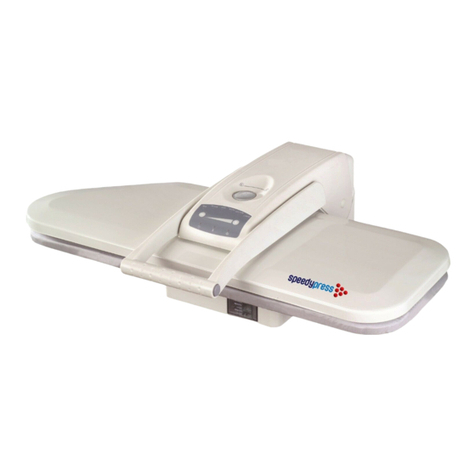
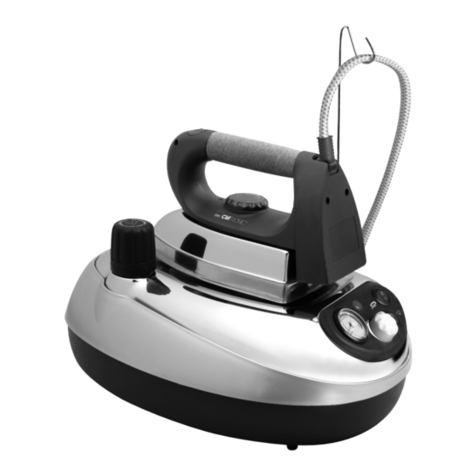
Speedypress PSP-202E User manual

TABLE OF CONTENTS
Important Safety Instructions....................1-3
Getting to Know Your Steam Press .... .......4-5
Features of the Steam Press.........................6
Operation&Instructions................................7
Tips Pressing............................................8-11
Cleaning the Steam Press.............. .............12
Storage................................... ....................12
Troubleshooting..........................................13
Please read this manual carefully before using and keep it for future reference.
DIGITAL FABRIC STEAM PRESS INSTRUCTION MANUAL
Steam Press
MODEL:PSP-202E

IMPORTANT SAFETY INSTRUCTIONS
When using electrical appliances, especially when children are present, basic safety precautions
the following:
should always be taken, including
READ ALL INSTRUCTIONS BEFORE USING
KEEP AWAY FROM WATER
DANGER-Any appliance is electrically live even when the switch is off.
To reduce the risk of death by electric shock:
1.Always“unplug it”immediately after using.
2.Do not place or store appliance where it can fall or be pulled into a tub or sink.
3.Do not place in, or drop into water or other liquid.
4.If an appliance falls into water, “unplug it”immediately. Do not reach into the water.
WARNING-To reduce the risk of burns, electrocution, fire, or injury to persons:
1.This appliance should never be left unattended when plugged in.
2.Close supervision is necessary when this appliance is used near children or the physically
result in fire or personal injury.
challenged. Unsupervised use could
3.Use this appliance only for its intended use as described in this manual. Do not use attachments not recommended by the manufacturer.
1
4.This appliance can be used by children aged from 8 years and above and persons with reduced physical, sensory or mental capabilities
or lack of experience and knowledge if they have been given supervision or instruction concerning use of the appliance in a safe way and
understand the hazards involved. Children shall not play with the appliance. Cleaning and user maintenance shall not be made by
children without supervision.

4.Never operate this appliance if it has a damaged cord or plug, if it is not working properly, or
6.Keep the cord away from heated surfaces. Do not allow cord to contact heated surfaces. Do not pull or twist cord. Let appliance cool
completely before putting away.
8.Never drop or insert any object into any opening.
9.Do not use outdoors or operate where aerosol(spray)products are being used or where oxygen is being administered.
10.Do not use an extension cord to operate appliance.
11.Surfaces of this appliance may be hot when in use. Do not let eyes or bare skin touch heated Surfaces.
12.Always turn the switch to the “off”position before plugging in or unplugging the unit.
13.Always let the appliance cool for at least thirty minutes before storing.
14.Do not move the appliance without unplugging it.
IMPORTANT SAFETY INSTRUCTIONS
5.Never operate this appliance if it has a damaged cord or plug, if it is not working properly, or if it has been dropped or damaged,
or dropped into water. Do not attempt to repair the appliance. Incorrect reassembly or repair could cause a risk of fire, electric shock,
or injury to persons when the appliance is used. Return the appliance to an authorized service centre for examination and repair .
15.Unplug this appliance before filling. Do not overfill.
2
16.While emitting steam, this appliance may cause burns if it is held too close to the skin, scalp or eyes,
To reduce the risk of contact with hot water as it escapes through steam vents, test appliance before each use by holding and
testing it away from body.
or if it is used incorrectly.
7.If the supply cord is damaged, it must be replaced by the manufacturer, its service agent or a similarly qualified person in order to avoid a hazard.

17.Do not operate steamer without properly filling the water container.
18. Never yank cord to disconnect from outlet. Instead, grasp plug and pull to disconnect.
19.Burns could occur from touching hot metal parts, or proximity to hot water or steam. Do not turn unit upside down- there may be
water in reservoir.
20.To reduce likelihood of circuit overload, do not operate another high wattage appliance on the same circuit.
21.Use distilled water in the appliance.
22.Be careful. Burns can occur from touching HOT METAL PARTS, OR PROXIMITY TO HOT WATER OR STEAM.
23.Do not let the cord hang over the edge of counter.
24.Always put the appliance in a secure and level place on a table or counter when using.
25.This unit is for household use only.
26. Do not allow cord to touch hot surfaces. Let appliance cool completely before putting away. Loop cord loosely around appliances
when storing.
27.This appliance must be grounded. Do not alter the plug or attempt to defeat this feature.
28.Before plugging in the steam press, be sure the electrical information on the label agrees with your power supply.
SAVE THESE INSTRUCTIONS
IMPORTANT SAFETY INSTRUCTIONS
3
29.Disconnect the appliance when not in use and when the mangle cloth is being replaced.

1.The Pressing Handle raises and lowers the Pressing Plate.
2.The Locking Knob will lock together the Pressing Plate and
the Ironing Board. Use this to carry or store the Steam Press.
3.The Steam Burst Buttons on either side of the Pressing Handle
produce a burst of steam when pressed.
4. The Pressing Plate it the temperature controlled surface that
heats and presses the fabric.
5.The Ironing Board is the padded surface that holds the fabric
during pressing. It has a removable cover that is washable.
6.The ON/OFF Switch.
7.The Power Indicator Light illuminates when On/Off Switch is
Set to the"On"position, providing you with a clear visual indication
that the unit is powered on.
8.The Pressing Indicator Light illuminates while the unit is heating to the selected temperature , and deactivates to provide a clear
visual indication that you are ready to begin pressing.
GETTING TO KNOW YOUR STEAM PRESS
9.The Steam Ready Indicator Light illuminates once the unit is ready to produce bursts of steam, providing you with a clear visual
indication that you can begin using the Steam Burst Buttons.
4
1
2
34
11
6
5
78910
12 13 14
Steam Press

12.The Pressing Cushion is a fabric covered pad used for pressing gathered or contoured areas such as sleeves, darts, yokes
13. The Measuring Cup is designed to assist you in easily and consistently filling the Water Reservoir with the optimum amount of water.
filling the Water Reservoir with the optimum amount of water.
14.The Spray Bottle allows you to moisten fabrics before pressing, when helps to make the pressing process easier and more effective
in certain instances.
The Auto Shut- Off feature includes both an Auto Shot- Off and an Auto Wake-Up .These multiple function safety features deactivate
electrical power to the heater when the Pressing Plate has been left closed against the Ironing Board for more than 10 seconds. Heater
deactivation is signalled by a beeping sound. Heater Functionality is restored when the Pressing Plate is raised back up. Power to the
heater will also be cut if the Pressing Plate is in the raised position without use for approximately 15 minutes(once again signaled by a
beeping sound) The heating ability of the unit can only be restored in this situation by pressing the Temperature Control Buttons.
11.The Water Tank
ABOUT THE AUTO SHUT-OFF
GETTING TO KNOW YOUR STEAM PRESS
10.The Temperature Control Buttons are used to select a desired temperature by cycling through the list of choices above the buttons.
Push the Temperature Control Buttons until the indicator light beneath the type of material you are going to press becomes illuminated.
IMPORTANT: Auto Shut- Off does not mean that power to the unit is totally cut off. Power is always on, and the Power Indicator Light will
Remain illuminated until On/Off Switch is set to "Off"position.
5

FEATURES OF THE STEAM PRESS
Your Steam Press provides clean, professional results every time!
.Pressing surface is fourteen times larger than most hand-held irons
.Can reduce ironing time up to 50%
.Multiple dry and steam settings, burst setting to remove stubborn wrinkles
.Variable temperature control
.Automatic shut off safety feature while open or closed with audible alert
.Power indicator light
.Protects delicate fabrics like silk
IMPORTANT For Household Use Only
Filling Instructions:
Do not plug the unit in until you have filled the Water Tank
1.Place Digital Fabric Steam Press on a flat, level surface.
2.Turn Locking Knob to “Unlock”position to unlock pressing Plate.
3.Lift up Pressing Plate using Handle. It will automatically stay in lifted position.
4.Pull Water Reservoir out. Note that Water Reservoir cannot be completely
do not attempt to force it free.
removed from unit;
5.Remove Water Reservoir Cap to express Water Reservoir fill hole.
6.Using Measuring Cup(included), fill Water Reservoir up to the MAX(300ml) line with distilled water.
6
POWER SWITCH

7.Replace Water Reservoir Cap and push filled Water Reservoir back into main unit.
OPERATION INSTRUCTIONS
1.Turn the ON/OFF Switch to the"on"position.
2.Identify the type of fabric you will press and then select the temperature setting that matches the
fabric to be pressed. It is best to start with the most delicate fabrics first, as higher heat will cause
damage to Nylon and Silks.
3.Lay fabric flat on Ironing Board.
4.Digital Fabric Steam Press is ready for use when Pressing Indicator Light deactivates. If pressing
wool, you may choose to spray with a burst of steam. This function is available once Steam Burst
Ready Indicator Light illuminates.
NOTE: Do not activate burst of steam with unit completely closed, as this may damage unit. Best
results are obtained if Pressing Plate is held open approximately 75 mm above Ironing Board before
pressing Steam Button. For safety reasons, do not hold Pressing Plate open more than 75 mm when
using steam burst function.
5.To press, lower Pressing Plate gently onto fabric and Ironing Board. Hold there for 6-8 seconds, then
lift up Pressing Plate. Repeat until you have achieved desired crease and smoothness.
6.Once Pressing tasks are complete, immediately set On/Off Switch to "off"position.
*DO NOT ATTEMPT TO PULL WATER RESERVOIR OUT COMPLETELY.
7
OPERATION INSTRUCTIONS

STEAM BURST
1.Hold Pressing Plate approximately 3" above Ironing Board.
2.Press Steam Burst Button to release a burst of steam onto fabric.
3.Lower Pressing Plate onto fabric, then raise once again.
4.Repeat steps 1-3 above until fabric is smooth and wrinkle-free.
IMPORTANT NOTE
FOR BEST RESULTS, PRESS BUTTON FOR 2 SECONDS AND RELEASE.
STEAMING TIPS
Pressing Garments
1. Lay the garment on the Ironing Board.
2. Lower the steam plate and return to the open position after a few seconds.
NOTE: the unit will automatically turn off the heating plate after
10 seconds in the closed position. A beep will emit until the unit is opened.
Once the unit is opened, it will return to normal operation.
Wrinkle Removal
1. Lower the Steam Plate until it is slightly above the Ironing Board(about three inches).
2.Activate the Burst of Steam with the buttons on the sides of the Pressing Handle.
3.Wait a few seconds, and activate the Burst of Steam again.
8
TIPS PRESSING

Shirts and Blouses
1.Place the shoulder yoke on the Ironing Board first and press.
2.Then place the sleeves on the Ironing Board with the fold
parallel to the long seam and press
3.Place the cuffs on the end of the board and press.
4.Place the bottom of the shirt be hind Ironing board so that
you begin pressing the side with the pocket. Pull the shirt to
wards you as you Press each section.
5.Then finish with the collar of shirt.
4.Lower the Pressing Plate and then raise.
5.Repeat this process until all wrinkles have been removed.
TIPS PRESSING
4
1
3

Pants
1.Place the Pressing Cushion under the waistband and press, repositioning the
waistband until completely pressed.
2.To press the in-seam, place the cushion under the area to be pressed.
3.Place the pleated area on the Ironing Board. Carefully fold pleats and press.
4.Embroidery should be placed face down on the Ironing Board to reduce wear
and prevent damage to delicate areas.
10
TIPS PRESSING
+
+

Other Techniques
1.Placing the pressing cushion between the fabric and the Pressing Plate may help with delicate fabrics.
2.Buttons and Zippers: if you have older types of buttons or zippers, you may need to take special care to avoid melting. In order to do so,
place the garment face down and cover with a pressing cushion before pressing.
3.Spray bottle may be used to spray the fabric lightly. This will further help to remove stubborn wrinkles.
4.Place a damp cloth over the fabric before pressing, which will help with stubborn wrinkles or heavy gauge fabrics.
5.To press large pieces of fabric, place entire piece behind the Ironing Board. Pull the fabric towards you, over the Ironing Board, and
lower the Pressing Plate. Press the fabric in sections until completed.
1.For garments constructed with details such as darts, curved seams, and shoulder pads, a Pressing Cushion may be used.
2.Use the cushion in areas where no creases are desired or to shape a tailored garment.
3.Place the area to be pressed onto the Ironing Board.
4.Place the Pressing Cushion under the dart, seam, etc.
5.Making sure that the area to be pressed is raised, lower the Pressing Plate until it meets the raised area.
6.Do not force the plate to its lowest position, as this may cause damage to the unit.
Using the Pressing Cushion
11
TIPS PRESSING

CLEANING THE STEAM PRESS
CLEANING THE STEAM PRESS & STORAGE
1.Place the Pressing Cushion in the middle of Ironing Board.
2.Place a clean towel over the Pressing Cushion and the Ironing Board.
3.Set the temperature control Button to its highest setting(LINEN).
4.When the Steam Burst Ready Indicator Light illuminates, lower Pressing Plate onto the pressing
cushion.
5.Press the steam burst button six times.
6.Allow the Pressing Plate to cool completely down.
7.Clean the pressing plate with a damp cloth.
the pressing.
Make sure the appliance is unpluged and then clean
8. Do not use abrasives or you may damage the plate.
9.The Ironing Board cover is removable for cleaning. Hand wash only with mild detergent.
STORAGE
1. Once pressing is complete, immediately turn unit off and unplug power cord from electrical outlet.
2.Allow unit to cool completely(at least 30 minutes).
3.Lower pressing plate down;and turn Locking Knob to "Lock"position.
4.Wrap up power cord and place in Cord Storage Compartment.
5.Store all accessories safely away, preferably near Digital Fabric Steam Press.
6.Store Digital Fabric Steam Press in a cool, dry place.
7.For long-term of storage, Press the steam button time to time, to use up the water remain in the water reservoir.
12

TROUBLE SHOOTING
PROBLEM POSSIBLE CAUSE SOLUTION
Unit fails to steam.
Power Indicator Light
does not illuminate.
Unit fails to steam.
Power Indicator
Light does illuminate.
Steam Burst output is
weak or intermittent.
Pressing Plate needs to be
cleaned.
Unit is damaged or malfunctioning.
Water Reservoir is empty.
Auto Shut-Off has engaged.
Household Circuit Breaker/
Ground Fault Interrupter has
tripped or blown a fuse.
Unit is not plugged in. Plug into electrical outlet.
Reset Circuit Breaker/Ground Fault
Interrupter, or replace fuse. If you need
assistance, Contact a licensed electrician.
Refer to Auto Shut-Off section on page 5
of this manual for proper procedure.
Refill Water Reservoir using procedures
on page 6-7 of this manual.
Please contact our customer support
department.
Refer to Cleaning the Digital Fabric
Steam Press section on page 11 of this
manual for proper procedure.
Before taking the unit to a service center, please check the following list of common problems for your issue.
13

Disposal of old Electrical & Electronic Equipment (Applicable in the European Union and other
European countries with separate collection systems).
This symbol on the product or on its packaging indicates that this product shall not be treated as house-
hold waste. Instead it shall be handed over to the applicable collection point for the recycling of electrical
and electronic equipment. By ensuring this product is disposed of correctly, you will help prevent potential
negative consequences for the environment and human health, which could otherwise be caused by inapp-
ropriate waste handling of this product. The recycling of materials will help to conserve natural resources.
For more detailed information about recycling of this product, please contact your local city office, your
household waste disposal service or the shop where you pur-chased the product.
V140305

1
Manuel d’utilisation de la presse à vapeur.
Model PSP-202E
Avant de l’utiliser, veuillez lire attentivement ces instructions
Contenu
Instructions importante de sécurité. 2-3
Connaître votre machine 3
Caractéristiques de la presse à vapeur 4
Fonctionnement et instructions 5
Conseils 6-8
Nettoyage de la presse 8
Stockage 8
Dysfonctionnements 9

2
Instructions importante de sécurité.
Lors de toute utilisation d’appareil électriques, et plus particulièrement si il y a présence d’enfants, certaines
précautions doivent être prises et notamment :
DANGER. Tout appareil électrique est dangereux, même s’il n’est pas en fonctionnement.
Afin d’éviter tout risque d’électrocution:
1. Débrancher la prise électrique immédiatement après utilisation.
2. Ne pas placer ni ranger l’appareil dans un endroit où il pourrait être en contact avec de l’eau (évier –
baignoire)
3. Eviter tout contact avec l’eau ou autre liquide.
4. Si l’appareil tombe dans l’eau, le débrancher immédiatement.
Avertissement. Pour réduire les risques de brûlures, d’électrocution, d’incendie ou de blessures :
1. Ne laissez jamais l’appareil branché seul et sans surveillance.
2. Une surveillance particulière est requise lorsque l’appareil est utilisé en présence d’enfants ou pas des
personnes à mobilité réduite. La non surveillance pourrait avoir comme conséquence un départ de feu ou
de possibles blessures.
3. Utiliser l’appareil uniquement pour sa fonction première comme décrit dans le manuel. Ne pas utiliser
d’accessoires non recommandés par le fabricant.
4. L’âge minimum requis pour utiliser cet appareil est de 8 ans. Toute personne n’ayant pas l’entièreté de ses
facultés physiques ou mentales n’utilisera l’appareil uniquement si elle est capable de suivre toutes les
instructions et comprend les risques impliqués. Les enfants ne doivent pas jouer avec l’appareil. Le
nettoyage et l’entretien de l’appareil par des enfants ne se fera que sous stricte surveillance.
5. Si le cordon électrique est abîmé, il doit être remplacé par le fabricant ou par toute personne compétente et
habilitée pour éviter tous risques ou dangers.
6. Ne jamais utiliser l’appareil si le cordon ou la prise sont endommagés ; si l’appareil fonctionne mal ; si il est
tombé ou est endommagé, ou si il est tombé dans l’eau. Ne pas essayer de réparer l’appareil. Une mauvaise
réparation peut conduire à une prise de risques pendant l’utilisation. En cas de problèmes, confier l’appareil
à des personnes compétentes pour la réparation.
7. Ne pas maltraiter le cordon. Maintenir le cordon à l’écart de la chaleur. Laisser refroidir l’appareil avant de
le ranger.
8. Ne pas modifier la prise de courant et utiliser l’adaptateur fourni par le fabricant.
9. Ne jamais laisser tomber ou insérer d’objets dans aucune des ouvertures.
10. Ne pas utiliser à l’extérieur ni en présence d’aérosols ou en cas d’administration d’oxygène.
11. Ne pas utiliser de rallonge électrique.
12. Les surfaces extérieures de l’appareil ne doivent pas être chaudes. Ne pas toucher à main nue les surfaces
chauffantes de l’appareil.
13. Mettre l’appareil en position « off » avant de le débrancher.
14. Laisser refroidit l’appareil au moins trente minutes avant de le ranger.
15. Toujours débrancher l’appareil avant de le changer de place.
16. Débrancher l’appareil avant de le remplir. Ne pas déborder.
17. Pendant la vaporisation, l’appareil peut poser des risques de brûlures. Vérifier le bon fonctionnement de la
vaporisation avant utilisation en prenant garde aux brûlures et en se maintenant à distance des buses
d’injection.
18. Ne pas utiliser la vaporisation si le niveau d’eau est insuffisant.
19. Ne pas tirer sur ce cordon pour débrancher l’appareil ; prendre la prise directement en main.

3
20. Attention aux brûlures en cas de contact avec les surfaces métalliques chaudes, l’eau chaude ou la vapeur.
Ne pas retourner l’appareil, de l’eau chaude peut encore se trouver dans le réservoir.
21. Pour éviter le déclenchement des disjoncteurs électriques en cas de surintensité, éviter de brancher pendant
l’utilisation un autre appareil sur le même circuit électrique.
22. Utiliser de l’eau distillée.
23. Soyez vigilant ! Brûlures possibles en cas de contact avec les parties métalliques chauffées, de l’eau chaude
ou de la vapeur.
24. Ne pas laisser le cordon pendre sur le côté du support.
25. Toujours placer l’appareil en sécurité, « de niveau » sur une table ou sur son support.
26. Cet appareil est conçu pour un usage privé et ménagé.
27. Le cordon ne doit pas être en contact de la chaleur. Laisser refroidir complètement l’appareil avant de le
ranger. Placer le cordon à l’endroit approprié sur l’appareil.
28. La prise électrique doit être pourvue d’une prise de terre. Ne pas modifier la fiche et utiliser l’adaptateur.
29. Avant de brancher la presse, s’assurer que le circuit électrique est capable de supporter l’intensité.
30. Débrancher l’appareil quand il n’est pas utilisé, et lors du remplacement de la housse de protection.
Conserver ces instructions
Connaitre la presse vapeur
1. Poignée de la presse –elle permet de lever ou de baisser la plaque pressante
2. Le crochet de blocage –bloque la presse en position fermée pour permettre le déplacement et le
rangement.
3. Les boutons « vapeur », de chaque côté de la poignée, permette d’envoyer la vapeur pendant le pressage.
4. La plaque pressante, régulée en température, chauffe et presse le tissu.
5. La table de repassage, muni d’une surface rembourrée qui maintient le tissue pendant le pressage, elle est
munie d’une housse de couverture lavable.
6. L’interrupteur principal (ON/OFF)(marche/arrêter)
7. L’indicateur principal, s’illumine dès quand l’appareil est « en marche ».
8. L’indicateur L’indicateur « presse » s’illumine quand la température requise est atteinte et donc le pressage
peut commencer.
9. L’indicateur de vapeur, s’illumine dès que l’appareil est prêt à produire de la vapeur
10. Le bouton de contrôle de température qui permet de sélectionner la température adéquate au tissu. Par
poussée successive vous choisissez la nature du tissu à presser.
11. Le réservoir d’eau
12. Le coussin de pressage, petit coussin rembourré qui aide au pressage d’endroit comme les manches, autour
du col, etc.
13. Le flacon de remplissage, calibré pour un remplissage facile du réservoir.
14. La bouteille « spray », permet d’humidifier le tissu avant pressage et facilite celui-ci.

4
Au sujet de la mise « arrêt » automatique.
Cette fonction de l’appareil permet de désactiver /réactiver la chauffe de la plaque pressante.
Quand la presse est en position fermée, la chauffe s’arrête après dix secondes de pressage et un signal sonore est
émis (« beeps »). Dés la réouverture de la presse, la chauffe reprend normalement.
Si presse est en position fermée pendant 15 minutes, il y de nouveau un signal sonore, mais cette fois la chauffe ne
reprend pas automatiquement et il est nécessaire de redémarrer l’appareil.
Attention : le fait que la presse se soit mise en arrêt ne signifie pas qu’elle n’est plus « sous tension ».
La presse est en effet toujours raccordée et le témoin « cordon » restera illuminé jusqu’à ce que la presse soit
débranchée.
Caractéristiques de la presse vapeur.
La presse vapeur est conçue pour donner un résultat impeccable et de niveau professionnel.
-La surface de pressage est vingt-quatre fois plus grande que la surface de la plupart des fers à repasser.
-Le temps de repassage est réduit jusqu’à 50%.
-Le choix multiples des conditions de vaporisation vient à bout des plus mauvais plis.
-Contrôle automatique et choix de la température.
-Mise en arrêt automatique de la chauffe avec signal sonore.
-Indicateur de raccordement électrique.
-Protège les tissus délicats comme la soie
Important : Uniquement pour un usage ménagé.

5
Instructions de remplissage :
Ne pas brancher la presse avant d’avoir effectuer le remplissage du réservoir.
1. Placer la presse à plat et de niveau.
2. Débloquer le crochet de blocage.
3. Relever la plaque pressante, elle se maintiendra en position ouverte.
4. Remplir le réservoir. Attention le réservoir ne se retire pas complètement de la presse. Ne pas le forcer à
« sortir ».
5. Retirer le capuchon du réservoir.
6. En utilisant le flacon de remplissage, remplir le réservoir d’eau distillée. Maximum 300 ml.
7. Remettre le capuchon en place et repousser le réservoir dans la presse.
NE PAS ESSAYER DE RETIRER COMPLETEMENT LE RESERVOIR DE LA PRESSE
Instructions d’utilisation :
1. Mettre l’interrupteur on/off (marche/arrêt) à la position « on »
2. Choisir et sélectionner la qualité du tissu à presser. Il est toujours préférable de choisir les qualités les plus
délicates ; une température trop élevée risque d’endommager les qualités comme le nylon ou la soie. . Tissu:
Cotton = Coton; Wool = Laine; Silk = Soie; Linen = Toile de lin.
3. Placer le tissu à plat sur table basse.
4. La presse est prête à l’utilisation dès que l’indicateur s’illumine. Si de la laine est pressée, on peut choisir de
presser avec un jet de vapeur. Cette fonction est disponible dès que l’indicateur « VAPEUR » s’illumine. –
Note : lorsque l’on choisit d’utiliser les jets de vapeur, il ne faut pas le faire quand la presse est fermée, cela
pourrait endommager la presse. Les meilleurs résultats sont obtenus en actionnant les jets de vapeur quand
la table pressante se trouve à peu près à 75 mm de la table. Par sécurité, ile ne faut pas utiliser la fonction
vapeur quand la presse est ouverte de plus de 75mm.
5. Presser en appuyant doucement la plaque pressante contre la table. Maintenir 6 à 8 secondes puis relever la
plaque. Répéter l’opération jusqu’à l’obtention du résultat désiré.
6. Un fois le pressage complètement terminé, placer immédiatement la presse en mode « OFF »
Table of contents
Languages:
Other Speedypress Iron manuals
