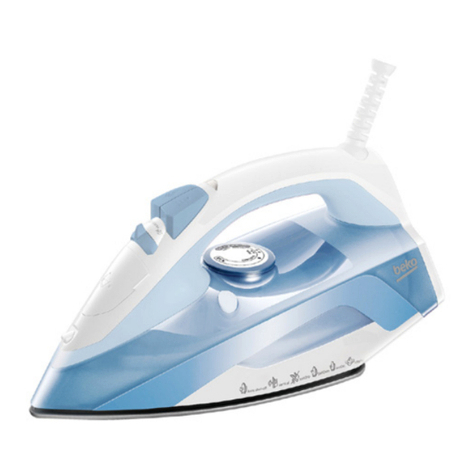
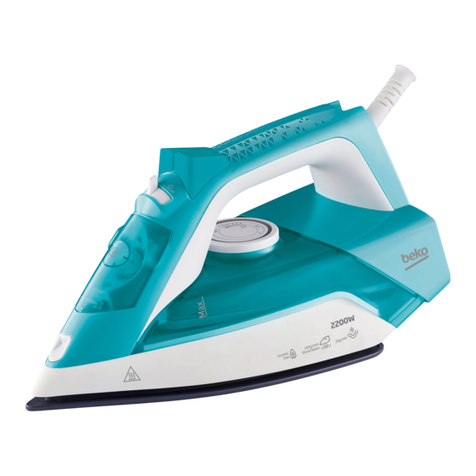
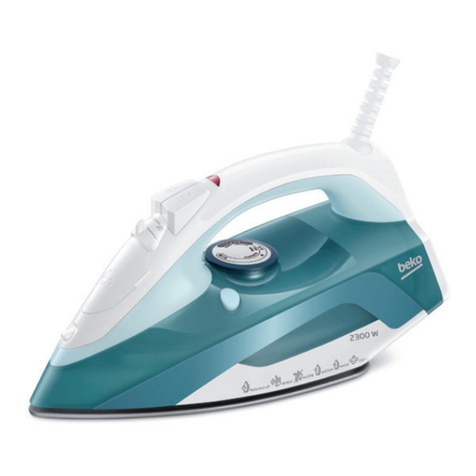
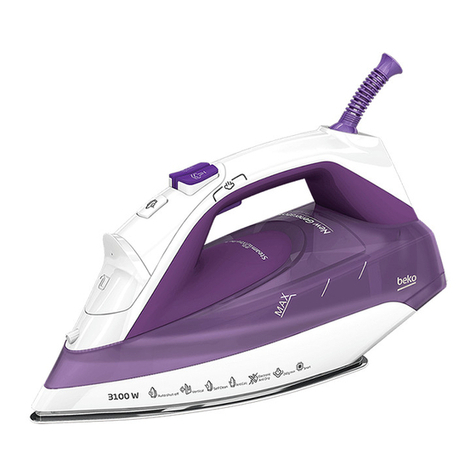
Beko SIM4123T User manual

www.beko.com
SIM4123T
01M-8939143200-2417-04
Steam Iron
User Manual
EN DE FR TR ES
PL HR RO IT TH

Please read this user manual first!
Dear Customers,
Thank you for selecting a Beko product. We hope that you get the best
results from your product which has been manufactured with high
quality and state-of-the-art technology. Therefore, please read this
entire user manual and all other accompanying documents carefully
before using the product and keep it as a reference for future use. If
you handover the product to someone else, give the user manual as
well. Follow all warnings and information in the user manual.
Meanings of the symbols
Following symbols are used in the various section of this manual:
CImportant information and useful
hints about usage.
AWARNING:
Warnings for
dangerous situations concerning
the safety of life and property.
WARNING:
Warning for hot
surfaces.
It does not contan PCB.
Made n P.R.C.
Ths product has been produced n envronmentally-frendly, state-of-the-art facltes.

3 / EN
Steam Iron / User Manual
CONTENTS
ENGLISH 4-15
DEUTSCH 16-32
FRANÇAIS 33-47
TÜRKÇE 48-60
ESPAÑOL 61-75
POLSKI 76-94
HRVATSKI 95-108
ROMANIAN 109-126
ITALIANO 127-144
THAI 145-157

4 / EN Steam Iron / User Manual
Ths secton contans safety nstructons that wll
help protect from rsk of personal njury or property
damage.
Falure to follow these nstructons nvaldates the
granted warranty.
1.1 General safety
•Ths applance comples wth the nternatonal
safety standards.
•Ths applance may be used by chldren who
are at the age of 8 or over and the people
whose physcal, perceptve or mental sklls
are mpared or who are nexperenced or not
knowledgeable about the applance as long
as they are supervsed or nformed and made
understood the safe use of the applance and
the encountered dangers. Chldren should
not play wth the applance. Cleanng and
user mantenance procedures should not
be performed by chldren unless they are
controlled by ther elders.
1Important nstructons for safety and envronment

5 / EN
Steam Iron / User Manual
•Do not leave the product unattended whle t s
plugged n.
•Unplug the product before fllng the water
reservor wth water.
•Operate and store the applance on a stable
surface.
•When the applance s placed on ts base plate,
ensurethatthesurfacebeneaththeplateslevel.
•Do not use the applance f the power cable
or the applance tself s damaged. Contact an
authorsed servce.
•If the applance s dropped or leaks water or has
other falures, contact the authorsed servce. Do
not use the applance untl t s repared.
•When the applance s not n use or left to cool
down keep the applance and power cable out of
reach of chldren under 8 years old.
•The applance s not sutable for usng outdoors.
•Only use the orgnal parts or parts recommended
by the manufacturer.
1Important nstructons for safety and envronment

6 / EN Steam Iron / User Manual
•Do not attempt to dsmantle the applance.
•Your mans power supply should comply wth
the nformaton suppled on the ratng plate of
the applance.
•The mans supply of the applance must be
secured wth a mnmum 16 A fuse.
•Use the applance wth a grounded outlet only.
•Do not use the applance wth an extenson cord.
•Do not pull the power cable when unpluggng
the applance.
•Unplug the applance before cleanng t.
•Do not wrap the cable around the applance.
•Do not touch the applance or ts plug wth wet
or damp hands when the applance s plugged n.
•The soleplate and ts surroundng area can be
extremely hot. Contactng hot surfaces may
cause burns. Therefore whle or just after usng
the applance, pay attenton not to touch the
hot surfaces.
1Important nstructons for safety and envronment

7 / EN
Steam Iron / User Manual
•Neverusetheapplancenorneartocombustble
or nflammable places and materals.
•If you keep the packagng materals, store them
out of the reach of chldren.
1.2 Complance wth WEEE Drectve and
Dsposng of the Waste Product
Ths product comples wth EU WEEE Drectve (2012/19/EU).
Ths product bears a classfcaton symbol for waste electrcal
and electronc equpment (WEEE).Ths product has been
manufactured wth hgh qualty parts and materals whch can
be reused and are sutable for recyclng. Do not dspose of the
waste product wth normal domestc and other wastes at the end of ts
servce lfe. Take t to the collecton center for the recyclng of electrcal
and electronc equpment. Please consult your local authortes to learn
about these collecton centers.
1.3 Complance wth RoHS Drectve
The product you have purchased comples wth EU RoHS Drectve
(2011/65/EU). It does not contan harmful and prohbted materals
specfed n the Drectve.
1.4 Package Informaton
Packagng materals of the product are manufactured from
recyclablemateralsnaccordancewthourNatonalEnvronment
Regulatons. Do not dspose of the packagng materals together
wth the domestc or other wastes. Take them to the packagng
materal collecton ponts desgnated by the local authortes.
1Important nstructons for safety and envronment

8 / EN Steam Iron / User Manual
2.1 Overvew
The values whch are declared n the markngs affxed on your applance or the other prnted documents suppled wth t
represent the values whch were obtaned n the laboratores pursuant to the pertnent standards. These values may vary
accordng to the usage of the applance and ambent condtons.
2Your ron
1. Power cable
2. Iron base plate
3. Temperature adjustment knob
4. Lme removal (self clean)
button
5. Soleplate
6. Water spray nozzle
7. Water refll ld
8. Steam adjustment button
9. Shock steam button
10. Water sprayng button
11. Thermostat ndcator and
Auto-Off lght
2.2 Techncal data
Voltage : 220-240V~
50/60 Hz
Power
consumpton : 1950-2300 W
Insulaton class : I
Shock steam
amount : up to 120 g/mn
1
2
6
3
4
5
7
8
9
10 11

9 / EN
Steam Iron / User Manual
3.1 Intended use
Ths applance s ntended only for
household use and ronng; t s not
sutable for professonal use.
3.2 Intal use
Pror to ntal use, fll twce (see
3.3) and vaporze to remove the
manufacturng resdues (see
3.6). Meanwhle, use shock steam
button (9) frequently.
C
You can smell a
mld odour or see
whte sedments
comng out of the
soleplate holes.
After performng
vaporzng process
twce, such odours
and sedments wll
dsappear. Also
water droplets may
form wthn the
water reservor; ths
s normal.
3.3 Refllng the
water reservor
1. Unplug the applance.
2. Fll the water cup provded wth
the applance.
3. Open the water refll ld (7) and
fll the applance wth water up
to MAX level.
4. Close the water refll ld (7).
C
Your applance s
desgned for use
wth tap water. If
your tap water s
excessvely hard, we
recommend you to
use a mxture of tap
water wth potable
water.
3.4 Settng the
temperature
1. After the applance s plugged n,
set the temperature accordng
to the type of your fabrc
by turnng the temperature
adjustment knob (3) n clockwse
drecton (see. 3.5).
- Thermostat ndcator lght (11)
wll lght up.
3Operaton

10 / EN Steam Iron / User Manual
2. When the applance reaches the
set temperature, thermostat
ndcator lght (11) wll turn off
and the applance s ready to use.
3.5 Temperature and
steam settngs table
When settng the temperature
of the applance, consder the
followng table.
Fabric
Type Temperature
Setting Steam
Setting
Synthetic •
Without
steam
Silk •
Without
steam
Woolen ••
Without
steam
Cotton •••
With steam
Linen -
Jean
Max With steam
AWARNING:
Before ronng frst
check the label of
the garment.
C
If you don’t know
the fabrc of your
garment, frst ron
an nvsble part of
your garment and
determne a correct
ronng temperature
for t.
C
In order to prevent
the brght stans
that may form on
the synthetc fabrcs
such as slk, ron on
the reverse sde of
the fabrc. Do not use
the water sprayng
feature n order to
prevent the stan
formaton.
3.6 Steam ronng
1. Fll the water reservor (see. 3.3).
2. Set the appropriate temperature
with the temperature adjust-
ment knob (3) (see 3.5).
A
WARNING:
For
ironing with steam,
temperature adjust-
ment knob should
be at “•••” or “max”
position.
3Operaton

11 / EN
Steam Iron / User Manual
3.7 Shock steam
A
WARNING:
Set
the temperature
adjustment knob to
a position where the
steam symbol will
be between the “ ”
range.
1. Fll the water reservor (see. 3.3).
2. Set the temperature adjustment
knob (3) to steam range by
turnng t n the clockwse
drecton.
- Thermostat ndcator lght (11)
wll lght up.
3. When the applance reaches the
set temperature, thermostat
ndcator lght (11) wll turn off.
4. After the thermostat ndcator
lght (11) turns off, you can ron
the garments wth the powerful
steam by pressng the shock
steam button (9).
A
WARNING:
If
ths process s
mantaned for a
prolongedtmewater
may come through
the soleplate (5)
together wth steam.
A
WARNING:
In
order to use the
shock steam feature
the thermostat
ndcator lght (11)
should be turned off.
3.8 Vertcal steam
You can also use the shock steam n
uprght poston (see. 3.7). You can
apply steam to your curtans and
your garments on the hanger wth
the steam you wll get by pressng
the shock steam button (9). Hold
the applance 15-30 cm away from
the garment and curtans.
A
WARNING:
During
the ironing if the
thermostat indicator
light (11) turns on,
before proceeding
with the shock steam
process wait for the
light to turn off.
AWARNING:
Never
drect ths steam to
people or pets.
3Operaton

12 / EN Steam Iron / User Manual
3.9 Sprayng water
1. Fll the water reservor (see. 3.3).
2. Set the temperature (see. 3.5).
3. Press the water sprayng button
(10) to spray water.
C
You can easly
remove creases
usng the water
sprayng feature.
3.10 Dry ronng
In order to make dry ronng, set
the steam settng button (8) to the
OFF “ ” poston.
C
Havng water n the
applance would be
advantageous; you
may use the water
sprayng button (10)
when necessary.
3.11 Automatc
Shutdown (Auto-Off)
•If the applance s hold
statonary for 30 seconds whle
n horzontal poston, t wll be
automatcally turned off.
•If the applance s hold statonary
for 7-10 mnutes whle n uprght
poston, t wll be automatcally
turned off.
•If the applance s hold statonary
for 30 seconds whle n a leaned
(rght or left) poston, t wll be
automatcally turned off.
C
In case of automatc
turn off the auto-off
lght (11) flashes.
•If the applance s moved n
horzontal poston t wll be
turned on.
C
It may take 60
seconds for the
soleplate (5) to reach
the prevously set
temperature.
3Operaton

13 / EN
Steam Iron / User Manual
4.1 Cleanng
A
WARNING:
When
you are fnshed
wth ronng, unplug
the applance. You
can dran the water
n the reservor by
openng the refll ld
(7) and tltng the
ron to the front.
1. Unplug the applance before
cleanng.
2. Wat for the applance to cool
down completely.
3. Use a slghtly damp cloth to
clean the outer surface of
the applance. Then dry t
thoroughly.
4. Wpe the sedments and
resdues on the soleplate (5)
wth a slghtly damp cloth and
soft, nonabrasve lqud cleaner
as necessary.
A
WARNING:
Do
not use gasolne,
solvent and abrasve
cleanng agents or
hard brush to clean
the applance.
4.2 Lme removal
(Self-Clean)
Lme removal functon cleans the
lme partcles accumulated n the
steam generator reservor of the
applance.
Use ths functon once n every
2 to 3 weeks. If the tap water s
very hard (f lme partcles fall
down from the soleplate (5) of the
applance), use the lme removal
functon more frequently.
1. Unplug the applance.
2. Refll the applance wth water
(see. 3.3).
3. Plug n the applance and set the
temperature adjustment knob
(3) to max. poston by turnng t
n the clockwse drecton.
4. When the thermostat ndcator
lght (11) turns off, unplug the
applance.
5. Keep the applance n a
horzontal poston over the snk
and shake the applance whle
pressng and holdng the lme
removal button (4). Contnue
untl the water n the reservor s
depleted.
4Cleanng and mantenance

14 / EN Steam Iron / User Manual
C
It may take some
tme for the water to
drp from the holes of
the soleplate.
6. After the reservor becomes
fully empty, release the lme
removal button (4).
7. If there s stll sedment, repeat
ths process.
8. Followng the lme removal
process, let the applance cool
n uprght poston. After the
applance cools down, wpe off
the soleplate (5) wth a cloth.
4.3 Storage
If you do not ntend to use the
applance for a long tme, store t
carefully.
•Before lftng the applance
unplug t and then let t cool
completely.
•Empty the water reservor.
•Keep the applance and ts
accessores n ther orgnal
packages.
•Store t n a cool, dry place.
•Always keep the applance out of
the reach of chldren.
4.4 Handlng and
transportaton
•Durng handlng and
transportaton, carry the
applance n ts orgnal
packagng. The packagng of
the applance protects t aganst
physcal damages.
•Do not place heavy loads on the
applance or the packagng. The
applance may be damaged.
•Droppng the applance wll
render t non-operatonal or
cause permanent damage.
4Cleanng and mantenance

15 / EN
Steam Iron / User Manual
5Troubleshootng
Although the appliance is plugged in, soleplate (5) does not heat up.
The appliance may be connected improperly.
>>> Check the plug and power
cable (1) of the appliance.
Temperature adjustment knob (3) may be at the Min. position.
>>> Turn the
temperature adjustment knob in the clockwise direction up to the steam sign.
The appliance does not generate steam.
The water reservoir may not have enough water. >>> Fill the water reservoir
with water up to Max level (see. 3.3).
Steam setting button (8) may be at without-steam position. >>> Switch the
steam setting button to the steam position (see. 3.6).
Shock Steam – Vertical Steam does not function.
These functions may have been used too frequently in a very short period of time.
>>> Keep ironing at a horizontal position and wait for a while before using the
shock steam function again. >>> Soleplate (5) may not be hot enough. Turn the
Temperature adjustment knob (3) in the clockwise direction up to the steam sign.
Seat the appliance in a vertical position and wait for the soleplate to heat up.
Water drops fall down onto the fabric during ironing.
You may not have securely closed the water refill lid (7).
>>> Close the water
refill lid securely.
You may be using the shock steam at temperature level
•
or
••
.
>>> Increase the temperature level (see. 3.7).
During ironing, sediments and residues fall down from the soleplate (5).
If the water you use for your appliance is too hard, such sediments may form.
>>>
Use the self-clean function for once or a few times (see. 4.2). For the subsequent
ironings fill the water reservoir of the appliance with a mixture of tap water and
potable water.
The appliance drops water after it cools down or stored.
You may have left the appliance on a horizontal position while there is water in its
reservoir.
>>> Empty the water reservoir.
Stains at the soleplate (5).
Wet garments might have been ironed and the soleplate (5) has had lime stains.
>>> After the appliance cools enough, wipe the soleplate with a microfiber
knitted or cotton cloth soaked in vinegar.

Bitte lesen Sie zuerst diese Anleitung!
Sehr geehrte Kundin, sehr geehrter Kunde,
Vielen Dank, dass Sie sich für ein Beko-Produkt entschieden haben.
Wir hoffen, dass Sie mit diesem Produkt, das mit den höchsten
Qualitätsanforderungen und der modernsten Technologie
hergestellt wurde, beste Ergebnisse erzielen. Bitte lesen Sie die
gesamte Bedienungsanleitung und alle anderen Begleitdokumente
aufmerksam, bevor Sie das Produkt verwenden; bewahren Sie sie zum
künftigen Nachschlagen sicher auf. Wenn Sie das Produkt an einen
Dritten weitergeben, händigen Sie bitte auch diese Anleitung aus.
Befolgen Sie alle Warnhinweise und Informationen in dieser Anleitung.
Symbole
Folgende Symbole werden in den verschiedenen Abschnitten dieser
Anleitung verwendet:
C
Wichtige Informationen und
nützliche Tipps in Bezug auf die
Verwendung.
AWARNUNG:
Warnhinweise zu
gefährlichen Situationen im Hinblick
auf die Sicherheit von Leib, Leben
und Eigentum.
WARNUNG:
Warnung vor heißen
Flächen.
Es enthält ken PCB.
Deses Produkt wurde n umweltfreundlchen, hochmodernen Enrchtungen hergestellt
Hergestellt n: P.R.C.

17 / DE
Bügeleisen / Bedienungsanleitung
Deser Abschntt enthält Scherhetsanwesungen,
de bem Schutz vor Personen- und Sachschäden
helfen.
Be Nchtbeachtung deser Anwesungen erlscht de
gewährte Garante.
1.1 Allgemene Scherhet
•Deses Gerät stmmt mt nternatonalen
Scherhetsstandards überen.
•Deses Gerät kann von Kndern m Alter von
mndestens 8 Jahren und Personen mt
engeschränkten physschen und psychschen
Fähgketen oder enem Mangel an Erfahrung
und Wssen m Umgang mt dem Gerät
verwendet werden, sofern se beaufschtgt
werden oder m scheren Umgang mt dem
Gerät unterwesen wurden und de damt
verbundenen Gefahren verstehen. Knder
dürfen ncht mt dem Gerät spelen. Rengungs-
und Wartungsarbeten dürfen ncht von Kndern
ausgeführt werden, sofern dese ncht durch
enen Erwachsenen beaufschtgt werden.
1Wchtge Anwesungen zu Scherhet und Umwelt

18 / DE Bügeleisen / Bedienungsanleitung
•Lassen Se das Gerät nemals unbeaufschtgt,
während es angeschlossen st.
•Zehen Se den Netzstecker, bevor Se den
Wasserbehälter auffüllen.
•Verwenden und lagern Se das Gerät auf enem
flachen und stablen Untergrund.
•Achten Se darauf, dass der Untergrund unter
der Platte eben st, wenn Se das Gerät auf de
Bassplatte stellen.
•Verwenden Se das Gerät ncht, wenn das
Netzkabel oder das Gerät selbst beschädgt
st. Wenden Se sch an enen autorserten
Servceanbeter.
•Falls das Gerät heruntergefallen st, leckt
oder andere Fehler aufwest, wenden Se sch
btte an enen autorserten Servceanbeter.
Verwenden Se das Gerät erst weder, nachdem
es reparert wurde.
•Halten Se Gerät und Netzkabel be
Nchtbenutzung oder während des Abkühlens
von Kndern unter 8 Jahren fern.
1Wchtge Anwesungen zu Scherhet und Umwelt

19 / DE
Bügeleisen / Bedienungsanleitung
•Das Gerät st ncht zur Benutzung m Freen
geegnet.
•NurOrgnalteleundvomHerstellerempfohlene
Tele verwenden.
•Ncht versuchen, das Gerät zu demonteren.
•Ihre Stromversorgung muss mt den Angaben
am Typenschld des Gerätes überenstmmen.
•De Stromversorgung des Gerätes muss
mt ener Scherung von mndestens 16 A
abgeschert werden.
•Verwenden Se das Gerät nur mt ener
geerdeten Steckdose.
•Gerät ncht mt enem Verlängerungskabel
verwenden.
•Bem Trennen des Gerätes ncht am Netzkabel
selbst zehen.
•Vor der Rengung den Netzstecker zehen.
•Netzkabel ncht um das Gerät wckeln.
•Gerät oder Netzstecker be Verbndung mt der
Stromversorgung ncht mt feuchten oder gar
nassen Händen berühren.
1Wchtge Anwesungen zu Scherhet und Umwelt

20 / DE Bügeleisen / Bedienungsanleitung
•De Sohle und der umlegende Berech können
extrem heß werden. Be Berührung heßer
Flächen drohen Verbrennungen. Achten Se
daher während und unmttelbar nach der
Benutzung darauf, kene heßen Flächen zu
berühren.
•Gerät nemals an oder n der Nähe von Stellen
benutzen, an denen sch lecht brennbare oder
gar explosve Materalen befnden.
•Falls Se de Verpackungsmateralen aufheben
möchten, bewahren Se se außerhalb der
Rechwete von Kndern auf.
1Wchtge Anwesungen zu Scherhet und Umwelt
Other manuals for SIM4123T
1
Table of contents
Languages:
Other Beko Iron manuals

Beko
Beko BKK 21233 User manual

Beko
Beko BKK 2304 User manual

Beko
Beko SPA 9130 B User manual

Beko
Beko SIM4126B User manual

Beko
Beko BKK 2174 User manual

Beko
Beko SPM7128P User manual

Beko
Beko ActiPress MasterPro BKU 8130 User manual

Beko
Beko SIM 3124 D User manual

Beko
Beko BKK 2174 User manual

Beko
Beko SIM4118NS User manual