SPT RF-314W User manual

Instruction Manual
3.1 CU. FT. Refrigerator
RF-314W (WHITE)
RF-314SS (STAINLESS STEEL)

Contents
1.
SAFETY WARNINGS............................................................................................................ 1
2.
INSTALLTION...................................................................................................................... 2
3.
PRODUCT OVERVIEW ..........................................................Error! Bookmark not defined.
4.
OPERATION..........................................................................Error! Bookmark not defined.
5.
CLEANING .......................................................................................................................... 6
6.
MAINTENANCE .................................................................................................................. 6
7.
TROUBLE SHOOTING ......................................................................................................... 7
8.
TIPS FOR ENERGY SAVING ................................................................................................. 7
.
DISPOSAL ........................................................................................................................... 8

1
1. SAFETY WARNINGS
Caution: risk of fire
1) WARNING―Keep ventilation openings, in the appliance enclosure or in the built-in structure,
clear of obstruction.
2) WARNING―Do not use mechanical devices or other means to accelerate the defrosting process,
other than those recommended by the manufacturer.
3) WARNING―Do not damage the refrigerant circuit.
4) WARNING―Do not use electrical appliances inside the food storage compartments of the
appliance, unless they are of the type recommended by the manufacturer.
5) WARNING―D NGER: Risk of child entrapment. Before you throw away your old refrigerator or
freezer:
• Take off the doors
• Leave the shelves in place so that children may not easily climb inside.
6) The appliance has to be unplugged before carrying out user maintenance on the appliance.
7) This appliance can be used by children age 8 years and above and persons with reduce physical
sensory or mental capabilities or lack of experience and knowledge if they have been given
supervision or instruction concerning use of the appliance in a safe way and understand the
hazards involved. Children shall not play with the appliance. Cleaning and maintenance shall not
be made by children without supervision.
8) If the supply cord is damaged, it must be replaced by the manufacturer, its service agent or
similarly qualified persons in order to avoid a hazard.
9) Please abandon the refrigerator according to local regulators as the unit contains flammable
blowing gas and refrigerant.
10) Follow local regulations regarding disposal of the appliance due to flammable refrigerant and
blowing gas. Before you dispose the appliance, please take off the doors to prevent children from
being trapped.
11) This appliance is intended to be used in household and similar applications such as
• staff kitchen areas in shops, offices and other working environments;
• farm houses and by clients in hotels, motels and other residential type environments;
• bed and breakfast type environments;
• catering and similar non-retail applications.
12) Do not store explosive substances such as aerosol cans with a flammable propellant in this
appliance.
IT IS HAZARDOUS FOR ANYONE OTHER THAN AUTHORISED SERVICE PERSONNEL TO
CARRY OUT SERVICES OR REPAIRS INVOLVING THE REMOVAL OF COVERS.
TO AVOID THE RISK OF AN ELECTRICAL SHOCK DO NOT ATTEMPT REPAIRS YOURSELF.

2
2. INSTALLTION
2.1 Location
When select ng a pos t on for your un t, please make sure the floor s flat and f rm. The room
should be well vent lated w th an amb ent room temperature between 61°F and 100°F. Avo d
locat ng your un t near a heat source, e.g. cooker, bo ler or rad ator. Also avo d d rect sunl ght as t
may ncrease the electr cal consumpt on. Extreme cold temperatures may cause the un t not to
perform properly. Th s un t s not des gned for use n garage or outdoor nstallat on. Do not drape
the un t w th any cover ng.
Please keep a clearance of 8 nches on both s des, 6 nches n the rear and 8 nches above the
un t. Th s allows for proper a r c rculat on around the refr gerator and mproves the un t’s cool ng
eff c ency. The door can be opened to the r ght or the left, depend ng on what better su ts the
locat on. Please ensure there s adequate space for the door to fully open.
2.2 Reversing the Door Swing
Tools Required:
Ph ll ps style screwdr ver / Flat blade screwdr ver / Hexagonal spanner
We recommend that 2 people handle the un t for door reversal.
Be sure the un t s unplugged and empty.
T lt the un t backwards and rest the un t on someth ng sol d so that t w ll not sl p.
Adjust the two level ng feet to the r h ghest pos t on.
All parts removed must be saved for re nstallat on of the door.
1) Remove the bracket from the bottom of the
refr gerator. Unscrew the two screws fro the
bottom bracket. Remove the foot from the
oppos te s de.
2) Parts removed: Screws (x2), Bottom Bracket /
Foot. Place to one s de
3) Sl de door down and away from the h nge p n
located on the top of the door.

3
4) Remove plast c cover from the door h nge and
unscrew the two screws from the top bracket
and transfer to the other s de.
5) Install top bracket w th the two screws on the
other s de. Sl de the door onto the top h nge. Be
sure the door s the r ght way up. Install the
plast c cover over the top bracket by press ng
down unt l t cl cks nto pos t on
6) Install the bottom h nge w th the two screws on
the on the new s de. Install foot on the other
s de
7) Check and make sure door s al gned hor zontally
and vert cally and that the seals are closed on all
s des before f nal t ghten ng of the bottom h nge.
Adjust the level ng feet as needed.
2.3 Door Space Requirements
The un t's door must be able to open fully as shown.
W×D≥31.5 n.×30.7 n.
2.4 Leveling the Unit
Adjust the two level ng feet at the front of the un t.
If the un t s not leveled, the door and magnet c seal al gnments
w ll not be covered properly.
W
D

4
2.5
Cleaning
Before Use
W pe the ns de of the un t w th a weak solut on of b carbonate soda. Then w pe w th a “wrung-
out” sponge or cloth w th warm water. Wash the shelves and salad b n n warm soapy water and
dry completely before replac ng n the un t. Clean the exter or of the un t w th a damp cloth.
If you requ re more nformat on refer to the Clean ng sect on.
2.6 Before Using Your Unit
Before plac ng any food n your un t, turn t on and wa t for 24 hours to make sure t s work ng
properly. Th s w ll also allow the un t to fall to the correct temperature. Your un t should not be
overf lled.
• Before Plugging - Please check that you have a wall socket that s compat ble w th the plug
suppl ed.
• Before Turn ng On – Please allow un t to s t for a m n mum of 2 hours, allow ng the coolant
to settle.
2.7 Interior Accessories
Various glass or plastic storage shelves are included with your appliance - different
models have different combinations.
In order to make the most of the storage volume, you can remove shelves or drawer
according to your usage needs. It is recommended to place one of the full size
shelves in the lowest set of guides (above the fruit and vegetable container) and keep
it in this position.
3. PRODUCT OVERVIEW
emperatUre control
Glass bottle rack
Vegetable and fruit crisper
*All images in this instruction manual are for indication only; please refer to your individual unit for details.
Temperature control

MAX
MED
MIN
OFF
4. OPERATION
4.1 Adjusting the emperature
• OFF = Power off
• MIN = Least cool temperature setting
• MED = Normal operation (suggested setting for most situations)
• MA = Coldest temperature setting
• During high ambient temperatures e.g. on hot summer days, it may be necessary to
set the thermostat on the coldest setting (MA ). This may cause the compressor to
run continuously in order to maintain a low temperature inside the cabinet.
• Please give your refrigerator time to cool down completely before adding food.
During initial use or after defrosting, we recommend setting the control to MA for a
minimum of 2 hours before adding food.
• Be careful the drawer does not mangle the refrigeration pipeline.
• The thermostat knob controls the temperature. When the thermostat control knob is
set to OFF, unit will not be running.
4.2 Noise Inside the Unit!
You may not ce that your un t makes some unusual no ses. Most of these are perfectly normal,
but you should be aware of them!
These no ses are caused by the c rculat on of the refr gerant n the cool ng system. It has become
more pronounced s nce the ntroduct on of CFC free gases. Th s s not a fault and w ll not affect
the performance of your un t. Th s s the compressor motor work ng, as t pumps the refr gerant
around the system.
4.3 ips for Keeping Food in the Unit
• Cooked food should always be stored on a shelf above raw meats/f shes to avo d bacter a
transfer. Keep raw meats/f shes n a conta ner that s large enough to collect ju ces and
cover t properly. Place the conta ner on the lowest shelf.
• Leave space around your food to allow a r to c rculate ns de the un t. Ensure all parts of
the un t are kept cool.
• To prevent transfer of flavors and dry ng out, pack or cover the food separately. Fru ts
and vegetables do not need to be wrapped.
• Always allow pre-cooked food to cool down before plac ng ns de the un t. Th s w ll help
to ma nta n the nternal temperature of the un t.
• To prevent cold a r escap ng, try to l m t the frequency of door open ng.

6
5. CLEANING
5.1 Defrosting
Frost may accumulate on the nner rear surface of the appl ance,
wh ch w ll automat cally defrost dur ng the cycle of the compressor.
Water s channeled v a the dra n hole to the collect on tray above the
compressor where t w ll evaporate.
Please ensure the dra n hole s checked and cleaned on a regular bas s
so water can ex t the storage compartment.
5.2 Cleaning the Interior and the Exterior of the Unit
• Remove shelves and the salad b n.
• W pe the ns de of the un t w th a weak solut on of b carbonate soda and then w pe
clean w th a “wrung-out” sponge or clothe of warm water. W pe completely dry before
replac ng the shelves and salad b n.
• Use a damp cloth to clean the exter or and f n sh w th a standard furn ture pol sh. Make
sure the door s closed to avo d the pol sh gett ng on the door seal or ns de the un t.
• The condenser gr lle located at the back of the un t and the adjacent components can be
vacuumed us ng a soft brush attachment.
5.3 Cleaning ips
Condensat on may appear on the outs de of the un t. Th s may be due to change n room
temperature. W pe off any mo sture res due. If the problem cont nues, please contact a qual f ed
techn c an for ass stance.
6. MAINTENANCE
6.1 Changing the Internal Light
Lamp replacement by profess onals.
6.2 Care When Handling / Moving Your Unit
Handle the un t by ts s des or base when mov ng t. Under no c rcumstances should t be l fted by
hold ng the edges of the top surface.
6.3 Servicing
The un t should be serv ced by an author zed eng neer and only genu ne spare parts should be
used. Under no c rcumstances should you attempt to repa r the un t yourself. Repa rs carr ed out
by nexper enced persons may cause njury or ser ous malfunct on.
6.4 Vacation / Storage
If the un t s not to be used for a long per od of t me, turn the thermostat to OFF pos t on and
unplug from power source. Empty all contents and clean the appl ance. Leave the door ajar to
prevent mold/m ldew growth and unpleasant smells.

7
7. Troubleshootin
The follow ng ssues can be handled by the user. If problem pers sts, please contact Sunpentown
Customer Serv ce at 1-800-330-0388.
No power
Un t s not plugged n. Check outlet and c rcu t.
Low voltage.
Power fa lure power.
Odor
Odorous foods should be closely wrapped.
Check for any rotten food.
Clean the nter or.
Long-term operat on of
compressor
It s normal for the un t to operate for longer per ods of t me
dur ng the hotter days when amb ent temperature s h gher.
Do not put too much food n the un t at one t me.
Wa t for food to cool down before plac ng them n the un t.
Frequent open ng of refr gerator door.
L ght does not llum nate Check f refr gerator s connected to power.
Check f bulb s damaged.
The refr gerator door cannot
close properly
Too much food ns de the un t and the door s blocked by food
packages.
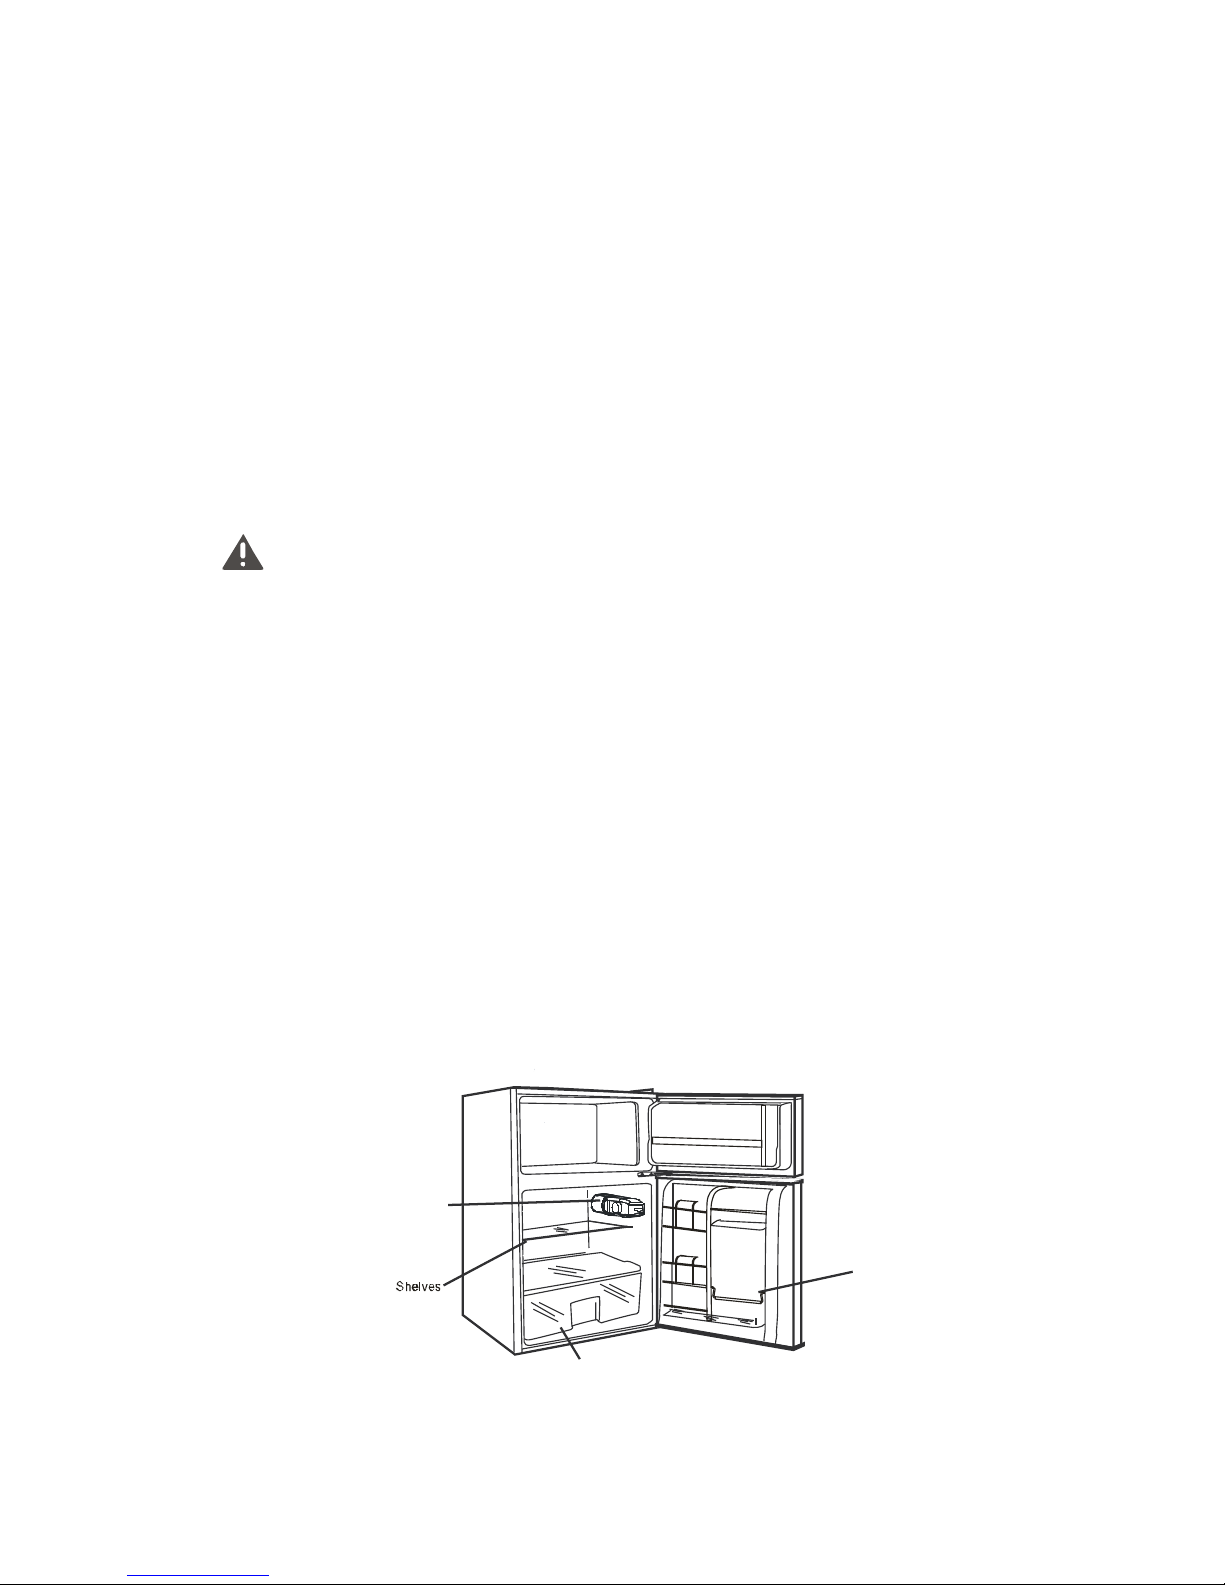
Adjust the level ng leg.
Loud no ses Check f un t s leveled.
No se cause by the refr gerant c rculat ng s normal
7.1 NO ES:
• The refr gerator may em t heat dur ng operat on, espec ally n summer, th s s caused by
the rad at on of the condenser, and t s a normal phenomenon.
• Condensat on: condensat on may be detected on the exter or surface and door seals of
the freezer when the amb ent hum d ty s h gh. Th s s a normal. S mply w pe away the
condensat on w th a dry towel.
• Buzz: the compressor w ll buzz dur ng start ng up or shutt ng down.
8. TIPS FOR ENERGY SAVING
• Try not to open the door too often, espec ally when the weather s hum d and hot. Once
you open the door, close t as soon as poss ble.
• Check the un t’s vent lat on per od cally to ensure adequate a r c rculat on beh nd the
un t.
• In normal temperature cond t ons, please set the thermostat at the m ddle sett ng.
• Before load ng the appl ance w th packages of fresh food, make sure they are cooled to
amb ent temperature.
• Ice and frost layer ncrease energy consumpt on, so clean the appl ance as soon as the
layer s 3-5 mm th ck.
• Keep the rear (condenser) free of dust and mpur t es.
• The appl ance should be located n the coolest area of the room, away from heat
produc ng appl ance or heat ng ducts and out of d rect sunl ght.
• Overload ng the appl ance forces the compressor to run longer. Foods that freeze too
slowly may lose qual ty or spo l.

8
• Wrap foods properly and w pe conta ners dry before plac ng them n the refr gerator.
Th s cuts down on frost bu ld-up ns de the appl ance.
• Do not l ne the storage b n w th alum num fo l, wax paper or paper towel. L ners
nterfere w th cold a r c rculat on, mak ng the appl ance less eff c ent.
• Organ ze and label food to reduce door open ngs and extended searches. Remove as
many tems as needed at one t me and close the door as soon as poss ble.
9. DISPOSAL
Old un ts st ll have some res dual value. An env ronmentally fr endly method of d sposal w ll
ensure that valuable raw mater als can be recovered and used aga n. The refr gerant used n your
un t and nsulat on mater als requ re spec al d sposal procedures. Ensure that none of the p pes
on the back of the un t are damaged pr or to d sposal. Up to date nformat on concern ng opt ons
of d spos ng of your old un t and packag ng from the new one can be obta ned from your local
counc l off ce.
When d spos ng an old un t, break off any locks or latches and remove the door as a safeguard.
Correct D sposal of th s product
Th s mark ng nd cates that th s product should not be d sposed w th other household
wastes. To prevent poss ble harm to the env ronment or human health from uncontrolled
waste d sposal, recycle t respons bly to promote the susta nable reuse of mater al
resources.
For more nformat on, please contact the local author ty or your reta ler where you purchased
the product.

9
Your Guarantee
If this product is found to be faulty as a result of faulty materials or workmanship within one
year from date of purchase, it will be repaired free of charge.
This guarantee is subject to the following terms:
• Sunpentown must be notified of the fault.
• Proof of purchase must be presented to Sunpentown’s nominated representative.
• The warranty will be void if the product if modified, misused or repaired by an
unauthorized person.
• The warranty after repair will not be extended beyond the original one-year period.
• All replacement parts will be new or reconditioned.
• Parts, which are replaced, become the property of Sunpentown.
• The warranty applies for the use of the product in the USA only.
What is NOT COVERED:
• Warranty does not include freight charges.
• Incidental or consequential damage caused by possible defects with this product.
• Damage to product caused by improper power supply voltage, accident, fire, floods or acts
of nature.
• Failure of product resulting from unauthorized modifications to the product.
• Improper installation or failure to perform the necessary maintenance.
This GUARANTEE is in addition to your Statutory Rights
SUNPENTOWN INTERNATIONAL INC.
14625 Clark Ave. City of Industry, CA 91745
Tel: 800-330-0388
service@sunpentown.com
www.sunpentown.com
This manual suits for next models
1
Table of contents
Other SPT Refrigerator manuals