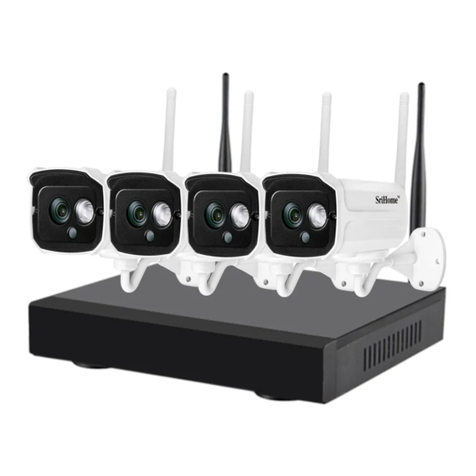
Sricam NVS010 User guide

Wireless NVR
Quick Operation Guide
Applicable to NVS010
V1.0 CN202310
English

1. Connect the host correctly (as shown below)
3. If the camera test screen displays normally, then select the camera installation location
according to the channel corresponding to the screen.
(Tips: It is recommended that the installation location have as few partition walls as possible, and
the network signal is relatively stable within 30 meters of indoor installation)
1
Camera (12V)
NVR power supply(12V/2A)
Router
HDMI or VGA
Monitor (optional)
Mouse (optional)
WiFi
CH1
CH3
CH2
CH4
+2023-10-25 16:45:29
Login
User Name
Tips
Cancel
password
Forget Password?
admin
2. After powering on and waiting for startup to complete, you will see the camera screen on
the host display. (NVR default login password: 888888)
Install wireless NVR
(1) Please use the power adapter provided by the manufacturer to connect
(2) Connect the NVR to the router through a network cable (for local access, please skip this step)
888888

2
If the product you purchased does not come with a hard drive, please purchase a 2.5-inch
hard drive by yourself, 4T is recommended (maximum support is 16T)
Notice:
A: The camera has been paired with the NVR host at the factory, so there is no need to configure WiFi.
B: If you purchase a single product of NVS010 and need to add a camera, please refer to pages 3-4
of the manual.
The hard disk installation method is as shown below:
Note: Please do not connect the NVR to the power supply before installing the hard disk.
(1) Open the hard drive compartment cover from the buckle underneath the hard drive compartment.
(2) Connect a 2.5-inch SATA hard drive to the NVR hard drive interface and fix it on the hard drive
compartment cover with screws.
(3) Fasten the hard drive compartment cover.
2.5”HDD
NVS010 output VGA/HDMI settings
Click the start menu in the lower left corner -> click the normal device icon -> click
"Advanced" -> turn on "HDMI Display"
Warn:
After the HDMI interface is turned on, the current host will no longer be
displayed, and an external monitor must be connected to display it.
NVR installation hard disk
CH1
CH3
CH2
CH4
+2023-10-25 16:45:29
Add IPC
General
Camera
Record
Backup Maintenance
Motion
Ring
Network
HDD
P2P
Playback
Normal settings
Startup Wizard
Advanced
HDMI display
Screen Saver
Log in
X

3
Reset
Note: If the camera does not emit a "beep", "beep", "beep" network configuration prompt after 30 seconds
of power on, please keep the power on and hold the Reset button for 5 seconds. After hearing a long beep,
let go and wait for the camera. Restart.
CH1
CH3
CH2
CH4
+2023-10-25 16:45:29
+
1
+2023-10-25 16:45:29
Added Device List
Index IP address Mac address type operate
1
idle
Add
2
idle
Add
3
idle
Add
4
idle
Add
5
idle
Add
6
idle
Add
7
idle
Add
8
idle
Add
Set up relay wireless status
X
Method 1: Scan the QR code to add
It will take about 30 seconds after the camera is powered on to complete the power-on process.
After hearing the beep, beep, and beep sounds from the camera, do the following:
(1). Click the icon in the lower left corner of the monitoring display
(2). Click "Add" on the right side of the device list, and then select "QR code"
(3). Aim the camera lens at the QR code and keep a distance of 20-60cm. After the camera
recognizes the QR code, the camera emits a "ding" sound, indicating that the network
configuration is successful. After successful pairing, wait a few seconds to see the video in the
preview interface.
How to add a camera
Warn: Do not delete the camera in the added device list. After deletion, you need to pair it again.
X
Search
Select IPC connection method
Tip
Pair QR code
2

Reset
4
+2023-10-25 16:45:29
Available device list
Add IPC
Serial number IP Address Mac Address
1 192.168.1.4 00:2A:2B:FE:55:E0
00:2A:2B:FE:55:ED
00:2A:2B:FE:55:E0
00:2A:2B:FE:55:ED
00:2A:2B:FE:55:E0
00:2A:2B:FE:55:ED
2 192.168.1.6
3 192.168.1.10
4 192.168.1.12
5 192.168.1.15
6 192.168.1.18
Tip: Click the camera IP button in the available devices list to enter the add device page.
Add
X
Cameras in the same local network (support SriHome models with network interfaces) can be
added to the device by searching and adding. Select "Search" -> Select the camera you want to
add in the list of available devices and enter the camera password.
(Default password: 888888) Click Add to confirm.
WIFI
Method 2: Button pairing added
Method 3: Search and add
It will take about 30 seconds after the camera is powered on to complete the power-on process.
After hearing the beep, beep, and beep sounds from the camera, do the following:
+
(1). Click the icon in the lower left corner of the monitoring display
(2). Click "Add" on the right side of the device list, and then select "Pair"
(3). To connect, quickly press the reset button of the camera 5 times for pairing. When the camera
emits a "ding" sound, it indicates that the network configuration is successful. After successful
pairing, wait a few seconds to see the video in the preview interface.
2023-10-25 16:45:29
Index IP address Mac address type operate
Add
Add
Add
Add
Add
Add
Add
Add
Set up relay wireless status
X
Search
Select IPC connection method
Tip
Pair QR code
Added Device List

5
SriHome APP Setup
Step 1. SriHome App Installation
Method 2: Search“SriHome”on Google Play or iOS App Store.
Method 1: Scan the QR code to download “SriHome” App.
Step 2. Register & Login SriHome App
Step 3. Add the Device to App
Device
3-1
Add
Next
N0*******
Input the device’s ID
3-2
Input device name to search device
You can scan the
QR code or input the
Device ID manually
WiFi NVR
ID: N0***********
Password: 888888
RoHS
The label is attached on
the NVR
12
Note: The NVR host must be connected to the Internet for the mobile APP remote
monitoring function to be used.
Android iOS

6
FAQ
Settings
Settings
System
Time Settings
Video Settings
Alarm Settings
Record Settings
Network Settings
Security Settings
Visitors Management
Home
1 2 3
Add share user
User authorization Visitor
Operator
Visitor
Input new user’s APP ID
User Remarks
Share User
Visitors Management
Add
FAQ1: Share the Wireless NVR to other users
To protect the user's privacy, the first user is an administrator by default. Other users
accessing the Wireless NVR need administrator permission, or they cannot login even
with ID and password. The way to get permission is as follows:
2. Access the “SriHome” App, tap Settings -> Visitor Management -> Add.
There are 2 types of permissions:
Operator:
Live video view, set time, alarm, record and network.
Visitor:
Viewing video only in real time
Note: You can find the user's App ID in
App Settings
1. Download SriHome App->Login Account->Add Camera ID
(Prompt no permission, please contact the administrator for authorization)

7
Click the main menu in the lower left corner >Device Maintenance >Restore Default
>Please select the default setting item you want.
FAQ3: If you forget your password, How to retrieve password
Login panel > Forgot password > Click Retrieve password > Check the recovery key on your bound
email account > Enter the key number, and your password will be displayed on the login panel.
FAQ2: If you forget who the administrator is, you can reset and
become a new administrator
CH1
CH3
CH2
CH4
+2023-10-25 16:45:29
Add IPC
General
Camera
Record
Backup Maintenance
Motion
Ring
Network
HDD
P2P
Playback
CH1
CH3
CH2
CH4
+2023-10-25 16:45:29
Add IPC
General
Camera
Record
Backup Maintenance
Motion
Ring
Network
HDD
P2P
Playback
Restore
IP address
System time
Password
Log
Other
X
OK Cancel
Upgrade Source USB
Mac address: 60:08:00:00:3B
Chip information: 714-W1
Series version: 6.3.17.11000000
System Upgrade
Select upgrade file
X
Upgrade
Restore
Reboot
Maintenance
CH1
CH3
CH2
CH4
+2023-10-25 16:45:29
Retrieve password
Random number 43501922
Retrieve password
OK
Recovery key
Select 'Retrieve Password' and check your recovery email
account for the recovery key
X
CH1
CH3
CH2
CH4
+2023-10-25 16:45:29
Retrieve password
Random number 43501922
Retrieve password
OK
Recovery key
****
Password: *******
X
CH1
CH3
CH2
CH4
+2023-10-25 16:45:29
Retrieve password
Random number 43501922
Retrieve password
OK
Recovery key
Select 'Retrieve Password' and check your recovery email
account for the recovery key
X
CH1
CH3
CH2
CH4
+2023-10-25 16:45:29
Login
User Name
Tips
Cancel
password
Forget Password?
admin
888888
Exit
Tip
Send successfully, please confirm the recovery
key in the mobile phone mailbox.

NVR inalámbrico
Guía de operación rápida
Aplicable a NVS010
V1.0 CN202310
Español

1. Conecte el host correctamente (como se muestra a continuación)
3. Si la pantalla de prueba de la cámara se muestra normalmente, seleccione la ubicación de
instalación de la cámara de acuerdo con el canal correspondiente a la pantalla.
(Consejos: se recomienda que la ubicación de instalación tenga la menor cantidad de paredes
divisorias posible y que la señal de la red sea relativamente estable dentro de los 30 metros de la
instalación interior.)
1
Cámara (12V)
Fuente de alimentación NVR (12V/2A)
Enrutador
HDMI o VGA
Monitorear (opcional)
Ratón (opcional)
WiFi
CH1
CH3
CH2
CH4
+2023-10-25 16:45:29
Login
User Name
Tips
Cancel
password
Forget Password?
admin
2. Después de encender y esperar a que se complete el inicio, verá la pantalla de la cámara en
la pantalla del host. (Contraseña de inicio de sesión predeterminada de NVR: 888888)
Instalar NVR inalámbrico
(1) Utilice el adaptador de corriente proporcionado por el fabricante para conectar
(2) Conecte el NVR al enrutador a través de un cable de red (para acceso local, omita este paso)
888888

2
Si el producto que compró no viene con un disco duro, compre usted mismo un disco duro
de 2,5 pulgadas; se recomienda 4T (el soporte máximo es 16T)
Aviso:
A: La cámara se ha emparejado con el host NVR de fábrica, por lo que no es necesario configurar WiFi.
B: Si compra un solo producto de NVS010 y necesita agregar una cámara, consulte las páginas 3-4
del manual.
El método de instalación del disco duro es el que se muestra a continuación:
Nota: No conecte el NVR a la fuente de alimentación antes de instalar el disco duro.
(1) Abra la cubierta del compartimiento del disco duro desde la hebilla debajo del compartimiento
del disco duro.
(2) Conecte un disco duro SATA de 2,5 pulgadas a la interfaz del disco duro del NVR y fíjelo en la c
ubierta del compartimiento del disco duro con tornillos.
(3) Fije la cubierta del compartimiento del disco duro.
2.5”HDD
NVS010 output VGA/HDMI settings
Haga clic en el menú de inicio en la esquina inferior izquierda -> haga clic en el icono del
dispositivo normal -> haga clic"Avanzado" -> activar "Pantalla HDMI"
Advertencia: Después de encender la interfaz HDMI, el host actual ya no se
mostrará y se deberá conectar un monitor externo para mostrarlo.
Disco duro de instalación NVR
CH1
CH3
CH2
CH4
+2023-10-25 16:45:29
Add IPC
General
Camera
Record
Backup Maintenance
Motion
Ring
Network
HDD
P2P
Playback
Normal settings
Startup Wizard
Advanced
HDMI display
Screen Saver
Log in
X

3
Reiniciar
Nota: Si la cámara no emite un mensaje de configuración de red "bip", "bip", "bip" después de 30 segundos
de encendido, mantenga la alimentación encendida y mantenga presionado el botón Restablecer durante 5
segundos. Después de escuchar un pitido largo, suéltalo y espera la cámara. Reanudar.
CH1
CH3
CH2
CH4
+2023-10-25 16:45:29
+
1
+2023-10-25 16:45:29
Added Device List
Index IP address Mac address type operate
1
idle
Add
2
idle
Add
3
idle
Add
4
idle
Add
5
idle
Add
6
idle
Add
7
idle
Add
8
idle
Add
Set up relay wireless status
X
Método 1: escanea el código QR para emparejar y agregar
Pasarán unos 30 segundos después de encender la cámara para completar el proceso de encendido.
Después de escuchar los pitidos, pitidos y pitidos de la cámara, haga lo siguiente:
(1). Haga clic en el icono en la esquina inferior izquierda de la pantalla de monitoreo
(2). Haga clic en "Agregar" en el lado derecho de la lista de dispositivos y luego seleccione "Código QR".
(3). Apunte la lente de la cámara al código QR y mantenga una distancia de 20-60 cm. Después de
que la cámara reconoce el código QR, emite un sonido "ding", lo que indica que la configuración
de la red se realizó correctamente. Después del emparejamiento exitoso, espere unos segundos
para ver el video en la interfaz de vista previa.
Cómo agregar una cámara
Advertencia: No elimine la cámara en la lista de dispositivos agregados. Después de la
eliminación, deberá volver a emparejarlo.
X
Search
Select IPC connection method
Tip
Pair QR code
2

Reiniciar
4
+2023-10-25 16:45:29
Available device list
Add IPC
Serial number IP Address Mac Address
1 192.168.1.4 00:2A:2B:FE:55:E0
00:2A:2B:FE:55:ED
00:2A:2B:FE:55:E0
00:2A:2B:FE:55:ED
00:2A:2B:FE:55:E0
00:2A:2B:FE:55:ED
2 192.168.1.6
3 192.168.1.10
4 192.168.1.12
5 192.168.1.15
6 192.168.1.18
Tip: Click the camera IP button in the available devices list to enter the add device page.
Add
X
Las cámaras en la misma red local (compatibles con modelos SriHome con interfaces de red) se
pueden agregar al dispositivo buscando y agregando. Seleccione "Buscar" -> Seleccione la
cámara que desea agregar en la lista de dispositivos disponibles e ingrese la contraseña de la
cámara. (Contraseña predeterminada: 888888) Haga clic en Agregar para confirmar.
WIFI
Método 2: agregar emparejamiento de botones
Método 3: buscar y agregar
Pasarán unos 30 segundos después de encender la cámara para completar el proceso de encendido.
Después de escuchar los pitidos, pitidos y pitidos de la cámara, haga lo siguiente:
+
(1). Haga clic en el icono en la esquina inferior izquierda de la pantalla de monitoreo
(2). Haga clic en "Agregar" en el lado derecho de la lista de dispositivos y luego seleccione "Emparejar".
(3). Para conectarse, presione rápidamente el botón de reinicio de la cámara 5 veces para emparejar.
Cuando la cámara emite un sonido "ding", indica que la configuración de la red se realizó
correctamente. Después del emparejamiento exitoso, espere unos segundos para ver el video en
la interfaz de vista previa.
2023-10-25 16:45:29
Index IP address Mac address type operate
Add
Add
Add
Add
Add
Add
Add
Add
Set up relay wireless status
X
Search
Select IPC connection method
Tip
Pair QR code
Added Device List

5
Nota: El host NVR debe estar conectado a Internet para poder utilizar la función de
monitoreo remoto de la aplicación móvil.
Configuración de la aplicación SriHome
Android iOS
Paso 1. Instalación de la aplicación SriHome
Método 2: busque "SriHome" en Google Play o iOS App Store.
Método 1: escanee el código QR para descargar la aplicación "SriHome".
Paso 2. Regístrese e inicie sesión en la aplicación SriHome
Paso 3. Agregue el dispositivo a la aplicación
Puede escanear el código
QR o ingresar la identificación
del dispositivo manualmente
WiFi NVR
ID: N0***********
Password: 888888
RoHS
equipo
3-1
Add
N0*******
Ingrese el ID del dispositivo
3-2
Introduzca el nombre del dispositivo del dispositivo de búsqueda
12
Próximo paso
La etiqueta está adherida al NVR .

6
FAQ
FAQ1: comparte el NVR inalámbrico con otros usuarios
Para proteger la privacidad del usuario, el primer usuario es un administrador por defecto.
Otros usuarios que acceden al NVR inalámbrico necesitan permiso de administrador o
no pueden iniciar sesión incluso con ID y contraseña. La forma de obtener el permiso
es la siguiente:
2. Acceda a la aplicación "SriHome", toque Configuración -> Administración de
visitantes -> Agregar.
Hay 2 tipos de permisos:
Operador:
Vista de video en vivo, ajuste de hora, alarma, registro y red.
Visitante:
Ver video solo en tiempo real
Nota: Puede encontrar la identificación de la aplicación del usuario en la configuración
de la aplicación
1. Descargue la aplicación SriHome->Iniciar sesión->Agregar ID de cámara
(No solicitar permiso, comuníquese con el administrador para obtener autorización)
FAQ-1 FAQ-2 FAQ-3
Home
Configuración
Configuración Agregar Usarios Agregar Usarios
Sistema
Configuración de hora
Configuración de video
Configuración de alarma
Configuración de grabación
Información de Internet
Gestión de visitantes
Cambiar la contraseña del dispositivo
1
Lista de Usarios
Agregar
Próximo paso
Seleccionar permisos
Ingrese el ID de la APLICACIÓN del
Notas para visitantes
OperadorUsario 1
Usario 2 Visitantes
Operador
24
3
9528222*****

7
Haga clic en el menú principal en la esquina inferior izquierda >Mantenimiento del dispositivo
>Restaurar valores predeterminados >Seleccione el elemento de configuración predeterminado
que desee.
FAQ3: Si olvida su contraseña, Cómo recuperarla
LPanel de inicio de sesión > Olvidé mi contraseña > Haga clic en Recuperar contraseña > Verifique
la clave de recuperación en su cuenta de correo electrónico vinculada > Ingrese el número de clave
y su contraseña se mostrará en el panel de inicio de sesión.
FAQ2: Si olvida quién es el administrador, puede restablecerlo y
convertirse en un nuevo administrador
CH1
CH3
CH2
CH4
+2023-10-25 16:45:29
Retrieve password
Random number 43501922
Retrieve password
OK
Recovery key
Select 'Retrieve Password' and check your recovery email
account for the recovery key
X
CH1
CH3
CH2
CH4
+2023-10-25 16:45:29
Retrieve password
Random number 43501922
Retrieve password
OK
Recovery key
****
Password: *******
X
CH1
CH3
CH2
CH4
+2023-10-25 16:45:29
Retrieve password
Random number 43501922
Retrieve password
OK
Recovery key
Select 'Retrieve Password' and check your recovery email
account for the recovery key
X
CH1
CH3
CH2
CH4
+2023-10-25 16:45:29
Add IPC
General
Camera
Record
Backup Maintenance
Motion
Ring
Network
HDD
P2P
Playback
CH1
CH3
CH2
CH4
+2023-10-25 16:45:29
Add IPC
General
Camera
Record
Backup Maintenance
Motion
Ring
Network
HDD
P2P
Playback
Restore
IP address
System time
Password
Log
Other
X
OK Cancel
Upgrade Source USB
Mac address: 60:08:00:00:3B
Chip information: 714-W1
Series version: 6.3.17.11000000
System Upgrade
Select upgrade file
X
Upgrade
Restore
Reboot
CH1
CH3
CH2
CH4
+2023-10-25 16:45:29
Login
User Name
Tips
Cancel
password
Forget Password?
admin
888888
Maintenance
Exit
Tip
Send successfully, please confirm the recovery
key in the mobile phone mailbox.
Table of contents
Languages:
Other Sricam DVR manuals
Popular DVR manuals by other brands
Lorex
Lorex LHWF1006 Series instruction manual
Interlogix
Interlogix TruVision DVR 40 user manual

Valore
Valore VMS63 quick start guide
U.S. Security Solutions
U.S. Security Solutions QS-X31ZAN quick start guide
Digimerge
Digimerge DHU600 Series instruction manual
Provision ISR
Provision ISR AHD Series user manual
