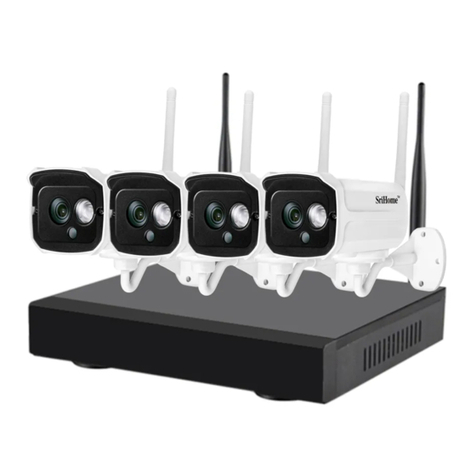
Sricam NVS001 User guide

1. Install wireless NVR
Thank you for purchasing our products, if you have any questions or needs, please contact us.
B. The maximum of hard disk capacity supported is 8TB (Terabytes).
1
4
1
3
2
LAN
1-1-1. Install HDD for NVS001
Install the hard disk with a cross screwdriver.
NVS004NVS001
Interface description
(1) Loosening the srews on the panel's rear and side.
(2) Remove the cover from the NVR.
A. Disconnect the power from the NVR before installing a hard disk drive (HDD).
Note:
USB Mouse
12V Adapter
Audio VGA
HDMI
LAN
USB Mouse
12V Adapter
Audio VGA
HDMI
1-1. Install HDD for NVR

Hard Disk Interface
2
1-1-2. Install HDD for NVS004
Install the hard disk with a cross screwdriver.
(3) Remove the battery insulation paper.
(4) Connect the data cable and power cable to HDD.
(5) Fasten the screws on the bottom to fix the HDD.
(6) Re-install the cover of the NVR and fasten screws.
Remove
Remove the insulator
before use

1-2. Connection NVR
Connect the mouse to the USB port of the NVR.
Connect to the monitor via an HDMI / VGA cable.
Connect to the internet (Router or Switch) via a net-cable (Local access please skip this step)
Connect to the DC 12V adapter and turn on the power.
Connection as below:
1-3. Connection the Cameras.
Power the camera through the DC adapter, and after 10 seconds, it will automatically connect
to the NVR.
Note:
A: The camera is connected to the NVR by default, and there is no need to configure WiFi.
B: The distance between the wireless camera and the NVR is within 30 meters.
1-4. Complete the basic settings according to the NVR startup guide.
(NVR default password: 888888).
3
Internet
DC adapter
Wireless connection
Router
or Switch
1
2
3
3
5
5
4
1
2
4
USB Mouse
12V Adapter
Monitor / TV
Audio
Smart phone Tablet

4
Follow the NVR startup wizard to complete the login settings.
(NVR default password: 888888)
admin
Login
Auto Login
NVR
2. NVR Login
3. Network Setting
Enter Desktop
When the network shows an abnormal state :
3-1. Check if your network cable is properly connected.
3-2. Double-click to open the network settings-select DHCP enable-OK.
3-3. If the DHCP function of the router is disabled, please enter the correct IP address manually.
X
Network
Net Card
192. 168. 1. 126
192. 168. 1. 1
183. 2. 1. 197
345865
80
1400MTU
8. 2. 4. 3
255. 266. 255 0
DHCP Enable
Network Testing
IP Address
Subnet Mask
Gateway
Primary DNS
Secondary DNS
TCP Port
HTTP Port
HS Download
Transfer Policy
OK Cancel
My Device PlayBack
Control Panel
Intemet
Record
Alarm
Camera
1
2
!
Netcard Perferred
Netcard Perferred
13:58:01
2021-10-19

5
4. SriHome APP Setup
Android iOS
Step 1. SriHome App Installation
Method 2: Search“SriHome”on Google Play or iOS App Store.
Method 1: Scan the QR code to download “SriHome” App.
Step 2. Register & Login SriHome App
Step 3. Add the Device to App
Device
3-1
Add
Next
N0*******
Input the device’s ID
3-2
Input device name to search device
You can scan the
QR code or input the
Device ID manually
WiFi NVR
ID: N0***********
Password: 888888
RoHS
The label is attached on
the NVR
12

B. Enter Desktop/Main Menu--My Device--Version--Serial NO.
Go to Desktop>Control Panel>Restore>Please select the default setting item you want.
Note: If you forget who is the administrator. Please select “APP user”, you can reset and become
a new administrator.
5. Reset
Enter Desktop
My Device
X
X
Version
Record Channel 16
Display software version and build date.
System 1.03.06720672.87020171.T000.22
Extra Info 1.15.205254565
Build Date 2021-03-05 16: 55:25
MAC C8:24:02:3e:ca:cf
SerialNo N382565RHDRU
OK
Enter Desktop
Control Panel
X
X
Restore
Please select setting entries that you want to default
Select all
General
Record Alarm Set
Net Service
Account
Network
Output Settings
RS232
APPUser
ALL Configuration
Cancel
OK
Note: A. The device ID is affixed to the label of the video recorder shell.
My Device PlayBack
Control Panel
Intemet
Record
Alarm
Camera
My Device PlayBack
Control Panel
Intemet
Record
Alarm
Camera
Restore system parameters to the factory default.
6
13:58:01
2021-10-19
13:58:01
2021-10-19

Note: 1. The camera and the wireless NVR have been paired at the factory.
2. Pair is only required for debugging and adding new cameras.
7
6. Add the Camera
Reset Reset
REC
RTSP
IP
WIFI
admin
CameraRecord Mode
Record ConfigPlay BackNetworkEncodeAlarmChannel TypeGUI DisplayBackupGeneralEevice Info
HDD ManageOutput AdjustRestoreUpgradeAutoMaintainImport/ExportLOGBPSCommon ConfigurationNet ServiceVersionControl PanelCloudLogout
Enter Desktop
When the camera is powered on for 20 seconds, the camera emits "di", "di" and "di" prompts.
Click the menu in the lower left corner of the display -> Click on -> Click on Icon distribution
network -> Align the QR code with a distance of 20-60cm, no beeping" After the prompt tone of
"di" and "di", it means that the network configuration is successful.
Note: 30 seconds after the camera is powered on, there is no prompt sound of "di", "di" or "di". Long press the
Reset button for 5 seconds, let go after hearing the prompt and wait for the camera to restart.
3
Reset
Aim the camera lens at the QR code and keep a distance of 20-60cm.
After the camera recognizes the QR code, the camera no longer emits
the beeping "di", "di" and "di", indicating that the network configuration
is successful, Wait a few seconds to see the video.
X
Wifi hotspot
ESSID host-d8:e6:e2
Wireless Channels Auto
Region MKK
Note:The use of wireless channels must comply with local laws and regulations
OK Cancel
REC
admin
CameraRecord Mode
Record ConfigPlay BackNetworkEncodeAlarmChannel TypeGUI DisplayBackupGeneralEevice Info
HDD ManageOutput AdjustRestoreUpgradeAutoMaintainImport/ExportLOGBPSCommon ConfigurationVersionControl PanelCloudLogout
Enter Desktop
PPPoe
DDNS
UPnP
G
2
1
Net Service

8
FAQ
Enter Desktop>Control Panel>Restore>Please select setting entries that you want to default.
1. Reset
Enter Desktop
Control Panel
X
X
Restore
Please select setting entries that you want to default
Select all
General
Record Alarm Set
Net Service
Account
Network
Output Settings
RS232
APPUser
ALL Configuration
Cancel
OK
My Device PlayBack
Control Panel
Intemet
Record
Alarm
Camera
Restore system parameters to the factory default.
2. If the user forgets his password, he can operate as follows
① Right click on the blank space, close the system>log out.
② Tick automatic login> click Restart in the lower right corner.
③ Tell the customer service the date in the lower right corner to reset the password
④ Right-click the mouse>Camera management>Enter the password notified by the customer service.
NVR
Camera
Default Password
Play Back
Record Mode
Screen layout
PTZ Control
Output Adjust
Logout
Logout
Shutdown
Reboot
admin
NVR
Login
Auto Login
admin
guest
13:58:01
2021-10-19
D05
D04
D03 D02 D02
D02
CH Kb/s
1 0
2 0
3 0
4 0
5 0
6 0
7 0
8 0
CH Kb/s
D02D08
D01
13:58:01
2021-10-19
D05
D04
D03 D02 D02
D02
D02D08
D01
CH Kb/s
1 0
2 0
3 0
4 0
5 0
6 0
7 0
8 0
CH Kb/s
X
SYSTEM LOGIN
admin
User Name
Password
Lack Authority
OK Cancel
Enter DesktopEnter DesktopEnter Desktop
My Device PlayBack
Control Panel
Intemet
Record
Alarm
Camera
Logout
Camera
Default Password
Play Back
Record Mode
Screen layout
PTZ Control
Output Adjust
Logout
13:58:01
2021-10-19
13:58:01
2021-10-19

9
Settings
Settings
System
Time Settings
Video Settings
Alarm Settings
Record Settings
Network Settings
Security Settings
Visitors Management
Home
1 2 3
Add share user
User authorization Visitor
Operator
Visitor
Input new user’s APP ID
User Remarks
Share User
Visitors Management
Add
3. How to share more users to watch in APP
To protect the user's privacy, the first user is an administrator by default. Other users
accessing the camera need administrator permission, or they cannot login even
with ID and password. The way to get permission is as follows:
Access the “SriHome” App, tap Settings -> Visitor Management -> Add.
There are 2 types of permissions:
Operator:
Live video view, set time, alarm, record and network.
Visitor:
Viewing video only in real time
Note: You can find the user's App ID in
App Settings
Other manuals for NVS001
1
This manual suits for next models
1
Table of contents
Other Sricam DVR manuals


