Sricam SP017 Owner's manual

Indoor IP Camera
Quick User Manual
EN/DE/IT/ES/FR
Customer Service
Monday - Saturday
9:00-18:00 Beijing Time (UTC +8)
E-Mail: [email protected]
Skype ID: tech.sricam
Website: www.sricam.com
For Videos of how to setup IP Cameras please visit Website: www.sricam.com/videos

Products Introduction
Before starting setup
Make sure of the following:
- Your router supports the 2.4GHz frequency band (802.11b/g/n).
- Your router DHCP is enabled.
- Your smartphone is connected tothe Internet with a WLAN/Wi-Fi that the camera will connect with.
- You know the WLAN/Wi-Fi password.( No special characters in the password and Wi-Fi SSID such
as @#$%^&*).
- Your smartphone, camera, and router should be within about 8 feet during setup. After your camera
is set up,you can move the camera to your preferred location(the configurations are saved to camera
system)
-For Videos of how to setup IP Cameras please visit Website: www.sricam.com/videos
-1-
Hardware Installation
1: Screw the mount on the wall with the two screws
Provided.
2: Loosen the thumb screws to adjust the mount to
the desired position. Once the position is set, tighten
the screws securely.
English
Reset
MicroSD
card Slot
SP020SP017

(Connect the camera to a Router or Switch with a RJ-45 Ethernet cable.)
Step1-3: Reset to default setting (After power on the camera,
you hear a clash sound from the camera. The Reset Button of SP020 is
next to USB Port)
Step1-2: Connect the camera to the network.
Start setup
then keep pressing the RESET button using a Reset Pin , until
Step1-1: Power the IP Camera
Step1. Product Connection
Step2. Sricam APP Installation
:Scan the QR code to download the“Sricam” App.
Search“Sricam”on Google Play or iOS App Store
-2-
RESET
English
1069813
WAN LAN
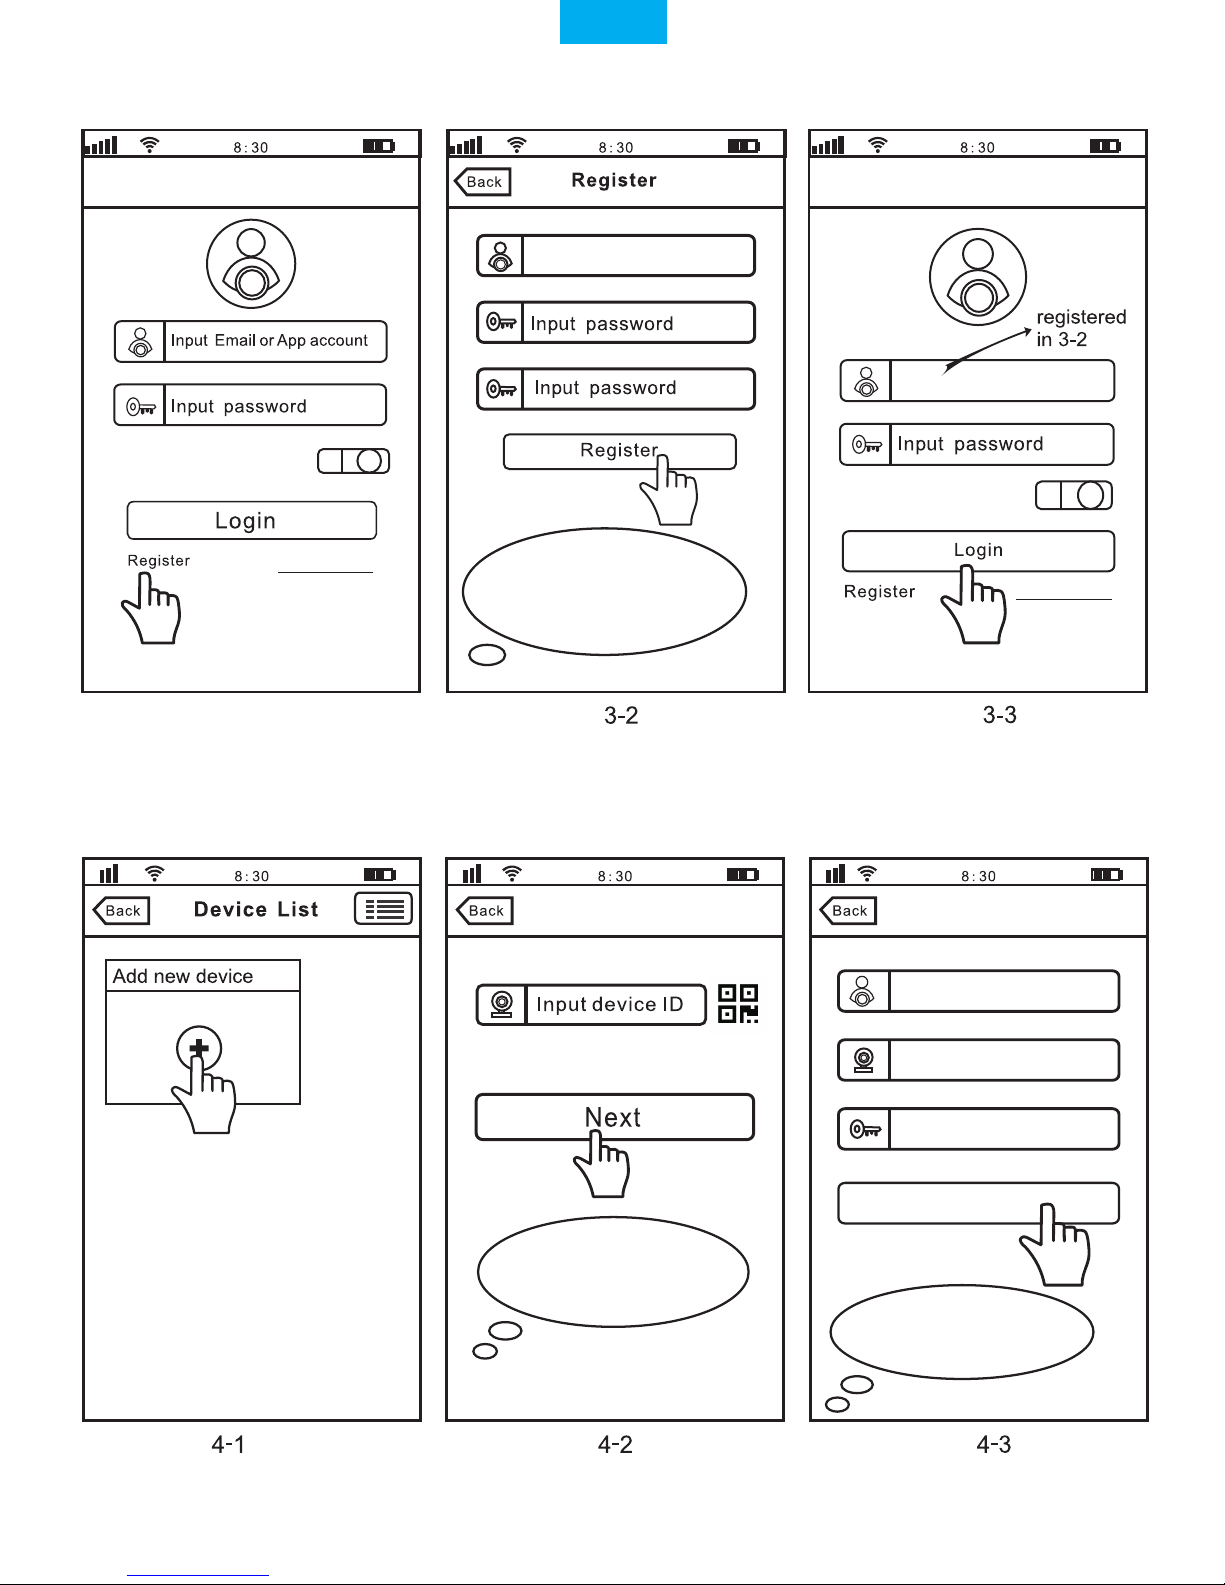
Step3. Register an APP User Account
-3-
3-1
Keep password
Keep password
Note: The “Device ID” can
be found on the label which is
attached to the camera.
Add deviceAdd device
IPCam
1069813
Next
Input password(default:888888)
Input the email
Please creat
a complex password
for App account, please don't
input your email password
0551876
Step4. View the Camera on a Smart Phone (Open the “Sricam”App and follow these steps)
Note: Here take camera
ID:1069813 as an example.
Forgot Password?
Forgot Password?
English
-4-
Note: Please use a
complex password for the device.
Password should be 6-9 characters
long(A-Z, and 0-9)Without
special characters.
Note:
Tap this button for setting
APP“Authority, Multi-Media, System,
About us,
Update, Logout. ”
IPCam Add new device
Authority: Open “Audio / Pan Tilt /...”
Multi-Media: Check “Video Playback/ Local Pictures
/ Alarm List”
Add device
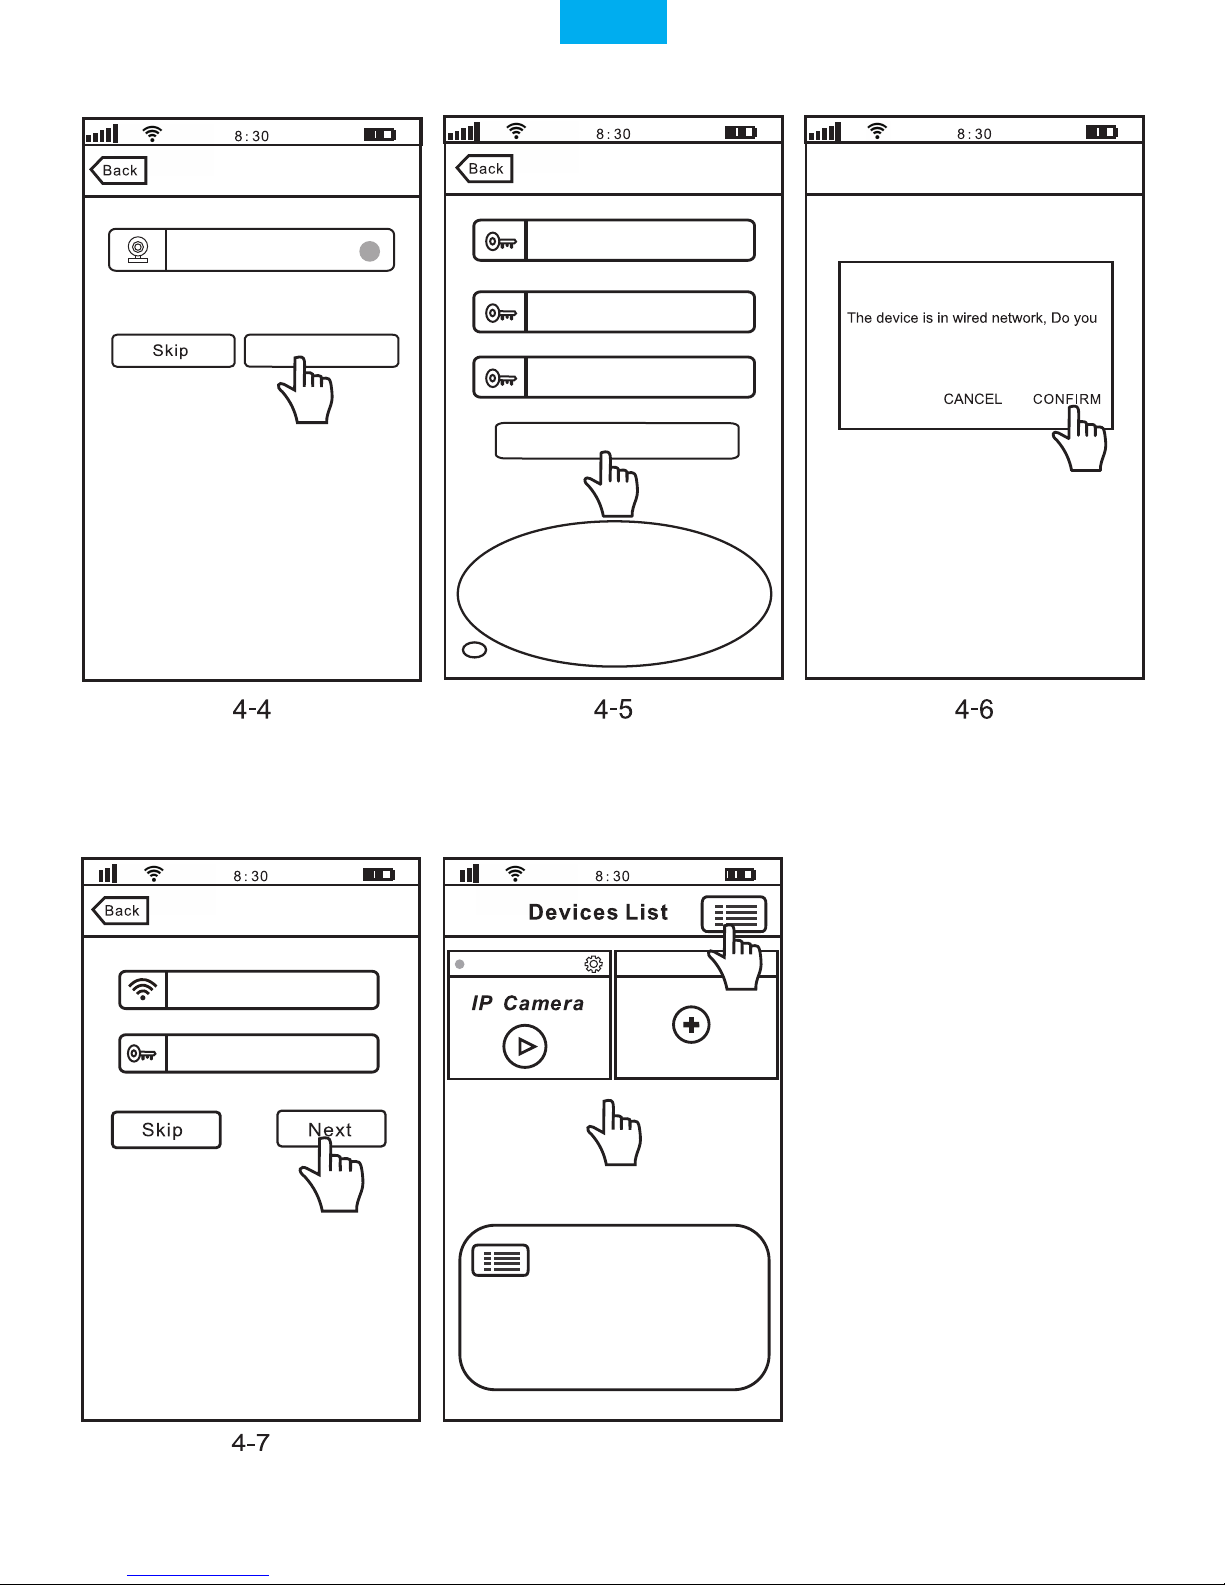
Wi-Fi Setting
Change Admin Password
Password modify succeed
want to connect to Wi-Fi network?
The device is online.For the security,you’d
better change the password immediately
Change Password
Modify
Input old admin password
Input new admin password
Input new admin password
1069813
Sricamsales
Input Wi-Fi Password
4-8
English
Drop-down to refresh
Other manuals for SP017
1
This manual suits for next models
1
Table of contents
Languages:
Other Sricam IP Camera manuals

Sricam
Sricam NVR Wireless Kit User guide

Sricam
Sricam SP007 Owner's manual

Sricam
Sricam AP011 User manual

Sricam
Sricam SP009 User manual

Sricam
Sricam AP Series User manual

Sricam
Sricam SP005 Owner's manual

Sricam
Sricam SP009C Owner's manual

Sricam
Sricam SP005 Owner's manual

Sricam
Sricam SP008 Owner's manual

Sricam
Sricam SP020 Owner's manual


