SRS Labs KWV Series User manual

Page | 1 INKWV-20130702
Wireless video door phone kit
KWV Series

Page | 2 INKWV-20130702
Important
Thank you for purchasing our wire ess video door
phone. Before carrying out the insta ation of your
new system, we strong y advise you read this
manua carefu y and comp ete y!
P ease charge the batteries for at east 10 hours
before first time use.
A though the wire ess video door phone has error
correction capabi ities, it can be affected by other
equipment in the area. It is strong y advised to test
the product before choosing your fina insta ation
position. (See a so Propagation of radio waves).
Power requirement
The system can be powered by battery or an
e ectrica power supp y, or both together. When
powered by battery and e ectrica together, the
battery wi automatica y recharge when it is ow.
•Battery Vo tage: DC 3.7V capabi ity:
1400mA/h
•E ectrica supp y INPUT 230 Vo ts AC, OUTPUT
5V, 1000mA.
In the event of a power fai ure, the communication
can be ost. The e ectrica network is c assified as
hazardous. The on y way to power down the
charger is to unp ug the power from the e ectrica
out et. Ensure that the e ectrica out et is a ways
easi y accessib e.
Warning:
1. On y use the charging base supp ied with your Wire ess Video Door Phone.
2. Do not a ow the charging contacts or the battery to come into contact with meta objects.
3. Do not open the handset, outdoor station or charger as you cou d be exposed to high vo tages.
4. Never short circuit the battery.
5. Do not expose the battery to extreme heat, fire or water
6. A ways use the cab es provided with the product.
The radio signal
Radio frequency or radio waves are used for
wire ess communication between outdoor and
indoor stations.
The performance of wire ess communication
depends on the environment where it is app ied.
Radio coverage qua ity wi be affected by possib e
b ockage between transmitter and receiver! Think
about wa s, concrete, meta (armored doors,
e evator shafts, etc.), p asterboard, wood, etc.
Not on y visib e obstructions can affect wire ess
qua ity, we get interference from e ectric or
e ectromagnetic devices as we ! Think about
wire ess routers, microwave ovens and TV’setc. It is
important to test the wire ess coverage on site
before starting the insta ation!

Page | 3 INKWV-20130702
Safety instructions:
1. P ease do not insta your system without
reading this manua , this is to avoid any
ma function or damage to these products.
2. Never open the devices by yourse f p ease
eave this to a professiona .
3. P ace the product handsets in a dust free, dry
and we venti ated room. Avoid direct sun ight.
4. P ease keep the product handsets away from
heat sources and water.
5. Never use any c eaning chemica s, or wet
c oths to c ean the handset. P ease on y use a
soft dry and c ean c oth.
6. Do not use the product in p aces where there
are exp osive hazards.
7. Do not drop the handsets, hand e them
carefu y.
8. Keep chargers and power supp ies away from
iquids.
9. Use your handset in temperatures between 0
and 35° C
10. Storage temperature must be between -20 and
45° C
xternal door station
Camera functions
•Ca button: In the STANDBY MODE press the
ca button to ca the indoor handset.
•Infrared camera: In CALLING MODE, the
infrared ight wi automatica y detect ight,
day or night. If the ight is not bright enough,
it wi ight up automatica y.
Indicator light descriptions
•B ue ight on y STANDBY MODE: if powered
by e ectricity, it f ashes every four seconds
when in the STANDBY MODE (if it is on y
powered by a battery no ight wi f ash).
•Low battery: F ash once a second and the
handset screen wi disp ay 'OUT LOW
POWER' in CALLING MODE.

Page | 4 INKWV-20130702
Installing the external door station
1
2
3
4
5
6
7
8
Phone charging base
Note: A en key for the camera unit is supp ied in the charger base
Power & Lock connections
P1: 5V Power supp y (+) Positive
P2: Power supp y (-) Negative
P3: Re ay (N/C) Norma y C osed
P4: Re ay (C) Common
P5: Re ay (N/O) Norma y Open

Page | 5 INKWV-20130702
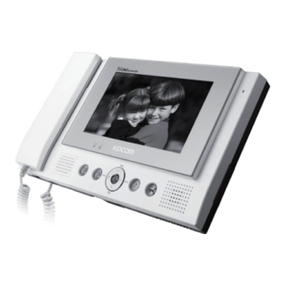
Wireless video handset
Button descriptions
" " On (Off) - Call - Confirm
•To answer or to end (press and ho d) a ca
when a visitor ca s from the outdoor
camera, press this button.
•To power on/off the handset, press and ho d
this button for three seconds.
•In any mode, to RESET the handset to
factory mode, press and ho d this button for
8 seconds.
•P ease se ect the confirm button if you are in
MENU mode.
" " Monitor
•In Standby mode, when the outdoor
camera is powered by e ectricity, press this
button to go to monitor mode.
•In Ca ing mode, press this button to switch
'video and audio' and 'audio on y'
•In MENU mode press this button to exit
menu.
" " Preview
•In standby mode press this button to view
images.
" " Unlock
•When in Ca ing mode this button needs to
be se ected to un ock
•When in standby mode it is the button for
viewing the images and down turning.
•When the handset is inked to the USB power
supp y press this button to go to MENU
mode.
Red and Blue indicator light descriptions
•Standby: B ue ight wi f ash every 4 seconds
•Low power: B ue ight wi f ash every second
•Charging: Red ight wi f ash every 4 seconds and the screen wi disp ay the battery charging
symbo .
•Fu power: Bright red ight wi show and the screen wi disp ay battery fu y charged symbo .
•Ca ing: Both b ue and red ights wi f ash together (purp e)

Page | 6 INKWV-20130702
General operation
1. When a visitor presses the ca button on the
outdoor unit (in STANDBY MODE), it rings
(connection is being made to the handset)
2. The handset disp ays a video of the visitor from
the outdoor unit; and rings every 10 seconds.
a. Start communication with your visitor by
pressing " “button (communication
automatica y goes to 'AUDIO MODE', you
can press the " " button to switch to
'VIDEO MODE.' 'AUDIO MODE' range is
onger than 'VIDEO MODE’ range.
Conversation time stretches to maximum of
120 seconds.
If the handset is too far away from the
outdoor unit and the signa is not strong
enough for 'Video and Audio' transmission,
the system wi automatica y go to 'AUDIO
MODE'.
b. If no one answers the ca within 40 seconds
the outdoor unit wi beep once and it wi
automatica y take a photo of the visitor.
3. During the conversation you can remote y un ock
the door by pressing the " " button, this wi
operate the re ay connection to the e ectric door
ock.
4. To end the communication you can press and
ho d the " " button. The system wi then return to
standby mode.
Monitor function
In STANDBY MODE when the outdoor unit is
powered by e ectricity, you can activate the
camera by pressing the " " button on the
handset to see and hear what is going on in front of
your door. The handset screen disp ays 'MONITOR' in
monitoring mode.
A so you can decide to ta k to outdoor units or not
by pressing the " " button to se ect 'TALK ON' or
'TALK OFF' in MONITORING MODE.
Preview pictures
In STANDBY MODE you can press " " or “ " to
preview the pictures stored in the handset. When
there are new pictures not previewed the screen
wi disp ay " " to prompt you.
When you are ooking at a new picture the top eft
corner of the picture disp ays the word 'NEW' and
the bottom of the picture disp ays the seria
number.
The Handset, at most, can store 10 pictures. You
can not de ete the pictures but the system wi auto
de ete the o dest picture when the picture amount
is above 10. If the handset is re-powered on or the
battery is rep aced a 10 pictures wi be auto
de eted.
Alarm function:
Note: The a arm feature is switched off as a defau t.
First y you need to start the a arm by pressing
1. Go to a arm switch.
2. Turn on the a arm option. If someone opens
your outdoor pane , the unit wi sound; the
handset wi a so ring an a arm to warn you.
How to STOP the alarm:
1. You have to fix the bottom pane of the
door camera (magnet) first, and then stop
the a arm by pressing the button on
handset.
2. Go to MENU mode and switch off the a arm
function.
Changing the battery
Rear View S ide the battery Remove the battery
cover down

Page | 7 INKWV-20130702
Troubleshooting
Technical Specification
Prob em Check So ution
Check if power is ow Recharge or rep ace the battery
Sound/image
is intermittent Check if is out of workab e range Make sure the system is in workab e range
Check if battery is ow or USB power
supp y is proper y connected
Rep ace battery or make sure USB
power supp y working proper y
No
communication
Check if code is c eared Match code again
Check if ock connection is we
connected
Fix ock connection
Check if the ock is fau ty Rep ace the ock
Can't un ock
Check if re ay is fau ty Contact us for repair
battery operation time is
short
Check if the handset is charging Rep ace battery
Indoor monitor Outdoor camera Recharge
base
Item Externa power Li-ion battery
power
Externa power Li-ion battery
power
Externa power
Input power 5V/1000MA 3.7V/1400MA 5V/1000MA 3.7V/1400MA USB 5V
Shutdown
current
200UA 0 MA
Average
working current
260MA 340MA
Standby current 4-8MA 15-18MA 0MA
Working vo tage USB 5V 3.7V-4.2V DC 5V 3.7V-4.2V
Transmission
power
18-20dBm 18-20dBm
Receive
sensitivity
-100dBm -100dBm
Charging
current
600MA 600MA 200MA
Charging time 3H 3H
Operating
temperature
-20C +70C -20C +70C -20C +70C
Audio Open and about 500M Transmission
distance Video and audio Open and about 300M
Table of contents
