ST Audio DSP24 ADAT User manual

About this manual:
The product described in this manual, has been developed and produced by ST
Audio / HOONTECH Co., Ltd.
• DSP24 ADAT is a trademark of HOONTECH Co., Ltd.
• ADAT is a registered trademark of Alesis.
• Microsoft, Windows, Windows 98, Windows 2000 and Windows XP are
registered trademarks, or trademarks of Microsoft Corporation.
All other brands and product names are trademarks, or registered trademarks of
their respective holders.
January 2002
It is the policy of ST Audio to improve products as new technology and newer
components become available. ST Audio, therefore reserves the right to change
specifications without prior notice.
A/S Centre
ST Audio / HOONTECH Co., Ltd.
4th Flr., Minkyung Bldg.,
#332 Songne-1Dong, Sosa-Ku,
Bucheon City, Kyungki-Do, Korea
Tel.: +82-32-611-1994
Fax: +82-32-612-0079
Internet: www.STAUDIO.com
Copyright © 2002 HOONTECH Co., Ltd.
This documentation was created by HOONTECH Co., Ltd. (Korea), RIDI
multimedia (Germany) and Sound & Music Promotions Pty Ltd. (Australia).
Note: To avoid damage of your speakers, always turn down the volume,
or turn off the power of your amplifier connected to the ST Audio DSP24
ADAT when you are rebooting or shutting down your PC.

ST AUDIO DSP24 ADAT
- 2 -
Contents
I. Introduction............................................................ 3
What’s in the box ? 3
Functions 3
II. Specifications ........................................................ 4
III. In- and output connectors .................................... 5
IV. Hardware installation ............................................ 7
Using the ADAT I/O ports 7
Using the WordClock in-/output 7
V. Driver and software installation ........................... 9
Installation under Windows 9x/Me 9
Installation under Windows 2000 13
Installation under Windows XP 16
VI. External Links ...................................................... 18
Monitoring 19
Clock source selection 20
VII. Mixer controls ...................................................... 22
Internal Mixer 22
External Mixer 23
VIII. Hardware settings ............................................... 26
IX. Usage with software applications...................... 30
Available in- and output devices 30
Setting up Emagic Logic SoundTrack24 32
Setting up Steinberg Cubase VST/24 3.72 33
Setting up Emagic Logic Audio Platinum 4.7 35
Setting up Cakewalk Pro Audio 9.x 36
Setting up Nemesys GigaSampler 1.64 38
X. Troubleshooting / FAQ........................................ 40
XI. Support / Contact................................................. 43

ST AUDIO DSP24 ADAT
- 3 -
I. Introduction
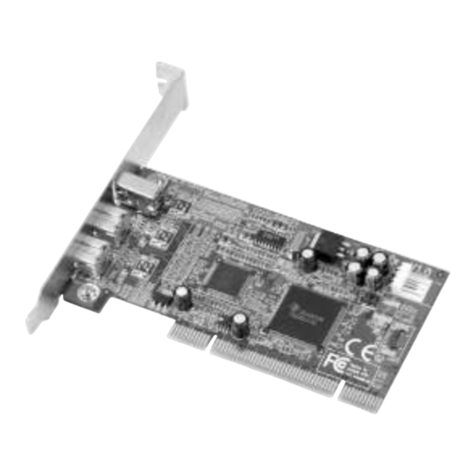
Congratulations on your purchase of the DSP24 ADAT by ST Audio. The DSP24
ADAT is a PCI interface card to connect ADAT compatible hardware, such as
multichannel recorders, digital mixers, synthesizers, etc. with your PC. With
extensive experience in the audio and PC industry, combined with valuable
suggestions from our customers, our engineers have developed a product we know
you will be satisfied with. We guarantee you uncompromising quality, as well as
excellent technical and audio properties at an extremely affordable price.
What’s in the box ?
You should have received the following with your DSP24 ADAT card:
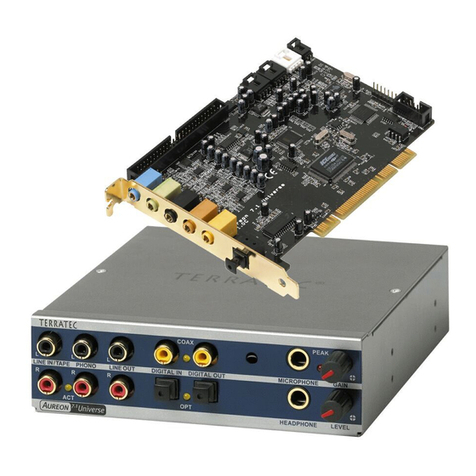
• ST Audio DSP24 ADAT PCI audiocard
• Breakout cable (15pin D-SUB to RCA / TRS adapter)
• 4pin-3pin cable for analog CD-ROM audio connection
• 2pin cable for CD-ROM digital output
• Driver and installation CD-ROM
• Logic SoundTrack24 CD-ROM by Emagic
• This manual
Functions
The DSP24 ADAT card from ST Audio is easy to install and contains everything
you need to form a powerful 8 channel digital audio link between any of your
ADAT compatible digital equipment, and your Windows PC. Simply insert the ST
Audio DSP24 ADAT card into an available PCI slot, and connect it with optical
cables to your ADAT compatible device. The available analog outputs allow you to
monitor signals directly from the card without a separate DAC unit.
Digital editing with the DSP24 ADAT card from ST Audio makes many jobs in the
studio effortless. For example, using the card with a linear digital tape recorder you
can send audio at up to 24-bit resolution into your computer, graphically edit your
tracks in your favorite software application, before sending them back to tape for
mixdown, archiving etc. Another great application is using your digital mixer as the
AD/DA audio interface for all famous computer recording software applications.

ST AUDIO DSP24 ADAT
- 4 -
II. Specifications
• PCI 2.1 compliant interface
• Optical ADAT interface: 8 input channels (up to 24-bit, 48kHz)
• Optical ADAT interface: 8 output channels (up to 24-bit, 48kHz)
• Coaxial S/PDIF I/O (24-bit)
• Supported sample rates: 22.05, 32, 44.1 and 48kHz (plus 88.2 and 96kHz for
S/PDIF)
• Analog monitoring output (24-bit DA converter resolution), 1/4" connectors
• Internal CD in plus Aux In via AC-97 Codec (Internal Mixer)
• WordClock I/O (BNC)
• MPU-401 compatible MIDI interface
• Drivers for Windows 9x/Me, NT4, Windows 2000 and Windows XP
available

ST AUDIO DSP24 ADAT
- 5 -
III. In- and output connectors
PCI card connectors / options
1. optical ADAT input
2. optical ADAT output
3. connects to the breakout cable (15pin D-SUB to RCA / TRS adapter) –
check the next page
4. BNC WordClock input
5. BNC WordClock output
6. analog CD input (routed to Internal Mixer) – CON1
7. analog Aux input (routed to Internal Mixer) – CON2
8. Jumper settings for further configuration (see USING THE WORDCLOCK
IN-/OUTPUT in the next section)

ST AUDIO DSP24 ADAT
- 6 -
Breakout cable
A. 15pin D-SUB connector that connects to the DSP24 ADAT PCI-card
B. analog monitoring outputs (1/4" TRS unbalanced –10dBv, left and right
channels), this output sends out the same signal as channel 1,2 of the optical
ADAT-output
C. coaxial S/PDIF in- and output (RCA)
D. MIDI in- and output (DIN)

ST AUDIO DSP24 ADAT
- 7 -
IV. Hardware installation
Make sure the computer is switched off and unplugged. Remove the external
computer cover. Insert the ST Audio DSP24 ADAT PCI-card into a free PCI slot
making sure that it is pressed firmly into position and secure it to the computer
case. Avoid using the first PCI slot (next to AGP) due to IRQ conflicts that can
arrise with AGP graphics cards.
You can use an analog cable to / from the CD-ROM drive if you want to listen to
audio CDs via the analog monitoring output of the card.
Now install the computer cover again, and connect the included breakout cable to
the 15pin D-SUB connector on the bracket of the PCI-card.
Using the ADAT I/O ports
The next step is to connect your ADAT device(s) to the optical I/O connectors on
the DSP24 ADAT card. We strongly recommend the use of only high quality
optical leads to connect ADAT devices. Connect the ADAT output of the card with
the ADAT input of your external ADAT compatible device. Connect the ADAT
input of the card with the ADAT output of your external device. The DSP24 ADAT
connects to any other device using the optical ADAT format.
Using the WordClock in-/output
When used in a professional studio envrionment that is using WordClock
synchronisation, the DSP24 ADAT can send out WordClock sync signals and also
use/recieve the clock from other WordClock devices.
To use the WordClock output, connect the corresponding cable to the WordClock
output BNC connector. It will always send out the sample rate that is selected by
the software using the DSP24 ADAT.
In order to sync the card to other WordClock devices, you need
to configure the DSP24 ADAT by changing a jumper on the
hardware itself.
The picture on the right side shows the jumper block in it's
default and recommended setup. All jumpers on HD5 to HD2
are set to OFF.
If you are not using the WordClock input, do not change these ON OFF
HD2HD3HD4HD5

ST AUDIO DSP24 ADAT
- 8 -
settings!
The settings shown on the left side enable the WordClock
input. The HD5 jumper is now set to ON. The other jumpers
(HD4, HD3 and HD2) are untouched.
To sync the DSP24 ADAT card to an external WordClock
source, External Links must be set to ADAT synchronisation.
Check the CLOCK SOURCE SLECTION section in the EXTERNAL
LINKS chapter later in this documentation.
ON OFF
HD2HD3HD4HD5

ST AUDIO DSP24 ADAT
- 9 -
V. Driver and software installation
The DSP24 ADAT comes with a CD-ROM that contains drivers for Windows
9x/Me, and WDM drivers for Windows 2000/XP. You can also download the latest
drivers from our website at www.STAUDIO.com. Please note that the installation
process is different, depending on the version of Windows you are using.
Installation under Windows 9x/Me
The following instructions refer to Windows 98 / 98 SE. The installation under
Windows 95 and Windows Me is very similar, although the displayed dialog boxes
might look slightly different.
After installation of the DSP24 ADAT in a PCI slot in the computer, boot up the
system. Windows will detect the new hardware automatically and display the
following screen.
Click Next.

ST AUDIO DSP24 ADAT
- 10 -
Select Search for the best driver for your device and click Next.
D:\sound\adat
Check Specify a location. Do not check CD-ROM drive or Floppy disk drives. Type
in <drivename>:\sound\adat (where <drivename> equals the letter of your
CD-ROM drive) in the window displayed above and click Next. Alternativly, you
can click Browse and select the correct directory on the CD, then click Next.
Note: you cannot use the driver from the directory \sound\dsp24 or from
\sound\dsp24ve, even if Windows might offer these directories. Make sure you are
using the correct directory!

ST AUDIO DSP24 ADAT
- 11 -
After Windows finds the driver you should see the above screen naming the driver
information file indicated in the screenshot. Click Next.
At this window, complete the installation by clicking Finish. Windows will now
install the driver for you through a series of installation screens. If you are
prompted to do anything (this would be unusual), please follow the directions on
screen.
The External Links software will be loaded automatically now. Check the next
chapter for reference.

ST AUDIO DSP24 ADAT
- 12 -
After the driver is installed ensure the installation worked by selecting Start >
Settings > Control Panel > System > Device Manager > Sound, video and game
controllers. You should see the audiocard's device listed there. Highlight it and
click on Properties. You should see the message This device is working properly.
Click on the Resources tab, you should see the message No conflicts. If so,
congratulations are in order. You have successfully installed the drivers for the
DSP24 ADAT under Windows 9x/Me.

ST AUDIO DSP24 ADAT
- 13 -
Installation under Windows 2000
The following instructions refer to Windows 2000. Please note that you must be
logged in as Administrator or with similar rights in order to install the DSP24
ADAT driver under Windows 2000.
After installation of the DSP24 ADAT in a PCI slot in the computer, boot up the
system. Windows will detect the new hardware automatically a few seconds after
you have entered your password and display the following screen.
Click Next.
Select Display a list of the known drivers for this device so that I can choose a
specific driver (very important!) and click Next.

ST AUDIO DSP24 ADAT
- 14 -
Select Sound, video and game controllers on the next dialog and again click Next.
Select Have Disk....
D:\sound\adat\wdm
Type in <drivename>:\sound\adat\wdm (where <drivename> equals the letter of
your CD-ROM drive) in the window displayed above and click OK. Alternativly,
you can click Browse and select the correct directory on the CD, then click OK.

ST AUDIO DSP24 ADAT
- 15 -
On this dialog (displayed on the previous page), make sure to select ST Audio
DSP24 ADAT WDM Audio System. Do not select any of the other entries (very
important!). Click Next. If you get a dialog box about a missing driver signature,
you can ignore it and just select Continue.
The next dialog is displayed to confirm the correct selection. Click Next. The driver
files are now copied to your system.
At the next window, complete the installation by clicking Finish. On some systems
you will be prompted to reboot the system. If that is the case on your PC, click Yes.
After the driver is installed, ensure the installation worked by selecting Start >
Settings > Control Panel > System > Hardware > Device Manager > Sound, video
and game controllers. You should see the audiocard's device listed there. Highlight
it and click on Properties. You should see the message This device is working
properly. If so, congratulations are in order. You have successfully installed the
drivers for the DSP24 ADAT under Windows 2000.

ST AUDIO DSP24 ADAT
- 16 -
Installation under Windows XP
The following instructions refer to Windows XP. If you use Windows XP
Professional, you must be logged in as Administrator or with similar rights in order
to install the DSP24 ADAT driver.
After installation of the DSP24 ADAT in a PCI slot in the computer, boot up the
system. Windows will detect the new hardware automatically a few seconds after
you have entered your password and display the following screen.
Select Install from a list or a specific location (Advanced) and click Next.
D:\sound\adat\wdm

ST AUDIO DSP24 ADAT
- 17 -
On this dialog (displayed on the previous page), select Search for the best driver in
these locations and make sure Include this location in the search: is checked. Type
in <drivename>:\sound\adat\wdm (where <drivename> equals the letter of your
CD-ROM drive) in the text box below above and click Next. Alternativly, you can
click Browse and select the correct directory on the CD, then click Next.
If you get a dialog box about a missing driver signature, you can ignore it and just
select Continue installation.
The driver files are now copied to your system. Once the installation is completed,
this dialog will be displayed:
Click Finish.
After the driver is installed ensure the installation worked by selecting Start >
Control Panel > System > Hardware > Device Manager > Sound, video and game
controllers (you might have to switch your Windows XP Control Panel to Classic
View to get to the System applet directly). You should see the audiocard's device
listed there. Highlight it and click on Properties. You should see the message This
device is working properly. If so, congratulations are in order. You have
successfully installed the drivers for the DSP24 ADAT under Windows XP.

ST AUDIO DSP24 ADAT
- 18 -
VI. External Links
External Links is the control center of the DSP24 ADAT card. It controls the
monitoring of your PC based studio. Different studio envrionments (e.g. analog
mixing desk vs. PC as digital mixer) require different monitoring setups.
Sometimes you want to listen to the signal you are recording directly (hardware
monitoring). Sometimes you want to listen to a modified version of the signal (e.g.
processed by an effect processor) or you want to listen to a completly different
audio track whilst recording. This means that you need to be able to define what
exactly is played through each separate output channels of your audiocard.
External Links allows you to do that, choose the way you like to work.
What is displayed by External Links?
The main screen of the software is divided into two main sections. The output
channels of the card are displayed on the left side of the window. The digital output
(S/PDIF Out), and also the 8 channels of the optical ADAT output are displayed
under the ADAT headline. The first output channel pair (Output 1,2) is
automatically used as analog monitoring output. The right section symbolizes the
I/O interface on the DSP24 ADAT card. The connectors on the left side (white
circles) are the available sources for the outputs.

ST AUDIO DSP24 ADAT
- 19 -
The virtual cables for the outputs (which mainly control the monitoring) cannot be
removed but replaced by other connections. These connections are displayed as
straight lines between the white circles. The available output sources are:
• S/PDIF In; the signal from the coaxial S/PDIF input of the
card
• Wave S/PDIF Out; the playback of the wave device
ADSP24 S/PDIF Out (n) or channel 9/10 of the ASIO/GSIF
driver
• Input 1,2; the signal from channel 1/2 of the optical ADAT
input
• WaveOut 1,2; the playback of the wave device ADSP24 Ext.
WaveOut 1/2 (n) or channel 1/2 of the ASIO/GSIF driver
• Input 3,4; the signal from channel 3/4 of the optical ADAT input
• WaveOut 3,4; the playback of the wave device ADSP24 Ext. WaveOut 3/4 (n)
or channel 3/4 of the ASIO/GSIF driver
• Input 5,6; the signal from channel 5/6 of the optical ADAT input
• WaveOut 5,6; the playback of the wave device ADSP24 Ext. WaveOut 5/6 (n)
or channel 5/6 of the ASIO/GSIF driver
• Input 7,8; the signal from channel 7/8 of the optical ADAT input
• WaveOut 7,8; the playback of the wave device ADSP24 Ext. WaveOut 7/8 (n)
or channel 7/8 of the ASIO/GSIF driver
All of these available signal sources can be connected to the outputs on the left side
of the External Links window.
Monitoring
For each stereo channel pair it
is possible to activate direct
monitoring (without any
latency). As in the example on these two pictures, you simply do it by connecting
Input 1,2 to Output 1,2. This means that the signal from the ADAT input channel
1/2 is sent directly to the output channel 1/2 without any latency / delay. The signal
you play inside your application via channels ½, are not audible now of course!
The second picture shows the
alternative: if you connect
WaveOut 1,2 with Output 1,2,

ST AUDIO DSP24 ADAT
- 20 -
the playback from your audio application is audible via the first output channel pair
of the ADAT output. The signal from the input is not audible at the same time,
unless the audio application provides monitoring functions which will introduce a
delay (latency) to your signal.
External Mixer
The limitation of these two options
for monitoring (which is a
limitation of many pro audiocards)
is that you cannot hear the input
and output signal at the same time.
If you use an analog (or digital)
mixer that is connected to both the
inputs and the outputs of the DSP24 ADAT card, you can monitor via the mixer so
that is no problem. The DSP24 hardware however has a built-in digital mixer so
you do not really need an external mixing desk. This function is called External
Mixer (easy to remember!) and as the input and playback signals, you can connect
it to Output 1,2 as shown on the picture.
If the External Mixer is connected to Output 1,2 (or alternativly to S/PDIF Out), all
input and all playback signals are audible simultaneously via the first two channels
of the ADAT output and the analog monitoring output (or alternativly via the
coaxial S/PDIF output). When you open the External Mixer (just click on the
Ext.Mixer button under the menu), you can set the volume for each playback and
input channel independandly. This allows you to create your own mix completly
digitally inside your PC without the need of external mixing equipment and without
the need for special software from third parties. This final mix can even be digitally
resampled using the ADSP24 (n) Digital Mixer MME wave device or channel
11/12 of the ASIO 2.0 driver. Check the section EXTERNAL MIXER in the following
chapter of this manual for reference.
Clock source selection
The three buttons in the upper left corner of
External Links allow you to select the clock
source for the DSP24 ADAT card:
Internal Select this (default) if the DSP24 ADAT should be the master clock
source for all operations. All digital devices connected to the
ADAT or S/PDIF output of the card need to work with external
synchronisation in this case.
Table of contents
