Stage4 AQUAFOG 3600 User manual

User manual
ENGLISH
AQUAFOG 2500/3600
Version 1.0
AQUAFOG 2500
AQUAFOG 3600

Warning 1
Caution 4
Please note: 4
Particular Warning! 4
Important 4
Figure 1 Functions 5
Description 6
Getting ready 7
Set Up 7
DMX Connector Pin Assignment 8
Functions of the buttons 9
Operation 12
Figure 2 DMX Chart 20
Troubleshooting 22
Maintenance 23
Accessories 25
Product Specification 26
CONTENTS
If the supply cord is damaged, it must be replaced
by the manufacturer, its service agent or similarly
qualified persons in order to avoid a hazard.
Read the manual
Indoor use only
This symbol indicating separate collection for electrical and
electronic equipment
Warning: situations that could cause injury to yourself or
others
Caution: situations that could cause damage to your
machine or other equipment
Note: notes, usage tips, or additional information
!
!
Instructional icons

1
Warning!
Like all electronic products, the low-fog
machine must be used with safety precautions
in mind. Please fill the clear water before
plugging. When water injection, please don’t
exceed the water line. After the machine
is finished or moved, please follow the
following safety instructions and empty the
water in the tank and the low-fog fluid inside
the tank.
•Productsforindooruseonly.Neveroperatein
rain or in damp conditions.
•Useonlyappropriate,groundedelectric
power supply for your unit. See your product
specification label for appropriate power supply.
This appliance must be earthed.
•Disconnectfromelectricmainspowersupply
when not in use, when filling the water,
or before maintenance.
•Long-distancemovement,pleasebesureto
emptythewaterandlow-foguidtank.
Thank you for selecting our AQUAFOG 2500,
AQUAFOG 3600, you already own the high-
tech, professional DMX low-fog machine!
Better read the manual thoroughly before
operation, follow instruction will help you
have a smooth handling with AQUAFOG
2500 or AQUAFOG 3600 achieve the most
satisfactory low-fog effect, it will also assist
unit to further prolong life time as a whole.

2
•Keepunitdry.Ifmoistureorliquidsenterthe
machine case, immediately disconnect power
supply.Contactaservicetechniciantodetermine
safety for use.
•Donotexposethemachinetothesun.
•Whenused,thecoveroftheinletoftankmust
becovered.Placethemachineinawellventilated
areatoensuresmoothventilation,allow50CM
spaceaboveandaroundthemachineforproper
ventilation.
•Donotstackheavyobjectsorotheritemson
thetopofthemachinetoavoiddamageor
deformation of the machine.
•Withoutuser-serviceablepartsinthepackage,
please contact your local agent or qualified
technicianforservicing.
•Withoutchangeablestructurebynon-qualied
user,pleasedonotopentherearpanelorhave
any change at will, otherwise, it may cause
accident!
•Beforecleaning,repairingorstoringthemachine,
please confirm that the machine has already cut
off the power, the plug has been pulled up, and
emptythewaterandthelow-foguidinthetank.
•Pleaseusecleanwater,andtheuseofwaterwith
impurities may result in poor effect or damage to
the machine.
•Betteruseourhighqualitywater-basedspecial
low-foguid,randomusewithotherlow-fog
uidmaymakebadeffectoreventojamthe
smokepipe.

3
•Keepsufcientcleanwaterandlow-foguidintank.
•Themachinemustkeepenoughwatertobe
usednormally.Pleasedonotexceedthewarning
water line when it is poured into the water.
When water is not enough, the machine will stop
workingautomatically.
•Neverputanyammablematerial(lipid,gas,
perfume etc.) or anything besides water and
low-foguidintothemachine,readtheuser
manual thoroughly before operation.
•Ifanyabnormalrunningoccurs,stopitimmediately,
emptytheuid,andbringthedoneupunit
(recommendoriginalbox)toyouragentordealer
forservicing.Makesurealluidisemptyfromthe
tankbeforemovingorshipping.
•Themachineisforadultuse.Keepoutofreachof
children.Neverleavetheunitrunningunattended.
•Neverdrinklow-foguid.Ifuidcontactseyesor
skin,rinseskinthoroughlywithwater.
•Readusermanualinstructionsthoroughlybefore
operating.Followtheinstruction.Neverremove
warningorinformativelabelsfromtheunit.

4
Caution!
Therearenouserserviceablepartsinsidethisunit.
Donotattemptanyrepairsyourself,doingsowillvoid
yourmanufactureswarranty.Intheunlikelyeventyour
unitmayrequireservicepleasecontactyourlocaldealer.
Please note:
Specicationsandimprovementsinthedesignofthis
unit and this manual are subject to change without any
prior written notice.
Particular Warning!
Themachinemustkeepenoughwatertobeused
normally.Pleasedonotexceedthewarningwaterline
when it is poured into the water. When water is not
enough,themachinewillstopworkingautomatically.
Important
The wires in this mains lead are colored in
accordance with the following code.
EU................................................................................
GreenandYellow–Earthed(E)
Blue–Neutral(N)
Brown–Live(L)
Warning: This appliance must be earthed.
USA .............................................................................
GreenandYellow–Earthed(E)
White–Neutral(N)
Black–Live(L)
Warning: This appliance must be earthed.
!

5
SMOKE ON/OFF
Figure1 Functions
A. Carrying handle
B. Low-Fog Fluid Tank
C. Water Tank
(clean water entrance)
D. Smoke Outlet
E. Water Level Window
(with warning full water line)
F. LCD display
G. 6 Function buttons
H. LED Indicator of Smoke ON/OFF
I. Smoke ON/OFF
(Express Output Button)
J. DMX 5 PIN XLR Input
K. DMX 5 PIN XLR Output
L. DMX 3 PIN XLR Input
M. DMX 3 PIN XLR Output
N. Control Socket Connection
O. Power ON/OFF
P. NFB (No Fuse Breaker)
Q. Power Input
R. Wheels with lock
S. Drain Valve
D
J K L M N O P Q S
R
E
A
F
G
AH
I
B
C

6
Description
• AQUAFOG2500/AQUAFOG3600isanefficientlow-fogmachine
thatcombinestheeffectsofsmokeandwatermist,lowfogcovered
thegroundisnoteasytofloat.
• Consumablematerialsarepurewaterandwaterbasedlow-fog
liquid. It is easy to get these materials with economic prices.
• Pioneerofonepiececase,resistanttofallandcrash.Uniquedesign
ofplasticflightcasechassisandwheelsonlyneedsadditionalbuyof
flightcasetopcovertohaveprofessionallow-fogmachinepackedin
flightcase.
• Outputbyonebutton.Additionalexpressoutputbuttonisdesigned
to simplify the continuous fogging.
• 5-8minutesoffirstheatingtime.
• 2-literliquidtank.Useofourwaterbasespeciallow-fogliquid.
• Maximum50litersofworkingliquid.Displayofliquidlevelforeasy
checking.
• LCDpanelforeasyreadingandunderstanding.
• Built-In1,4or6channelDMXcontrol.Easiertobecontrolledby any
DMX controller.
• Multifunctionsofoperationcontrolincludingbuilt-intimer,manual
and DMX.
•Equipedwith3Pand5PXLRconnector.ProfessionalpowerCONcable.
• CanworkwithSTAGE4 wirelessDMXWIFItransferWD-1to realize
realwirelessDMXcontrolenvironment.

7
Getting Ready
All products are thoroughly tested at the factory and shipped in
perfect condition. If damage has occurred during shipping, or if
components are missing, please contact your local dealer immediately.
Your package should include:
1.OneAQUAFOG2500orAQUAFOG3600
2.One powerCON cable
3.One product user manual
Set Up
1. Opentheshippingcartonandcarefullyremovethelow-fogmachine
unit from the shipping carton;
2. Besuretoremovepackingmaterialfromaroundthelow-fog
machine, especially near the outlet;
3. Setthemachineonadry,atsurface;
4. Useonlyhighquality,water-basedspeciallow-foguid(Figure1-B);
5. Fillthecleanwatertothetank(Figure1-C).Takecarenottoexceed
the warning water line and ensure the use of clean water. When
waterisnotenough,themachinewillstopworkingautomatically;
6. Plug mains power cord from the machine into appropriate power
supplysocket.Waitabout5-8minutesforheatingelementtorst
heat up;
7. UseLCDdisplay&Functionbuttons(Fiqure1-F&G)foroperating
control, or connect DMX controller for setting;
8. Orrmlyattachtheremotecontrolmechanismtosocket(Figure1-N)
onthebackoftheunit,refertoyourcontrollermanualforoperation
details;
9. Whenthelow-fogmachineisidleandnotworking,itissuggested
that the power supply be cut off immediately, the plug is pulled out,
andemptywaterandlow-foguidfromthemachine.

8
DMX Connector Pin Assignment
Themachineprovidesa3-or5-pinXLRconnectorforDMX
connection. The diagram below indicates pin assignment information.
5 pin XLR 3 pin XLR
1. Ground
1. Ground
1. Ground
1. Ground
2. Cold
2. Cold
2. Cold
2. Cold
3. Hot
3. Hot
3. Hot
3. Hot
4. N/A
4. N/A
5. N/A
5. N/A
XLR Pin Configuration
Pin 1= Ground
Pin 2= Data Compliment
(negative)
Pin 3= Data True (positive)
Pin 4= No use
Pin 5= No use
XLR Pin Configuration
Pin 1= Ground
Pin 2= Data Compliment
(negative)
Pin 3= Data True (positive)

9
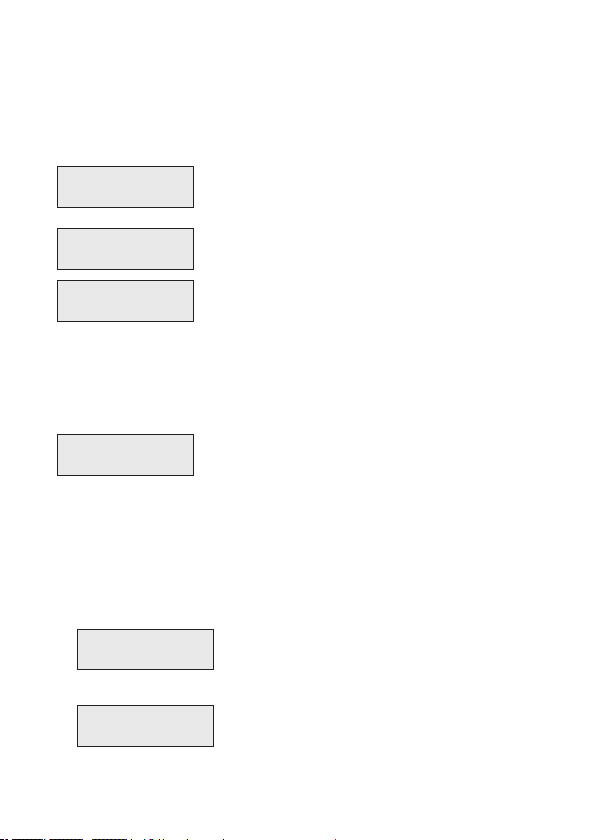
FUNCTION: Functionswitchingbutton;thenhavethenumericalvalue
changed by using UP and DOWN buttons.
DMX Mode:
DMX mode selection. Single channel, 4 channel and
6 channel mode can be selected.
DMX Address: SettingofDMXaddress.Rangeofaddressvalue:
address=001~512.PressUP/Down1.5secondscanchange
valuecontinuouslyandfast,pressedUP/DOWNatthesame
time,valuebackto1.
FOG VAL:
Settingofsmokeoutput0%,10~100%.
WIND VAL: Settingofwindvolume10%~100%.
WATER MIST VAL: SettingofWaterMistON/OFFforAQUAFOG2500,
andvolumeforAQUAFOG3600.
AQUAFOG2500=ON/OFF,
AQUAFOG3600=A(50%),B(50%),A+B(100%).
Duration: Settingdurationoftimingfogging(Duration=50~250s).
Interval:
Settingintervaloftimingfogging(Interval=30~2000s).
SMOKE ON/OFF

10
SLEEP OFF: Setting duration of sleep time for the machine
(Duration=10min.-200min.).
1. When this function is OFF, the machine does not
enter dormancy state.
2. If adjusted to 200, it means that in the standby
state, there is no timing fogging and continuous
fogging in 200 minutes, then enter the dormancy
state. Under the dormancy state, the heater is no
longer standby, and stops heating until cooling.
3. In dormant state, if timing fogging or continuous
fogging is started again, the machine will start
heating again and enter the standby state.
FLUID SCAN ON/OFF: ON/OFFsettingofautomaticinspectionofuid.
1. When this function is OFF, the machine cannot
inspectvolumeoftheuid.Thismeansthatthe
machinewillkeepworkingeventhere’snouid.
2. When this function is ON, the machine starts this
inspection function automatically.
Whenthemachinedetectsthatnouidwillstop,
the LCD display will show “NO FLUID”.
Display Backlight Setting: There are two modes.
Long pressing of the MENU can interchange these
twobacklightmodes.
1. Lighted mode:
displayappears“——STANDBY——”.
2. Power saving mode:
displayappears“—STANDBY—“.
Backlightlightsuponlywhenpressed.
Few minutes later light off automatically.

11
UP: Buttonforincreasingnumericalvalue.
DOWN: Buttonfordecreasingnumericalvalue.
TIMER: Starting button of timing fogging.
HOLD: Starting button of continuous fogging.
MANUAL: Starting button of manual fogging.
Press“Manual”(withoutreleasing),maximumoutput
fogging.Release“Manual”torecoverpreviousstatus.
This function can be started forcedly under any status..
SMOKE ON/OFF: Starting button of continuous fogging.
• Setvaluesareautomaticallysaved.
• Inpreheatingorstandby,thefunctionscanbeswitchedonthe
Function button.
• AQUAFOG2500/AQUAFOG3600isanefcientlow-fog
machinethatcombinestheeffectsofsmokeandwatermist,
the specific relationship is as follows:
smoke+watermist=low-fog(totalvolume)
Control priority order:
WhenbothDMXconsoleandVT-1areconnectedtothemachine,
appears problem of priority among the panel control, DMX console
andVT-1controller.There’snoapparentpriorityamongthethree
controls. The one which has change action gets the priority of control.
1. IfDMXvalueschangesofeachDMXchannelbyDMXconsole,
the control priority is DMX console.
2. IfwantingVT-1tohavethecontrolpriority,turntheknobtoOFF
then to ON.
3. PressingTimer,Hold,Manual,orSmokeON/OFFbuttonsofthe
control panel to let it get the control priority.
Important: The one which controls the last action has the control
priority.
12
Operation
Pourenoughcleanwaterintowatertankandwater-basedlow-fog
uidintosmoketank,pleasedon’toverll.Plugmainspowercord
fromthemachineintoappropriatepowersupplysocket.
Primarypoweron,showsthecurrentsoftwareversion;
If there is no water or insufficient water, there will be
no water warning;
2secondsafter,switchestoworkingstatus;
— —HEATING— —:Heatingup.Settingfunctionvalue
is allowed when heating up.
F100: Showsthesmokeoutputvalue;Ontheleft
showsthecurrentsmokeoutputis100%.
W10: Windvolume;Ontheleftshowsthecurrent
windvolumeis10%.
U:ON: WaterMistON/OFFforAQUAFOG2500;
On the left shows the current water mist is ON.
U:A+B: WaterMistvolumeforAQUAFOG3600;Onthe
leftshowsthecurrentwatermistisA+B(100%).
V1.0
NO WATER
— —HEATING— —
F100 W10 U:ON
— —HEATING— —
F100 W10 U:A+B
Continuous Fogging Operation ......................................................
Panel button control when DMX signals are not connected.
Press Function button, to select fog VAL and setting
thesmokeoutput,pressUP/DOWNbuttontoadjust
thevalueofsmokeoutputto0%or10~100%.
Thedisplayonleftshowsvolumeis100%;
Press Function button, to select wind VAL and setting
thevalueofwindvolume,pressUP/DOWNbutton
toadjustthevalueofwindvolumefrom10~100%.
Thedisplayonleftshowsvolumeis10%;
FOG VAL
100
WIND VAL
10
1.
2.
After the preheating is completed, please do the operation according to the
operating mode required below.

13
Afterthecompletionofthevalueswillbe
automatically stored;
Under continuous fogging, press a Hold button
orSMOKEON/OFFbuttonagaintostopthe
continuous fogging; The display shows information
as left icon: When the machine stops fogging,
please do not unplug the machine immediately, but
wait 20 seconds to let the machine automatically
removeresidualsmokefromthemachine.Thisisto
avoidcausingnegativeeffectwhenusednexttime;
PresstheHoldbuttonorSMOKEON/OFFbuttonto
startthecontinuousfogging,theblueledabove
SMOKEON/OFFBUTTONwillcontinuetoash;
Afterseveralseconds,returntolefticon;
Press Function button, to select water mist VAL and
settingthestateofvolume,pressUP/DOWNbuttonto
selectthevolumestateON/OFFforAQUAFOG2500,
andA(50%),B(50%)orA+B(100%)forAQUAFOG
3600.ThedisplayonleftshowsvolumeisONfor
AQUAFOG2500,orA+B(100%)forAQUAFOG3600;
WATER MIST VAL
ON or A+B
— —STANDBY— —
F100 W10 U: A+B
— —CLEANING— —
F100 W10 U: A+B
— —RUNNING— —
F100 W10 U: A+B
— —STANDBY— —
F100 W10 U: A+B
3.
4.
7.
5.
5.
6. PressUP/DOWNbuttonduringsprayingsmoketoadjustthevolumefor
smokeoutput(FogVAL);
• Setvaluesareautomaticallysaved.
• UP/DOWNbuttoncanonlybeusedtoadjustsmokeoutput
(FogVAL)whensprayingsmoke.

14
Timing Fogging Operation..............................................................
Panel button control when DMX signals are not connected.
Press Function button, to select duration and setting
thevalueofduration,pressUP/DOWNbuttonto
adjustthevalueoftheduration,theminimum50
seconds,andthemaximum250seconds.
The display on left shows duration is 52 seconds;
PressFunctionbutton,toselectintervalandsetting
thevalueofinterval,pressUP/DOWNbuttonto
adjustthevalueoftheinterval,theminimum30
seconds,andthemaximum2000seconds.The
displayonleftshowsintervalis30seconds;
Press Function button, to select fog VAL and setting
thesmokeoutput,pressUP/DOWNbuttontoadjust
thevalueofsmokeoutputto0%or10~100%.
Thedisplayonleftshowsvolumeis100%;
Press Function button, to select water mist VAL and
settingthestateofvolume,pressUP/DOWNbuttonto
selectthevolumestateON/OFFforAQUAFOG2500,
andA(50%),B(50%)orA+B(100%)forAQUAFOG
3600.ThedisplayonleftshowsvolumeisONfor
AQUAFOG2500,orA+B(100%)forAQUAFOG3600;
Startthetimingfogging,thedurationandinterval
of fogging are decreasing by the seconds. The
durationandintervalprocesswillcirculate;
Press Function button, to select wind VAL and setting
thevalueofwindvolume,pressUP/DOWNbutton
toadjustthevalueofwindvolumefrom10~100%.
Thedisplayonleftshowsvolumeis10%;
Duration
52
Interval
30
FOG VAL
100
WATER MIST VAL
ON or A+B
— —RUNNING— —
F100 D52 I30
WIND VAL
10
1.
2.
3.
5.
7.
4.
6. Afterthecompletionofthevalueswillbeautomaticallystored,atthistime
press Timer, into the timing fogging;

15
Under continuous fogging, press a Hold button
orSMOKEON/OFFbuttonagaintostopthe
continuous fogging; The display shows information
as left icon: When the machine stops fogging,
please do not unplug the machine immediately, but
wait 20 seconds to let the machine automatically
removeresidualsmokefromthemachine.Thisisto
avoidcausingnegativeeffectwhenusednexttime;
Afterseveralseconds,returntolefticon.
— —CLEANING— —
F100 D52 I30
— —STANDBY— —
F100 W10 U: A+B
8.
9.
• Setvaluesareautomaticallysaved.
• UP/DOWNbuttoncanonlybeusedtoadjustsmokeoutput(FogVAL)
whensprayingsmoke.
• Whenthecontinuousfoggingactionisexecuted,itcanswitchdirectlyto
the timing fogging according to the “Timer” button. When the timing
foggingactionisexecuted,itcanalsoswitchdirectlytothecontinuous
fogging according to the “Hold” button.

16
The LCD screen of the machine shows as left
picture;
The LCD screen of the machine shows the increase
and decrease correspondingly with adjusted by
controller;
Afterseveralseconds,returntolefticon;
Turntheknobcounterclockwisetotheendagain
to switch off; The display shows information as left
icon: When the machine stops fogging, please do
not unplug the machine immediately, but wait 20
secondstoletthemachineautomaticallyremove
residualsmokefromthemachine.Thisistoavoid
causingnegativeeffectwhenusednexttime;
— —STANDBY— —
F20 W50 U: A+B
— —RUNNING— —
F20 W50 U: A+B
— —STANDBY— —
F20 W50 U: A+B
— —CLEANING— —
F20 W50 U: A+B
5.
7.
9.
8.
6. Thevolumeadjustmentknobclockwiseadjustmentvolumeincreases,
counterclockwiseadjustmentvolumereduction,thegreenLEDuponthe
controllerisblinking;
Remote Control Operation..............................................................
For best result, use VT-1 wired controller.
1. Firmlyattachtheremotecontrolmechanismtosocket(Figure1-N)onthe
backoftheunit;
2. Plug mains power cord from the machine into appropriate power supply
socket,theredLEDuponthecontrollerislighted;
3. Thevolumeadjustmentknobonthecontrolleriswiththeswitch;
4. Turntheknobcounterclockwisetotheendtoswitchoff,thefogisoff,
the green LED upon the controller is lighted;

17
The LCD screen of the machine shows the increase
and decrease correspondingly with adjusted by
controller;
— —RUNNING— —
F100 W100 U: A+B
2.
Manual Fogging Operation.............................................................
1. Aslongasheatingiscompleted,underanystatus,forexample,
timingfoggingorexternalDMXconsolecontrolthefogging,pressandhold
Manualbutton(withoutreleasing),Manualfoggingoperationcanpriorityto
other operations;
3. Release“Manual”torecoverpreviousstatus.
A
B
C
D
A- 1/4”stereojack
B- Knob
C- GreenLED(Volumeoutput)
D- RedLED(power)
Controller power cord length: 3 m;
Connector:1/4“stereojack;
Function: Airvolumeadjustment&ON/OFF.
Model VT-1
Cable Length 3m
EffectiveDistance N/A
Connector 1/4”stereojack
Function • ON/OFF •Volumeadjustmen
Dimension(LxWxH) 90x50x39mm
Weight 0.257kg
VT-1

18
DMX Control Operation ..................................................................
1. Use the function button under the LCD display to set up the DMX channel
modeandDMXaddress(Figure1-G).Thereare3DMXmodesforchoice;
1CH, 4CH, & 6CH DMX mode;
4. ConnecttheDMX512controllercabletotheinputsocket(Figure1-JorL)
ofthemachineunit.Makesurethesignalcablepolarityiscorrect.
WhenDMXsocketreceiveseffectiveDMXsignals,themachineenterDMX
control mode automatically;
6. AfterenteringtheDMXoperationmode(receivingDMXsignalandstarting
work),DMXchannelmodecanstillbeswitchedatthistime,butmustuse
Function button to do channel mode switching. At the same time, we can
useUP/DOWNbuttontochangetheDMXaddressvalues;
Press Function button to enter DMX mode setting,
pressUP/DOWNbuttontoselectthechannelmode,
there are 1CH, 4CH, and 6CH to choose from,
setvaluesareautomaticallysaved.Leftdisplay
shows 6 channel mode;
Setvaluesareautomaticallysaved.Thenenterthe
DMXoperationstate,thetwobarsnexttothestate
willstarttoblink.
LCD display of machine description:
The first line shows the state, there will be 4 states
HEATING,RUNNING,CLEANINGandSTANDBY;
Thesecondlineshowsthecurrentstateofsmoke
outputis80%,stateofwindvolumeis30%,and
watermistvolumeisA+BsettingatDMXconsole.
If 6CH mode, the second line shows the current
stateofsmokeoutputis80%,durationis27s,and
intervalis30ssettingatDMXconsole;
Press Function button to enter DMX address setting,
pressUP/DOWNbuttontoadjustDMXaddress,
Whenthedesiredaddressvalueisset,theDMX
addressisautomaticallysaved.Leftdisplayshows
the DMX address is 1;
DMX MODE
6 CH
— —RUNNING— —
F80 W30 U: A+B
— —RUNNING— —
F80 D27 I30
DMX ADDR
1
2.
5.
3.
This manual suits for next models
1
Table of contents
Other Stage4 Fog Machine manuals


