manuals.online logo
Brands
  1. Home
  2. •
  3. Brands
  4. •
  5. Stagg
  6. •
  7. Amplifier
  8. •
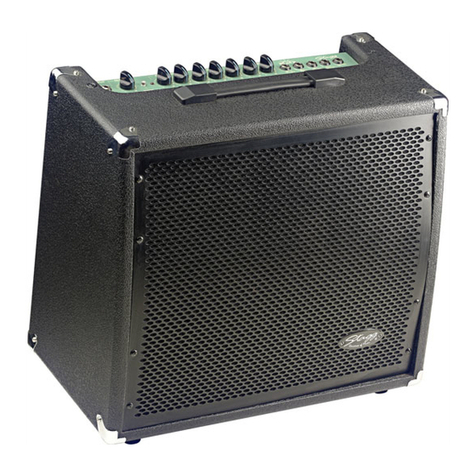
  9. Stagg EDA 40 User manual

Stagg EDA 40 User manual

BACK PANEL:
WARNING: This amplier must be earthed. Please check that the supply voltage details given on the
rating label (located on the rear panel) are in accordance with your electricity supply.
1 MAINSINPUT: This is the input socket into which the mains power cable must be connected. This
amplier is supplied with a power cable with a moulded-on plug. If the socket outlets in the home are not
suitable for this plug, use an appropriate plug adapter that can handle the power required for the amplier.
2 POWERFUSE: In the event of the power fuse having to be replaced, rst unplug the power cable
from the mains outlet. Then remove the fuse cover and replace the power fuse with another fuse of the
same type and value. Never plug the power cable back into the mains outlet without the fuse cover. If the
power fuse blows up again when powering on the amplier, take the apparatus to a suitable service centre
for repair.
3 CD/MP3INPUT: This is a line level 1/8” (Ø 3.5 mm) mini stereo jack into which an MP3/CD/Tape
player may be connected.
4 HEADPHONES This is a 1/4” (Ø 6.3 mm) standard jack output to connect the headphones. When
headphones are connected, no sound is produced from the speaker.
5 DRUMSINPUT: Plug your electronic drums in here, using the Left and Right 1/4” (Ø 6.3 mm) jack
inputs for stereo sound sources, or the Left input alone for mono sound sources. We recommend that
you always use a high-quality shielded cable to prevent any background noise interference or unwanted
feedback.
6 AUXILIARYINPUT: Here you can plug in any other instrument using a 1/4” (Ø 6.3 mm) mono jack
input. Again, we recommend that you always use a high-quality shielded cable to prevent any background
noise interference or unwanted feedback.
PLEASENOTE: Drum amplifying can prove complicated, because the sounds involved range from bass-
heavy kick drum to high-pitched cymbals. It is therefore possible that you may have to use different
settings depending on the type of music you play. Remember that the EDA-40 is designed primarily as an
indoor amp.
FeaturesandSpecicationsaresubjecttochangewithoutnotice.
FRONT PANEL:
1 AUXILIARYVOLUME: This control determines the output volume for the auxiliary channel.
2 DRUMGAIN: This control determines the gain level for the drum channel.
3 DRUMCOMPRESSION: This control reduces the dynamic range of the output signal and evens out
the changes in volume that occur according to how hard you hit your electronic drums. Adding compression
will make your electronic drums sound smoother and clearer and avoid unnecessary distortion.
4 TREBLE: This control determines the level of high frequencies in the output signal. Adding treble will
make the drums sound brighter and sharper.
5 MIDDLE: This control determines the level of middle frequencies in the output signal. Adding mid will
make your drums sound rounder and fuller.
6 PARAMETRICMIDDLE: Parametric mid is a more sophisticated way of boosting or cutting middle
frequencies. In a traditional EQ, the frequency area that is boosted or cut is xed. With a parametric mid
EQ, this frequency area is adjustable from mid low to mid high. Use this knob to select the required range
of middles, then use knob # 5. to determine the level of the selected range of mid frequencies.
7 BASS: This control determines the level of low frequencies in the output signal. Adding bass will make
your drums sound warmer and heavier.
8 MASTER: This control determines the overall volume of the amplier.
9 POWER: This switch turns the amplier on or off. The switch is lit up when the amp is powered on.
2 3 USER’S MANUALSUSER’S MANUAL EDA 40 EDA 40
234 5 6 7 8 9 3 4 5 6
TECHNICAL SPECIFICATIONS
Max.RatedPower/Loudspeaker 40W RMS @ 4Ω load / 10” Woofer w/ Coaxial Tweeter
FrequencyResponse 35Hz to 10kHz
TotalHarmonicDistortion ≤ 1%
SignaltoNoiseRatio 60dB (@ max. Rated Power)
InputImpedance 150kΩ (Instrument) / 22kΩ (Aux.)
PowerConsumption 70W max
MaximumInputLevel 140mV (Instrument) / 50mV (Aux.)
MaximumGain 70dB (Instrument) / 75dB (Aux.)
Dimensions(HxWxD) 42 x 38 x 27cm / 16.5 x 14.5 x 10.6in.
Weight 12.3kg / 27.1lb
12
1
RoHS
compliant
4
USER’S MANUAL EDA 40
INSTRUCTIONS FOR USE:
Plug the mains lead into a suitable power socket and connect your instrument to the input socket of the
amplier with a suitable cable (this cable is not supplied with the amplier, but is normally supplied with the
instrument). Finally, press the Power Switch to the ON position, the switch will light up and your amplier
is ready for use.
The EDA-40 amp can be tilted back and stabilised by inserting the crutch-like amplier rest – provided – in
the hole in the metal plate at the back, or mounted on a tripod-style stand, by switching the metal plate at
the back and the one on the underside of the amp, using a crosshead screwdriver.
IMPORTANT SAFETY INSTRUCTIONS:
READANDKEEPTHESEINSTRUCTIONSHEEDALLWARNINGS.
• If, after you have followed the instructions outlined above, your amplier fails to function, please contact
your vendor. Under no circumstances should the amplier be opened. Leave all servicing to qualied
personnel.
•Electrical appliances must never be used in conditions of high humidity or heat.
To prevent any risk of re or electric shock, never spill or splash liquids on the amplier.
Should this happen, unplug the power cable from the mains outlet immediately.
• We would like to draw your intention to the instructions printed on the notice attached to the back of
the amplier.
• Exposure to extremely high noise levels may cause permanent hearing damage (especially when using
headphones). Please use this amplier responsibly for you and your neighbourhood.
MARKING & CONFORMITY:
1. The CE mark on this product means it conforms to the EMC Directive (89/69/EEC), CE marking Directive
(93/68/EEC) and Low Voltage Directive (72/23/EEC).
2. The «Crossed-out Wheeled Bin» is to draw your attention to the WEEE (Waste Electric & Electronic
Equipment) Directive (2002/96/EC). It means this apparatus must be collected separately for recycling.
3. «RoHS compliant» means this device conforms to the Directive (2002/95EC) on the restriction of the use
of certain hazardous substances in electrical and electronic equipments, such as: Mercury, Lead, Cadmium,
Hexavalent Chromium, Polybrominated Buphenyl (PBB) and Polybrominated Diphenyl Esthers (PBDE).
USER’S MANUAL
DISTRIBUTOR / DEALER
EMD Music 07-2010-UK
EDA 40
40W ELECTRONIC DRUM AMPLIFIER

Other Stagg Amplifier manuals

Stagg 60 GA DSP USA User manual

Stagg

Stagg 60 GA DSP USA User manual

Stagg BASS BACKLINE Series User manual

Stagg

Stagg BASS BACKLINE Series User manual

Stagg SMS8P User manual

Stagg

Stagg SMS8P User manual

Stagg SPA-SUB 1208 EUR User manual

Stagg

Stagg SPA-SUB 1208 EUR User manual

Stagg 20 AA R User manual

Stagg

Stagg 20 AA R User manual

Stagg 20 GA DR User manual

Stagg

Stagg 20 GA DR User manual

Stagg 40 GA DSP USA User manual

Stagg

Stagg 40 GA DSP USA User manual

Stagg 60 AA R User manual

Stagg

Stagg 60 AA R User manual

Stagg 40 AA R User manual

Stagg

Stagg 40 AA R User manual

Stagg 60 GA DSP User manual

Stagg

Stagg 60 GA DSP User manual

Stagg 20 BA USA User manual

Stagg

Stagg 20 BA USA User manual

Stagg 10 GA USA User manual

Stagg

Stagg 10 GA USA User manual

Stagg 250 GARH EU+UK User manual

Stagg

Stagg 250 GARH EU+UK User manual

Stagg 40 GA DSP User manual

Stagg

Stagg 40 GA DSP User manual

Stagg 20 GA DR USA User manual

Stagg

Stagg 20 GA DR USA User manual

Stagg 10 GA User manual

Stagg

Stagg 10 GA User manual

Stagg 15 GA DR USA User manual

Stagg

Stagg 15 GA DR USA User manual

Stagg KBA 40 User manual

Stagg

Stagg KBA 40 User manual

Stagg 20 BA User manual

Stagg

Stagg 20 BA User manual

Stagg 40 AA R USA User manual

Stagg

Stagg 40 AA R USA User manual

Stagg 10 AA USA User manual

Stagg

Stagg 10 AA USA User manual

Stagg 60 BA User manual

Stagg

Stagg 60 BA User manual

Stagg 60 BA USA User manual

Stagg

Stagg 60 BA USA User manual

Stagg BASS BACKLINE 500 BAH User manual

Stagg

Stagg BASS BACKLINE 500 BAH User manual

Popular Amplifier manuals by other brands

Inter-m M-1500 operating manual

Inter-m

Inter-m M-1500 operating manual

Fracarro MAP Series manual

Fracarro

Fracarro MAP Series manual

Chord HugoTT instruction manual

Chord

Chord HugoTT instruction manual

Audio Authority HDMI 1398B user manual

Audio Authority

Audio Authority HDMI 1398B user manual

Yamaha DSP-A595a Service manual

Yamaha

Yamaha DSP-A595a Service manual

Denon AVR-3803 Service manual

Denon

Denon AVR-3803 Service manual

Fender 2224 manual

Fender

Fender 2224 manual

Musical Fidelity V90-AMP instructions

Musical Fidelity

Musical Fidelity V90-AMP instructions

Altec 1566A operating instructions

Altec

Altec 1566A operating instructions

Augustica Corvette manual

Augustica

Augustica Corvette manual

Glenayre GL-T8541 user manual
Glenayre

Glenayre GL-T8541 user manual

OM POWER OM2000A+ instruction manual

OM POWER

OM POWER OM2000A+ instruction manual

Starke sound AD4.320 user guide

Starke sound

Starke sound AD4.320 user guide

Questtel L-RF-EDFA-14dBm user manual

Questtel

Questtel L-RF-EDFA-14dBm user manual

Pyle PQA2100 manual

Pyle

Pyle PQA2100 manual

Sony XM-754HX Operating Instructions  (English operating instructions

Sony

Sony XM-754HX Operating Instructions (English operating instructions

Fangtek ft690 Instruction

Fangtek

Fangtek ft690 Instruction

Onkyo TX-SV515PRO II instruction manual

Onkyo

Onkyo TX-SV515PRO II instruction manual

manuals.online logo
manuals.online logoBrands
  • About & Mission
  • Contact us
  • Privacy Policy
  • Terms and Conditions

Copyright 2025 Manuals.Online. All Rights Reserved.