Star Trac Fitness E-ST 5090 User manual

Star Trac Fitness™
E-ST 5090 Stepper
OWNER’SMA N A L

Introduction . . . . . . . . . . . . . . . . . . . . . . . . . . . . . . . . . . . . . . . . . . . . . . . . . . . . . . . . . . . . . . . . . . . . . . . . . . . . . . . . . . . . . . 4
About This Manual . . . . . . . . . . . . . . . . . . . . . . . . . . . . . . . . . . . . . . . . . . . . . . . . . . . . . . . . . . . . . . . . . . . . . . . . . 4
Safety Instructions . . . . . . . . . . . . . . . . . . . . . . . . . . . . . . . . . . . . . . . . . . . . . . . . . . . . . . . . . . . . . . . . . . . . . . . . . . . . . . . . . 5
Assembly and Setup . . . . . . . . . . . . . . . . . . . . . . . . . . . . . . . . . . . . . . . . . . . . . . . . . . . . . . . . . . . . . . . . . . . . . . . . . . . . . . . 11
Unpacking and Assembly . . . . . . . . . . . . . . . . . . . . . . . . . . . . . . . . . . . . . . . . . . . . . . . . . . . . . . . . . . . . . . . . . . . . 11
Operating Instructions . . . . . . . . . . . . . . . . . . . . . . . . . . . . . . . . . . . . . . . . . . . . . . . . . . . . . . . . . . . . . . . . . . . . . . . . . . . . . 15
Display Panel Features . . . . . . . . . . . . . . . . . . . . . . . . . . . . . . . . . . . . . . . . . . . . . . . . . . . . . . . . . . . . . . . . . . . . . 15
Soft Trac® . . . . . . . . . . . . . . . . . . . . . . . . . . . . . . . . . . . . . . . . . . . . . . . . . . . . . . . . . . . . . . . . . . . . . . . . . . . . . . . . 16
Hints and Tips for etting Started . . . . . . . . . . . . . . . . . . . . . . . . . . . . . . . . . . . . . . . . . . . . . . . . . . . . . . . . . . . . . 16
Viewing Workout Data During a Program . . . . . . . . . . . . . . . . . . . . . . . . . . . . . . . . . . . . . . . . . . . . . . . . . . . . . . . 16
Pause Mode . . . . . . . . . . . . . . . . . . . . . . . . . . . . . . . . . . . . . . . . . . . . . . . . . . . . . . . . . . . . . . . . . . . . . . . . . . . . . . 17
Cooldown Cycle . . . . . . . . . . . . . . . . . . . . . . . . . . . . . . . . . . . . . . . . . . . . . . . . . . . . . . . . . . . . . . . . . . . . . . . . . . . 17
Using the Personal Fan . . . . . . . . . . . . . . . . . . . . . . . . . . . . . . . . . . . . . . . . . . . . . . . . . . . . . . . . . . . . . . . . . . . . . 17
Heart Rate Monitoring . . . . . . . . . . . . . . . . . . . . . . . . . . . . . . . . . . . . . . . . . . . . . . . . . . . . . . . . . . . . . . . . . . . . . . 18
Quick Start . . . . . . . . . . . . . . . . . . . . . . . . . . . . . . . . . . . . . . . . . . . . . . . . . . . . . . . . . . . . . . . . . . . . . . . . . . . . . . . 18
Preset Programs . . . . . . . . . . . . . . . . . . . . . . . . . . . . . . . . . . . . . . . . . . . . . . . . . . . . . . . . . . . . . . . . . . . . . . . . . . 19
Heart Rate Control Programs . . . . . . . . . . . . . . . . . . . . . . . . . . . . . . . . . . . . . . . . . . . . . . . . . . . . . . . . . . . . . . . . 23
Fitness Test . . . . . . . . . . . . . . . . . . . . . . . . . . . . . . . . . . . . . . . . . . . . . . . . . . . . . . . . . . . . . . . . . . . . . . . . . . . . . . 25
Preventive Maintenance . . . . . . . . . . . . . . . . . . . . . . . . . . . . . . . . . . . . . . . . . . . . . . . . . . . . . . . . . . . . . . . . . . . . . . . . . . . . 26
Daily Maintenance . . . . . . . . . . . . . . . . . . . . . . . . . . . . . . . . . . . . . . . . . . . . . . . . . . . . . . . . . . . . . . . . . . . . . . . . . 26
Weekly Maintenance . . . . . . . . . . . . . . . . . . . . . . . . . . . . . . . . . . . . . . . . . . . . . . . . . . . . . . . . . . . . . . . . . . . . . . . 26
Monthly Maintenance . . . . . . . . . . . . . . . . . . . . . . . . . . . . . . . . . . . . . . . . . . . . . . . . . . . . . . . . . . . . . . . . . . . . . . . 26
Regulatory Information . . . . . . . . . . . . . . . . . . . . . . . . . . . . . . . . . . . . . . . . . . . . . . . . . . . . . . . . . . . . . . . . . . . . . . . . . . . . . 27
FCC and Other Domestic Regulations . . . . . . . . . . . . . . . . . . . . . . . . . . . . . . . . . . . . . . . . . . . . . . . . . . . . . . . . . 27
Canadian DOC and Other Regulations . . . . . . . . . . . . . . . . . . . . . . . . . . . . . . . . . . . . . . . . . . . . . . . . . . . . . . . . . 27
European Applications . . . . . . . . . . . . . . . . . . . . . . . . . . . . . . . . . . . . . . . . . . . . . . . . . . . . . . . . . . . . . . . . . . . . . . 27
2 STAR TRAC E-ST STEPPER OWNER’SMAN AL
TABLE OF CONTENTS
Copyright 2010. Star Trac by Unisen, Inc. All rights reserved, including those to reproduce this book or parts thereof in any form without first obtaining written permission
from Star Trac.
Every effort has been made to keep this information current; however, periodically, changes are made to the information herein, and these changes will be incorporated into
new editions of this publication. All product names and logos are trademarks of their respective owners.
STAR TRAC E-ST STEPPER OWNER’SMANUAL 3
E-ST 5090
E Series Stepper

4 STAR TRAC E-ST STEPPER OWNER’SMAN AL
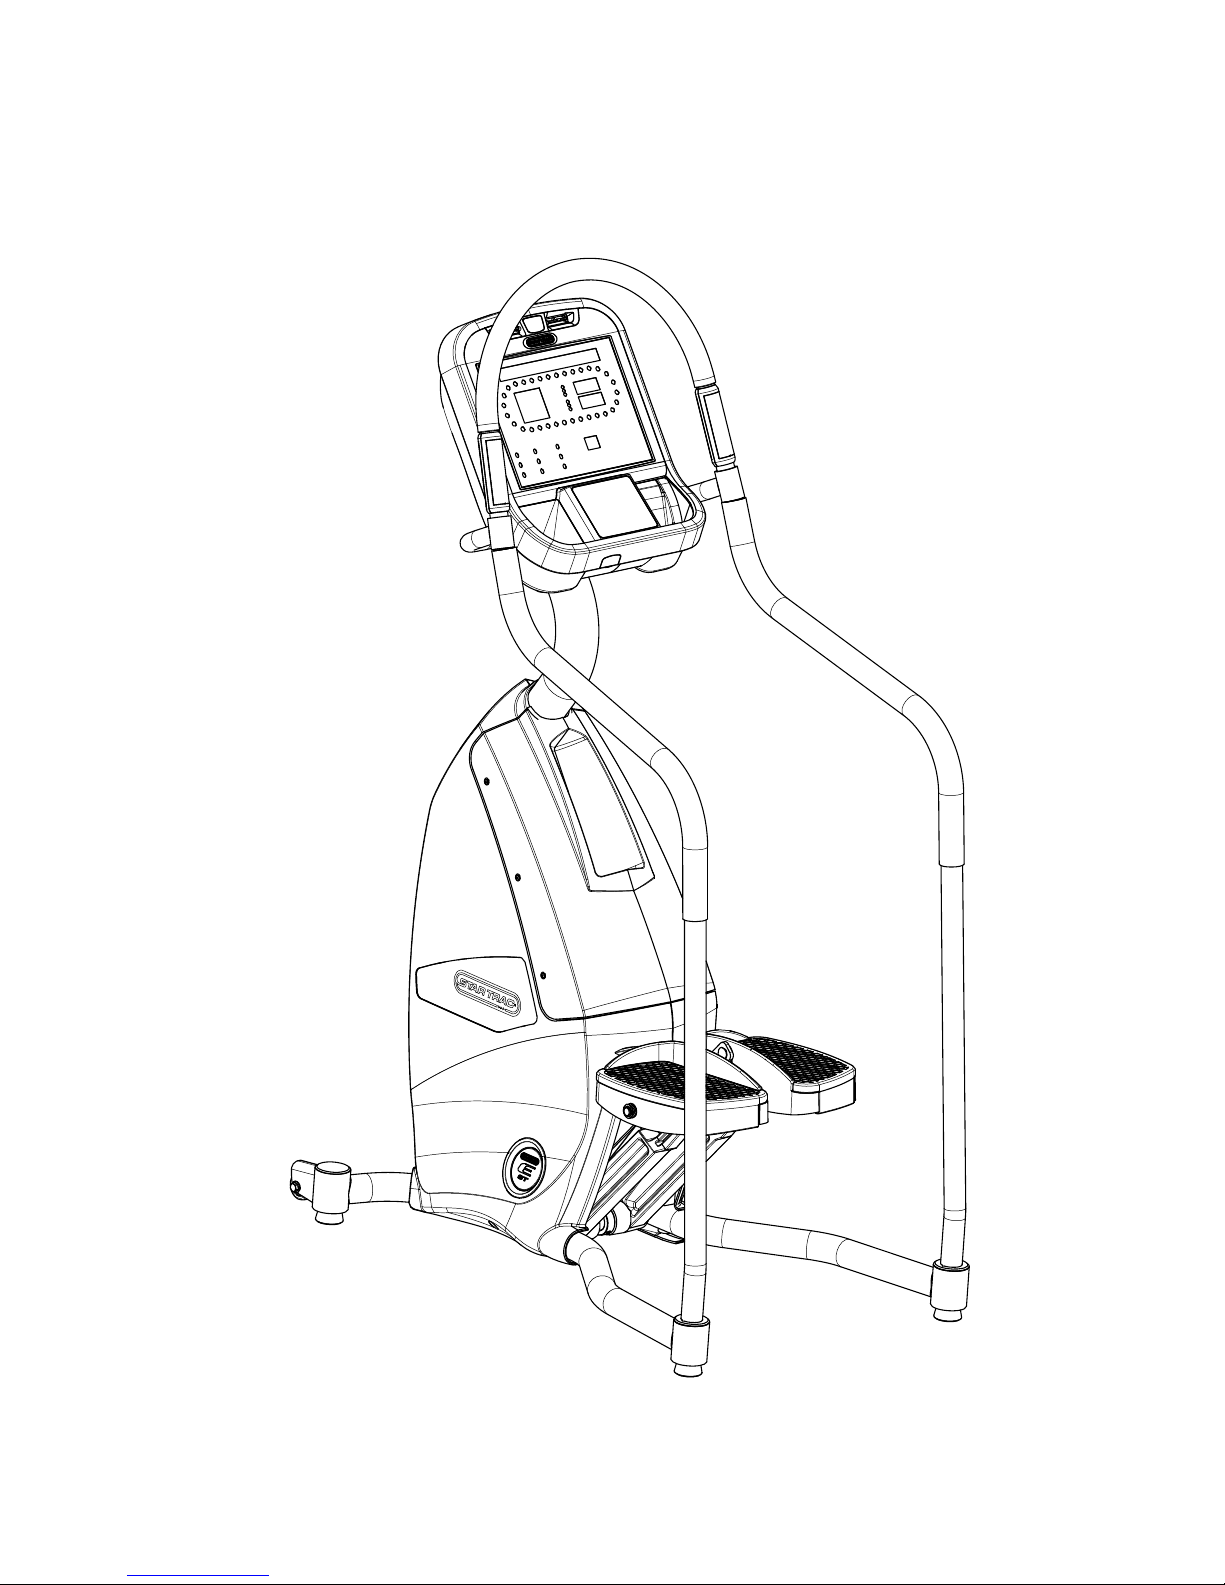
Thank you for choosing the STAR TRAC E-ST STEPPER. The Stepper has been designed to provide the user the most rewarding expe-
rience based upon the carefully planned features it possesses. The design elements of this product will provide you with a comfortable,
intuitive, safe and reliable experience, guiding you to a habit-forming lifestyle. Our mission is to provide products to mold lifelong habits
for health and fitness, and our Stepper will provide the path to meet your goals. Step to it!
ABO T THIS MAN AL
This manual is applicable to the STAR TRAC E-ST STEPPER. The manual is divided into six sections, as follows:
Introduction
Provides an overview of each section within the manual.
Safety Instructions
Provides guidelines, in multiple languages, for safely operating the Star Trac E-ST Stepper.
Assembly and Setup
Provides instructions for unpacking, assembling and setting up the Star Trac E-ST Stepper.
Operating Instructions
Provides an overview of the operation of the Star Trac E-ST Stepper.
Preventive Maintenance
Describes the preventive maintenance measures required to keep the Star Trac E-ST Stepper in top condition.
Regulatory Information
Provides regulatory information for the Star Trac E-ST Stepper.
INTROD CTION

STAR TRAC E-ST STEPPER OWNER’SMAN AL 5
This chapter includes fitness safeguards and precautions for the installation and use of the STAR TRAC E-ST STEPPER. Please read
this chapter carefully before installing or using your equipment.
Safety instructions are provided in the following languages (in the order shown):
nEnglish
nDutch
nFrench
nerman
nItalian
nPortuguese
nSpanish
nSwedish
nChinese
nJapanese
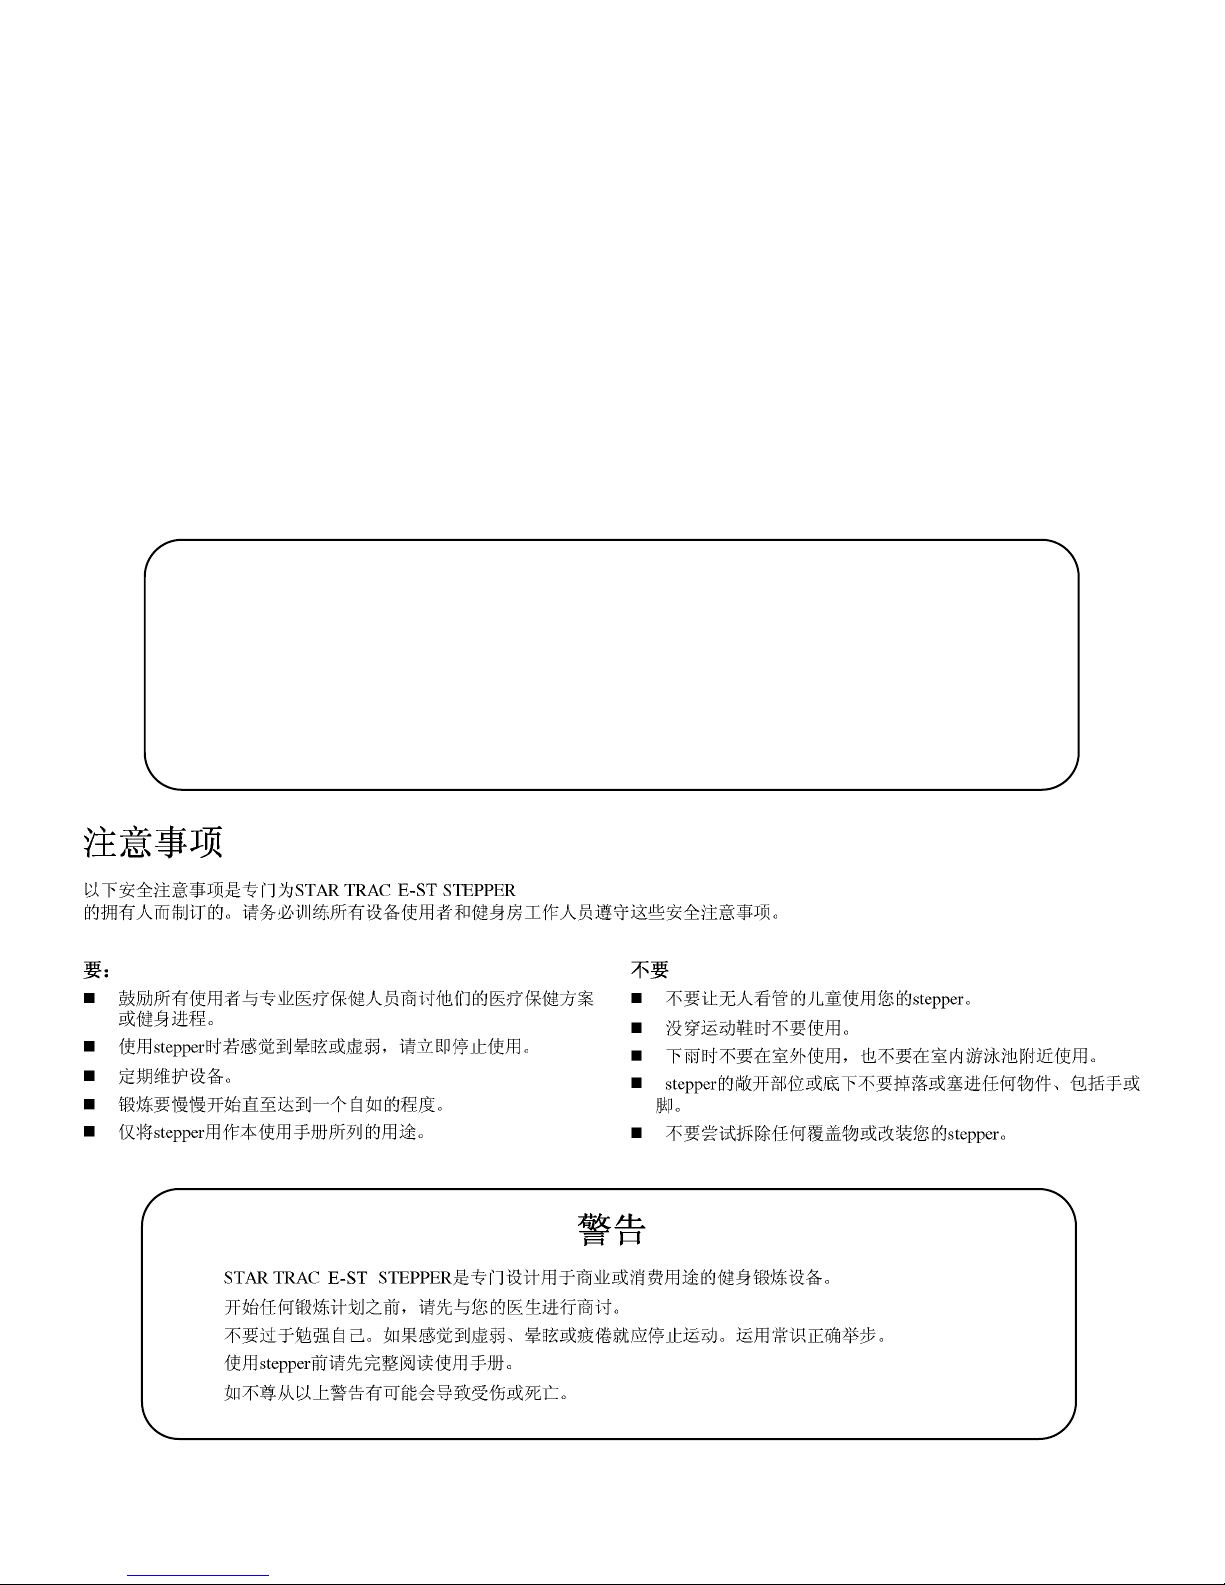
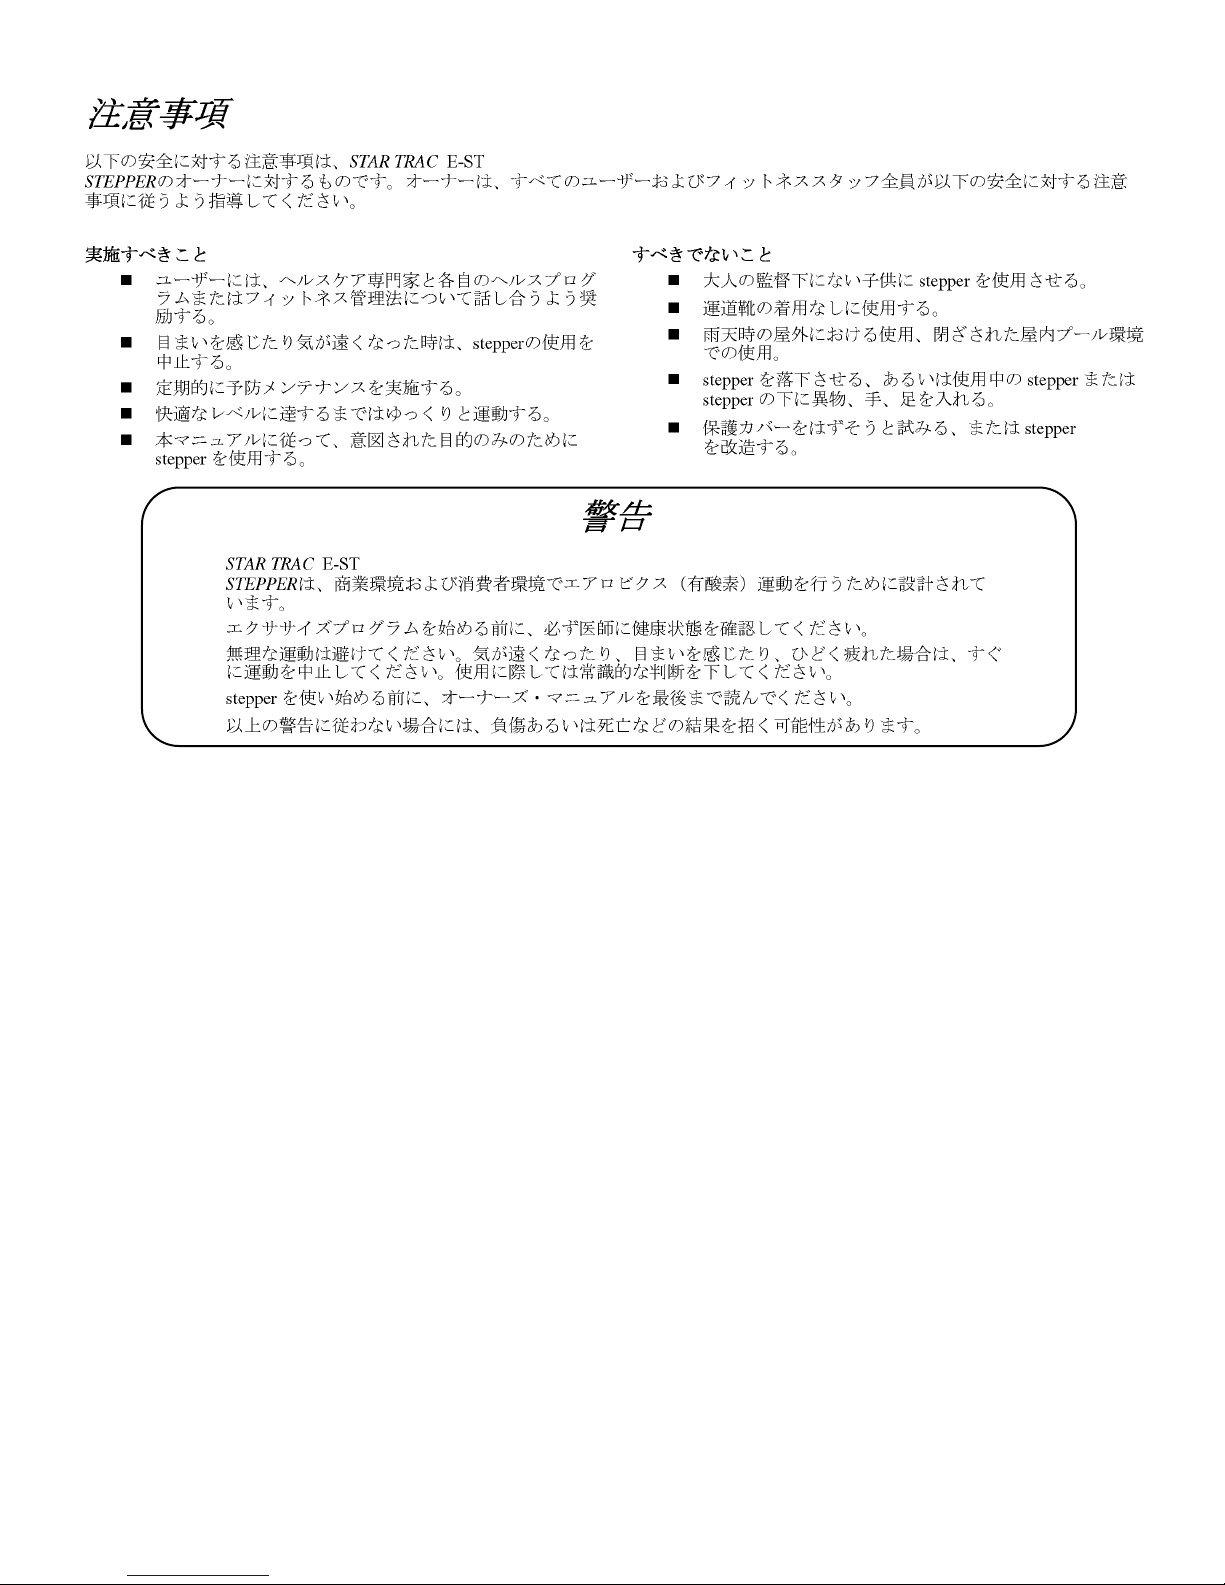
PRECA TIONS
These safety notes are directed to you as the owner of the STAR TRAC E-ST STEPPER. Please train all your users and fitness staff
to follow these safety instructions.
SAFETY INSTR CTIONS
Do
nDo encourage each of your users to discuss their health pro-
gram or fitness regimen with a healthcare professional.
nDo stop operating your Stepper if you feel dizzy or faint.
nDo perform regular preventative maintenance.
nDo exercise slowly until you reach a level of comfort.
nDo use the Stepper only for its intended use, as described in
this manual.
Do Not
nDo not let unsupervised children operate your Stepper.
nDo not use without athletic shoes.
nDo not use in rainy weather outdoors, or in an enclosed pool
environment.
nDo not drop or insert any object, hands, or feet into any open-
ing, or underneath your Stepper.
nDo not attempt to remove any shrouds or modify your
Stepper.
WARNING
Your STAR TRAC E-ST STEPPER is designed for aerobic exercise in a commercial or consumer environment.
Please check with your physician prior to beginning any exercise program.
Do not push yourself to excess. Stop if you are feeling faint, dizzy, or exhausted. Use common sense when step-
ping.
Read the Owner's Manual in its entirety before operating your Stepper.
Failure to obey this warning can result in injury or death.

VOORZORGSMAATREGELEN
Deze veiligheidsaantekeningen zijn aan u gericht als eigenaar van de STAR TRAC E-ST STEPPER. elieve uw gebruikers en uw per-
soneel voor conditietraining volledig bekend te maken met deze veiligheidsinstructies.
PRÉCA TIONS
Ces consignes de sécurités s'adressent aux propriétaires du E-ST STEPPER de STAR TRAC. Veuillez instruire tous vos utilisateurs et
instructeurs à suivre ces consignes.
Doe het volgende:
nMoedig elk van uw gebruikers aan hun gezondheidsprogram-
ma of conditietherapie met een professioneel uit de gezond-
heidszorg te bespreken.
nStop het gebruik van uw stepper als u zich duizelig of een
flauwte voelt.
nVoer regelmatig preventief onderhoud uit.
nOefen langzaam totdat u een comfortniveau heeft bereikt.
nebruik de stepper alleen voor zijn bedoelde gebruik, zoals in
deze handleiding staat beschreven.
Doe het volgende NIET:
nLaat kinderen zonder toezicht de stepper niet bedienen.
nNiet zonder gymschoenen gebruiken.
nNiet buiten bij regenachtig weer gebruiken, of in dichte ruimte
met een zwembad.
nLaat geen enkel voorwerp in de stepper vallen en steek uw
handen of voeten in geen enkele opening van of onder uw
stepper.
nProbeer geen omhulsels te verwijderen of uw stepper te wijzi-
gen.
WAARSCH WING
Uw STAR TRAC E-ST STEPPER is ontworpen voor aërobische oefeningen in een commerciële of gebruiker-
somgeving.
Zie uw arts vóór het beginnen van een oefenprogramma.
Dwing uzelf niet tot buitensporige oefeningen. Stop als u zich duizelig, uitgeput of een flauwte voelt.
Lees de gebruikershandleiding helemaal en aandachtig door alvorens uw stepper te bedienen.
Nalaten deze waarschuwing op te volgen kan letsel of overlijden tot gevolg hebben.
À Faire
nEncouragez tous les utilisateurs à consulter un médecin au
sujet de leur programme de fitness ou régime d'exercice.
nCessez d'utiliser le stepper en cas d'étourdissement ou de
faiblesse.
nExécutez régulièrement la maintenance préventive.
nCommencez l'exercice lentement jusqu'à ce que vous
atteignez un niveau confortable.
nUtilisez le stepper uniquement de la manière prévue, telle que
décrite dans ce manuel.
À éviter
nNe laissez pas des enfants utiliser le stepper sans surveil-
lance.
nNe l'utilisez pas sans porter de chaussures d'athlétisme.
nNe l'utilisez pas en extérieur lors de temps pluvieux, ni en
intérieur dans une salle de piscine.
nÉvitez de laisser tomber tout objet ou d'introduire les mains
ou pieds dans toute ouverture ou en-dessous du stepper.
nNe tentez pas de retirer tout carter de protection ni de modifi-
er le stepper.
AVERTISSEMENT
Le E-ST STEPPER de STAR TRAC est conçu pour l'exercice aérobique dans un environnement commercial ou
privé.
Veuillez consulter un médecin avant de commencer tout programme d'exercice.
Ne vous poussez pas au-delà de vos limites. Arrêtez-vous si vous vous sentez faible, étourdi ou épuisé. Faites
preuve de bon sens lorsque vous vous entraînez.
Lisez le guide de l'utilisateur en entier avant d'utiliser le stepper.
Le non-respect de ces avertissements peut se traduire par des blessures, voire la mort.
6 STAR TRAC E-ST STEPPER OWNER’SMAN AL

STAR TRAC E-ST STEPPER OWNER’SMAN AL 7
VORSICHTSMASSNAHMEN
Die folgenden Vorsichtsmaßnahmen richten sich an Sie als Besitzer des STAR TRAC E-ST STEPPER. Bitte schulen Sie alle Ihre
Benutzer und Ihr Fitness-Personal in der Beachtung dieser Sicherheitsvorschriften.
PRECA ZIONI
Queste note precauzionali sono dirette a voi, come proprietario dello STAR TRAC E-ST STEPPER. Siete pregati di istruire i vostri uten-
ti e il vostro personale all'osservanza di queste precauzioni.
Gebote
nLegen Sie jedem Ihrer Benutzer nahe, sein esundheits-
oder Fitnessprogramm mit einem medizinischen Fachmann
zu besprechen.
nBeenden Sie den Betrieb Ihres stepper, wenn Sie sich
schwindelig oder schwach fühlen.
nFühren Sie regelmäßige vorbeugende Wartungsmaßnahmen durch.
nTrainieren Sie langsam, bis Sie eine gewisse Komfortzone
erreichen.
nVerwenden Sie den stepper nur zum vorgesehenen, in dieser
Anleitung beschriebenen Zweck.
Verbote
nLassen Sie den stepper nicht von unbeaufsichtigten Kindern
in Betrieb nehmen.
nBenutzen Sie das erät nicht ohne Sportschuhe.
nBenutzen Sie das erät bei regnerischen
Witterungsbedingungen nicht im Freien und nicht in einer
geschlossenen Schwimmbadumgebung.
nLassen Sie keine egenstände in irgendwelche Öffnungen
oder unter den stepper fallen und halten Sie Hände und Füße
von diesen Bereichen fern.
nUnternehmen Sie keinen Versuch, irgendwelche
Abdeckungen zu entfernen oder den stepper zu modifizieren.
ACHT NG
Der STAR TRAC E-ST STEPPER ist für aerobische Übungen in einer kommerziellen oder Verbraucherumgebung
vorgesehen.
Bitte holen Sie vor Aufnahme eines jeden Trainingsprogramms den Rat Ihres Arztes ein.
Trainieren Sie nicht übertrieben hart. Hören Sie auf, wenn Sie ein Schwäche-, Schwindel- oder
Erschöpfungsgefühl verspüren. Lassen Sie sich beim Schritttraining von Ihrer Vernunft leiten.
Lesen Sie vor Inbetriebnahme Ihres stepper die Bedienungsanleitung vollständig durch.
Ein Missachten dieses Achtungshinweises kann Verletzungen oder den Tod zur Folge haben.
Da Fare
nIncoraggiate i vostri utenti a discutere il loro programma di
salute o di fitness con uno specialista dell'healthcare.
nInterrompete l'uso dello stepper se avete giramenti di testa o
se vi sentite mancare.
nEseguite periodicamente servizi di manutenzione.
nUtilizzate lo stepper soltanto per l'uso è a cui è destinato,
come descritto nel manuale.
Da Non Fare
nNon consentite a bambini di usare lo stepper senza la super-
visione di un adulto.
nNon utilizzate lo stepper senza scarpe atletiche.
nNon utilizzate lo stepper all'esterno in condizioni piovose o in
un ambiente con piscina interna.
nNon lasciate cadere oggetti sullo stepper e non inserite ogget-
ti, mani o piedi in qualsiasi apertura esterna o sotto lo
Stepper.
nNon cercate di rimuovere le coperture o di modificare lo step-
per.
AVVERTENZE
Lo STAR TRAC E-ST STEPPER è stato realizzato per esercizi di aerobica in un ambiente pubblico o privato
adeguato.
Prima di iniziare un programma di esercizio fisico, consultate il vostro medico.
Non eccedete i vostri limiti. Fermatevi se vi sentite mancare, se avete giramenti di testa o se vi sentite esausti.
Usate buon senso nell'utilizzo dell'attrezzatura.
Leggete il Manuale dell'utente interamente prima di utilizzare lo stepper.
La mancata osservanza di queste avvertenze può comportare lesioni gravi o morte.

8 STAR TRAC E-ST STEPPER OWNER’SMAN AL
PRECA ÇÕES
Estas notas de segurança destinam-se a você, proprietário do STAR TRAC E-ST STEPPER. Treine todos os usuários e o pessoal da
academia para que sigam estas instruções de segurança.
PRECA CIONES
Estas notas de seguridad están dirigidas a usted como el dueño de STAR TRAC E-ST STEPPER. Por favor instruya a todos sus usuar-
ios y personal de entrenamiento para que sigan estas instrucciones de seguridad.
O que fazer
nIncentive todos os usuários a discutirem seu programa de
saúde ou sistema de condicionamento físico com um profis-
sional da área de saúde.
nPare o funcionamento do stepper se sentir tontura ou ver-
tigem.
nEfetue a manutenção preventiva regular.
nFaça exercícios lentamente até atingir um grau de conforto.
nUse o stepper apenas de acordo com a finalidade para que
se destina, conforme descrito neste manual.
O que não fazer
nNão deixe crianças sem supervisão operarem o stepper.
nNão use sem os sapatos esportivos apropriados.
nNão utilize em ambientes externos quando o tempo estiver
chuvoso, nem em um ambiente fechado de piscina interna.
nNão deixe cair nem insira nenhum objeto, mãos ou pés em
qualquer abertura ou sob o stepper.
nNão tente remover nenhum degrau nem modificar seu step-
per.
ADVERTÊNCIA
Seu STAR TRAC E-ST STEPPER foi projetado para exercícios aeróbicos em um ambiente comercial ou próprio
do consumidor.
Consulte seu médico antes de começar qualquer programa de exercícios.
Não se esforce demais. Pare se sentir tontura, vertigem ou exaustão. Tenha bom senso ao fazer o exercício.
Leia todo o Manual do Proprietário antes de operar o seu stepper.
Deixar de observar esta advertência pode resultar em ferimentos ou morte.
Lo que se debe hacer
nDígale a cada uno de sus usuarios que discuta su programa
de salud o régimen de ejercicio con un profesional de la
salud.
nDeje de operar su stepper si se siente mareado o como que
va a desmayarse.
nLleve a cabo mantenimiento preventivo a intervalos regu-
lares.
nHaga ejercicio lentamente hasta que alcance un nivel en el
que se sienta cómodo.
nUtilice el stepper solamente para lo que fue diseñado, como
se describe en este manual.
Lo que no se debe hacer
nNo permita que los niños operen su stepper sin supervisión.
nNo lo use sin zapatos atléticos.
nNo lo utilice afuera en la lluvia ni en un ambiente cerrado
donde haya una piscina.
nNo lo deje caer ni inserte objetos, manos o pies en ninguna
apertura de su stepper ni debajo de él.
nNo intente quitar ninguna cubierta o recubrimiento ni modi-
ficar su stepper.
ADVERTENCIA
Su STAR TRAC E-ST STEPPER está diseñado para el ejercicio aeróbico en un ambiente comercial o de con-
sumo.
Por favor consulte con su médico antes de iniciar cualquier programa de ejercicio.
No haga un esfuerzo excesivo. Deténgase si se siente mareado, exhausto o como si fuera a desmayarse. Use
su sentido común al hacer ejercicio.
Lea completamente el Manual del dueño antes de operar su stepper.
El no cumplir con esta advertencia puede resultar en una lesión o en la muerte.
STAR TRAC E-ST STEPPER OWNER’SMAN AL 9
FÖRSIKTIGHETSÅTGÄRDER
Dessa säkerhetsanmärkningar är riktade till dig i egenskap av ägare av STAR TRAC E-ST STEPPER. Var god utbilda alla användare
och all personal att följa dessa säkerhetsanvisningar.
Man ska
nuppmuntra alla användare att konsultera sitt hälsoprogam
eller sin träningsregim med en läkare.
nsluta använda stepper om man känner sig yr eller svimfärdig.
nutföra regelbundet underhåll i förebyggande syfte.
nmotionera långsamt tills man når en komfortnivå.
nendast använda stepper för dess avsedda användning, enligt
beskrivning i denna handbok.
Man ska inte
nlåta barn använda stepper utan uppsikt.
nanvända stepper utan sportskor.
nanvända stepper utomhus i fuktigt väder eller i ett inneslutet
bassängområde.
ntappa in eller föra in något föremål, händer eller fötter i någon
öppning, eller under stepper.
nförsöka att avlägsna några skyddskåpor eller att modifiera
stepper.
VARNINGAR
Din STAR TRAC E-ST STEPPER är avsedd för aerobisk träning i kommersiella eller konsumentinriktade miljöer.
Konsultera din läkare innan du inleder något träningsprogram.
Driv inte dig själv för hårt. Sluta om du känner dig yr, svimfärdig eller utmattad. Använd stepper med sunt förnuft.
Läs igenom hela handboken innan du använder stepper.
Underlåtelse att iaktta dessa varningar kan medföra skada eller dödsfall.
10 STAR TRAC E-ST STEPPER OWNER’SMAN AL

STAR TRAC E-ST STEPPER OWNER’SMAN AL 11
ASSEMBLY AND SET P
The following parts are included with the base STAR TRAC E-ST STEPPER:
Description Qty Description Qty
Base 1 Screw, 1/4-20 x 1.25, Hex Head4
Display Weldment with Neck Assembly 1 Washer, 1/4 ID Type B, Flat 4
Handrails (1 Right, 1 Left) 2 Screw, 1/4-28 x 1/2, Button Head 4
Screw, .312-18 x 1.00, Hex Head 4
Washer, .312 Split Lock 4
Washer, .312 Flat 4
Nut, .312-18, Hex Machine 4
NOTE: The Di play A embly i found in it own box, along with the unit’ detailed operating in truction .
NPACKING AND ASSEMBLY
NOTE: Inspect the shipping carton for any parts that may be missing BEFORE discarding the carton. Items can shift during trans-
portation, and may be accidentally discarded with the carton. If any parts are missing, please contact Star Trac Support at 800-503-
1221. Have the serial number of the STAR TRAC E-ST STEPPER, and the part num-
ber(s) of the missing parts ready so they may be shipped to you.
1. npack the Shipping Carton
Open the top of the STAR TRAC E-ST STEPPER box, remove the
handrails and place aside. Remove the Display weldment/Next assem-
bly and place aside. Remove the fasteners and place aside. Remove
remaining packing material, and carefully remove from the pallet base.
Note: The display comes in a seperate box.
2. Removing the Shrouds
Remove the 6 screws that hold on the center shroud in place.
Next remove the 6 screws that hold the side shrouds in place.
Remove the side shrouds from frame. Set the 3 shrouds and
12 screws aside for later use.
12STARTRACE‐STSTEPPERO
WNER’S
M
ANUAL
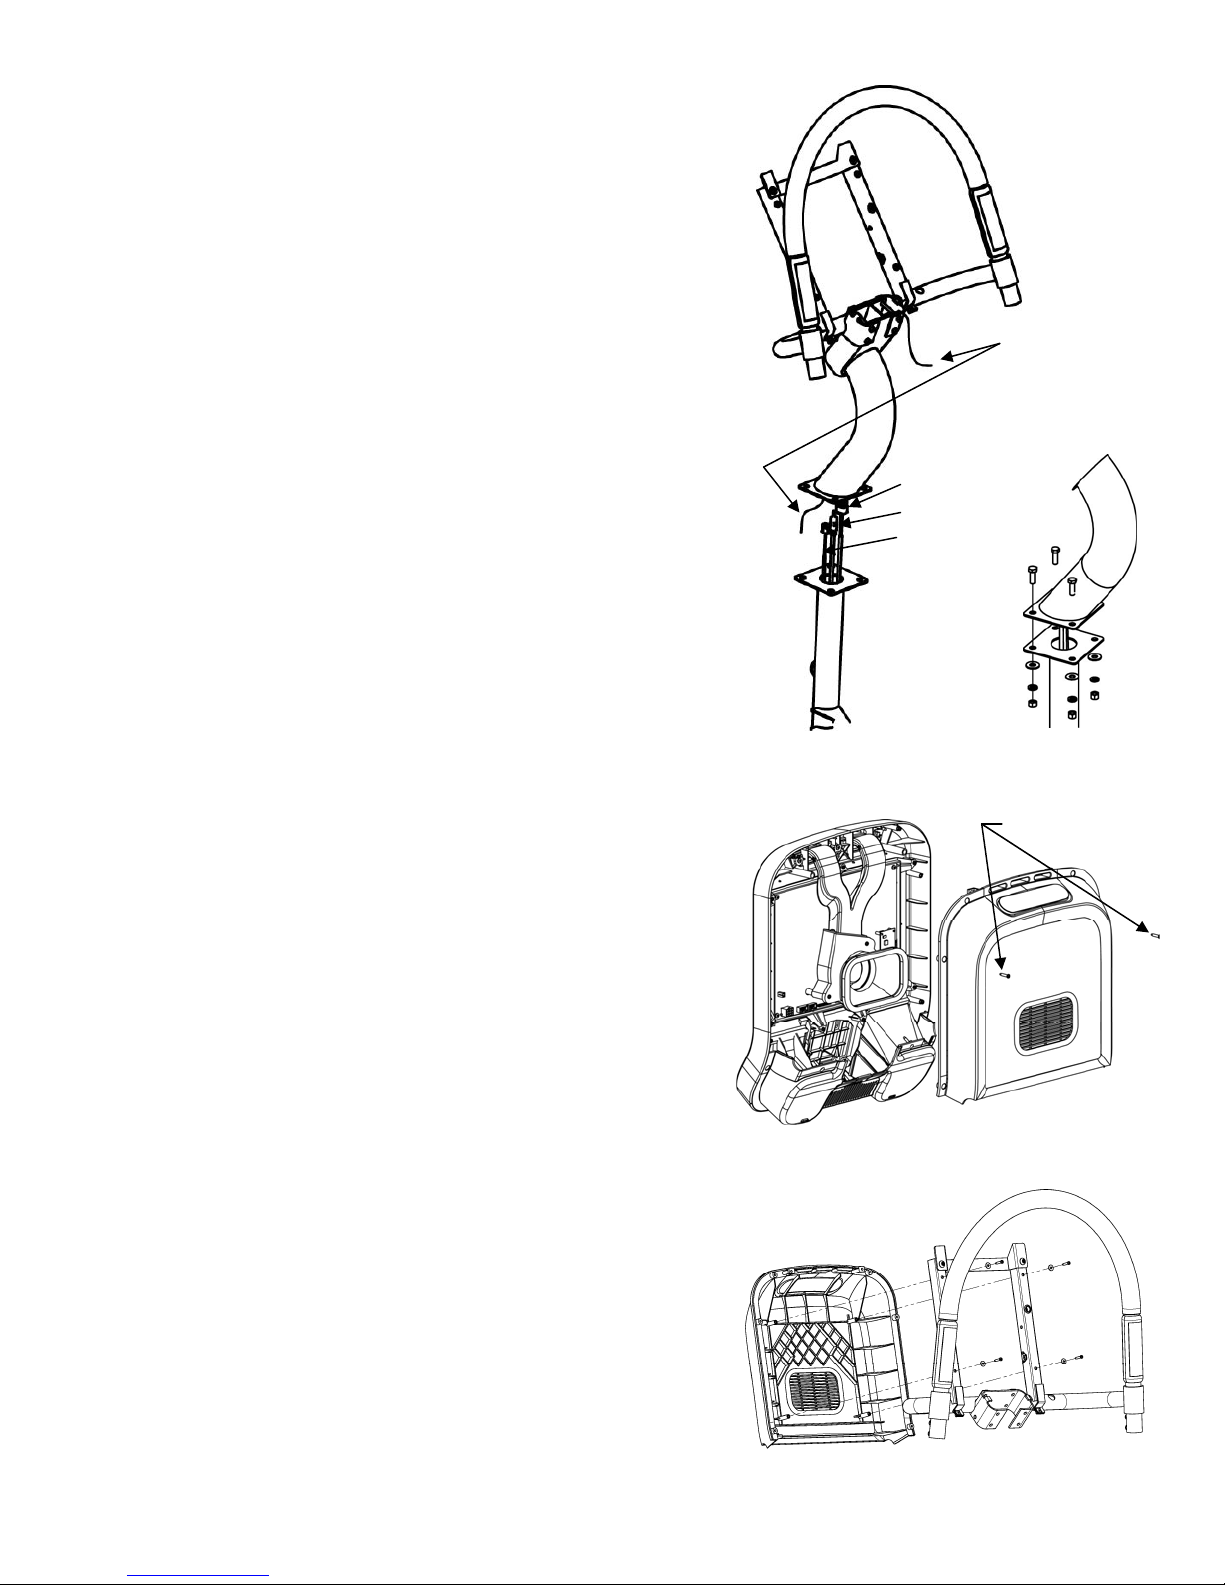
3.InstallingtheDisplayWeldment/NeckAssembly
(a)AligntheDisplayWeldmentwiththebase.Usingthepre‐installed
wirepulltheMainI/Ocable(largewhiteplasticconnector),power
harness(smallwhiteplasticconnector),andcoaxialcable(black
rubbercover)fromthebottomthroughthetopoftheneckformating
tothedisplayasneeded.Itisrecommendedthateachwirebepulled
throughtheneckoneatatime.Takecaretoavoidunnecessary
tensionorbendingofthecables.IfthebasewillbematedwithanLED
displaywithoutaPVSkititisrecommendedtotuckthepowerharness
andcoaxialcableinsidetheneckastheywon’tbeused.
(b)Installthe4boltswiththeassociatedflatwashers,lockwashers,
andnutsasshown.Makesuretheboltsaretight.AftertheNeck
Assemblyhasbeenboltedinplace,youcanreplacetheshroudsthat
wereremovedaspartofStep2above.
4.OpenDisplay
Remove(2)M4x0.7screwsfrombackofdisplay(retainforlateruse)
witha#2Phillipsscrewdriverandseparatethebackofthedisplay
fromthefront.
5.InstallingtheDisplayAssembly
(a)Takethereardisplaycoverandattachittothedisplayweldment
usingthesuppliedscrews.NotethattheNeckAssemblyhasbeen
hiddentoshowtheimportantdetailbutwillalreadybeattached.
ScrewsM4x0.7
(a) (b)
Pre
‐
installed wire
MainI/Ocable
CoaxCable
PowerHarness

STAR TRAC E-ST STEPPER OWNER’SMAN AL 13
(b) It is now time to attach the display. NOTE: Thi tep
a ume that you will be attaching the LED di play. Should you
be in talling the embedded di play or adding a PVS kit, plea e
refer to tho e applicable manual . The following display con-
nections will need to be made: connect the main display cable
to the connector labeled J4 on the display PCB, connect the
heart rate grip cable to the heart rate board, and connect the
ground wire from the heart rate board to the quick disconnect
tab on the display weldment.
(c) With the display electrical connections made, you can now
attach the display. There are 2 tabs located on the bottom of the
display weldment, so in order to attach the display, you will first
need to guide the bottom of the display under the tabs and then
second you will need pivot the display forward around the tabs to
mate the display to the rear plastics. Once in place, you can attach
the screws.
(d) With the display in place, attach the 8 M4 x 0.7 screws provided.
6 screws go around the rear of the display and 2 go near the under-
side of the cupholders as shown.
5. Installing the Handrails
NOTE: It i recommended that thi tep be performed by at lea t 2 people.
(a) With the assistance of another person, tip the STAR TRAC E-ST STEP-
PER forward and hold in place while completing the following steps.
(b) Remove the 2 rear leg levelers.
(c) Slide the left handrail into the upper end of the left handlebar
weldment and line up the screw holes.
(d) Loosely attach 2 supplied button head screws to the left handlebar
weldment junction using a 5/32” (4mm) hex key or T-handle.
Board
1ST
2ND
J4
round Wire
Heart Rate
Board
Quick Disconnect
M4 x 0.7
Screws

(e) Position the lower end of the left handrail over the rear leg weldment, then pulling the
handrail towards you secure it into position with 2 washers and 2 hex screws provided using
a 5/32” (4mm) hex key or T-handle.
(f) Tighten the button head screws from step d above.
(g) Repeat steps c - f for the right handrail.
(h) Replace the 2 leg levelers that were removed in step b.
(i) Return the STAR TRAC E-ST STEPPER to the upright position.
6. Final Assembly and Testing
Check all screws to ensure they are tightened securely.
Adjust leveling feet to assure that the Stepper is level to the floor and does not rock back and forth.
Make sure the side handrails are tight.
Mount the Stepper, begin stepping, and verify that the display panel turns on.
Operate the unit to check for proper operation.
You have now completed assembly of your STAR TRAC E-ST STEPPER.
14 STAR TRAC E-ST STEPPER OWNER’SMAN AL

STAR TRAC E-ST STEPPER OWNER’SMAN AL 15
Operating the STAR TRAC E-ST STEPPER is very easy. Simply mount the Stepper by stepping on the Soft Trac®pedals, begin step-
ping, and press QUICK START. Learning the features and incorporating the STAR TRAC E-ST STEPPER into your members' fitness
programs is just as easy. In this chapter, you will learn the display functions and how to get the most out of every STAR TRAC E-ST
STEPPER workout.
IMPORTANT: Before operating the Stepper, you must be familiar with the following equipment limitations:
nMaximum Weight: Your STAR TRAC E-ST STEPPER is designed for a maximum user weight of 350 lbs/158 kg. DO NOT
exceed the maximum user weight.
DISPLAY PANEL FEAT RES
Your STAR TRAC E-ST STEPPER is equipped to provide you
and your users unlimited exercise opportunities. Experiment with
its features to find the right combination for your fitness regimen.
The Display Panel provides the operating controls and display
elements described in the following paragraphs.
Q ICK START Key: Enables the Stepper for
manual operation using a default weight as set
in Manager/Maintenance Mode, a default
LEVEL of "1", and a default time limit as set in
Manager/Maintenance Mode.
NOTE: Default time and weight are adjustable
through Manager/Maintenance Mode.
Numeric Keypad: Allows you to enter specif-
ic values for program parameters during pro-
gram setup. During a program, these keys
may be used to change difficulty level.
OK Key: (part of numeric keypad) Allows you to confirm selections during program setup and operation.
ARROW Key: (part of numeric keypad) Allows you to make corrections to values entered during program setup.
Increase LEVEL Key: Increases the difficulty level, in one-level increments; levels are from 1(least difficult) to 20 (most
difficult). Current level setting is shown in the LEVEL display window.
Decrease LEVEL Key: Decreases the difficulty level from 20 (greatest difficulty) to 1(least difficulty), in one-level incre-
ments. Current level setting is shown in the LEVEL display window.
NOTE: During program setup and while in Manager/Maintenance Mode, the Increase LEVEL and Decrease LEVEL
keys increment or decrement the value shown in the Information Window.
Fan Key: Allows you to control the speed of the personal cooling fan, either OFF, HI H or LOW.
SCROLL Keys: Scrolls the upper and lower data information windows between the three available data displays.
Preset Program Keys: Allow you to access a desired preset workout program.
OPERATING INSTR CTIONS
iPULSETM
NUMERIC
KEYPAD
UPPER DATA
INFORMATION
WINDOW
LOWER DATA
INFORMATION
WINDOW
QUICK START
KEYPAD
FAN CONTROL
KEYPAD
PROFILE
DISPLAY
PRESET
PROGRAMS
KEYPAD
LEVEL ADJUST
KEYPAD
MESSAGE
WINDOW
MOTIVATIONAL
TRACK

pper Data Information Window: Shows current and aggregate data related to your workout. Pressing the associated SCROLL key
scrolls between the following displays:
nCALORIES - Shows your aggregate caloric expenditure thus far in your workout.
nCAL/HR - Shows your current caloric expenditure per hour based on your current difficulty level and stepping rate.
nWATTS - Shows your current watts expenditure at that specific time during your workout.
NOTE: Press the SCROLL key to toggle between data during your workout.
Lower Data Information Window: Shows current and aggregate data related to your workout. Pressing the associated SCROLL key
scrolls between the following displays:
nDISTANCE - Shows the total number of vertical feet or meters you have climbed thus far.
nSPEED - Shows the speed at which you are currently stepping, in steps-per-minute.
nMETS - Shows your current METS expenditure at that specific time during your workout.
NOTE: Press the SCROLL key to toggle between data during your workout.
Graphic Display: Traces your progress through each of the programs and allows you to anticipate changes in difficulty. Display ele-
ments illuminate from left to right across the bottom of the display to indicate your progress through the course. At each step, display
elements illuminate in columns to indicate your ascent up the gradient that is in effect.
Motivational Track: Shows your progress counter-clockwise around a 10-floor course, starting from the bottom
center.
Information Window: Provides informational messages, prompts during program setup, feedback during your workout, notification
when your workout is complete, and scrolling summarized workout data after your workout. During your workout, the Information Window
shows the following data:
nTIME - Shows the duration of your workout thus far in minutes and seconds.
nFLOORS - Shows the total number of floors you have climbed thus far.
nHEART RATE - Shows your current heart rate in beats-per-minute (BPM) while wearing a heart rate strap or grasping the heart
rate grips.
Depending on the program completed and Stepper settings as set in Manager/Maintenance Mode, workout data may include:
SOFT TRAC®SYSTEM
The Soft Trac®system is the Stepper’s foot comfort and step absorption system consisting of a yielding, durable rubber pad covering
both foot pedals. This system is designed to protect ankles, knees, joints, and back while reducing numbness in toes and feet and
providing a comfortable stepping surface. Whether you place your feet at the front, middle, or rear of the pedals you will enjoy the
benefits of the Soft Trac®system.
HINTS AND TIPS FOR GETTING STARTED
The following hints and tips will assist in training your users to maximize the fitness benefits of your STAR TRAC E-ST STEPPER.
nStep at a rate that feels comfortable and most natural, yet is sufficient to achieve a good cardio workout.
nTry different stepping rhythms. In manual operation, vary your stepping speed from slow to fast, then back to slow. As you
become more comfortable with your Stepper, try stepping faster, varying the difficulty LEVEL, or using the preset programs.
nWatch the Graphic Display to anticipate changes in difficulty. When you use the preset programs, the display shows
changes in difficulty as tall or short columns.
VIEWING WORKO T DATA D RING A PROGRAM
Workout data is shown in three windows on the Stepper Display Panel: the Information Window (located at the top of the Display Panel)
and the Upper and Lower Data Information Windows (located inside the Motivational Track, to the right of the raphic Display).
Information shown in the Information Window during a workout includes elapsed time, number of floors climbed, and heart rate (HR),
when in use. After the workout is complete, workout summary information is shown in the Information Window.
16 STAR TRAC E-ST STEPPER OWNER’SMAN AL

The Information Window also displays important instructions and cues throughout the workout.
The Upper and Lower Data Information Windows also display information during a workout.
To view workout data during your workout:
1. Press the Upper Data Information Window SCROLL key to view the following workout data (the current data display is indicat-
ed by an LED next to the parameter name):
nCALORIES - Shows your aggregate caloric expenditure thus far in your workout.
nCAL/HR - Shows your current caloric expenditure per hour based on your current difficulty level and stepping rate.
nWATTS - Shows your current watts expenditure at that specific time during your workout.
NOTE: Press the SCROLL key to toggle between data during your workout.
2. Press the Lower Data Information Window SCROLL key to view the following workout data (the current data display is indicat-
ed by an LED next to the parameter name):
nDISTANCE - Shows the total number of vertical feet or meters you have climbed thus far.
nSPEED - Shows the speed at which you are currently stepping, in steps-per-minute.
nMETS - Shows your current METS expenditure at that specific time during your workout.
PA SE MODE
If you come to a complete stop during your workout (SPM is less than 10), the Stepper will enter a “pause” mode. To continue your work-
out, begin stepping before the “pause” time expires and your workout data will not be lost.
COOLDOWN CYCLE
Once you have completed your workout, the Stepper enters a two-minute Cooldown cycle.
NOTE: The Stepper software is programmed to properly decrease difficulty level to provide a cooldown.
To operate the Stepper during Cooldown:
1. You can adjust the difficulty LEVEL during Cooldown.
nUse the keys to enter a difficulty LEVEL (from 1 to 20); or press the or key, as desired, to increase or
decrease the difficulty LEVEL in 1 unit increments.
nWhen the desired difficulty LEVEL has been entered by using the keys, press the key to accept the displayed
LEVEL.
2. When the Cooldown cycle ends, your workout summary displays in the Information Window. If you wish to exit the Cooldown
cycle before it ends automatically, stop stepping.
SING THE PERSONAL FAN
The STAR TRAC E-ST STEPPER is equipped with a built-in personal fan to increase your comfort during a workout. You can control
the fan speed during your workout.
To operate the personal fan:
nPress the key, as necessary, to cycle the personal fan from OFF to HI H to LOW to OFF. An LED indicator lights to
show the currently selected fan speed.
nThe fan remains set at the set speed if you pause your program, unless your workout was less than two minutes in length.
nThe fan turns off automatically if you exit your workout, or when you complete your workout program.
nThe fan turns off automatically if you pause your program and the time elapsed is less than two minutes.
STAR TRAC E-ST STEPPER OWNER’SMAN AL 17
HEART RATE MONITORING
Heart rate monitoring allows you to determine if your workout is too challenging or not challenging enough. Monitoring your heart rate
is easy with the STAR TRAC E-ST STEPPER. You may use a heart rate strap, or you can simply grasp the silver contact heart rate
grips. Your goal will be to keep your exercise heart rate between 60 and 90 percent of the theoretical maximum for your age, as shown
in the accompanying Target Heart Rate table.
NOTE: The Heart Rate monitor is not a medical test, nor is it designed as a medical test. It is simply a guide to target heart rate train-
ing. Please consult with your physician prior to engaging in any strenuous physical activity.
NOTE: If both the heart rate grips and a heart rate strap are being used, the heart rate grips will override and be displayed in the HR
window.
IMPORTANT: The manufacturer does not warrant the heart rate system performance on this product, as the heart rate system per-
formance varies, based on a user's physiology, fitness level, age, method of use and other factors. Furthermore, the heart rate system
is not for medical use.
CONTACT HEART RATE MONITORING
You may use the heart rate contact grips to automatically check your heart rate while stepping. Just follow these steps.
1. rasp the stainless steel heart rate contact grips; you do not have to squeeze tightly.
nWhen the heart rate contact grips are grasped, the will display and an audible “beep” will sound to indicate that a heart
rate has been detected.
2. It may take from 30 to 60 seconds for the heart rate system to acquire and display your heart rate.
3. When your heart rate has been acquired, the indicator and your heart rate in beats per minute (BPM) display in the HEART
RATE field of the Information Window.
4. Release the Heart Rate grips if you wish to remove your heart rate reading from the display.
CHEST STRAP HEART RATE MONITORING
You may use the heart rate strap to automatically check your heart rate. Just follow these steps:
1. Before beginning your workout, or during a pause, moisten the back of the transmitter on the heart rate strap. Place the strap
snugly around your chest with the transmitter resting directly over your sternum.
2. When your heart rate has been acquired, the indicator and your heart rate in beats per minute (BPM) display in the HEART
RATE field of the Information Window.
3. Remove the heart rate strap if you wish to remove your heart rate reading from the display.
NOTE: The performance of the transmitter may be affected by body types, body oils, metal in clothing, and outside electrical interfer-
ence. Always be sure that the transmitter and skin are in good contact. Avoid operating other electrical equipment near your Stepper
when you use the heart rate strap.
Q ICK START
Quick Start lets you begin your workout by simply pressing one key, or by stepping for approximately 13 seconds without pressing any
key. Quick Start uses a default weight as set in Manager/Maintenance Mode, a difficulty LEVEL of 1, and a time limit as set in
Manager/Maintenance Mode. YOU control resistance LEVEL during the entire program.
To operate the Quick Start program:
1. Mount the Stepper, begin stepping, and press the QUICK START key.
2. If desired, you can use the personal fan during your workout (see “Using the Personal Fan” for details).
3. You can adjust the difficulty LEVEL during the program, using either of the following methods.
nUse the keys to enter a difficulty LEVEL (from 1 to 20). When the desired level has been entered, press the
key to confirm the difficulty LEVEL.
nPress the or key, as desired, to increase or decrease the difficulty LEVEL in 1 unit increments.
4. You can scroll through workout data during the program (see “Viewing Workout Data During a Program” for details).
18 STAR TRAC E-ST STEPPER OWNER’SMAN AL

5. If you wish to pause the program, stop stepping. The Stepper will enter pause mode and display your workout results for one
entire cycle.
6. When you have reached your workout goal, the Stepper enters the Cooldown cycle (see “Cooldown Cycle” for details). If you
wish to exit the program before you have reached your workout goal, stop stepping and allow the Pause timer to expire. If you
wish to skip the Cooldown cycle, press the key to view your workout summary.
PRESET PROGRAMS
The STAR TRAC E-ST STEPPER offers 8 preset programs to add variety and challenge to your workout. Additionally, the HR TRAIN-
IN feature lets you select one of two cardio-intensive training programs, or a Fitness Test.
Pre-set programs include:
Allows the user to pre-program a time goal and user weight. Difficulty is determined by the user during the program.
Provides a high intensity interval workout.
Provides a workout designed to target the thigh muscles.
Provides a workout designed to target the gluteal muscles.
Provides a motivational workout in which the user can climb one of nine famous landmarks.
Advanced programs that offer the user the ability to train in specific HR zones, or perform a Fitness Test.
NOTE: When entering setup data for any program, if the key is not pressed, the system will “auto-advance”
through the prompts.
MAN AL PROGRAM
The MANUAL program allows the user to pre-program a time goal, difficulty LEVEL and user weight. Difficulty LEVEL can be adjusted by the
user during the program.
To operate the MAN AL program:
1. Mount the Stepper, begin stepping, and press the key.
2. You are prompted to enter your weight. The Stepper displays a default weight as set in Manager/Maintenance Mode. You may
enter any weight from 1 to 350 pounds (1 to 158 kg).
nUse the keys to enter your current weight; or press the or key, as necessary, to increase or decrease the
displayed weight in 1 pound (or 1 kg) increments.
nWhen your correct weight has been entered, press the key to accept the displayed value.
3. You are prompted to enter a time goal. The default time is 20 minutes, or equal to the time parameter set in Manager/
Maintenance Mode if less than 20 minutes. You may enter any time from 1 to 99 minutes.
nUse the keys to enter your desired time goal; or press the or key, as necessary, to increase or decrease
the displayed value in 1 minute increments.
nWhen your desired goal has been entered, press the key to accept the displayed value.
4. You are prompted to enter a difficulty LEVEL.
nUse the keys to enter a difficulty LEVEL (from 1 to 20) or press the or key, as desired, to increase or
decrease the difficulty LEVEL in 1 unit increments.
nWhen the desired difficulty LEVEL has been entered, press the key to accept the displayed LEVEL.
5. If desired, you can use the personal fan during your workout (see “Using the Personal Fan” for details).
6. You can adjust the difficulty LEVEL during the program, using either of the following methods:
nUse the keys to enter a difficulty LEVEL (from 1 to 20). When the desired level has been entered, press the
key to confirm the difficulty LEVEL.
nPress the or key, as desired, to increase or decrease the difficulty LEVEL in 1 unit increments.
STAR TRAC E-ST STEPPER OWNER’SMAN AL 19
7. You can scroll through workout data during the program (see “Viewing Workout Data During a Program” for details).
8. If you wish to pause the program, stop stepping. The Stepper will enter pause mode and display your workout results for one
entire cycle.
9. When you have reached your workout goal, the Stepper enters the Cooldown cycle (see “Cooldown Cycle” for details). If you
wish to exit the program before you have reached your workout goal, stop stepping and allow the Pause timer to expire.
FAT BRNER PROGRAM
The FAT BURNER program provides a high intensity interval workout.
To operate the program:
1. Mount the Stepper, begin stepping, and press the key.
2. You are prompted to enter your weight. The Stepper displays a default weight as set in Manager/Maintenance Mode. You may
enter any weight from 1 to 350 pounds (1 to 158 kg).
nUse the keys to enter your current weight; or press the or key, as necessary, to increase or decrease the
displayed weight in 1 pound (or 1 kg) increments.
nWhen your correct weight has been entered, press the key to accept the displayed value.
3. You are prompted to enter a time goal. The Stepper displays a default time of 20 minutes, or equal to the time parameter set
in Manager/Maintenance Mode if less than 20 minutes. You may enter any time from 1 to 99 minutes.
nUse the keys to enter the desired time goal, or press the or key, as necessary, to increase or decrease
the displayed value in 1 minute increments.
nWhen your desired time goal has been entered, press the key to accept the displayed value.
4. You are prompted to enter a difficulty LEVEL.
nUse the keys to enter a difficulty LEVEL (from 1 to 20) or press the or key, as desired, to increase or
decrease the difficulty LEVEL in 1 unit increments.
nWhen the desired difficulty LEVEL has been entered, press the key to accept the displayed LEVEL.
5. If desired, you can use the personal cooling fan during your workout (see “Using the Cooling Fan” for details).
6. You can adjust the difficulty LEVEL during the program using either of the following methods:
nUse the keys to enter a difficulty LEVEL (from 1 to 20). When the desired difficulty LEVEL has been entered, press
the key to confirm the difficulty LEVEL.
nPress the or key, as desired, to increase or decrease the difficulty LEVEL in 1 unit increments.
7. You can scroll through workout data during the program (see "Viewing Workout Data During a Program” for details).
8. If you wish to pause the program, stop stepping. The Stepper will enter pause mode and display your workout results for one
entire cycle.
9. When you have reached your workout goal, the Stepper enters the Cooldown cycle (see “Cooldown Cycle” for details). If you
wish to exit the program before you have reached your workout goal, stop stepping and allow the Pause timer to expire.
20 STAR TRAC E-ST STEPPER OWNER’SMAN AL
Other manuals for Fitness E-ST 5090
1
Table of contents
Other Star Trac Stepper Machine manuals


Popular Stepper Machine manuals by other brands

Deco Gear
Deco Gear DecoHome DGSTEPPER user manual

Christopeit Sport
Christopeit Sport Twist'n Step Plus Assembly and exercise instructions

Body Champ
Body Champ BMS 100 owner's manual

Kettler
Kettler MONTANA Important instructions

Sunny Health & Fitness
Sunny Health & Fitness P2000 user manual

Spokey
Spokey COLUMN II manual


