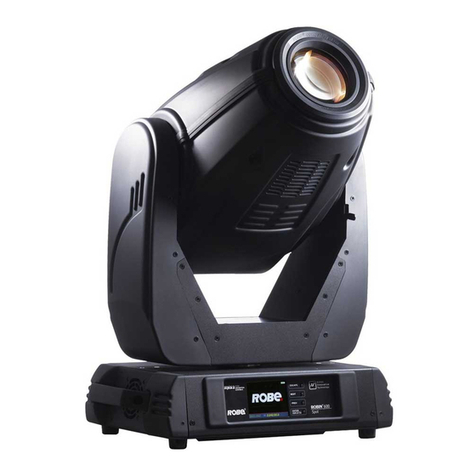
Star Warning Systems STARVISION II VL22 User manual

PLITSTR284 REV. D 3/29/05
The STARVISIONII™visor light is designed to be mounted on the inside of
your vehicle. It is not intended for exterior applications.
It is the sole responsibility of the owner to ensure the warning light is
secure. Check your light every time you enter the vehicle to ensure that it
is mounted securely. Star Headlight and Lantern Co. assumes no
responsibility for the secure mounting of this light.
MODEL VL22 LED VISOR LIGHT
30 Tilt-Activated Flash Patterns –Lightweight –Polycarbonate
Voltage : 10-16VDC
Current Draw : Approx. 1.5 Amps
STARVISIONII
™
IMPORTANT: Please read all of the following instructions before installing your new Model VL22
STARVISIONII™ LED Visor Light .
CAUTION: Please be sure to check that your cigarette plug outlet is properly fused. Testing the
light before this fuse is properly installed will void the warranty on the light.
WARNING!!!! Care should be taken when pos
itioning this warning light on the visor so that the light
and/or cord does not interfere with the proper operation of the driver-side or passenger-
side
airbag! Failure to heed this warning may result in serious or fatal injury.
The VL22 uses state-of-the-art Light Emitting Diode (LED) technology. This
warning light is comprised of ultra
-high intensity LEDs that are operated by a micro-
controller to efficiently produce light output with lifetimes up to 100,000 hours.

Mounting
1. The STARVISION II™ Visor Light comes equipped
with two Velcro straps for standard visor
mounting. Please read all of the following
instructions before installing your new
STARVISIONII™ Visor Light .
2. Place the vehicle’s sun visor in the “down”
position. (Typically the passenger side visor.)
3. Place the STARVISION II™ Visor Light in front of the
vehicle’s sun visor, with the cigarette plug cord exiting the
top of the light. Please Note: The VL22 must be mounted
with the power cord exiting the top of the light or the tilt-switch
will not function properly.
4. With the flat side of the light mounted against the visor and the LEDs
pointing towards the windshield, adjust the straps so that the light may be
slid over the end of the visor.
5. Once in place, tighten the straps to the desired tension.
6. Route the wire across the top of the visor and down to
your cigarette plug outlet.
Passenger side
mounting is shown
here. Please note that
the cord is routed such
that it runs towards the
outside of the
windshield and does
not obstruct the view of
the driver.
CAUTION!!! Once the light is secured,
route your cord such that it does not
interfere with the vision of the driver or
the operation of the steering wheel, gear
shifter, and/or any airbags.
Warning: It is the owners sole responsibility to ensure
that the mount is secure and will not come
loose while the vehicle is in motion.

Operation
When in the “ON” mode, the STARVISION II™LED Visor Light is designed with a tilt sensor to
automatically turn the light “ON” when the visor is flipped down and turn the light “OFF” when the
visor is pushed back up.
This light was also designed with provisions to de-activate the tilt switch. If you wish to alter the
internal jumper settings so that the light will operate at any angle, using the On/Off button, please
call our Customer Service Department at 585-226-9787.
ON/OFF BUTTON:
There are two push-button switches located to the right on the face of the STARVISION II™. The
bottom button is red and switches the unit on and off. When the unit is switched ON, the green
LED that is located on the right end of the light near the buttons, will illuminate. This signifies that
the light is in standby mode. While in standby mode, the VL22 will remain off when the visor is in
the up position. The VL22 will activate when the visor is flipped down. When the green LED is not
lit, the VL22 is OFF and will not flash in any position.
PATTERN SELECT BUTTON:
The black push-button switch located above the On/Off switch-button is the Pattern Select
button. Each time this switch-button is depressed, the VL22 will cycle to the next pattern. The
VL22 is designed with thirty different patterns:
1. Singleflash Alternating (Default Pattern) 16. Dimmer FX
2. Singleflash Simultaneous 17. Simultaneous Rapid Pulse w/Variable Rate
3. Tripleflash Simultaneous 18. Alternating Rapid Pulse w/Variable Rate
4. Five-Flash Simultaneous 19. Alternating 21-Flash Burst
5. Singleflash Fast Alternating 20. Alternating Doubleflash, Quadflash, and Quadflash Burst w/Overlap
6. Tripleflash Fast Alternating 21. Alternating Tripleflash, Tripleflash Burst, and Rapid Singleflash
7. Five-Flash Fast Alternating 22. Simultaneous Doubleflash, Alternating Doubleflash, and Alt. Rapid Singleflash
8.. Singleflash Alternating POP 23. Alternating Tripleflash Burst, Simultaneous Doubleflash, and Alternating Singleflash
9. Tripleflash Alternating POP 24. Fast Alternating Doubleflash and Fast Simultaneous Doubleflash
10. Five-Flash Alternating POP 25. Simultaneous Doubleflash, Fast Simultaneous Doubleflash, and Alt. Rapid Singleflash
11. Singleflash Fast Alternating Rapid 26. Alternating Singleflash and Fast Alternating Singleflash
12. Simultaneous Quadflash Burst 27. Alternating Five-Flash Burst, Fast Alternating Five-Flash, and Alt. Rapid Singleflash
13. Alternating Quadflash Burst 28. Steady Red w/Blue Singleflash and Singleflash POP
14. Alternating Rapid w/Overlap 29. Steady Red w/Blue Singleflash
15. Alternating Tripleflash w/Overlap 30. DEMO MODE (cycles through all patterns)
There is also an additional “OFF” pattern included after the DEMO MODE. After the “OFF”
pattern, the patterns will start to cycle through again. The STARVISION II™ LED Visor Light will
“remember” the selected pattern when switched off and that pattern will be displayed the next
time the light is switched on.

PARTS LIST
Circuit (Red/Blue) S8070-228-1Cig Plug 176
Circuit (Red/Red) S8070-228-2Clear Lens P30129-10C
Circuit (Blue/Blue) S8070-228-3Velcro Straps P30209-1
Circuit (Amber/Amber) S8070-228-4Backplate P30019-59
Circuit (Red/Amber) S8070-228-5Backplate Screws P30052-32
Circuit (Blue/Amber) S8070-228-6Switchbutton Nuts P30007-68-1
Circuit (White/White) S8070-228-7Front Housing/Frame P30214-2
This light has been factory tested and approved. If the light fails to work when the plug is
inserted into the cigarette plug, check the green LED on the side of the light.
If the green LED is not lit:
A. Press the red ON/OFF push-button switch
B. Twist the plug a few times to remove any ash or other deposits which might be
preventing a good contact from being made
C. Remove the fuse from the vehicle fuse box and check to see if it has blown.
D. Remove the fuse from the cig plug on the light (if present) and check to see if it has
blown.
E. Clean the lighter socket and contact surfaces.
If your VL22 does not flash and the green LED is lit:
A. Press the black Pattern Select push-button switch to be sure the “Off” pattern is not
selected.
B. Check that the light is properly oriented with the cig plug exiting from the top of the
light and that the light is in a vertical position.
ONE YEAR LIMITED WARRANTY
The manufacturer warrants each new product against factory defects in material and workmanship for one year after the
date of purchase. The owner will be responsible for returning to the Service Center any defective item(s) with the
transportation costs prepaid. The manufacturer will, without charge, repair or replace at its option, lights or light part(s)
which its inspection determines to be defective. Repair or replacement item(s) will be returned to the purchaser with
transportation costs prepaid from the service point. A copy of the purchaser's receipt must be returned with the defective
item(s) in order to qualify for the warranty coverage. Exclusions from this warranty are FLASH TUBES/BULB(S)as well
as the finish. This warranty shall not apply to any light which has been altered, such that in the manufacturer's judgment
the performance or reliability has been affected or damage has resulted from abnormal use or service.
There are no warranties expressed or implied (including any warranty of merchantability or fitness), which extend this
warranty period. The loss of use of the product, loss of time, inconvenience, commercial loss or consequential
damages, including costs of any labor, are not covered. The manufacturer reserves the right to change the design of the
product without assuming any obligation to modify any product previously manufactured.
This warranty gives you specific legal rights. You might also have additional rights which may vary from state to state.
Some states do not allow limitations on how long an implied warranty lasts. Some states do not allow the exclusion or
limitation of incidental or consequential damages. Therefore, the above limitation(s) or exclusion(s) may not apply to you.
If you have any questions concerning this or any other product,
please contact our Customer Service Department at (585) 226-9787.
If a product must be returned for any reason, please contact our Customer Service Department
to obtain a Returned Goods Authorization number (RGA #) before you ship the product to Star.
Please write the RGA # clearly on the package near the mailing label.
The VL22 uses state-of-the-art Light Emitting Diode (LED) technology. This warning
light is comprised of ultra-high intensity LEDs that are operated by a micro-controller
to efficiently produce light output with lifetimes up to 100,000 hours. Under normal
circumstances, you will not need to replace any lights in this warning light.
Table of contents
