9
●
Notes
Operating principles of the Robot Cleaner
Operating principles of the Robot Cleaner
The device uses a camera and various sensors to detect and recognize the ceiling and obstacles,
information on which is then used to create a virtual map located inside the CPU installed at the
main body as it cleans. It decides on either cleaned areas or to-be-cleaned areas by itself as it
generates the most effective map when in operation(except under the random mode or max mode
of operation). 15 built-in detection sensors allow the Robot Cleaner to minimize butts to the wall
or other objects such as chairs and flowerpots. The Robot Cleaner can be operational on the floor
with a threshold of as high as 18 mm, and it detects the staircase using the floor sensor to prevent
itself from falling down.
Suction of the Robot Cleaner
The Robot Cleaner is equipped with one main brush, two side brushes and one vacuum
suction inlet. Dust on the floor is collected by the rotating side brushes and then swept
by the rotating main brush into the dust box.
●
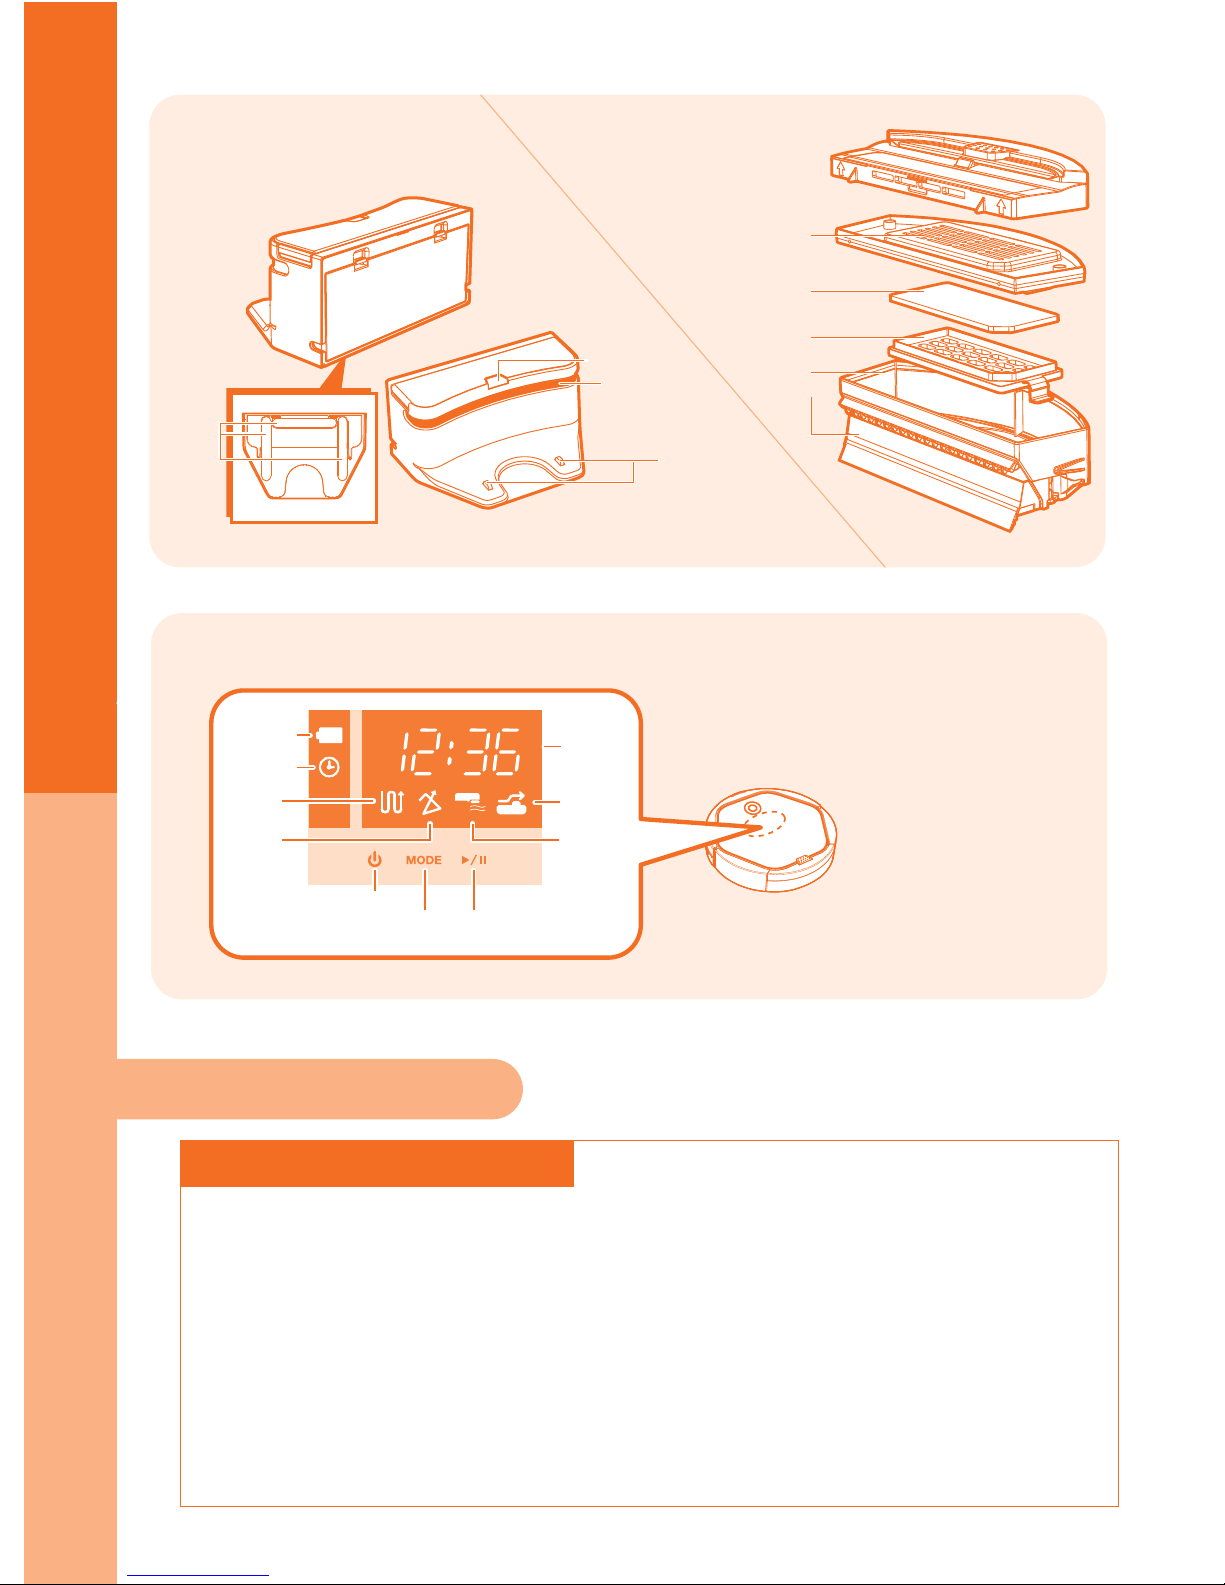
Installation of the Robot Cleaner
Before use
1. Turn upside down the Robot Cleaner, and check the
locations of the left and right side brushes.
2.
3.
※ A soft fabric patch laid on the floor would help reduce
scratches on the upper plate of the Robot Cleaner.
Installation of the side brushes
1 2
※ Caution :
Make the hole and pole of the side brush fit each
other correctly and then push into the position.
※ Adapter Connection
illustrated
Installation
of the
charging
station
4
12
1. Open the rear cover of the charging station and then
mount the adapter with a power plug connected, as
illustrated here.
2. Completely connect the charging jack of the adaptor to
the jack inside the charging station.
3. Place the cable in an orderly way inside the rear space
of the charging station.
4. Secure space as wide as 0.5 m on both sides and deep
at least 1.5 m from the front of the charging station.
3
Place the L-side brush over the axis of a pole near the
L mark and then push forcibly into the position.
Place the R-side brush over the axis of a pole near the
R mark and then push forcibly into the position.