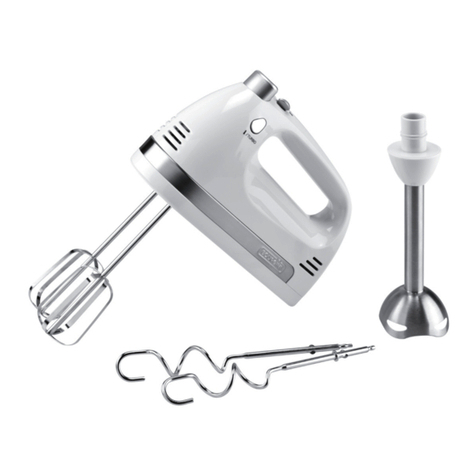
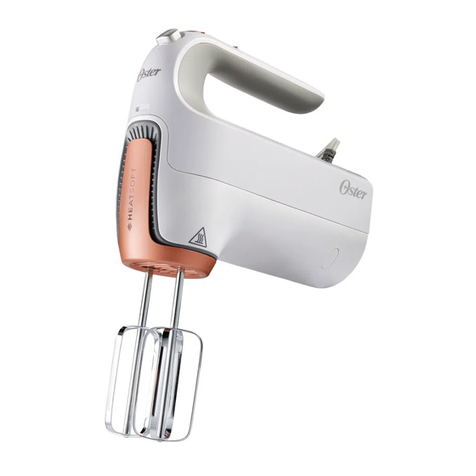
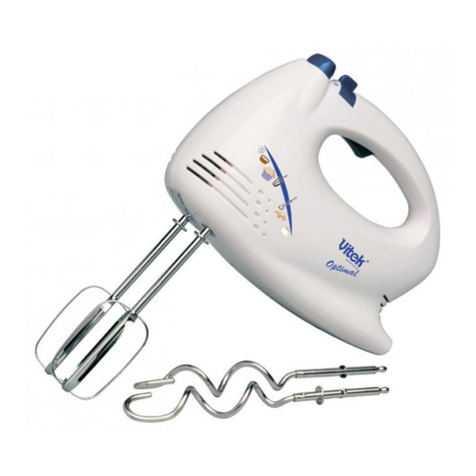
STARFRIT 024226 Assembly instructions

INSTRUCTIONS FOR USE AND CARE P.2
INSTRUCTIONS POUR L’USAGE ET L’ENTRETIEN
P.13
INSTRUCCIONES DE USO Y MANTENIMIENTO P.25
5-SPEED HAND MIXER
BATTEUR À MAIN 5 VITESSES
BATIDORA DE MANO DE
5 VELOCIDADES

2
OPERATING AND SAFETY INSTRUCTIONS
Item No. Voltage (V) Wattage (W) Frequency (Hz)
024226 120 250 60
IMPORTANT SAFEGUARDS
READ THE INSTRUCTIONS BEFORE USE
WARNING: To reduce the risk of fire, electrical shock, serious personal
injury and/or property damage:
A. To protect against electric shock, DO NOT immerse the power
cord, plug or product in water or expose to other liquids.
B. Keep the product out of the reach of children and pets. This
product is not intended for use by children. Close adult supervision
is necessary when any appliance is used near children. Do not leave
the product unattended while it is in use.
C. Do not use this hand mixer for anything other than its intended
use. Always unplug the product from the electrical outlet when not
in use.
D. Avoid contact with moving parts (beaters and dough hooks) when
the hand mixer is in use. Spatulas and other utensils should be
discarded when using the hand mixer.
E. Do not use this appliance for chopping ice or blending hard
and dry substance. Doing so will result in premature wear of the
appliance.
F. Do not operate the product if it has a damaged power cord or
plug, or after the appliance malfunctions or has been damaged
in any manner. Do not attempt to examine or repair this product
yourself. For further assistance, please contact customer service to
the following e-mail address: starfrit.com/en/contact-us
G. Always unplug the appliance from the electrical outlet when not in
use, before putting on or taking off parts, and before cleaning or
moving the appliance. To disconnect, pull directly on the plug-do
not pull on the power cord.
H. Remove beaters and dough hooks before cleaning.
I. Never release beater or dough hooks when the appliance is in
operation.
J. Do not plug or unplug the product into/from the electrical outlet
with wet hands.
K. Connect the power plug to an easily accessible outlet so that the
hand mixer can be unplugged immediately in the event of an
emergency.

3
L. Do not use attachments not recommended or sold by the product
manufacturer. The use of accessory attachments not recommended
by the appliance manufacturer may cause injuries.
M. This product is intended for indoor, household use only. Do not use
outdoors or for any other purpose.
N. Do not allow the power cord to hang (e.g., over the edge of a table
or counter) or touch hot surfaces.
O. Do not place the product on or near a hot gas or electric burner, or
in heated oven or microwave oven.
P. Always use the hand mixer on a firm or stable surface.
DO NOT OPERATE THE APPLIANCE FOR MORE THAN 5 MINUTES
CONTINOUSLY. ALLOW THE APPLIANCE TO REST FOR A MINIMUM OF 20
MINUTES BETWEEN 2 CONTINOUS CYCLES
SAVE THESE INSTRUCTIONS FOR
FUTURE REFERENCE
POLARIZED PLUG: This appliance is equipped with a polarized plug (one blade is
wider than the other). As a safety feature to reduce the risk of electrical shock, this plug
is intended to fit in a polarized outlet only one way. If the plug does not fit fully in the
outlet, reverse the plug. If it still does not fit, contact a qualified electrician. Do not
attempt to defeat this feature or modify the plug in any way. If the plug fits loosely into
the AC outlet or if the AC outlet feels warm, do not use that outlet.
SPECIAL INSTRUCTIONS: A short not detachable power-supply cord is provided to
reduce risks resulting from becoming entangled in or tripping over a longer cord
AN EXTENSION CORD MAY BE USED IF CARE IS EXERCISED IN THEIR USE:
• Minimize the risk of overheating by using the shortest UL or ETL cord possible.
• The marked electrical rating must be at least as great as that of the product.
• Never use a single extension cord to operate more than one appliance.
• Arrange the longer cord so that it will not drape over a countertop or tabletop
where it can be tripped over, snagged, or pulled on unintentionally (especially by
children).
• DO NOT alter the plug. DO NOT attempt to defeat the safety purpose of the
polarized plug.

4
1
2
3
4
5
1. RELEASE BUTTON
2. 5-SPEED VARIABLE CONTROL
3. TURBO BUTTON
4. BEATERS
5. DOUGH HOOKS

5
BEFORE FIRST USE
(Read the instructions before first use)
NOTE: During first use of the appliance, smoke and/or a slight odour may occur from
the appliance. This is normal and will quickly disappear. It will not recur after appliance
has been used a few more times.
1. Remove all parts & accessories. Dispose of packaging.
2. Wash all removable parts (beaters and dough hooks) in hot soapy water or in the
dishwasher and dry thoroughly.
3. The body of the hand mixer can be cleaned with a damp cloth. Never immerse the
body hand mixer in water.
TO ASSEMBLE:
WARNING: Ensure the appliance is unplugged from the electrical outlet before
inserting beaters or dough hooks into the hand mixer.
According to the recipe you want to prepare, select the correct attachment for your
needs insert either beaters or dough hooks in the hand mixer.
Inserting beaters:
• Unplug the hand mixer and set the speed variable control to 0.
• Firmly push beaters inside the openings until they click into place.
(See image above)
• Ensure that beaters are fully inserted before using the mixer.
NOTE: Beaters are interchangeable

6
Inserting dough hooks:
• Unplug the hand mixer and set the speed variable control to 0.
• Insert dough hook with collar on the right side which has the larger opening.
(See image above)
• Firmly push dough hooks in until they click into place. Insert the dough hook
without collar on the left side which has the smaller opening. Ensure that dough
hooks are fully inserted before using the mixer.
NOTE: Dough hooks must be inserted into the correct side and are not
interchangeable.
TO USE:
1. Ensure the speed variable control on the hand mixer is set to the 0 position.
2. Insert beaters or dough hooks according to section to assemble.
NOTE: Ensure the beaters or dough hooks are firmly positioned before operating.
3. Plug the appliance into a standard 120-volt AC electrical outlet.
4. Add the ingredients into a bowl, hold the mixer handle and position the beaters or
dough hooks in the center where the food will be mixed.
5. Set the speed variable control on the lowest speed to start mixing. Gradually
increase the speed variable control from lower to higher speed until desired
speed. The speed variable control includes speeds 1 through 5 with a Turbo
function. The mixer will run at the highest speed when pressing the Turbo button.
(See mixing guide and turbo function)
NOTE: Keep the beaters or dough hooks always immersed in the mixture to avoid
splashing the mixture from the spinning beaters or dough hooks.
6. Guide the beaters or dough hooks in constant motion circling around the
circumference of the bowl and through the center to incorporate all ingredients. If
necessary, to scrape the sides or bottom of the bowl using a utensil, ensure that the
speed variable control is at 0. The hand mixer can be placed vertically and stay still
because of its self-stand design.
Collar
Right side

7
7. When mixing is complete, set the speed variable control switch to the O position.
Remove the power cord from the outlet.
8. Remove the beaters or dough hooks by pressing the RELEASE button. The
beaters or dough hooks will be released automatically. Do not force the beaters or
dough hooks out of openings.
NOTE: Use a spatula to remove the mixture from the beaters or dough hooks.
BEATERS
Beater attachments can be used for all mixing and whipping tasks: Blend, stir, mix, beat
and whip. The beaters allow thorough and fast mixing results. (See mixing guide for
more details)
MIXING GUIDE
Use the following guide for speed selections. The range of foods that can be mixed
with a hand mixer is quite extensive. To prevent splattering, start mixing on a slower
speed until the ingredients begin combining, gradually increase speed range for the
required task.
Lows speeds are designed for hard ingredients. Harder ingredients will be well
incorporated in your mixture when blending slowly.
Higher speeds are designed for more heavy liquid ingredients such as eggs or heavy
cream. The ingredients will mix and blend with one another.
Please note that speed selection may vary slightly depending on your recipe.
SPEED MIXING TASKS USE
1 (Low) Blend
Ideal for starting all mixing
procedures and combining
ingredients. Use this
speed to blend flour or
other dry ingredients
with liquids or moist
mixtures. Incorporate nuts,
chocolate chips, raisins or
other chunky ingredients
in your mixture.
2 (Low) Stir
Ideal to stir thin batters
and gelatin mixtures.
Prepare sauces, dressings
and puddings.
3 (Medium) Mix
Ideal to combine butter,
sugar and to mix eggs into
batters. Prepare batters,
cookie dough and cake
mixes.
4 (Medium) Beat Ideal to beat whole eggs
and frostings.

8
5 (High) Whip
Ideal to whip fluffy
mixtures, whipped cream,
egg whites and mashed
potatoes.
Turbo option ---------
Use at any speed setting
to achieve maximum
power for tough mixing
tasks.
NOTE: The beaters are not designed for mixing and kneading bread dough.
(See section dough hooks for more details)
DOUGH HOOKS
The dough hooks will allow you to save time and effort to knead dough. They can be
used to help you prepare your favorite pizza dough, quick breads and cookie dough.
Begin by mixing dry ingredients at low speeds (1-2) and gradually add wet ingredients.
Once dry and wet ingredients are combined, slowly increase speed and add water
again until ingredients form a lump. The final result should feel smooth and elastic.
Some brands of flour absorb more liquid than others, so additional amounts of liquid
may need to be added if the dough is not the right consistency.
NOTE: Only use dough hooks for kneading.
TURBO FUNCTION
The Turbo function allows you to increase the mixing speed to the maximum power
level from any setting. When you feel the hand mixer slowing down or straining in
tough mixing tasks (such as mixing cookie dough), press the Turbo button.
As soon as the Turbo button is released the hand mixer will return to the pre-selected
speed.
REMOVING BEATERS & DOUGH HOOKS
Once mixing is completed turn the speed variable control to 0 and raise beaters or
dough hooks slowly and unplug the appliance. To remove the beaters or dough hooks
position the mixer over a bowl or sink and press the Release button. The beaters or
dough hooks will drop out of their openings for easy cleaning.
PREPARATION TIPS
To mix with ease, refrigerated ingredients such as butter and eggs should be at room
temperature.
To eliminate the possibility of shells in your recipe; break eggs into separate container
first, then add to the mixture.

9
CLEANING TIPS:
WARNING: Ensure the appliance is unplugged from the electrical outlet and allow it to
cool down completely before handling or cleaning it.
1. Remove beaters or dough hooks from the hand mixer and wash in hot soapy water
or in the dishwasher. NOTE: Do not allow the beaters and dough hooks to soak in
water for an extended period, as this may damage them prematurely.
2. Make sure accessories are dried thoroughly.
3. The body of the hand mixer can be cleaned with a damp cloth. Never immerse
the body of the hand mixer in water. NOTE: Do not use abrasive scouring pads or
cleaners when cleaning the beaters/dough hooks as these may scratch the surface.
WARRANTY
1-YEAR LIMITED WARRANTY.
This warranty covers any defects in materials and workmanship for a period of one
(1) year from the date of the original purchase. Please retain your original receipt as
a proof of the purchase date. Any complaints must be registered within the warranty
period. The product will be repaired, replaced (parts including blades or entire
appliance) or refunded at our sole discretion. Shipping charges may apply.
This warranty does not cover normal wear of parts or damage resulting from any
of the following:
Negligent use or misuse of the product including failure to clean the product regularly,
use for commercial purposes, accident, use on improper voltage or current, use
contrary to the operating instructions, disassembly, repair or altercation by anyone
other than a STARFRIT authorized service agent.
Decisions as to the cause of damage are the responsibility of Starfrit. All decisions
will be final. For further assistance, please contact customer service to the
following e-mail address: starfrit/en/contact-us.

10
RECIPES
BANANA BREAD AND CHOCOLATE CHIPS
SERVINGS: 8 portions
ATTACHMENTS: Beaters
Ingredients:
• 1 ½ cup (375 ml) flour
• 1 cup (250 ml) sugar
• 1 teaspoon (5 ml) baking soda
• 1 teaspoon (5 ml) salt
• 3 ripe bananas
• 1 egg
• ½ cup (125 ml) mayonnaise
• ¾ cup (190 ml) chocolate chips
Preparation:
1. Preheat the oven to 350°F (180°C).
2. In a bowl, combine the flour, sugar, baking soda and salt; set aside.
3. In another bowl, combine the bananas, egg and mayonnaise. Attach the beaters
to your Starfrit 5-speed Hand Mixer, starting to mix on low speed increasing to
medium speed.
4. Incorporate the dry ingredients and beat until the ingredients are just barely
combined and no more dry flour is visible.
5. Put aside your Starfrit 5-speed Hand Mixer and with spatula incorporate the
chocolate chips.
6. Place the mixture in a buttered loaf pan.
7. Bake 60 minutes or until golden brown.

11
CARROT CAKE
SERVINGS: 8 portions
ATTACHMENTS: Beaters
Cake:
• 2 cups (500 ml) flour
• 1 teaspoon (5 ml) baking powder
• 1 teaspoon (5 ml) baking soda
• ½ teaspoon (2.5 ml) salt
• ½ teaspoon (2.5 ml) cinnamon
• ½ teaspoon (2.5 ml) nutmeg
• ½teaspoon (2.5 ml) ground ginger
• 4 eggs
• 250 mL (1 cup) canola oil
• 1 teaspoon (5 ml) vanilla
• 1 tablespoon (15 ml) orange zest
• ¾ cup (190 ml) brown sugar
• ¾ cup (190 ml) sugar
• 3 cups (750 ml) grated carrots
• 1 ½ cups (375 ml) chopped walnuts
Icing:
• ½ cup (125 ml) butter, softened
• 8 ounces (240g) cream cheese, softened
• 4 cups (1000 ml) confectioners' sugar
• 1 teaspoon vanilla extract
• 1 cup whole walnuts
Preparation:
1. Preheat the oven to 180°C (350°F).
2. In a bowl, combine the flour with the baking powder, baking soda, salt and spices.
3. In a separate bowl, using your Starfrit 5-speed Hand Mixer with the beater
attachments beat the eggs with the oil, vanilla, zest, brown sugar and sugar at
medium speed. At low speed, gradually add the grated carrots.
4. Set your Starfrit 5-speed Hand Mixer aside. Using a spatula, gradually incorporate
the mixture of dry ingredients and stir until a smooth paste is obtained.
5. Butter two 20 cm (8 inches) round molds, then spread the dough over them. Bake
for 30 to 35 minutes, until a toothpick inserted in the center of a cake comes out
clean. Let cool on a rack and unmold.
6. In a bowl, using your Starfrit 5-speed Hand Mixer, combine the cream cheese with
the butter. On low speed, gradually whisk in the vanilla and confectioner’s sugar
until a creamy consistency is achieved.
7. Spread icing on first cake, then cover with second cake. Spread the rest of the icing
over the top and sides.
8. Gently press the walnuts into the icing around the sides of the cake.
9. Chill for 60 minutes to let the icing set, then slice and serve.

12
PIZZA CRUST
SERVINGS: 1 crust
ATTACHMENTS: Dough hooks
Ingredient:
• 1 package (¼-ounce or 7 g)
Active Dry Yeast
• 1 tablespoon (15 ml) white sugar
• ¼ cup (65 ml) warm water (110°F/ 45°C)
• 2 ½ cups (625 ml) bread flour
• 2 tablespoon (30 ml) olive oil
• 1 teaspoon (5 ml) salt
Preparation:
1. In a medium bowl, dissolve Active Dry Yeast
and sugar in warm water. Let sit for 1 minute.
2. Incorporate the flour, salt and olive oil using
The Starfrit 5-speed Hand Mixer with the dough hooks on low speed. It should take
less than a minute to form the dough. If the dough does not release from the sides
of the bowl, add a pinch of flour. If the dough is very dry and floury, add a small
amount of water.
3. Scrape the hooks and knead for approximately 2 minutes or until you have a smooth
elastic dough (scrape the hooks halfway through kneading). Let rest for 5 minutes.
4. Turn dough out onto a lightly floured surface and pat or roll into a round.
5. Transfer crust to a lightly greased pizza pan. Spread with desired toppings and bake
in preheated oven (425°F/ 220°C) for 17 to 22 minutes.
6. Let baked pizza and cool for 5 minutes before serving.

13
MODE D’EMPLOI ET CONSIGNES DE SÉCURITÉ
No de l’article Tension (V) Puissance (W) Fréquence (Hz)
024226 120 250 60
DIRECTIVES IMPORTANTES
LIRE LES INSTRUCTIONS AVANT D’UTILISER
L’APPAREIL
AVERTISSEMENT : Pour réduire les risques d’incendie, de décharges
électriques, de blessures corporelles sérieuses et de dommages
matériels.
A. Pour assurer une protection contre les décharges électriques, NE
PAS immerger le cordon d’alimentation, la fiche ou le batteur à
main 5 vitesses dans l’eau ou dans tout autre liquide.
B. Garder l’appareil hors de la portée des enfants ou des animaux
domestiques. Cet appareil ne doit pas être utilisé par des enfants.
La surveillance d’un adulte est nécessaire lorsque l’appareil est en
fonction en présence d’un enfant. Ne pas laisser l’appareil sans
surveillance lorsqu’il est en fonction.
C. Ne pas utiliser le batteur à main à d’autres fins que pour lesquelles
il a été conçu. Ne pas laisser l’appareil sans surveillance lorsqu’il est
en fonction.
D. Éviter les contacts avec les pièces en mouvements (batteurs et
crochets pétrisseurs) quand le batteur à main est en fonction. Les
spatules et autres ustensiles doivent être retirés du bol à mélanger
lorsque le batteur à main est en fonction.
E. Ne pas utiliser le batteur à main pour concasser de la glace
ou autres substances dures et sèches. Ceci peut causer l’usure
prématurée de l’appareil.
F. Ne pas utiliser l’appareil si le cordon électrique ou la prise
électrique sont endommagés, si l’appareil a subi une quelconque
défaillance ou s’il a été endommagé. Ne pas tenter de réparer
l’appareil. Pour obtenir une aide supplémentaire, communiquez
avec le service à la clientèle à l’adresse suivante : starfrit.com/fr/
contactez-nous
G. Toujours débrancher l’appareil lorsqu’il n’est pas en fonction, avant
d’installer ou d’enlever des pièces, ou avant de le nettoyer ou de le
déplacer. Pour débrancher l’appareil, tirer sur la fiche électrique, ne
jamais tirer sur le cordon d’alimentation.
H. Toujours retirer les batteurs et les crochets pétrisseurs avant le
nettoyage.

14
I. Ne pas appuyer sur le bouton de relâchement pour libérer les
batteurs ou les crochets pétrisseurs lorsque le batteur à main est en
fonction.
J. Ne jamais brancher ou débrancher l’appareil lorsque vous avez les
mains mouillées.
K. Brancher la fiche d’alimentation dans une prise électrique
facilement accessible de sorte que le batteur à main 5 vitesses
pourra être rapidement débranché en cas d’urgence.
L. Ne pas faire usage d’accessoires non recommandés par le
fabricant ou non vendus par celui-ci avec cet appareil. L’utilisation
d’accessoires non recommandés par le fabricant peut causer des
blessures.
M. Cet appareil a été conçu pour un usage domestique et intérieur
uniquement. Ne pas utiliser à l’extérieur ou à toutes autres fins que
pour lesquelles il a été conçu.
N. Ne pas laisser pendre le cordon d’alimentation (par exemple d’une
table ou d’un comptoir) ou toucher à des surfaces chaudes.
O. Ne pas installer l’appareil sur ou à proximité d’un brûleur à
gaz ou électrique, ou à l’intérieur d’un four chaud ou d’un four
micro-ondes.
P. Toujours utiliser l’appareil sur une surface stable.
NE PAS FAIRE FONCTIONNER PENDANT PLUS DE 5 MINUTES À LA FOIS.
LAISSER L’APPAREIL REFROIDIR 20 MINUTES AU MAXIMUM APRÈS AVOIR
COMPLÉTÉ DEUX CYCLES CONSÉCUTIFS.
VEUILLEZ CONSERVER CE MODE
D’EMPLOI POUR RÉFÉRENCE.
FICHE POLARISÉE : Cet appareil est doté d’une fiche polarisée (une lame est plus
large que l’autre). Par mesure de sécurité, pour réduire les risques de décharges
électriques, cette fiche s’enfonce dans la prise électrique polarisée que d’une seule
façon. Si la fiche ne pénètre pas au complet dans la prise, inversez-la. Si elle ne
s’enfonce toujours pas, communiquez avec un électricien qualifié. Ne jamais modifier la
conformation de la fiche. Si la prise pénètre dans la prise de courant avec beaucoup de
jeu ou si la prise vous semble chaude, n’utilisez pas cette prise.

15
RECOMMANDATIONS PARTICULIÈRES : Un cordon d’alimentation court est
fourni afin de réduire les risques de vous emmêler ou de trébucher sur un cordon
d’alimentation plus long.
UNE RALLONGE ÉLECTRIQUE PEUT ÊTRE UTILISÉE SI SON UTILISATION EST FAITE
AVEC PRÉCAUTIONS :
• Pour réduire le risque de surchauffe, utiliser les rallonges homologuées UL ou ETL
les plus courtes possible.
• La puissance électrique indiquée sur la rallonge doit être au moins aussi élevée
que la puissance de l’appareil.
• Ne jamais utiliser qu’une seule rallonge pour alimenter plusieurs appareils.
• Ne jamais laisser pendre une rallonge du bord d’un comptoir ou d’une table afin
de prévenir les trébuchements, les accrochages ou d’éviter qu’un enfant tire sur la
rallonge par accident.
• NE PAS modifier la fiche. NE PAS tenter de contourner le mécanisme de sécurité
de la fiche.
1
2
3
4
5
1. BOUTON DE RELÂCHEMENT
2. COMMANDE À 5 VITESSES VARIABLES
3. BOUTON TURBO
4. BATTEURS
5. CROCHETS PÉTRISSEURS

16
AVANT LA PREMIÈRE UTILISATION
(Lire les instructions avant la première utilisation)
NOTE : Lors de la première utilisation, de la fumée ou une légère odeur pourrait se
dégager de l’appareil. Ceci est normal et disparaîtra rapidement. Cela ne se reproduira
pas après quelques utilisations de l’appareil.
1. Retirer toutes les pièces et retirer l’emballage.
2. Laver les pièces amovibles (batteurs et crochets pétrisseurs) dans une eau chaude
et savonneuse et sécher complètement ou placer dans le panier à ustensiles du
lave-vaisselle.
3. Le boîtier moteur du batteur à main peut être nettoyé avec un linge humide. Ne
jamais immerger le boîtier moteur du batteur à main dans l’eau.
ASSEMBLAGE
ATTENTION : Toujours s’assurer que le batteur à main n’est pas branché avant
d’insérer les batteurs ou les crochets pétrisseurs.
Sélectionner l’accessoire, soit les batteurs ou les crochets pétrisseurs, selon la recette
à préparer.
Insertion des batteurs :
• Débrancher l’appareil et ajuster le contrôle de vitesse à 0.
• Insérer fermement les batteurs dans les ouvertures jusqu’à ce qu’un clic sonore se
fasse entendre (voir image ci-dessus).
• S’assurer que les batteurs sont bien en place avant d’utiliser l’appareil.
NOTE : Les batteurs sont interchangeables.

17
Insertion des crochets pétrisseurs :
• Débrancher l’appareil et ajuster le contrôle de vitesse à 0.
• Le crochet pétrisseur doté d’un collet s’insère dans la plus grande ouverture qui
est à droite (voir image ci-dessus).
• Insérer fermement les crochets pétrisseurs dans les ouvertures jusqu’à ce qu’un
clic sonore se fasse entendre. Le crochet sans collet s’insère dans l’ouverture de
gauche. S’assurer que les crochets pétrisseurs sont bien en place avant d’utiliser
l’appareil.
NOTE : Les crochets pétrisseurs doivent être insérés dans les ouvertures
correspondantes et ne sont pas interchangeables.
UTILISATION
1. S’assurer que le contrôle de vitesse variable du batteur à main est à 0.
2. Insérer les batteurs ou les crochets pétrisseurs comme indiqué à la section
Assemblage.
NOTE : S’assurer que les batteurs ou les crochets pétrisseurs sont bien en place
avant d’utiliser le batteur à main.
3. Brancher l’appareil dans une prise électrique standard de 120 V.
4. Ajouter des ingrédients dans un bol à mélanger, placer le batteur à main (avec les
batteurs ou les crochets en place) au centre du bol.
5. Ajuster le batteur à main à la vitesse la plus lente pour commencer à mélanger.
Augmenter graduellement la vitesse en ajustant le contrôle de vitesse variable
jusqu’à la vitesse désirée. Le contrôle de vitesse est doté de cinq vitesses et d’une
fonction Turbo. Lorsque la fonction Turbo est sélectionnée, le batteur fonctionne
à la vitesse la plus rapide (consulter le tableau de mélanges et la fonction Turbo).
NOTE : Toujours garder les batteurs ou les crochets sous la surface de votre
mélange pour éviter les éclaboussures et autres dégâts.
Collet
côté droit

18
6. Effectuer un mouvement circulaire constant en maintenant les batteurs ou
crochets à l'intérieur du bol ou au centre pour bien incorporer tous les ingrédients.
Si nécessaire, utiliser un ustensile pour gratter la surface ou le fond du bol, et le
cas échéant toujours s’assurer que le contrôle de vitesse est à 0. Le batteur à main
peut être déposé debout sans danger à cause de sa conception autoportante.
7. Une fois l’opération terminée, ajuster le contrôle de vitesse à 0. Débrancher
ensuite l’appareil.
8. Retirer les batteurs ou les crochets pétrisseurs en appuyant sur le bouton de
relâchement. Les batteurs et les crochets seront relâchés automatiquement. Ne
pas tenter de forcer leur relâchement.
NOTE : Utiliser une spatule pour nettoyer les batteurs ou les crochets pétrisseurs.
BATTEURS
Les batteurs peuvent être utilisés pour mélanger et fouetter les ingrédients : mixer,
mélanger, battre et fouetter. Les batteurs favorisent un mélange rapide et uniforme des
ingrédients.
GUIDE DE MÉLANGE
Lire les instructions suivantes pour la sélection adéquate des vitesses. Le nombre de
préparation et de recettes qui peuvent être effectuer avec un batteur à main est vaste.
Pour éviter les éclaboussures, commencer à mélanger à basse vitesse jusqu’à ce que
les ingrédients commencent à se combiner et graduellement augmenter la vitesse
jusqu’à l’obtention du résultat voulu.
Mélanger à basse vitesse est recommandé pour les ingrédients fermes. Les ingrédients
fermes seront bien incorporés à votre mélange en utilisant une basse vitesse.
Mélanger à haute vitesse est recommandé pour les ingrédients liquides et denses
comme des œufs ou de la crème épaisse. Les ingrédients seront incorporés
complètement.
Prendre note que la sélection de vitesse pourra varier selon la recette à compléter.

19
VITESSE ACTION TÂCHES
1 (basse) Mélanger
Pour commencer toutes les
procédures de mélange. Utiliser
cette vitesse pour mélanger des
ingrédients secs comme de la
farine ou autre avec des ingrédients
liquides ou des mélanges
humides. Incorporer noix, pépites
de chocolat, raisins ou autres
ingrédients
en morceaux.
2 (basse) Mélanger /
incorporer
Pour incorporer les ingrédients
d'un mélange à pâte léger ou les
préparations de gélatine. Idéal
également pour les sauces, les
vinaigrettes et les poudings.
3 (moyenne) Mélanger
Pour combiner beurre et sucre
ou incorporer des œufs dans un
mélange. Préparer des mélanges à
pâtes, des biscuits et des mélanges
pour gâteaux.
4 (moyenne) Battre Pour battre les œufs et la
préparation de glaçages.
5 (haute) Fouetter
Pour fouetter la crème, les
blancs d’œufs et pour obtenir de
délicieuses pommes de terre en
purée.
Option Turbo ------------
Pour obtenir plus de puissance
pour les tâches difficiles. L’option
Turbo peut être utilisée à toutes les
vitesses du batteur à main.
NOTE : Les batteurs ne sont pas conçus pour mélanger et pétrir la pâte à pain.
(Lire la section Crochets Pétrisseurs pour obtenir plus d’information)
CROCHETS PÉTRISSEURS
Les crochets pétrisseurs vous permettront de sauver du temps et de l’énergie. Ils sont
parfaits pour réussir votre pâte à pizza préférée, des pains éclair et de la pâte à biscuits.
Commencer par mélanger les ingrédients secs à basse vitesse (1 ou 2), et ajouter
graduellement les ingrédients liquides. Lorsque les ingrédients secs et liquides sont
combinés, augmenter la vitesse graduellement et ajouter de l’eau jusqu’à l’obtention
d’une boule. Le résultat final devrait être lisse et élastique. Certaines marques de
farines absorbent plus d’eau, vous pourriez avoir à ajouter plus d’eau pour obtenir la
consistance adéquate.
NOTE : Pour pétrir, utiliser uniquement les crochets pétrisseurs.

20
FONCTION TURBO
La fonction Turbo permet d’obtenir la puissance maximale de mélange à toutes les
vitesses. Si le batteur à main faiblit ou que la substance à mélanger est plus résistante
(comme de la pâte à biscuits), appuyer sur le bouton Turbo.
Lorsque que vous cessez d'appuyer sur le bouton Turbo, le batteur à main revient à la
vitesse initiale.
RETRAIT DES BATTEURS ET DES CROCHETS
PÉTRISSEURS
Lorsque vous avez terminé de mélanger les ingrédients, ajuster le contrôle de vitesse
variable à 0, retirer lentement les batteurs ou les crochets du mélange et débrancher
l’appareil. Pour retirer les batteurs ou les crochets du batteur à main, placer le
batteur au-dessus d’un bol à mélanger ou d’un lavabo et appuyer sur le bouton
de relâchement. Les batteurs ou crochets se libéreront automatiquement de leurs
ouvertures.
RECOMMANDATIONS
Pour mélanger plus facilement des ingrédients qui sont normalement réfrigérés, les
sortir du réfrigérateur d’avance pour qu’ils soient à température ambiante au moment
de la préparation.
Pour éviter de retrouver des éclats de coquilles d’œufs dans vos mélanges, toujours
préparer les œufs dans un autre contenant, puis ajouter à votre mélange.
NETTOYAGE
ATTENTION : S’assurer que l’appareil est débranché et le laisser refroidir
complètement avant de le manipuler et de le nettoyer.
1. Retirer les batteurs et les crochets pétrisseurs et les nettoyer dans une eau chaude
et savonneuse ou au lave-vaisselle. NOTE : ne pas laisser tremper les batteurs
ou crochets pétrisseurs dans l’eau pour une longue période pour éviter de les
endommager prématurément.
2. S’assurer que les accessoires soient complètement secs.
3. Le boîtier moteur du batteur à main peut être nettoyé avec un linge humide. Ne
pas immerger le boîtier moteur sous l’eau.
NOTE : Ne pas utiliser de produits nettoyants abrasifs ou des tampons à récurer
pour nettoyer les batteurs ou les crochets pétrisseurs, car leur surface extérieure
pourrait être endommagée.
Table of contents
Languages:
