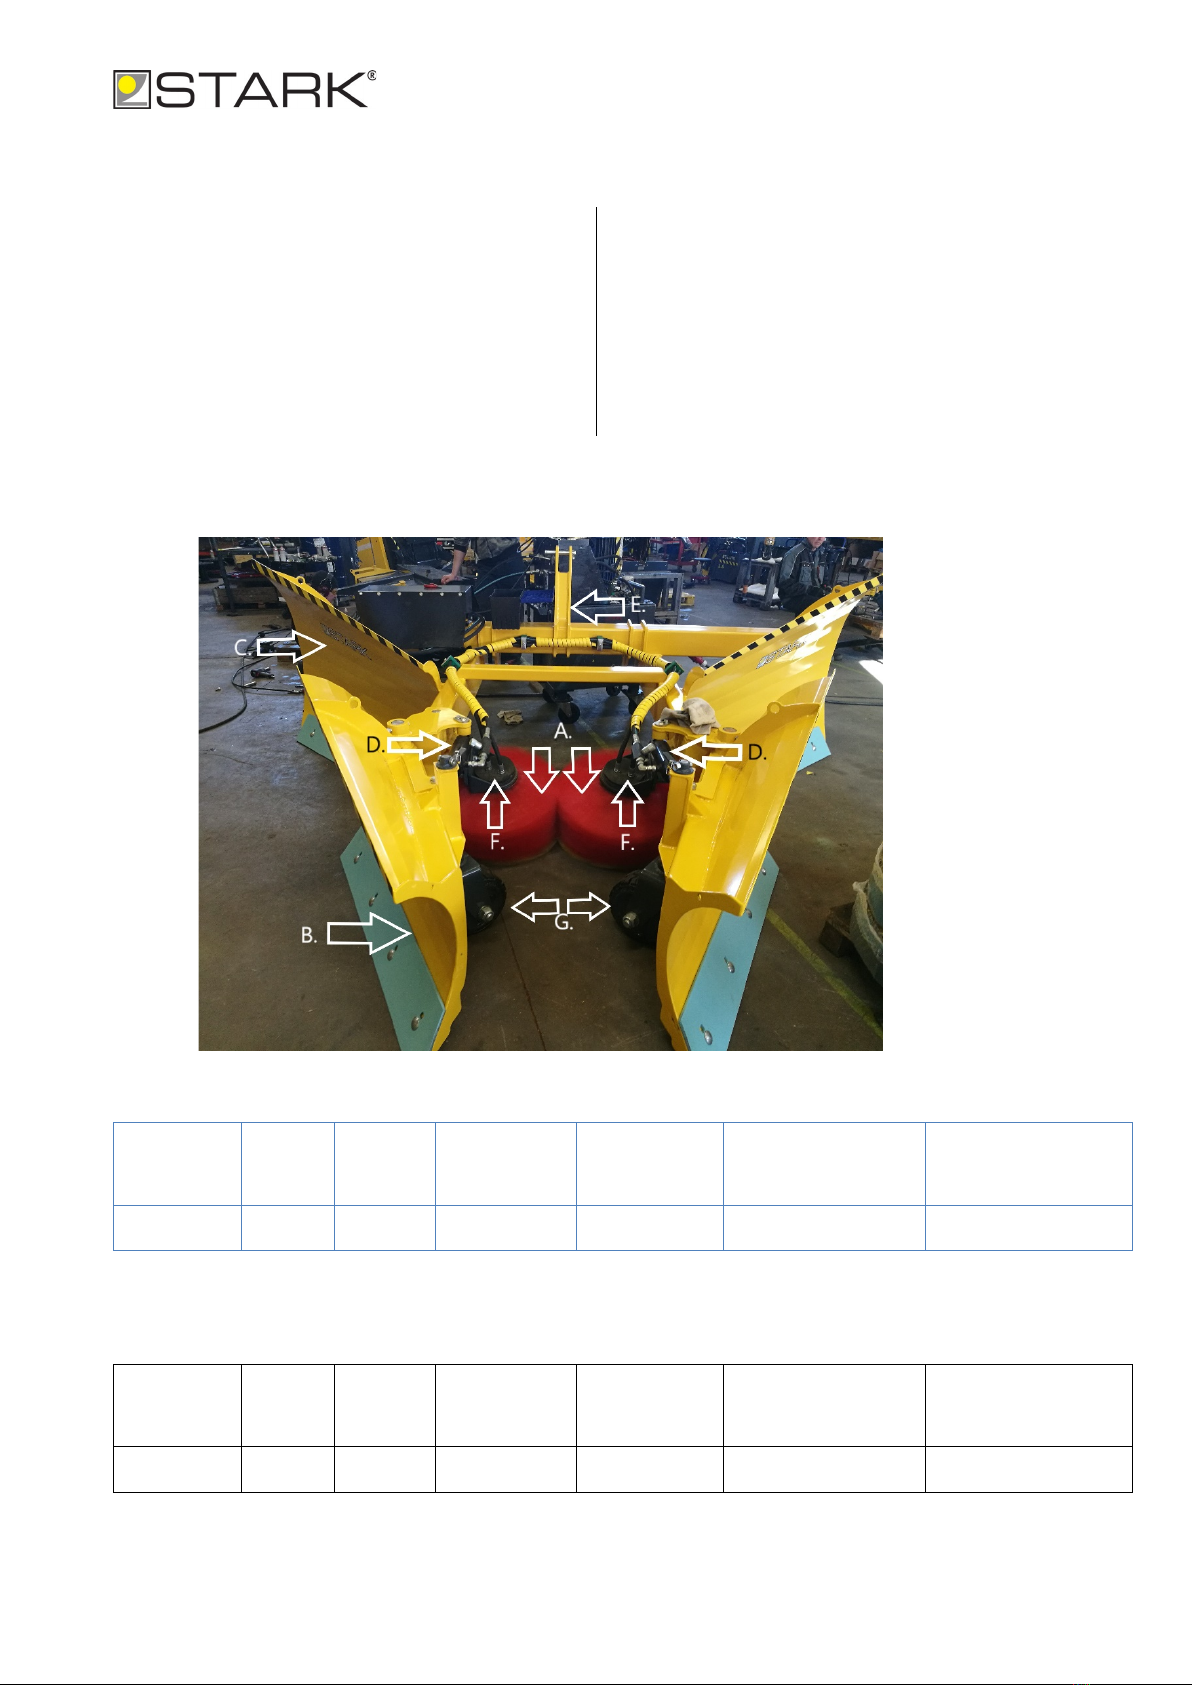
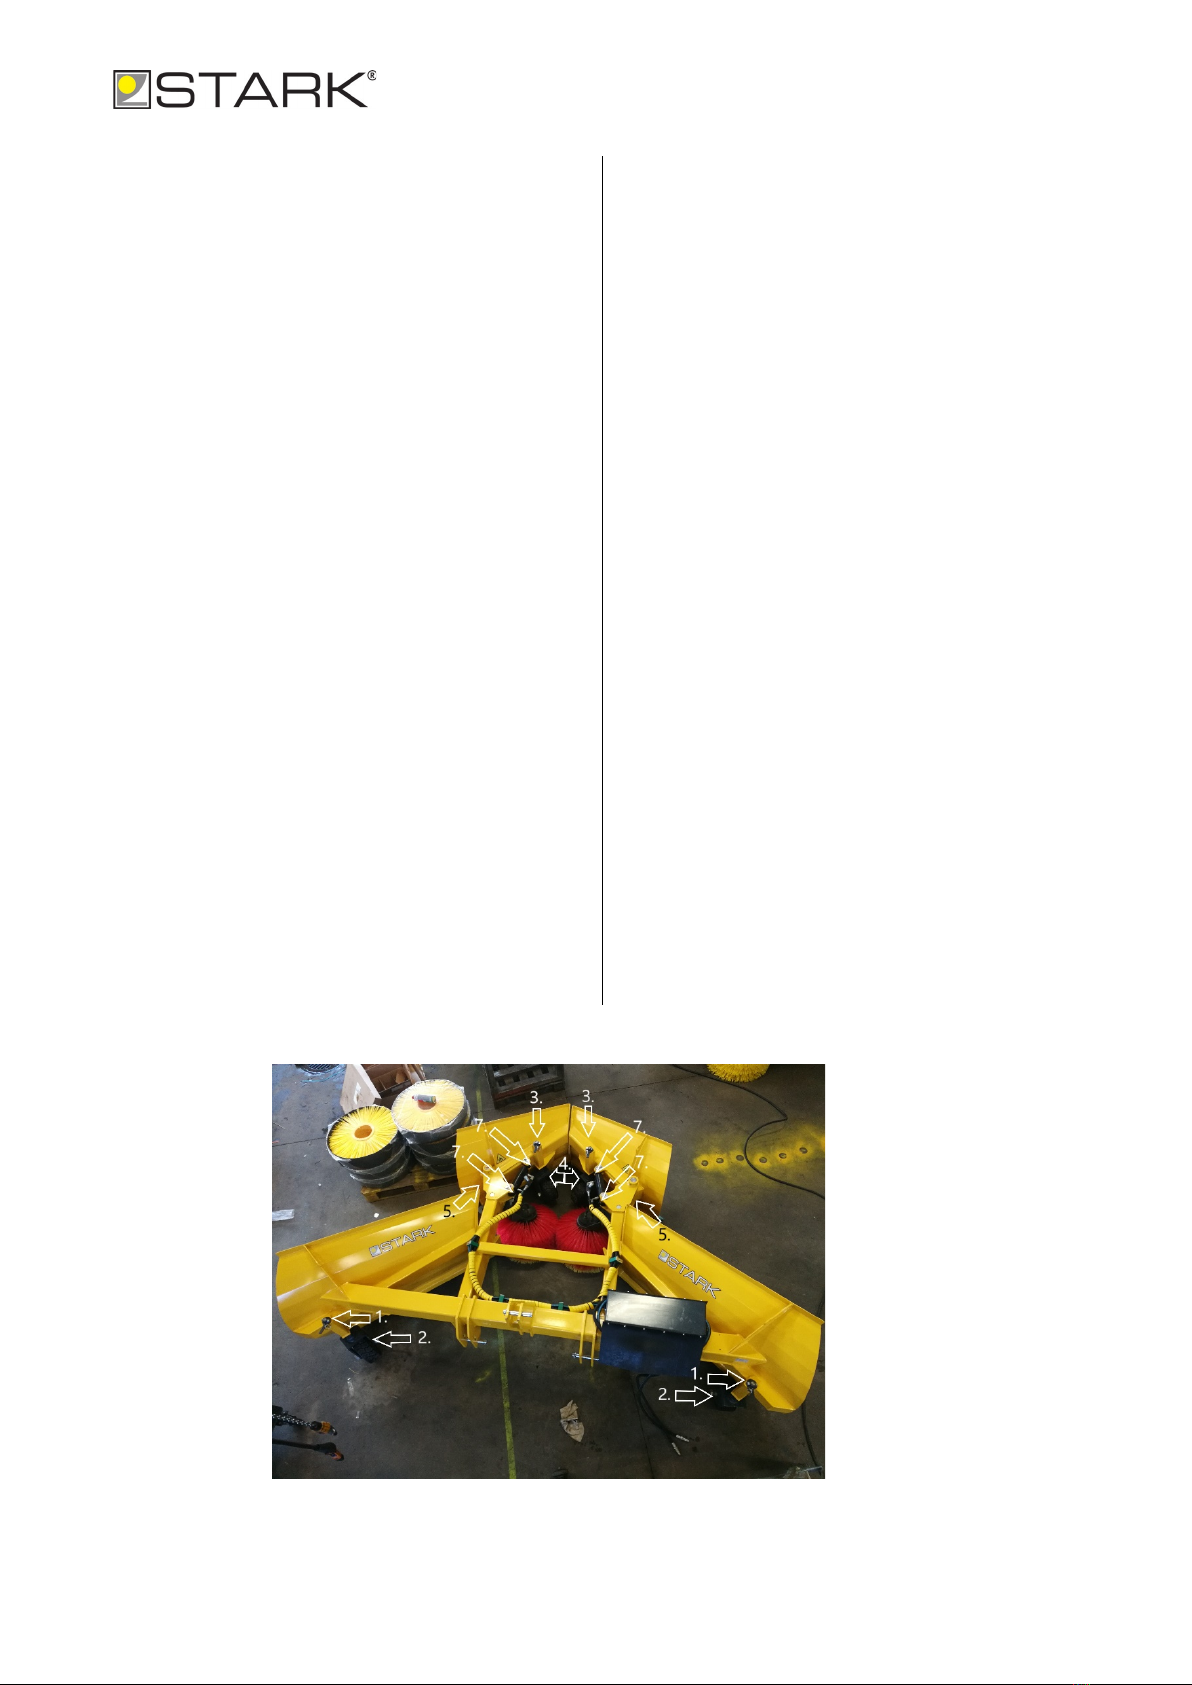
1.1 Turvallisuusohjeet
•Työlaitetta saa käyttää vain sen toimintaan
perehtynyt henkilö. Ensisijainen vastuu
laitteen turvallisesta käytöstä on
käyttäjällä.
•Varmista, että peruskoneen vaatimukset
ovat kunnossa. Huomioi peruskoneen
paino ja teho!
•Älä koskaan työskentele viallisella laitteella
•Ennen käyttöä varmista, että laitteen
kytkentä peruskoneeseen on kunnossa ja
kaikki lukitukset kiinni.
•Sammuta traktori huoltotöiden ajaksi.
Kytke myös seisontajarru päälle. Älä ikinä
pyöritä harjaa ollessasi laitteen lähellä.
•Älä koskaan mene pelkän nostolaitteen
varassa olevan laitteen alle. Tue laite.
•Älä koskaan mene pyörivän harjan luokse.
Auratessa ja/tai harjaa pyöritettäessä
turva-etäisyys 10m!
•Konetta kytkettäessä huomioi
puristumisvaara traktorin ja lanan välissä.
•Älä käytä laitetta sellaiseen tarkoitukseen,
mihin sitä ei ole suunniteltu.
•Huoltotöissä käytä asianmukaisia
suojavarusteita.
•Älä poista laitteesta siihen kuuluvia osia.
Osien poistaminen voi heikentää laitteen
turvallisuutta.
•Perehdy varoitustarroihin ja kyltteihin.
•Laitetta käytettäessä yleisillä teillä on
noudatettava tieliikennelakia ja asetuksia.
•Käytä työskennellessä aina varoitusvilkkuja
•Huomioi laitteen leveys, paino ja muut
seikat jotka vaikuttavat esim.
ajettavuuteen. Sovita työskentelynopeus
olosuhteiden mukaan. Huomioi myös, ettei
työskentelyalueella ole ketään.
•Käytä vain alkuperäisiä Stark-varaosia.
1.1 Safety instructions
•The implement may only be operated by
those familiar with its operation. The
operator has the primary responsibility for
the safe use of the implement.
•Make sure the base machine meets the
requirements. Note the weight and power
of the base machine!
•Never operate a faulty implement.
•Before use, check that the implement is
properly attached to the base machine and
that all locks have engaged.
•If you need to carry out maintenance,
always turn off the tractor and engage the
handbrake. Never leave the brush running
if you move near it.
•Never go under an implement only held up
by the lifting mechanism. The implement
must be supported.
•Never approach a running brush. The
safety distance is 10 metres while
ploughing and/or running the brush.
•Note the crushing hazard posed by the
blades and the tractor when you attach
the implement.
•Only use the implement for its intended
purpose.
•Use the appropriate personal protective
equipment during maintenance.
•Never remove parts of the implement
permanently. Missing parts may
compromise the safety of the implement.
•Learn the warning stickers and labels.
•If you operate the implement on public
roads, you must follow the local
regulations on road safety.
•Always use the warning lights when
working.
•Consider the implement's width and
weight, as well as any other factors that
affect things like handling. Adjust your
working speed to the current conditions.
Always make sure that there are no people
in the working area.
•Only use original Stark spare parts.