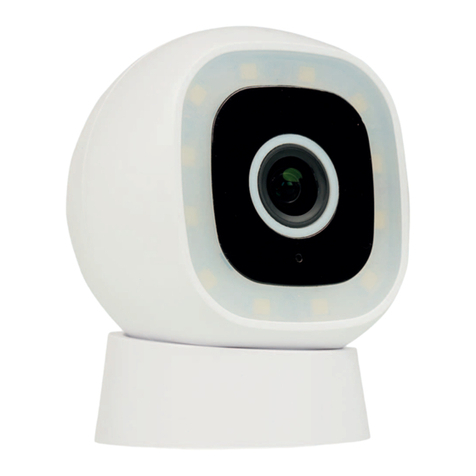
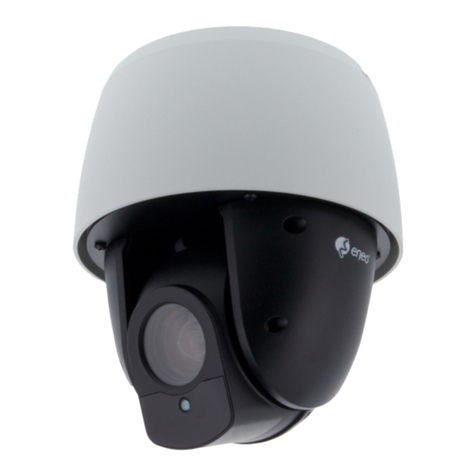
Starligh STPI-352CS30XLS User manual

Manual de Instalación domo con LED`s infrarrojos modelo STPI-352CS30XLS
Santa Rosa 1501 (X5000ETE) Bº Alberdi. Córdoba. Tel/fax 54(0351) 4809210 y rotativas
mail: ventas@starligh.com www.starligh.com 1
IR Variable Speed Dome Camera
User Manual
Please read the user manual before installing and use this
speed dome
STPI-352CS30XLS

Manual de Instalación domo con LED`s infrarrojos modelo STPI-352CS30XLS
Santa Rosa 1501 (X5000ETE) Bº Alberdi. Córdoba. Tel/fax 54(0351) 4809210 y rotativas
mail: ventas@starligh.com www.starligh.com 2
1. Product Introduction
Thanks for use my company’s constant speed dome camera series product
This series of products using the most stable high-performance digital DSP design,
some of the main component is famous brand such as Motor-driver, zoom module ,
electronic slip ring . our speed dome has the perfect design and easy installation
,which is an inevitable trend for the high-tech products . It can quickly and accurately
position and track the target, It can be no blind spot in the all-round goal of a 24-hour
surveillance .
This product can be widely used in smart buildings, bank security, urban roads, airport
terminals ect which can meet any of the diversification request for the square,
1.1 Safety Attention Notes
A. Please read the instructions thoroughly before installing or operating the unit .
B. Please follow the safety operating standard when installing
C. Only professional and experienced staff can do the installation and maintenance
work
D. Use reliable tools, poor tools can cause danger
E. Make sure the using environment meet requirements of the product
F. Please check the strength and toughness of the installation base, the base must
bear 4 times the total weight of speed dome and accessories.
G. Please keep all packaging for future packaging and transportation.
1.2 Cautions
A.Please do not install the speed dome in the inflammable and explosive area.
B. Please do not put the speed dome in the unstable table or mounting bracket.
C. Please prevent all liquids or other contaminating material from entering into the
dome housing.
D. Do not use the wrong power adapter ,the speed dome power supply isDC12V.
E. RS-485, blue wire for 485+ (A), green wire for 485-(B)
F. Please do not turn on the power before finishing installation
G. Please do not open the speed dome or repair by yourself .
H. Please do not clean the unit by Corrosive detergent .
I. Avoid shooting very bright objects directly into the camera’s CCD (such as the sun or
light fittings)
J. Please prevent over weight impact or shock
K. Please read manual book thoroughly before installation.
1.3 Function
Horizontal rotation speed 0-20°/s,Vertical rotation speed 0-20°/s
Support auto scan
RS485 , Pelco D ,P
Aluminum Alloy , IP66 Waterproof housing
Outdoor and Indoor mounting
Power supply : DC12V 5A
1.4 Warmly notice
Please don't Pull the cable, for fear of broken or make it poor
contact.

Manual de Instalación domo con LED`s infrarrojos modelo STPI-352CS30XLS
Santa Rosa 1501 (X5000ETE) Bº Alberdi. Córdoba. Tel/fax 54(0351) 4809210 y rotativas
mail: ventas@starligh.com www.starligh.com 3
1.5 Packing and Accessories
2 . Address code, Baud rate, Protocol Setting
2.1 Switch Position Setting
Take down of the lower cover(see detail photo),you will see the code switcher:SW1 and
SW2
SW1
SW2
SW1 was used to set the address code and SW2 was used to set the communication baud
rate
2.2 Address code
This speed dome support modify the address code by other devices(eg. DVR,keypad
controller) if the zoom module was Sony or Chinese zoom module(detail setting pls
reference to Page3)
Address code was set by the SW1, the default setting is No.1
SW1
Setting as below
Address Switchers settings
1 2 3 4 5 6 7 8
1 ON OFF OFF OFF OFF OFF OFF ON
2 OFF ON OFF OFF OFF OFF OFF ON
3 ON ON OFF OFF OFF OFF OFF ON
4 OFF OFF ON OFF OFF OFF OFF ON
ID Item Quantity
1 Manual 1 piece
2 Guarantee card 1 piece
3 Passed card 1 piece
4 Glove 1 pair
5 DC12V 5A adapter 1 piece
6 Bracket 1 piece
7 Dome Camera 1 piece

Manual de Instalación domo con LED`s infrarrojos modelo STPI-352CS30XLS
Santa Rosa 1501 (X5000ETE) Bº Alberdi. Córdoba. Tel/fax 54(0351) 4809210 y rotativas
mail: ventas@starligh.com www.starligh.com 4
5 ON OFF ON OFF OFF OFF OFF ON
6 OFF ON ON OFF OFF OFF OFF ON
7 ON ON ON OFF OFF OFF OFF ON
8 OFF OFF OFF ON OFF OFF OFF ON
9 ON OFF OFF ON OFF OFF OFF ON
10 OFF ON OFF ON OFF OFF OFF ON
11 ON ON OFF ON OFF OFF OFF ON
12 OFF OFF ON ON OFF OFF OFF ON
……
255 ON ON ON ON ON ON ON ON
If using other devices (eg, DVR, keypad controller) to control this speed dome ,need to
set communication protocol(in automatically identify ), baud rate and dome address code
in a correct position ,when setting the address, for different address code from different
factories, sometimes need add 1 or reduce 1 on dome camera’s address . eg, dome
address is 2 , then have to set the address code as 3 on the DVR ,then can use the DVR
to control the speed dome properly, and so on.
2.3 Baud Rate Setting
This speed dome support modify the baud rate by other devices (eg. DVR, keypad
controller) if the zoom module was Sony or Chinese zoom module(detail setting
please reference to Page3)
The Switcher1&2 was used to set the baud rate,the setting as below,the default baud
rate is 2400bps
SW2
Baud
Rate
1 2
1200bps OFF OFF
2400bps ON OFF
4800bps OFF ON
9600bps ON ON

Manual de Instalación domo con LED`s infrarrojos modelo STPI-352CS30XLS
Santa Rosa 1501 (X5000ETE) Bº Alberdi. Córdoba. Tel/fax 54(0351) 4809210 y rotativas
mail: ventas@starligh.com www.starligh.com 5
2.4 Communication protocol setting
This series products can automatically identify Pelco-D and Pelco-P protocol , so the
speed dome can work without setting communication protocol . The default setting is Pelco-
D . If use Pelco-P protocol , connect the IR Constant speed dome with the keyboard (Note :
the dome address marching baud rate )
2.5 OSD Menu
If the zoom module is Sony or JXJ,then will show basic information on the
screen(eg.Address code, baud rate,commnication protocol) ,if was Sony FCB-EX480CP
zoom module.the screen will show
This means the speed dome address code is 001,Baud rate is 2400,communication
protocol is Pelco-D
3. Speed dome function setting
3.1 Preset position setting
Wag the joystick,select a view and enter the preset positions No,and press “Preset” key
on the joystick.that is saved the preset postion.
3.2 Tour scan setting
This series speed dome cameras support 1 tour scan.Maximum support 8 preset
positions.if only set 4 preset positions.the tour scan will run from preset postion 1 to 4.
If set 8 preset positions, then the tour scan will run from 1-8
Each preset residence time is 4 seconds in the tour scan.
3.3 Limit A-B scan setting
This series speed dome can set two fixed points(A&B),and the scan speed can set slow
(preset position is 51),middle (preset position is 52),fast (preset position is 53).
A:Left limit fixed point setting: select a view and set it as preset position 57.(Left limit fixed
point)
B:Right limit fixed point setting: select a view and set it as preset position 58.(right limit
fixed point)
C:call preset position 62 or 98.then will run Limit scan.
ID :001 PELCO-D 2400

Manual de Instalación domo con LED`s infrarrojos modelo STPI-352CS30XLS
Santa Rosa 1501 (X5000ETE) Bº Alberdi. Córdoba. Tel/fax 54(0351) 4809210 y rotativas
mail: ventas@starligh.com www.starligh.com 6
3.4 360°scan
Call preset positions 63 or 99,then camera will run 360°scan automatically.
3.5 IR LED Mode
IR LED can set IR LED ON,IR LED OFF,IR LED AUTO, WIDE OR TELE IR LED,WIDE
AND TELE IR LED
A: IR LED ON:call preset position 80,the screen will display “IR LED ON”,3 seconds later
will disappear
B: IR LED OFF:call preset position 81,the screen will display “IR LED OFF”,3 seconds
later will disappear
C: IR LED AUTO: call preset position 82,the screen will display “IR LED AUTO”,3 seconds
later will disappear
D: WIDE OR TELE IR LED: call preset position 83,the screen will display “WIDE OR TELE
IR LED”,3 seconds later will disappear
E: WIDE AND TELE IR LED: call preset position 84,the screen will display “WIDE AND
TELE IR LED”,3 seconds later will disappear
3.6 Clear all preset positions
Call preset positions 80,then can clear all preset positions on the operation cameras.
3.7 Modify the address code by software
This series camera not only support modify the address code by set the switchers,but
also support modify it from the menu
A:Call preset positions 59,and screen will display “Dome address:001”
B:Wag the joystick and select the address code
C:Press key “IRIS+” Save and then exit automatically.
D:Dome camera restart,and new address code is available
3.8 Modify the address code by software
This series camera not only support modify the baud rate by set the switchers,but also
support modify it from the menu
A:Call preset positions 60,and screen will display “BAUD RATE:2400BPS”
B:Wag the joystick and select the address code
C:Press key “IRIS+” Save and then exit automatically.
D:Dome camera restart,and new baud rate is available
Shortcut key function table
Preset
positions
Call preset
positions
Function
59 Modify address code
60 Modify baud rate
80or45 IR LED ON
81or46 IR LED OFF
82or47 IR LED AUTO
83or48 WIDE OR TELE IR LED
84or49 WIDE AND TELE IR LED
64or95 Enter OSD
61or97 Start tour scan
62or98 Start A-B limit scan
63or99 Start 360°scan
51 A-B Limit scan speed Slow
52 A-B Limit scan speed Middle
53 A-B Limit scan speed Fast

Manual de Instalación domo con LED`s infrarrojos modelo STPI-352CS30XLS
Santa Rosa 1501 (X5000ETE) Bº Alberdi. Córdoba. Tel/fax 54(0351) 4809210 y rotativas
mail: ventas@starligh.com www.starligh.com 7
54 360°scan speed slow
55 360°scan speed Middle
56 360°scan speed Fast
57 Limit scan Left fixed point
58 Limit scan Right fixed point
100 Clear all preset positions
4 Speed dome installation and connection
Step 1: In the accessories have a inner Hexagon screwdriver , Using the Hexagon
screwdriver take down 4pcs M3×6 screw(Figure 1) , remove the lid(Figure 2)
Figure 1 Figure 2 Figure 3 Figure 5
Step 2: Use the cross screwdriver take down 7pcs M3×5 screw(Figure 3) from the IR LED
board , and remove the IR LED board
Step 3 : Connect the camera 9pin cable well(Figure 5)
Step 4: Fix the camera on the installation board(Figure 6) , and use 4pcs M2×5 screw to fix
the camera (Figure 7)

Manual de Instalación domo con LED`s infrarrojos modelo STPI-352CS30XLS
Santa Rosa 1501 (X5000ETE) Bº Alberdi. Córdoba. Tel/fax 54(0351) 4809210 y rotativas
mail: ventas@starligh.com www.starligh.com 8
Figure 6 Figure 7 Figure 8
Step 5: On the back of each IR LED, should be use heat conduction silica gel attach the
silica gel film .make sure insulate between back ①of each big IR LED and the
corresponding conduct heat metal pole ②. if not , when the power on , the IR LED will
damage . (Figure 8)
Figure 9 Figure 10 Figure 11
Step 6: Install the camera into the ellipse speed dome cover(Figure 9), under the
plastic cover of the camera (Figure 10), then use the cross screwdriver install the 7pcs M3 *
5 screw to the IR led board (Figure 11).
Step 7: Put the camera glass cover on(Figure 12) , use the screwdriver install the 4pcs
M3*6 screw on the back cover(Figure 13).

Manual de Instalación domo con LED`s infrarrojos modelo STPI-352CS30XLS
Santa Rosa 1501 (X5000ETE) Bº Alberdi. Córdoba. Tel/fax 54(0351) 4809210 y rotativas
mail: ventas@starligh.com www.starligh.com 9
Figure 12 Figure 13
5 Attention Items:
A:Please use the right power :DC12V /5A . do not use the wrong adapter.
B:Please don’t pull the cable directly , for fear damage the cable or lead to poor
connection by cable loose .
C:Please connect the speed dome shell with the ground in case the static or lightning
strike .
6. Simple troubleshooting table
Failture Issue Possible reason Solution
Power on, no
movement, no
image, indicator light
doesn’t on
Power cable connects wrong Connect again
Power supply damaged Replace
protective tube is bad replace
power cable is connected bad Check
Power on ,self check
,has image, can’t
control
the machine’s address code or
baud rate is wrong Reset address code and baud rate
protocol wrong correct it
Rs485 cable is connected wrong check RS485 line
Can’t check itself
,has image but with
motor hoot
mechanical breakdown check it and repair it
dome camera leans correct it
power supply is not enough replace it
Image unstable video cable is not connected well correct it
Power is not enough replace it
Image dim Focus in manual state
Operate the machine or adjust any
preset position to let it in auto focus
state
Dome cover is dirty clean the dome cover
can’t control the
speed dome to
speed dome’s power is not
enough replace the power

Manual de Instalación domo con LED`s infrarrojos modelo STPI-352CS30XLS
Santa Rosa 1501 (X5000ETE) Bº Alberdi. Córdoba. Tel/fax 54(0351) 4809210 y rotativas
mail: ventas@starligh.com www.starligh.com 10
rotate check the camera has matching
resistor or not
install resistor for the fast dome
camera
the distance between control
keyboard and speed dome is too
far
Using twisted-pair RS485 line or
overstriking RS485 cable
non-standard operation power off and restart
7. Housing cleaning
A. To ensure clear image, users should clean the housing cover regularly .When clean it
please wear glove to avoid being scratched, your sweat may erode the housing cover .
B. Use dry cloth to clean the inside and outside of the housing cover .
C. Please use neutral detergent to get rid of the solidity on the housing cover .
8. Speed dome Maintenance
A. Check speed dome power supply regularly to avoid plug is not in the socket.
B. Make sure voltage of the speed dome and monitor center is stable.
C. Mark the speed dome located in low position , remind unprofessional persons not to
touch it .
D. Ask professional persons to manage all the monitor equipments, unprofessional staff are
forbidden to operate the equipments.
E. Make monitor equipments power off at night if no person watch the equipment.
Annex :prevent lightning strike
This product adopts the TVS board prevent lightning technical,Can effective prevent a
variety of pulse signals that the power lower than 1.5KW,like the instantaneous lightning
strike、surge etc damage the camera.but, For the outdoor installation should be according
the actual situation, on the assumption that under the guarantee the safety of electric do
the necessary protective measures: (attached photo)
A keep at least 50 meter distances between Signal transmission lines or equipment
and high voltage power cables
B Outdoor wiring try to choose to walk along the roof line
C For open spaces should adopt the seal steel pipe buried cable,and for steel pipe
adopt one point earthing, Absolutely forbidden to adopt an aerial wiring
D In the Thunderstorms region or high voltage area(such as substation ), Must take
an extra large prevent ray equipment and install lightning rod etc,the line of the prevent
thunder and the grounding design must be full consider combine with the building, and
meet the requirements of national and industry standards.
E system should be equipotential grounding,grounding equipment should be meet dual
requests of system anti-interference and electrical safety, and can’t shorted or mixed up
with the zero line of strong power system,when system grounding alone, grounding
impedance<=4Ω,grounding line Cross-Section should be <=25mm2

Manual de Instalación domo con LED`s infrarrojos modelo STPI-352CS30XLS
Santa Rosa 1501 (X5000ETE) Bº Alberdi. Córdoba. Tel/fax 54(0351) 4809210 y rotativas
mail: ventas@starligh.com www.starligh.com 11
< attached photo >
Table of contents


