manuals.online logo
Brands
  1. Home
  2. •
  3. Brands
  4. •
  5. Stealth Cam
  6. •
  7. Security Camera
  8. •
  9. Stealth Cam STC-V650 User manual

Stealth Cam STC-V650 User manual

STC-V650 User’s Manual
Toll Free Customer Support 1-877-269-8490
www stealthcam net
Version 1.0 1/08
STC-V650
www.stealthcam.net Toll Free 877-269-8490 2
For Customer Service or Warranty Information Call Toll Free
877-269-8490
Stealth Cam LLC
P.O. Box 539504
Grand Prairie TX 75053-9504
www.stealthcam.net
Stealth Cam Limited Warranty
Your Stealth Cam scouting camera is covered by a 90 days Limited Warranty
on parts and labor from the date of original purchase and purchases must be
made through an authorized dealer. The warranty covers defects in
workmanship and materials. The warranty does not apply to units which have
been damaged or abused intentionally or unintentionally. A purchase from
individuals or unauthorized internet sites voids the warranty.
Tampering with or altering the unit will void the warranty. Any unauthorized
service will void warranty. Original sales receipt must be produced for any
warranty service and a Return Authorization (RA) number must be obtained
from customer service at 877-269-8490 prior to returning product.
STC-V650
www.stealthcam.net Toll Free 877-269-8490 3
Manual Contents
Camera overview 4
Picture capacity chart 7
Camera kit contents 8
Battery and memory Installation 9
Definition 13
Set up and programming 16
Using the camera 22
Mounting the camera 23
Viewing & Deleting images 28
Using external solar power 32
Memory compatibility chart 34
Technical Specs 35
General Information 38
Moon Phase symbol chart 40
STC-V650
www.stealthcam.net Toll Free 877-269-8490 4
Camera overview
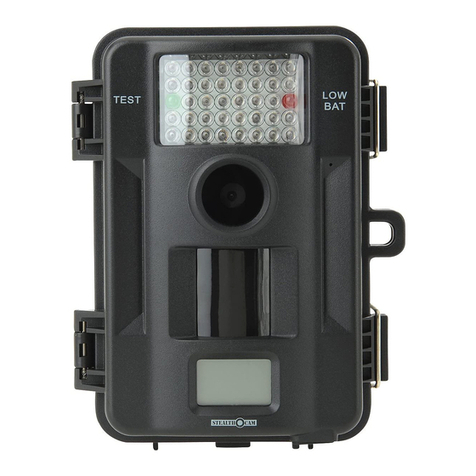
Front housing image with major parts indication.
STC-V650
www.stealthcam.net Toll Free 877-269-8490 5
Open view image with major parts indication:
STC-V650
www.stealthcam.net Toll Free 877-269-8490 6
Side view with major parts indication:
STC-V650
www.stealthcam.net Toll Free 877-269-8490 7
Picture / Image Capacity
SD card High Mid Low Base AVI
16MB 8 17 40 160 1
32MB 16 34 80 320 2
64MB 32 68 160 640 4
128MB 64 136 320 1280 8
256MB 128 272 640 2560 16
512MB 256 544 1280 512 32
1 GB 512 1088 2560 10240 64
2 GB 1024 2176 5120 20480 128
NOTE: Picture / Image Capacity Chart provides approximate number of
images or AVI movies based on resolution setting and the size of
memory card. These figures may vary depending on the amount of
detail in the image.
STC-V650
www.stealthcam.net Toll Free 877-269-8490 8
Camera kit contents
• Model STC-V650 Sniper Digital Scouting Camera
• User Manual
• USB cable
• Mounting Strap
STC-V650
www.stealthcam.net Toll Free 877-269-8490 9
Battery & memory installation
The Stealth Cam STC-V650 Sniper Advanced Digital Scouting Camera
is designed to operate using two different types of battery power
options.
NOTE: Always have camera in the OFF position when installing or
removing batteries. Removing battery while the camera is in operation
may damage the camera.
Batteries “C” cell:
The internal battery compartment accepts 6 x “C” cell batteries. Be
sure to use high quality brand name alkaline batteries. Install batteries
with correct polarity (+/-) as noted inside the battery compartment.
Warning:
Do not use a different Voltage lead
acid battery other than the one specified in
this section. Doing so will damage the camera
and will void the warranty.
STC-V650
www.stealthcam.net Toll Free 877-269-8490 10
12V Lead Acid external battery
The STC-V650 is equipped with an external power jack designed to
accept a barrel plug cable to attach to a sealed lead acid battery. (sold
separately). This will enhance the camera’s field life. Battery cable and
complete 12V Lead Acid battery kits are available wherever Stealth
Cam scouting cameras are sold or call toll free 877-269-8490. Only
Stealth Cam external battery accessories are recommended.
• Insert the external battery barrel plug into the DC 12V jack on
the bottom of camera housing
• Turn the camera power on.
 Please make sure the voltage and polarity (+/-) are correct
before connection. Incorrect voltage or polarity (+/-) will
damage the camera.
Please note: When both internal and external batteries are connected
the camera will draw power from the higher voltage
source first.
Solar Power
See using external solar power section on page 32.
STC-V650
www.stealthcam.net Toll Free 877-269-8490 11
Memory Options
Your STC-V650 camera is equipped with 32MB built in flash memory.
The camera is also equipped with an expandable media card slot
capable of accepting up to 2GB SD card (sold separately). With no
memory card inserted into the slot the camera will use the built in
32MB memory. If an SD card is inserted into the slot then the camera
will bypass the built in memory and utilize the SD memory for image
storage. The front counter display will show the number of images on
the built in memory unless the expansion card is inserted at which point
the counter will only show the number of images in the expansion card.
Inserting SD card
ake sure camera is in the OFF position whenever adding or
removing memory.
• Insert SD memory card in to the SD card slot completely and in
the correct direction as shown by the sticker located at the side
of the housing.
• To remove the SD memory card depress the SD card and pull
out the card gently.
STC-V650
www.stealthcam.net Toll Free 877-269-8490 12
 SD cards must be clean (no images from other sources). If
you are using the SD card from other cameras, please
make sure to format the SD card in your computer using
FAT formatting, not FAT32, prior to use in the camera.
New cards are good to use straight from the package.
STC-V650
www.stealthcam.net Toll Free 877-269-8490 13
Definitions
• Time out: To set the amount of time in minutes the camera will
sleep between PIR triggering.
• Flash:
o Auto – Flash on based on surrounding light conditions.
o Off – Turn off the flash.
• Capture mode:
o 1P ~ 9P: 1 to 9 burst mode image capturing per PIR
triggering.
o Video: 5 to 90 seconds adjustable video per PIR triggering.
• Resolution:
o 6 0M: Select this option to capture a 6.0 mega pixels image.
(High image quality)
o 3 0M: Select this option to capture a 3.0 mega pixels image.
(Medium image quality)
o 1 3M: Select this option to capture a 1.3 mega pixels image.
STC-V650
www.stealthcam.net Toll Free 877-269-8490 14
(Low image quality)
o 0 3M: Select this option to capture a 0.3 mega pixels image.
(Base image quality)
o Video resolution (320 x 240): This is the resolution during
video capturing.
• Batteries Status: It shows the battery status.
o Full: It shows the battery is full.
o Low: It shows the battery is low and front Low Battery
indicator will also blink.
 When the camera has detected low batteries, (Batteries are
lower then 5.8 +/-0.2Volts) the camera unit will power off
within 30 seconds automatically. Please replace with new
batteries; otherwise the camera will stop working.
• Day and Time: Displays the date and time that you have set
on still image. For AVI it will appear either on the first frame or
the last frame.
STC-V650
www.stealthcam.net Toll Free 877-269-8490 15
• Moon phase and Temperature: Displays the moon phase and
temperature.
• PIR Far/Near dial: Adjusts the PIR detection sensitivity.
o Near is 19 feet
o Far is 30 feet
STC-V650
www.stealthcam.net Toll Free 877-269-8490 16
Set up and Programming
When the camera is first turned on, the internal LCD screen
displays the camera status The following information is displayed
on this screen
Flash Mode Control:
The camera is pre-programmed with Auto Flash setting
• Switch the camera to ON position.
• To turn off the flash mode press the [UP] button
once within 30 seconds. icon will appear on the top of the
screen.
• To turn on the flash mode back to Auto setting press the [UP]
button the second time. icon will appear on the top of the
screen.
STC-V650
www.stealthcam.net Toll Free 877-269-8490 17
If no buttons are pressed after 30 seconds, the LCD screen will
power down to conserve battery life and enter 1 minute count
down to enter PIR detection mode. To re-power the display
screen, press and hold the UP or DOWN button until the status
screen appears.
Programming the Stealth Cam STC-V650
Switch the camera to the ON position. Once the Camera status screen
is visible press the MENU button. This will bring up the SETTING
screen. Capture mode / Resolution / Time out / TV System / Date &
Time settings are all performed in this menu.
Setting
>
Capture mode
Resolution
Time out
TV system
Date and Time
STC-V650
www.stealthcam.net Toll Free 877-269-8490 18
Set the Capturing sequence The Stealth Cam STC-V650 can be
programmed to shoot 1-9 pictures per triggering or 5~90 seconds
of video.
• Power on the unit press the [MENU] button to bring up the
menu on the LCD screen.
• Press [UP] or [DN] to highlight CAPTURE mode.
• Then press the [OK] button to enter capture setting.
• Press the [UP] or [DN] button to select the desired capture
setting (number of pictures per triggering) and press the [OK]
button to save. You will be returned to the SETTING SCREEN
menu.
• Use the UP and DOWN buttons to select additional program
settings or press [MENU] again to exit the SETTING SCREEN.
Set the Resolution:
• Press the [UP] or [DN] to highlight RESOLUTION.
• Then press the [OK] button to enter the resolution settings.
• Press the [UP] or [DN] button to select the desired resolution
and press [OK] to save.
STC-V650
www.stealthcam.net Toll Free 877-269-8490 19
• Use the UP and DOWN buttons to select additional program
settings or press [MENU] again to exit the SETTING SCREEN.
Set the Time out:
• Press the [UP] or [DN] button to highlight TIME OUT.
• Press [OK] to enter the setting.
• Press [UP] or [DN] button to set the desired time out in minutes
(one minute increment from 1-10 and five minute increments
from 10 to 59 minutes).
• Press [OK] again to save the setting. You will be returned to the
SETTING SCREEN menu.
• Use the UP and DOWN buttons to select additional program
settings or press [MENU] again to exit the SETTING SCREEN.
Set TV System: NTSC is the default and correct setting for all of
North America Most of the European and Asian country use PAL
system Below is the instruction for changing the TV output
option
• Press the [UP] or [DN] button to highlight TV system.
STC-V650
www.stealthcam.net Toll Free 877-269-8490 20
• Press [OK] to enter the setting.
• Press the [UP] or [DN] to set the TV output in NTSC or PAL
system.
• Press [OK] again to save the setting. You will be returned to the
camera’s status screen.
Set Date and Time: This camera uses the 24hr military time format
• Press the [MENU] button to bring up the menu on the LCD
screen.
• Press the [UP] or [DN] button to highlight DATE AND TIME.
• Press [OK] to enter the TIME & DATE setting menu.
• Press [UP] or [DN] to select the TIME.
• Using the UP and DOWN buttons set the appropriate hour
then press OK. This will highlight the minutes. Using the UP
and DOWN buttons select the appropriate minutes.
• Press [OK] to save the time and you will be returned to the
TIME & DATE setting menu.
• Press [UP] or [DN] to select DATE and press [OK].

Other manuals for STC-V650

1

This manual suits for next models

1

Other Stealth Cam Security Camera manuals
Stealth Cam STC-P8XT series User manual

Stealth Cam

Stealth Cam STC-P8XT series User manual

Stealth Cam Delta8 STC-QX8 User manual

Stealth Cam

Stealth Cam Delta8 STC-QX8 User manual

Stealth Cam Prowler HD STC-DVIRHD User manual

Stealth Cam

Stealth Cam Prowler HD STC-DVIRHD User manual

Stealth Cam STC-I850 User manual

Stealth Cam

Stealth Cam STC-I850 User manual

Stealth Cam STC-U840IR User manual

Stealth Cam

Stealth Cam STC-U840IR User manual

Stealth Cam STC-G26FX User manual

Stealth Cam

Stealth Cam STC-G26FX User manual

Stealth Cam STC-DVIR4 User manual

Stealth Cam

Stealth Cam STC-DVIR4 User manual

Stealth Cam STC-G45NG User manual

Stealth Cam

Stealth Cam STC-G45NG User manual

Stealth Cam STC-G45NGX User manual

Stealth Cam

Stealth Cam STC-G45NGX User manual

Stealth Cam STC-U840IRS1 User manual

Stealth Cam

Stealth Cam STC-U840IRS1 User manual

Stealth Cam STC-I550 User manual

Stealth Cam

Stealth Cam STC-I550 User manual

Stealth Cam STC-I890 User manual

Stealth Cam

Stealth Cam STC-I890 User manual

Stealth Cam STC-SNX1 User manual

Stealth Cam

Stealth Cam STC-SNX1 User manual
Stealth Cam STC-I530IR User manual

Stealth Cam

Stealth Cam STC-I530IR User manual

Stealth Cam STC-AC540IR User manual

Stealth Cam

Stealth Cam STC-AC540IR User manual

Stealth Cam STC-DVIR8 User manual

Stealth Cam

Stealth Cam STC-DVIR8 User manual

Stealth Cam Titan STC-Z3IR User manual

Stealth Cam

Stealth Cam Titan STC-Z3IR User manual

Stealth Cam STC-U840IRS1 User manual

Stealth Cam

Stealth Cam STC-U840IRS1 User manual
Stealth Cam STC-U732IR User manual

Stealth Cam

Stealth Cam STC-U732IR User manual

Stealth Cam STC-I840IR User manual

Stealth Cam

Stealth Cam STC-I840IR User manual
Popular Security Camera manuals by other brands

Vicon HPOE-100 installation guide

Vicon

Vicon HPOE-100 installation guide

EverFocus EDH5201 manual

EverFocus

EverFocus EDH5201 manual

ATIK Cameras GP quick start guide

ATIK Cameras

ATIK Cameras GP quick start guide

Sony REVDN700-2 instruction manual

Sony

Sony REVDN700-2 instruction manual

Bosch DINION HD 1080p HDR Specifications

Bosch

Bosch DINION HD 1080p HDR Specifications

Easy Access EASYRING V3 manual

Easy Access

Easy Access EASYRING V3 manual

VIGITAL IP200MP-RV1B quick start guide

VIGITAL

VIGITAL IP200MP-RV1B quick start guide

Sony HDC3500 operating instructions

Sony

Sony HDC3500 operating instructions

PNI IP930W user guide

PNI

PNI IP930W user guide

Speco O6MDP3N user manual

Speco

Speco O6MDP3N user manual

Xineron XIN-MPD-0110 Quick installation guide

Xineron

Xineron XIN-MPD-0110 Quick installation guide

EverFocus EI220 Specifications

EverFocus

EverFocus EI220 Specifications

CVTE SC701 user manual

CVTE

CVTE SC701 user manual

Sanyo DSR-HB8000 brochure

Sanyo

Sanyo DSR-HB8000 brochure

Panasonic WV-NW502S installation guide

Panasonic

Panasonic WV-NW502S installation guide

Surveon CAM6120 operating instructions

Surveon

Surveon CAM6120 operating instructions

DVTEL CB-5222 Quick install guide

DVTEL

DVTEL CB-5222 Quick install guide

Wisenet TNU-6321 quick guide

Wisenet

Wisenet TNU-6321 quick guide

manuals.online logo
manuals.online logoBrands
  • About & Mission
  • Contact us
  • Privacy Policy
  • Terms and Conditions

Copyright 2025 Manuals.Online. All Rights Reserved.