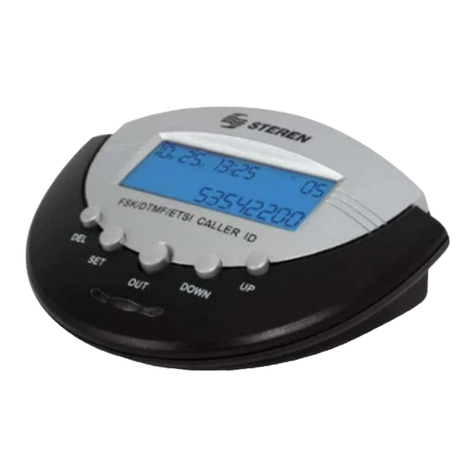
Steren TEL-810 User manual

Before using your new Caller ID, please read this
instruction manual to prevent any damage. Put it away in
a safe place for future references.
IMPORTANT
Before using your new Caller ID, assure to install 3 AAA
batteries, otherwise Blue Back Light will not light on and caller
ID won’t works.
Caller ID function only works if you have subscribed for the
service with your local telecom
company.
Device must be placed in a cool dry and ventilated place.
Do not expose LCD screen to sunlight.
Clean only with a soft, dry cloth. Do not use solvents.
MAIN FEATURES
14-digit LCD display
Blue background lit
100 incoming calls memory
30 outgoing calls memory
Display of incoming number, new call, total calls, repeat
calls
Checking, erasing and call back for incoming / outgoing
calls
Auto-add “0” in call back
Real time & date display in idle mode
FSK / DTMF compatibility
•
•
•
•
•
•
•
•
•
CONTROLS
1.- Del
While you are checking the incoming / outgoing calls, press
this button once to delete the selected number from the
memory / Press and hold for more than 2 seconds to delete
all incoming and outgoing phone numbers / Backs to previ-
ous page
2.- Set
Allows you to configure the device
3.- Out
Displays outgoing phone numbers / elapsed time
4.- Down
Displays incoming phone numbers
5.- Up
Displays outgoing phone numbers
6.- Phone
Allows you to connect the included phone cable to Phone
Line connector into the phone set.
7.- Line
Allows you to plug the phone line to Caller ID
8.- Battery compartment
ENGLISH
ENGLISH-2
ENGLISH
ENGLISH-3
ENGLISH
ENGLISH-4
1
234
5
1
234
5
67
8
6 7
8
Before usin
g
y
our new Caller ID, please read this
i
nstruct
i
on manua
l
to prevent an
y
d
ama
g
e.
P
ut
i
t awa
y
i
n
a
safe place for future references
.

CONNECTIONS
INITIAL SETTINGS
Before configure the equipment, make sure it is
connected to the phone set and phone line.
Setting time, and date
1.- Press Set button twice, the Year blinks in the LCD screen.
2.- Use Up / Down to set the current year. Press Set to store
the changes. Then, the month blinks.
3.- Repeat step 2 to enter month, day, time format (12 or 24),
hours and minutes.
4.- After you entered the correct data information, DO NOT
press any button for 3 seconds, the screen backs to normal
view and the changes are stored in memory.
5.- Use Set button to change the parameters of: Code, Flash,
Auto IP, IP, LCD screen and Pause.
6.- To configure one of this options, press Set once, then use
Up / Down buttons to select one item. To confirm press Set
button.
7.- In the same way, use Up / Down buttons to change the
parameters; when you finish the edition, DO NOT press any
button for 3 seconds, the changes will be stored in memory.
If you have subscribed caller ID service from your local
telecom service provider and the message sent from
telecom network is in FSK mode, the message will auto
adjust the Date & Time on the device.
The Flash option, allows you to configure the time while
you transfer a call between a phone set to other.
The LCD option allows you to set the contrast of the
screen.
Auto IP and IP functions are available only for IP voice
systems.
Pause function helps to configure the device when it’s
working with a commuter.
CALLER ID
INCOMING CALLS
To review incoming calls, press Up / Down buttons. Incoming
numbers, date and time appears on LCD screen. To visualize
more telephone numbers, press Up / Down.
The Caller ID can store up to 100 incoming telephone
numbers on memory.
To receive the complete caller ID information, please pick
the phone handset up after two rings.
Erasing incoming telephone numbers:
1.- Press Up / Down to select the number that you want to
erase.
2.- Press Del button, the selected number will be erased from
the memory.
Erasing all incoming telephone numbers:
1.- Press and hold Del button for more than 2 seconds, all the
incoming calls will be erased from memory.
REVIEWING OUTGOING CALLS
To review the dialed phone numbers, press Out button. The
last dialed number displays in the screen.
Press Out once again, to visualize the elapsed call time.
If you want to visualize more stored numbers, press Out
many times as you need.
Any dialed number in Pulse Mode will not be stored in
OUT memory.
Erasing dialed numbers:
1.- Press Out button to select the number that you want to
erase.
2.- Press Del button once, the selected number will be
deleted from memory.
Erasing all dialed numbers:
1.- Press and hold Del button for more than 2 seconds. All the
incoming calls will be erased from memory.
TROUBLESHOOTING
ENGLISH
ENGLISH-5
ENGLISH
ENGLISH-6
ENGLISH
ENGLISH-7
ENGLISH
ENGLISH-8
To phone To phone line
Trouble Solution
Verify batteries are correctly installed
Review the batteries char
g
e
Assure that you have subscribed to
the service on your telecom company
Probably you answered the phone
before two rin
g
s
Make sure that you have installed
new babtteries on the tele
p
hone
Re
p
lace the batteries
Blue Light doesn't work
Caller ID doesn't work / appears
uncompleted data
If
y
ou have subscribed caller ID service from
y
our local
telecom service provider and the messa
g
e sent from
telecom network is in FSK mode, the messa
g
e will auto
a
d
j
ust the Date & Time on the device
.
T
he Flash option, allows
y
ou to confi
g
ure the time while
y
ou transfer a call between a phone set to other
.
T
he LCD option allows
y
ou to set the contrast of the
screen.
A
uto IP and IP functions are available onl
y
for IP voice
s
y
stems
.
P
ause function helps to confi
g
ure the device when it’s
wor
ki
n
g
w
i
t
h
a commuter.
A
T
he Caller ID can store up to 100 incomin
g
telephone
numbers on memor
y.
T
o receive the com
p
lete caller ID information,
p
lease
p
ick
t
he phone handset up after two rin
g
s
.
A
n
y
dialed number in Pulse Mode will not be stored in
O
UT memor
y.

SPECIFICATIONS
Input: 4,5V (3xAAA)
Input line: -48V
Dimensions: 5,3 x 3,9 x 2in
Weight: 106g
Product design and specifications are subject to change,
without notice.
ENGLISH
ENGLISH-9
WARRANTY
This Steren product is warranted under normal usage against defects in
workmanship and materials to the original purchaser for one year from the date of purchase.
CONDITIONS
1.- This warranty card with all the required information, invoice or purchase ticket, product box or package, and
product, must be presented when warranty service is required.
2.- If the product stills on the warranty time, the company will repair it free of charge.
3.- The repairing time will not exceed 30 natural days, from the day the claim was received.
4.- Steren sell parts, components, consumables and accesories to costumer, as well as warranty service, at any of
the addresses mentioned later.
WARRANTY IS VOID IN NEXT CASES:
If the product has been damaged by an accident, acts of God, mishandling, leaky batteries, failure to follow enclosed
instructions, improper repair by unauthorized personnel, improper safe keeping, among others.
a) The consumer can also claim the warranty service in the purchase establishment.
b) If you lose the warranty card, we can reissue it, if you show the invoice or
purchase ticket.
RETAILER INFORMATION
Name of the retailer
Address
Product
Brand
Part number
Serial number
Date of delivery
In case your product fails, contact a closer retailer. If you have any doubt, please give a call to our Call
Center.
Call Center
01 800 500 9000
Product: 100 Calls Caller ID System
Part number: TEL-810
Brand: Steren
Antes de utilizar su nuevo Identificador de Llamadas lea
este instructivo para evitar cualquier mal
funcionamiento. Guárdelo para futuras referencias.
IMPORTANTE
Antes de comenzar a utilizar su nuevo identificador de
llamadas asegúrese de instalar 3 baterías tipo AAA, de otra
forma la pantalla luminosa no se encenderá y el equipo no
funcionará.
El identificador de llamadas sólo funciona si tiene contratado
el servicio con una compañía de telefonía local.
El equipo se debe colocar en un lugar ventilado y seco.
No exponga la pantalla de LCD a la luz directa del sol.
Limpie con un paño seco. No utilice solventes.
CARACTERÍSTICAS
Pantalla de LCD de 14 dígitos
Fondo luminoso azul
Memoria para 100 llamadas entrantes
Memoria para 30 llamadas salientes
Información de número entrante, llamada nueva, total de
llamadas,
llamadas repetidas
Revisión, borrado y retorno de llamadas entrantes y
salientes
Agregado automático de 0 en regreso de llamadas.
Desplegado de la fecha y hora actual en modo de espera
Compatibilidad FSK / DTMF
•
•
•
•
•
•
•
•
•
•
ESPAÑOL-2
ESPAÑOL
P
roduct desi
g
n and specifications are sub
j
ect to chan
g
e,
without notice
.
A
ntes de utilizar su nuevo Identificador de Llamadas lea
este instructivo
p
ara evitar cual
q
uier mal
f
uncionamiento. Guárdelo
p
ara futuras referencias
.
A

1
234
5
1
234
5
Al teléfono A la línea telefónica
CONTROLES
1.- Borrar (Del)
Mientras revisa las llamadas entrantes y salientes, presione
este botón una vez para borrar el número seleccionado de la
memoria / Presione por más de 2 segundos para borrar todos
los números entrantes y salientes / Regresa a la pantalla
anterior en modo de Ajuste
2.- Ajustes (Set)
Realiza configuraciones básicas del equipo
3.- Salir (Out)
Muestra las llamadas realizadas así como el tiempo de la
llamada
4.- Bajar (Down)
Muestra las llamadas entrantes
5.- Arriba (Up) Muestra las llamadas salientes
6.- Phone
Permite conectar el cable telefónico incluido al conector de
Phone Line del teléfono
7.- Line
Permite conectar la línea telefónica al identificador de
llamadas
8.- Compartimiento de baterías
ESPAÑOL-3 ESPAÑOL-4
ESPAÑOL
ESPAÑOL
4.- Una vez que ingresó los datos correctos, NO presione
ningún botón por 3 segundos, la pantalla regresará al modo
normal y los cambios serán guardados en memoria.
5.- Mediante el botón de Ajuste (Set) puede cambiar los
parámetros de: Código (code), Flash, Auto IP, IP, Pantalla de
Lcd (LCD), y Pausa (Pause).
6.- Para configurar una de estas opciones, presione el botón
de Ajuste (Set) una vez, utilice los botones de arriba / abajo
para seleccionar la opción deseada, y vuelva a presionar el
botón de Set.
7.- De igual forma, utilice los botones de arriba / abajo para
cambiar los parámetros; una vez que haya terminado, NO
presione ningún botón por 3 segundos, los cambios se
guardarán en la memoria.
Si el servicio de identificador de llamadas de su
proveedor de telefonía está en modo FSK, la hora y la
fecha será ajustada automáticamente.
La opción de Flash le permite configurar el tiempo de
espera para transferir una llamada a otro número
telefónico.
La opción de LCD le permite configurar el contraste de la
pantalla.
Las opciones Auto IP, e IP solamente están disponibles
si cuenta con servicio de telefonía basado en IP.
La opción de Pausa permite configurar el tiempo de
pausa de la marcación cuando se utiliza con
conmutadores.
ESPAÑOL-5 ESPAÑOL-6
ESPAÑOL
ESPAÑOL
67
8
6 7
8
CONEXIONES
AJUSTES INICIALES
Antes de comenzar los ajustes iniciales asegúrese de
que el equipo esté conectado al teléfono y a la línea
telefónica.
Ajuste de la hora, la fecha
1.- Presione la tecla de Ajuste (Set) dos veces. El año
comenzará a parpadear en la pantalla de LCD.
2.- Utilice las teclas de arriba / abajo (Up/ Down) para
cambiar el año. Presione Ajustar (Set) para ingresar el
cambio. El mes comenzará a parpadear.
3.- Repita el paso 2 para ingresar el mes, el día, el formato
de hora (12 o 24 hrs), la hora y los minutos.
Si el servicio de identificador de llamadas de su
p
roveedor de telefonía está en modo FSK, la hora
y
la
f
echa será a
j
ustada automáticamente
.
L
a opción de Flash le permite confi
g
urar el tiempo de
e
spera para transferir una llamada a otro número
telefónico
.
L
a opción de LCD le permite confi
g
urar el contraste de la
p
antalla
.
L
as o
p
ciones Auto IP, e IP solamente están dis
p
onibles
si cuenta con servicio de telefonía basado en IP
.
L
a opción de Pausa permite confi
g
urar el tiempo de
p
ausa de la marcación cuando se utiliza con
c
onmutadores
.

COMO UTILIZAR EL IDENTIFICADOR DE
LLAMADAS
LLAMADAS ENTRANTES
Para revisar los números telefónicos de las llamadas que
recibió, presione la tecla Arriba / Abajo (Up / Down). En la
pantalla se muestran los números telefónicos así como la
fecha y la hora en que se recibieron.
Para poder visualizar más números telefónicos presione la
tecla Arriba / Abajo (Up / Down).
El equipo puede almacenar hasta 100 números
telefónicos en memoria (llamadas entrantes).
Conteste las llamadas después de que el teléfono timbre
2 o más veces, de otra forma podría no aparecer la
información en el identificador de llamadas.
Si desea borrar un número telefónico:
1.- Presione la tecla Arriba / Abajo (Up / Down) para
seleccionar el número que desee borrar.
2.- Presione la tecla de Borrar (Del), el número seleccionado
será borrado de la memoria.
Si desea borrar todas las llamadas entrantes:
1.- Mantenga presionada la tecla de Borrar (Del) por más de
2 segundos, todas las llamadas entrantes serán borradas de
la memoria.
LLAMADAS SALIENTES
Para revisar los números telefónicos de las llamadas que
realizó, presione la tecla de Salir (Out). En pantalla se
visualizará el último número marcado. Presione una vez más
para visualizar la duración de la llamada.
Si desea visualizar más números, presione el botón de Salir
(Out) tantas veces sea necesario.
Cualquier número marcado en modo de Pulso, no será
almacenado en la memoria de llamadas salientes.
Si desea borrar un número telefónico saliente:
1.- Presione la tecla de Salir (Out) para seleccionar el
número que desee borrar.
2.- Presione la tecla de Borrar (Del) una vez, el número
seleccionado será borrado de la memoria.
Si desea borrar todas las llamadas salientes:
1.- Mantenga presionada la tecla de Borrar (Del) por más de
2 segundos, todas las llamadas salientes serán borradas de
la memoria.
ESPAÑOL-7 ESPAÑOL-8
ESPAÑOL
ESPAÑOL
PROBLEMAS Y SOLUCIONES
ESPECIFICACIONES
Entrada: 4,5V (3xAAA)
Entrada de línea: -48V
Dimensiones: 135x100x52mm
Peso: 106g
El diseño del producto y las especificaciones pueden
cambiar sin previo aviso.
ESPAÑOL-9
ESPAÑOL
Problema Solución
Revise que las baterías están
correctamente instaladas
Revise que las baterías tienen carga
suficiente
Asegúrese de tener contratado el
servicio con su proveedor de
telefonía
Posiblemente contestó antes de que
el teléfono timbrara 2 veces
Asegúrese de haber instalado
baterías en el e
q
ui
p
o
Instale baterías nuevas
No enciende la pantalla azul
El identificador de llamadas no
funciona / se muestra la
información incompleta
PÓLIZA DE GARANTÍA
Esta póliza garantiza el producto por el término de un año en todas sus partes y mano de obra, contra cualquier
defecto de fabricación y funcionamiento, a partir de la fecha de entrega.
CONDICIONES
1.- Para hacer efectiva la garantía, presente ésta póliza y el producto, en donde fue adquirido o en Electrónica
Steren S.A. de C.V.
2.- Electrónica Steren S.A de C.V. se compromete a reparar el producto en caso de estar defectuoso sin ningún
cargo al consumidor. Los gastos de transportación serán cubiertos por el proveedor.
3.- El tiempo de reparación en ningún caso será mayor a 30 días, contados a partir de la recepción del producto
en cualquiera de los sitios donde pueda hacerse efectiva la garantía.
4.- El lugar donde puede adquirir partes, componentes, consumibles y accesorios, así como hacer válida esta
garantía es en cualquiera de las direcciones mencionadas posteriormente.
ESTA PÓLIZA NO SE HARA EFECTIVA EN LOS SIGUIENTES CASOS:
1.- Cuando el producto ha sido utilizado en condiciones distintas a las normales.
2.- Cuando el producto no ha sido operado de acuerdo con el instructivo de uso.
3.- Cuando el producto ha sido alterado o reparado por personal no autorizado por Electrónica Steren S.A. de C.V.
El consumidor podrá solicitar que se haga efectiva la garantía ante la propia casa comercial donde adquirió el
producto. Si la presente garantía se extraviara, el consumidor puede recurrir a su proveedor para que le expida
otra póliza de garantía, previa presentación de la nota de compra o factura respectiva.
DATOS DEL DISTRIBUIDOR
Nombre del Distirbuidor
Domicilio
Producto
Marca
Modelo
Número de serie
Fecha de entrega
ELECTRONICA STEREN S.A. DE C.V.
Camarones 112, Obrero Popular, 02840, México, D.F. RFC: EST850628-K51
STEREN PRODUCTO EMPACADO S.A. DE C.V.
Biólogo MaximIno Martínez No. 3408 Int. 3 y 4, San Salvador Xochimanca, México, D.F. 02870,
RFC: SPE941215H43
ELECTRONICA STEREN DEL CENTRO, S.A. DE C.V.
Rep. del Salvador 20 A y B, Centro, 06000, México. D.F. RFC: ESC9610259N4
ELECTRONICA STEREN DE GUADALAJARA, S.A.
López Cotilla No. 51, Centro, 44100, Guadalajara, Jal. RFC: ESG810511HT6
ELECTRONICA STEREN DE MONTERREY, S.A.
Colón 130 Pte., Centro, 64000, Monterrey, N.L. RFC: ESM830202MF8
ELECTRONICA STEREN DE TIJUANA, S.A. de C.V.
Calle 2a, Juárez 7636, Centro, 22000, Tijuana, B.C.N. RFC: EST980909NU5
En caso de que su producto presente alguna
falla, acuda al centro de distribución más
cercano a su domicilio y en caso de tener
alguna duda o pregunta por favor llame a
nuestro Centro de Atención a Clientes, en
donde con gusto le atenderemos en todo lo
relacionado con su producto Steren.
Centro de Atención a Clientes
01 800 500 9000
Producto: Identificador de Llamadas
Modelo: TEL-810
Marca: Steren
Cual
q
uier número marcado en modo de Pulso, no será
a
lmacenado en la memoria de llamadas salientes
.
E
l diseño del producto
y
las especificaciones pueden
c
ambiar sin previo aviso
.
Table of contents
Languages:
Other Steren Caller ID Box manuals