STILLE imagiQ2 Operating and maintenance manual
imagiQ2 installation procedure
Thank you for purchasing the STILLE imagiQ2
surgical imaging table. Below you find the steps
that guide you for a successful installation and
use of the product. For more info please contact
1. Unpack the table
For instructions on how to unpack the table please visit:
www.stille.se/movies/imagiq2-product-training/ and
select the video called “Unpacking imagiQ2” from the
Product training video section.
2. Complete the installation report
Please be informed that the standard warranty terms will
only apply if the table is registered with STILLE. In case
the product is not registered with STILLE, the products
are subject to a 1-year warranty from the date of
delivery.
The installation report shall be submitted to STILLE no
longer than 10 days from the date of the installation.
For registering your product please visit:
www.stille.se/iQ2registration
If you have any questions, please contact your sales
representative or STILLE directly.
3. Read the user manual / Get to know the product
Read carefully and always follow the instructions in the
manual before first using the imagiQ2™ operating table.
This manual has been written to ensure that you will
handle the table in a safe and correct manner. You will
find the user manual included with the table. You can also
STILLE has prepared an educational video channel for
a quick and more hands-on product training. Each
video is no longer than 1 minute and includes all table
functionality, attachment of the accessories and packing/
unpacking of the table. The educational video channel is
not intended to replace the user manual.
Go to STILLE’s educational video channel here:
www.stille.se/movies/imagiq2-product-training/
4. FIRST TIME USE procedure
Follow the procedure described below before the
STILLE imagiQ2TM operation table is used for the first
time:
4.1) Charge the batteries continously until they are fully
charged or for a minimun of 12 hours for standard battery
and 24 hours for battery upgrade before first time use
(the main switch must be “ON” when charging the table).
4.2) Fill out the testprotocol ISO -EN 62353 (this protocol
depends on each country requirements)
4.1) Consult the user manual /educational video channel.
4.2) Test run all functions on the hand control as described:
A. Column, Run column from lowest position to highest
position and up again.
B. Lateral tilt right, Run tabletop from zero position
to maximum right inclination, and then zero the table.
C. Lateral tilt left, Run tabletop from zero position to maxi-
mum left inclination, and then zero the table.
D. Longitudinal tilt (Trendelenburg), Run tabletop from
zero position to maximum head down, and then zero
the table.
E. Reversed longitudinal tilt (anti-Trendelenburg), Run
tabletop from zero position to maximum head up and
then zero the table.
F. Quick-trend (Trendelenburg), Run tabletop from zero
position to maximum head down and then zero the table.
G. Zero position. Lateral tilt, Run tabletop from maximum
left inclination to maximum right inclination and back.
Make sure that the table stops both times it passes
zero position.
H. Longitudinal tilt (Trendelenburg) Run tabletop from
maxmum head down to maximum head up and back. Make
sure that the table stops both times it passes zero position.
I. Panning (float). Pan functions, place table in 0-position
and test run both axis. Check that motion works
effortlessly and smooth (manoeuvre with one hand only).
All above mentioned steps (A-I) shall be controlled on the
safety Hand Control as well.
Register your product for the full warranty to take place
Surgical perfection. For life.
www.stille.se/iQ2registration
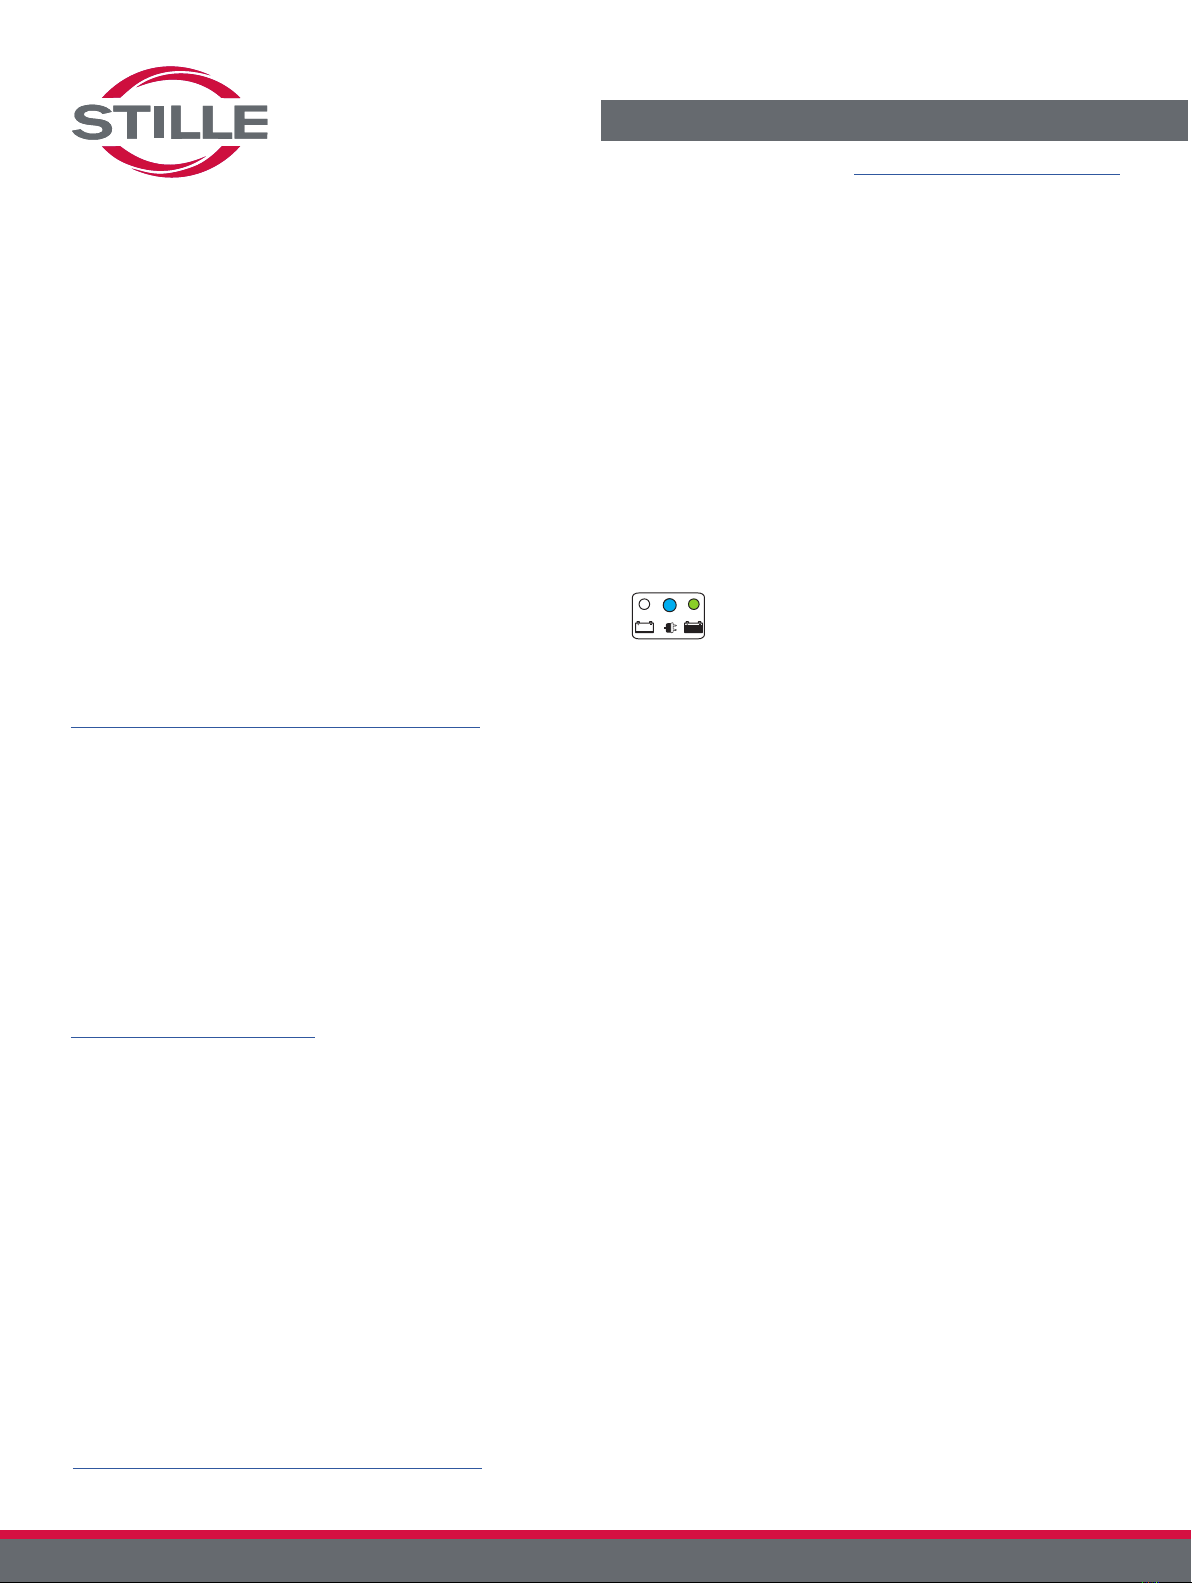
Constant Blue and Green light

Stille AB Ekbacken 11, 644 30 Torshälla, Sweden • Phone: +46 8 588 580 00 • inf[email protected] • www.stille.se
Art. no: 950-5300007-EN14-01-InstallationABC © 2014-08-01 STILLE. All rights reserved.
Daily control before procedures
nThe operator should have knowledge how to operate
the device, be aware of warnings and signals described
in the user manual and the user manual should always
be available. For a video presentation of the table use
please consult the educational video channel at:
www.stille.se/movies/imagiq2-product-training/
nThe operator should perform a function according to
steps A-I (See FIRST TIME USE procedure).
nTest the device for proper function and inspect cables
for cuts and other damage. If in doubt, replace the
relevant parts.
Good to know:
nThe main switch should be in the “Up” position to start
the table (it is shipped in the “off/down” position) To
find the main switch on the base of the table please
consult the “Main switch (power ON & OFF)” educa-
tional video at:
www.stille.se/movies/imagiq2-product-training/
nThe pan handle has a tension adjustment. Make sure
you keep it tight to the side rail.
nThe table can also be operated with AC power. STILLE
recommends for the battery to be fully charged before
first time use.
nMake sure the battery is properly charged during at
least 12 hours for standard battery /24 hours for bat-
tery upgrades before first time use.
To learn more about the imagiQ2’s functionality please consult the user manual or watch the educational video channel.
For more information please contact STILLE:
Customer Service USA
Phone: +1 (800) 665-1614
E-mail: [email protected]
Technical Service USA
Phone: +1 (800) 665-1614 ext. 105
E-mail: servic[email protected]
Customer Service International
Phone: +46 (8) 588 58 011
E-mail: [email protected]
Technical Service International
Phone:+46 (8) 588 58 030
E-mail: servic[email protected]
Other manuals for imagiQ2
2
Other STILLE Medical Equipment manuals


Popular Medical Equipment manuals by other brands


Dräger
Dräger Babytherm 8000 WB Instructions for use

Aspire
Aspire ACTIVE AIR ACUTE 8 Series user manual

VBM Medizintechnik
VBM Medizintechnik 66-10-025 Reprocessing Instructions

nCounters
nCounters Essential Angle Sensor Unit Operation manual

Molift
Molift Etac Nova Stand Up user manual

Gima
Gima HS-201W user manual


