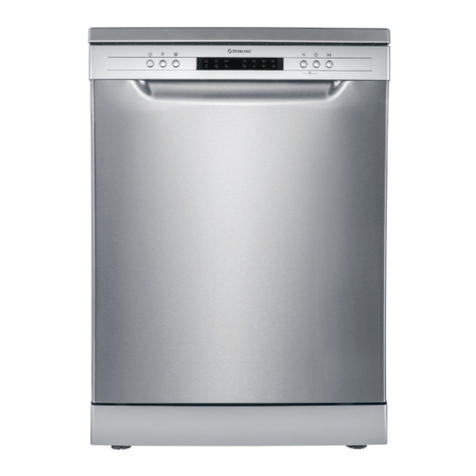
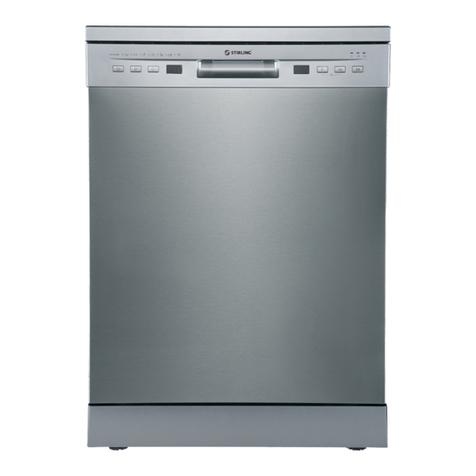
Stirling W60B2A411B User manual

Model Number W60B2A411B
N13275
Integrated Dishwasher
AFTER SALES SUPPORT
1300 886 649
AUS MODEL: W60B2A411B PRODUCT CODE: 48538 08/2015
INSTRUCTION MANUAL
IM Version No: V1.2 Issue Date: 09 February 2015

2
Welcome
Congratulations on choosing to buy a STIRLING®product.
All products brought to you by STIRLING®are manufactured to the highest
standards of performance and safety and, as part of our philosophy of customer
service and satisfaction, are backed by our comprehensive 3 Year Warranty.
We hope you will enjoy using your purchase for many years to come.

3
Contents
02 Welcome
04 Warranty Details
05 General Safety Instructions
08 Product Overview
10 Getting Started: Quick Reference
11 Installation
20 Features
22 Instructions
32 Frequently Asked Questions
35 Other Useful Information
43 Repair and Refurbished Goods or Parts Notice

4
Integrated Dishwasher
Warranty Details
The product is guaranteed to be free from defects in workmanship and parts
for a period of 36 months from the date of purchase. Defects that occur
within this warranty period, under normal use and care, will be repaired,
replaced or refunded at our discretion, solely at our option with no charge for
parts and labour. The benefits conferred by this warranty are in addition
to all rights and remedies in respect of the product that the consumer
has under the Competition and Consumer Act 2010 and similar state and
territory laws.
Our goods come with guarantees that cannot be excluded under the
Australian Consumer Law. You are entitled to a replacement or refund for
a major failure and to compensation for any other reasonably foreseeable
loss or damage. You are also entitled to have the goods repaired or
replaced if the goods fail to be of acceptable quality and the failure does
not amount to a major failure.

5
General Safety InstructionsGeneral Safety Instructions
IMPORTANT SAFETY INSTRUCTIONS
READ CAREFULLY AND KEEP FOR FUTURE REFERENCE
Read this manual thoroughly before first use, even if you are familiar with this type
of product. The safety precautions enclosed herein reduce the risk of fire, electric
shock and injury when correctly adhered to. Keep the manual in a safe place for
future reference, along with the completed warranty card and purchase receipt. If
applicable, pass these instructions on to the next owner of the appliance.
Always follow basic safety precautions and accident prevention measures when
using an electrical appliance, including the following:
Pay particular attention to safety messages that follow the words:
DANGER, WARNING and CAUTION.
These words are used to alert you to a potential hazard that can seriously
injure you and others. The instructions will tell you how to reduce the chance
of injury and let you know what can happen if the instructions are not followed.
DANGER means that failure to read this safety statement may result in severe
personal injury.
WARNING means that failure to read this safety statement may result in
extensive product damage or serious personal injury.
CAUTION means that failure to read this safety statement may result in
minor or moderate personal injury, property or equipment damage.
Electrical safety and cord handling
• Before connecting and turning on the appliance, ensure the electrical voltage and
circuit frequency correspond to those indicated on the appliance rating label.
• WARNING! Ensure the outlet is properly earthed to the ground. If unsure, consult
a qualified electrician or a service representative. Improper connection of the
equipment grounding conductor can result in the risk of an electric shock if the
appliance malfunctions.
• WARNING! Do not modify the cord and plug provided with the appliance; if it does
not fit the outlet, have a proper outlet installed by a qualified electrician.
• WARNING! If the supply cord is damaged, do not use the appliance. A damaged
cord must be replaced by the manufacturer or its service agent. Contact the after
sales support line.
• Do not use an adaptor; do not use an extension cord. We recommend you connect
the appliance to a separate circuit serving only this appliance.
• Do not kink or damage the power cord. Position it out of the way so no one steps
on or places anything on the cord or against it.
• Make sure the appliance is switched off before you plug it into the power supply.

6
General Safety Instructions (Cont.)
• Always turn the power off at the power point before you insert or remove a plug.
Remove by grasping the plug, do not pull on the cord.
• CAUTION! To reduce the risk of electric shock, do not expose the appliance, cord
or plug to rain, moisture or any other liquid.
• Unless your home is already fitted with a residual current device (safety switch), we
recommend installing an RCD with a rated residual operating current not exceeding
30mA to provide additional safety protection when using electrical appliances. See
your electrician for professional advice.
Installation
• DANGER! Under certain conditions, hydrogen gas may be produced in a hot-water
system that has not been used for two weeks or more. Hydrogen gas is explosive!
If the hot-water system has not been used for such a period of time, before using
the dishwasher, turn on all hot-water taps and let the water flow from each of them
for several minutes. This will release any accumulated hydrogen gas. As the gas is
flammable, do not smoke or use an open flame during this time.
• WARNING! Do not install the dishwasher yourself. Have it installed by an
accredited plumber or installer only.
• WARNING! Any electrical work required for the installation of this dishwasher
should be carried out by a qualified electrician.
• During installation, the power supply cord must not be excessively or dangerously
bent or flattened.
• When removing an old dishwasher from service or discarding it, remove the door to
the washing compartment.
• Only use new hose sets when connecting this dishwasher to the water supply; do
not reuse old hoses.
• Do not install the appliance on or near any flammable or hot object.
• If there are any ventilation openings in the base, make sure they are not obstructed
by carpet.
• Install the dishwasher on an even, flat and stable ground.
• Cardboard packaging is manufactured from recycled paper and should be
disposed of responsibly for recycling. Keep plastic packaging materials out of
reach of young children.
Usage conditions and restrictions
• Do not operate your dishwasher unless all enclosure panels are properly in place.
• This appliance is intended for indoor domestic use only. Do not use it for anything
other than its intended purpose, and only use it as described in this manual.

7
General Safety Instructions (Cont.)General Safety Instructions (Cont.)
• The appliance is not intended for use by persons (including children) with reduced
physical, sensory or mental capabilities, or lack of experience and knowledge,
unless they have been given supervision or instruction concerning use of the
appliance by a person responsible for their safety.
• Young children should be supervised to ensure they do not play with the appliance.
Close supervision is necessary when any appliance is used by or near children.
• Do not attempt to alter or modify this appliance or its controls in any way.
• Do not sit or stand on the door or dish rack, or use it for anything other than its
intended purpose.
• Do not place any heavy objects on the dishwasher door when it is open. The
appliance could tip forward.
• If the heating element is exposed, do not touch it during or immediately after use.
• Open the door very carefully if the dishwasher is operating as there is a risk of
water escaping.
• The door should not be left open as this could increase the risk of someone tripping
over the door.
• Do not overload this dishwasher, it has a maximum capacity of 14 place settings.
• To ensure safe operation, follow a few simple rules when loading the dishwasher:
• Place sharp items so they are not likely to damage the door seal.
• Place long bladed knives with their cutting edge down in the cutlery tray to
avoid potential hazards.
• Place plastic items so they do no come into contact with the heating element.
(Only wash plastic items that are marked dishwasher safe or the equivalent.
For plastic items not marked, check the manufacturer’s recommendations.)
• Use only detergent and rinse additives designed for an automatic dishwasher and
keep them out of reach of children. Never use liquid detergent (for manual washing
up), soap or laundry detergent in your dishwasher.
• DANGER! Dishwasher detergent is strongly alkaline and can be extremely
dangerous if swallowed. Avoid contact with the skin and eyes.
• DANGER! Keep children away from the dishwasher when the door is open. Even
after a wash there could still be detergent left inside. Make sure that the detergent
compartment is empty after completion of the wash cycle.
• Never leave the appliance unattended while in use.
• Do not attempt to take the unit apart. Apart from regular maintenance as described
in this manual, this appliance is not designed to be dismantled by the user. In case
of damage or malfunction, have the unit repaired by trained personnel only, or
contact the after sales support line for advice.
• Inappropriate use can result in property damage, injury or death. We assume no
liability for misuse of the appliance or noncompliance with these instructions.

8
Product Overview
1 Cutlery tray
2 Cup rack
3 Upper basket
4 Basket rails
5 Upper spray arm
6 Lower basket
7 Filters (at the bottom, not visible here)
8 Lower spray arm
9 Detergent dispenser
10 Rinse aid dispenser
11 Control panel (see opposite)
12 Water supply hose
13 Drain hose and holder (elbow)
14 Handle (of the ornamental front panel,
installed, but not fully visible here)
11
1
Also supplied, but not pictured here:
Installation hardware:
2x T-shaped plugs, 4x Hole plugs,
6x 4*26 Wood screws (cross slot, round head)
4x 4*44 Wood screws (countersunk head)
Product documentation:
Instruction manual, Quick start guide,
Warranty certificate
2
3
5
6
7
8
4
9
10
13 12
14

9
Product Overview (Cont.)
1 2 4
3 5
67
Control panel
1 Display: This will display the set delay time, error codes or the estimated time left
for the program to run.
2 Delay time: This option will allow you to delay the start time of any wash cycle for
up to 24 hours. Press this button (repeatedly) to select the desired delay start time
in one-hour steps.
3 Child lock: Press and hold this button for 3 seconds to activate the child lock
function. When the child lock has been set, the indicator above the button lights up.
4 60 minute program: Press this button to select this 1 hour program.
5 3 in 1 function: Press this button when using 3 in 1 dishwasher tablets in the
Intensive, Heavy or Normal program; it helps dissolve the detergent at the
appropriate time during the wash cycle.
6 Program selection: Press this button (repeatedly) to select the wash program.
7 On/Off: Press this button to turn the power supply on or off.
8 Check water supply indicator: This indicator lights up when the tap is turned off,
the water supply is interrupted or supply hose kinked.
9 Rinse aid indicator: This indicator comes on when the dispenser needs refilling.
10 Drying indicator: This indicator comes on during the drying cycle.
11 Program indicators: These lights indicate which program has been selected or is
in progress.
NOTE: When you have selected the wash program and closed the door, the
dishwasher will start operating.
11
10
8
9

10
Getting Started
For detailed operating instructions, read the corresponding content in this manual on
the pages listed below.
Topic Brief instructions Page
Installation This appliance is designed for fully integrated installation
in your kitchen. Make sure the surface is level and there
is a water inlet, drain connection and power point nearby.
11-19
Loading the
dishwasher
Scrape off leftover food, soften burnt food residues with
water, then load plates, larger bowls and pots in the
bottom basket, cutlery in the cutlery tray and glasses,
cups and small plates or bowls in the top basket.
22-25
Checking
rinse aid
If you are using a standard detergent, make sure there is
sufficient liquid rinse aid in the dispenser.
28-29
Adding
detergent
Fill dishwasher detergent (or a detergent tablet) into the
detergent dispenser compartment.
26-27
Running the
dishwasher
• With the dishwasher plugged in and the water tap turned
to full pressure, press the ON/OFF button to switch on.
• If you are using a “3 in 1” or similar detergent tablet,
press the 3in1 button and select the Intensive, Heavy
or Normal program.
• Press the PROGRAM button to select a wash program
(or press the 60min button for this program).
• If you want the dishwasher to start later, press the
DELAY button to delay the start for up to 24 hours.
• Close the dishwasher door firmly to start the selected
wash program, or the countdown to a delayed start.
30, 9
20-21,
26
20-21
30
Changing a
program
Once a program has started, you can only change it at
the beginning before the detergent has been released.
To change a program at this stage, cancel the current
program first, then select the new program and start again.
30
Adding a dish A dish/utensil can only be added before the detergent dis-
penser opens. Open the door a little and when the spray
arms stop working, add the dish. Close the door to restart.
30
After the wash When the buzzer indicates the program has finished,
open the door — take care as hot steam may escape.
Press the ON/OFF button to turn off the dishwasher. Wait
at least 15 minutes to let your dishes cool down before
unloading. Turn off the power, close the tap and leave the
dishwasher door slightly ajar to let moisture evaporate.
31
Quick reference

11
Installation
Positioning the appliance
This dishwasher is designed for fully integrated installation (see page 13). Position
it close to an existing water inlet and drain connection, and make sure there is a power
point nearby, or in an adjoining cabinet. The back of the appliance should face against
the wall behind it and the sides along any adjacent cabinets or walls (Fig. 1).
The dishwasher’s water supply and drain hoses can be positioned either to the right or
left sides to facilitate proper installation.
Make sure the appliance does not stand on any water hoses or the power cable.
Fig. 1
Connectors for
power cord and
inlet/outlet hoses
Install the dishwasher into the cabinet
600mm min.
Unpacking the appliance
• This product has been packaged to protect it against transportation damage.
Unpack the appliance but keep all packaging materials until you have made sure
your new dishwasher is undamaged and in good working order. The carton is
recyclable. Whenever possible, reuse the carton and recycle it when disposing of
the packaging materials.
• Plastic wrapping can be a suffocation hazard for babies and young children, so
ensure all packaging materials are out of their reach, and dispose of them safely.
• Unwind the cord to its full length and inspect it for damage. Do not use if damaged.
In case of damage, contact our after sales support line for advice.
DANGER! Make sure your electrical power is disconnected before installing the
dishwasher. Failure to do so can result in death or electrical shock.
ATTENTION! All relevant pipes and electrical equipment should be installed by
professional plumbers, electricians or dishwasher installers. Make sure
to use new water supply and drain hoses. Do not use old hoses.
ATTENTION! Read this manual to familiarise yourself with all parts and operating
principles. Pay particular attention to the safety instructions.

12 AFTER SALES SUPPORT
1300 886 649
AUS MODEL: W60B2A411B PRODUCT CODE: 48538 08/2015
Installation (Cont.)
Figure 3 shows the dimension of the ornamental front panel.
Space requirements
Figure 2 shows the minimum space requirements for the dishwasher, in the cabinet
and when the door is open.
Fig. 2
Dishwasher
Dishwasher
door
Cabinet
Minimum space for
door opening: 50mm
Fig. 3
<-------- 540 -------->
2-Ø2 Hole with 10mm depth
66
659 min.
15
<-------- 594 -------->
708 max.

13
AFTER SALES SUPPORT
1300 886 649
AUS MODEL: W60B2A411B PRODUCT CODE: 48538 08/2015
Installation (Cont.)
Affixing the ornamental front panel
Figure 4 shows how to fix the ornamental panel to the front of the machine.
Fig. 4
Dishwasher door
Ornamental panel (3~7kg)
2-4x26 Wood screw
T-shaped plug
4-4x44 Wood screws
(1) Remove 2-ST4x10
(2) 4x44 Wood screw
4-4x44 Wood screw
Integrated Design
This dishwasher is designed for fully
integrated installation in your kitchen.
You can either install it with the supplied
ornamental stainless steel front panel or
have your own cabinet front custom made
to match your kitchen design and disguise
the dishwasher. In either case you will need
a skirting board (see page 18).

14
Installation (Cont.)
Connecting the water supply hose
Connect the water supply hose to your cold water supply with a threaded 3/4”
connector (Fig. 6). During use, the dishwasher will heat up the water to the required
temperature. Make sure the hose is not kinked or squashed and is fastened tightly. If
the water pipes are new or have not been used for an extended period of time, let the
water run to make sure it is clear and free of impurities. This step is necessary to avoid
the risk of the water inlet being blocked and damaging the appliance.
Tension adjustment of the door spring
After you have attached the front panel, try to open and close the door to check the
balance and ensure that the door can remain in the same place. If there are balance
problems, adjust the screw in clockwise or counterclockwise direction until the door is
properly balanced (Fig. 5).
Fig. 5
3~7kg
Hexnut tool
CR-V 4mm
30°~90°balance
Fig. 6
Hot water connection
The appliance can also be connected to your
hot water supply as long as it does not exceed a
temperature of 60ºC. Connecting the appliance to
the hot water supply will shorten the wash cycle
time by about 15 minutes.

15
Installation (Cont.)
Electrical connection
Make sure that the electrical voltage and circuit frequency in your home correspond
to those indicated on the appliance rating label and that the electrical system is sized
for the maximum voltage on the rating plate. A time delay fuse or circuit breaker is
recommended, as well as provision of a separate circuit serving only this appliance.
To connect the dishwasher, insert the plug into a properly earthed power outlet that
can hold 250V/10A. Both the cord and the socket should be easily accessible. If the
electrical socket is not appropriate for the plug, replace the socket rather than use an
adaptor or the like as such devices could cause overheating and fire.
WARNING!
• Do not use an extension cord or an adaptor with this appliance.
• Do not bend the power cord. Do not place the appliance on top of the cord.
• Do not modify the plug provided with this appliance. If it does not fit into your
power point, have a suitable outlet installed by a qualified electrician.
Earthing
This appliance must be earthed. In the event of a malfunction or breakdown, earthing
will reduce the risk of an electric shock by providing a path of least resistance for the
electric current.
This appliance is equipped with a cord having an equipment-earthing conductor and
an earthing plug. The plug must be plugged into an appropriate outlet that is installed
and earthed in accordance with all local standards and requirements.
WARNING!
• Ensure the outlet is properly earthed to the ground. If unsure, consult a qualified
electrician or a service representative. Improper connection of the equipment
grounding conductor can result in the risk of an electric shock if the appliance
malfunctions.
• Do not, under any circumstances, cut or remove the third grounding prong from
the power plug.

16
Connecting the drain hose
Connect the water drain hose to the drain pipe connector on the back of the dish-
washer and the other end to a drain pipe (Ø ≥40mm). Do not bend or crimp the hose.
Follow the illustration below (Fig. 7) when installing the waste connection. It must be at
a height between 400mm (minimum) and 1000mm (maximum). The water drain hose
should be fixed tightly. (If you need to drain any excess water from hoses and the sink
is higher than 1m from the floor, you will need to drain the excess water into a bowl or
container held underneath the pipe and lower than the sink.)
Fig. 7
Sink
Outlet hose
Installation (Cont.)

17
Installation (Cont.)
Fig. 8
Adjust the front feet Adjust the back feet
Levelling the appliance
If the floor is uneven, the front or back feet of the appliance may be adjusted, just
screw the feet in or out a little until the dishwasher reaches a horizontal position
(Fig. 8). The angle of inclination must not exceed 2 degrees.
Correctly levelled, the appliance will be more stable and much less likely to move or
cause vibrations and noise during operation.

18
Installation (Cont.)
Installing the skirting board
Figure 9 shows how to install the skirting board. The required height of the skirting
board is a matter of aesthetics. It depends on your benchtop height and should enable
comfortable door opening and closing. Reference dimensions are listed in the table
below. The ornamental front panel for this dishwasher is 668mm.
Fig. 9
Ornamental front panel
Skirting board panel
Reference dimensions
Ornamental
front panel
Appropriate height of
skirting board panel

19
Securing the dishwasher
Following the pictorial instructions in Fig. 10, secure the dishwasher with the cabinet
by tightening the screws (self-tapping timber screws ST4*26), then plug the four hole
plugs into the holes.
Installation (Cont.)
Beforerstuse
After your new dishwasher has been installed, and before using it for the first time,
make sure to check the following points to ensure safe and efficient operation:
• Is the dishwasher level and properly installed?
• Is the inlet valve open?
• Are the hose connections secured tightly and there is no leakage at either end?
• Are all electrical cords tightly connected?
• Is the power switched on at the power point?
• Are the inlet and drain hoses free of knots and kinks?
• Has all packing material been removed from the dishwasher?
• Is all product documentation stored safely for easy access?
Fig. 10
ST4*26
Hole plug

20
Features
Wash programs and cycles
Program Suitability Program Information
Detergent Amount Running Time (min.) Energy (kWh) Water (L)
Intensive
For the most heavily soiled loads, such
as pots, pans, casserole dishes and
dishes that have been sitting with dried
food on them for a while.
Prewash (40ºC)
Main wash (55ºC)
Rinse 1
Rinse 2
Hot rinse (65ºC)
Drying
32.5g 150 1.35 20
Heavy
For heavily soiled loads, such as pots,
plates, cups, bowls and serving dishes.
Main wash (60ºC)
Rinse 1
Rinse 2
Hot rinse (65ºC)
Drying
32.5g 135 1.25 16
Normal * For normally soiled loads, such as
plates, glasses, bowls and lightly soiled
pots and pans: the recommended daily
wash program.
Main wash (45ºC)
Rinse
Hot rinse (50ºC)
Drying
32.5g 113 0.83 13.7
Rinse
For dishes that need to be rinsed and
dried only.
Prewash
Hot rinse (70ºC)
Drying
No detergent required 67 0.85 8
Rapid
A shorter wash and rinse program for
lightly soiled loads that do not need drying.
Main wash (40ºC)
Hot rinse (50ºC)
20g 50 0.60 8
Soak A prewash cycle only for rinsing dishes
that you plan to wash later that day. Prewash
No detergent required 8 0.07 4
60min For lightly and normally soiled plates
and pans, for everyday use.
Rinse 1
Rinse 2
Hot rinse (50ºC)
Drying
25g 60 0.83 12.5
* This program was used for testing the appliance to the Australian Standard
AS/NZS 2007.1 with 14 place settings, rinse aid setting on 5 (or on 4 for four setting
dispenser) and the upper basket in lower position. This is also the program used for
testing the appliance for MEPS and WELS ratings.
Other manuals for W60B2A411B
2
Table of contents
Other Stirling Dishwasher manuals
Stirling
Stirling W60B2A411B User manual
Stirling
Stirling W60A1A401B User manual
Stirling
Stirling STR-DW12-W2 User manual
Stirling
Stirling W60A1A401B-SS User manual
Stirling
Stirling STR-DWSS12 User manual
Stirling
Stirling STR-DW12-W User manual

Stirling
Stirling W60B2A411B User manual
Stirling
Stirling STR-DW14-SS User manual

Stirling
Stirling STR-DWSS12 User manual

Stirling
Stirling STR-DW12-W User manual
