Stirling 2120C-BLK User manual
Model Number 2120C-BLK
MODEL: 2120C-BLK PRODUCT CODE: 63410 12/2018
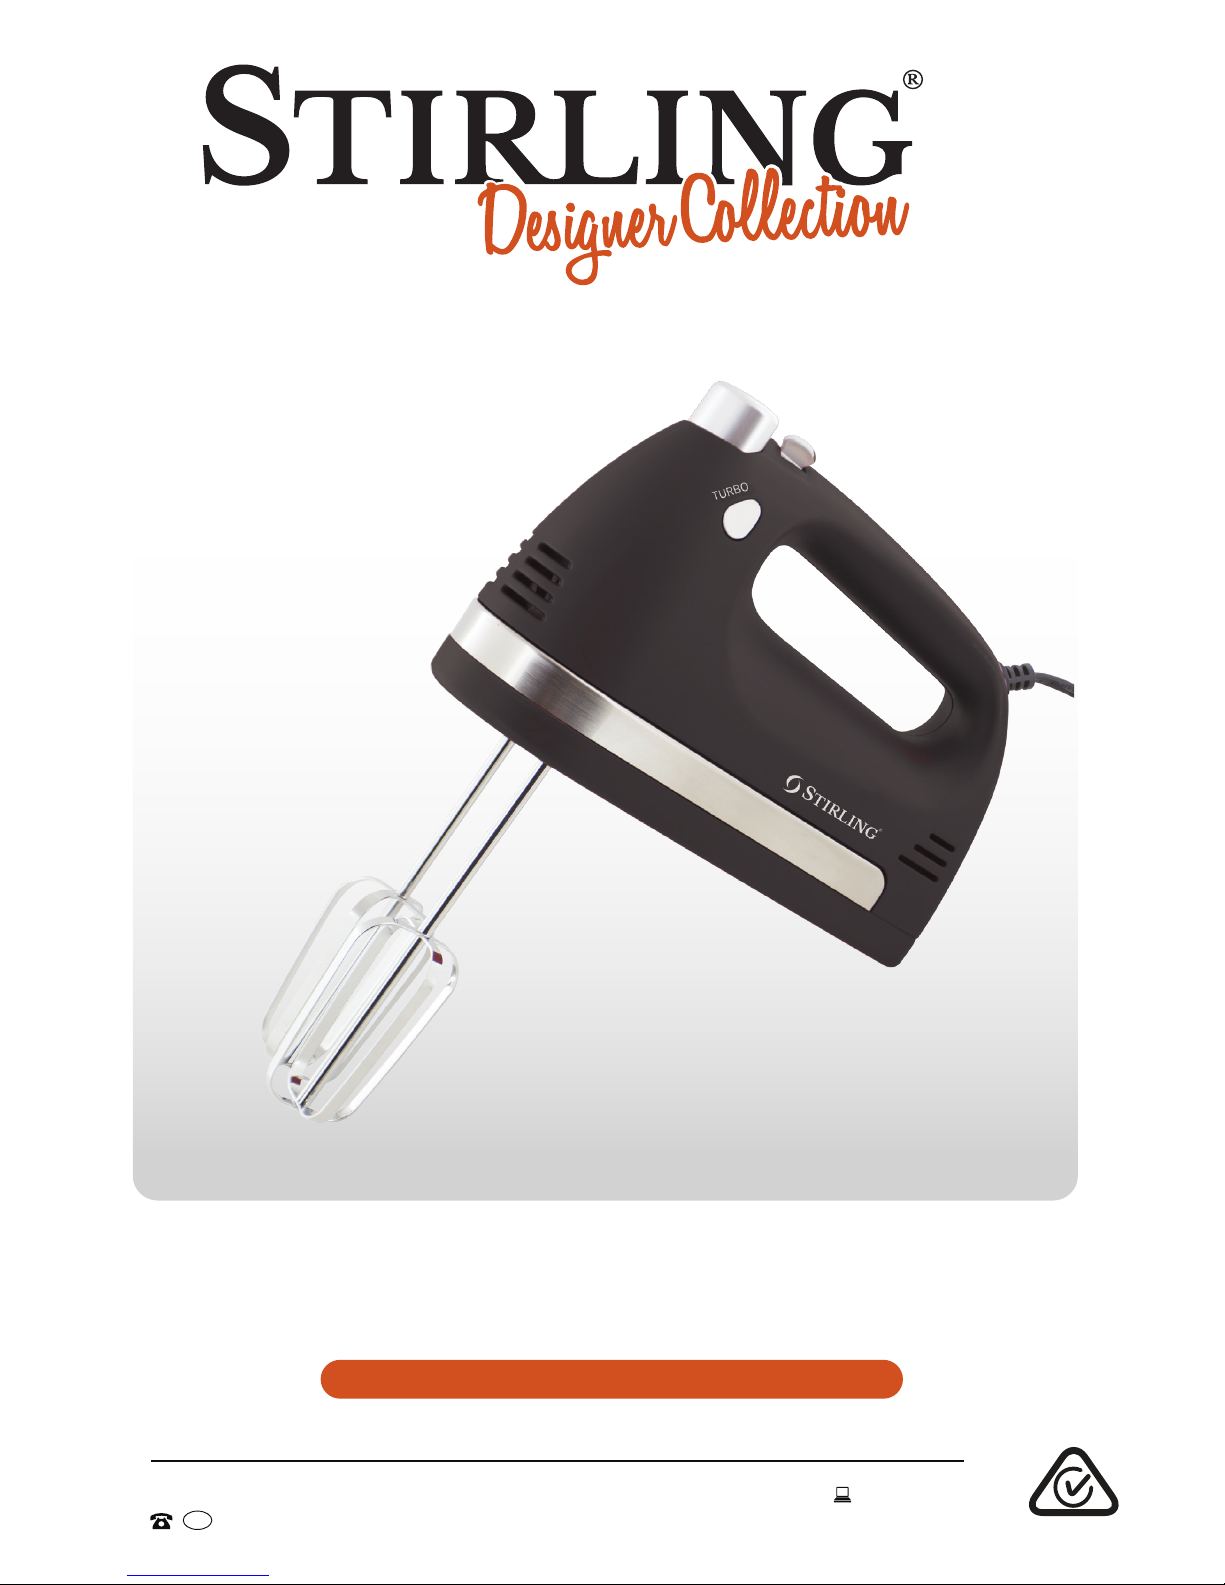
Hand Mixer
AFTER SALES SUPPORT
1300 886 649
AUS
INSTRUCTION MANUAL
E209

AFTER SALES SUPPORT
1300 886 649
AUS MODEL: 2120C-BLK PRODUCT CODE: 63410 12/2018
2
Welcome
Congratulations on choosing to buy a STIRLING®product.
All products brought to you by STIRLING®are manufactured to the highest
standards of performance and safety and, as part of our philosophy of
customer service and satisfaction, are backed by our comprehensive
3Year Warranty.
We hope you will enjoy using your purchase for many years to come.

MODEL: 2120C-BLK PRODUCT CODE: 63410 12/2018 3
02 Welcome
04 Warranty Details
05 General Safety Instructions
07 Product Overview
08 Getting Started
09 Instructions
11 FAQs and Troubleshooting Guide
12 Other Useful Information
14 Recipes
19 Repair and Refurbished Goods or Parts Notice
Contents
AFTER SALES SUPPORT
1300 886 649
AUS MODEL: 2120C-BLK PRODUCT CODE: 63410 12/2018
4
Hand Mixer
YEAR WARRANTY
3
The product is guaranteed to be free from defects in workmanship and parts
for a period of 36 months from the date of purchase. Defects that occur
within this warranty period, under normal use and care, will be repaired,
replaced or refunded at our discretion. The benefits conferred by this
warranty are in addition to all rights and remedies in respect of the product
that the consumer has under the Competition and Consumer Act 2010 and
similar state and territory laws.
Our goods come with guarantees that cannot be excluded under the
Australian Consumer Law. You are entitled to a replacement or refund for a
major failure and to compensation for any other reasonably foreseeable loss
or damage. You are also entitled to have the goods repaired or replaced if the
goods fail to be of acceptable quality and the failure does not amount to a
major failure.
Warranty Details
REGISTER YOUR PURCHASE AT www.aldi.com.au/en/about-aldi/product-registration/ TO KEEP UP-TO-DATE WITH IMPORTANT PRODUCT INFORMATION

MODEL: 2120C-BLK PRODUCT CODE: 63410 12/2018 5
General Safety Instructions
IMPORTANT SAFETY INSTRUCTIONS
READ CAREFULLY AND KEEP FOR FUTURE REFERENCE
Read this manual thoroughly before rst use, even if you are familiar with this type
of product. The safety precautions enclosed herein reduce the risk of fire, electric
shock and injury when correctly adhered to. Keep the manual in a safe place for future
reference, along with the completed warranty card, purchase receipt and carton. If
applicable, pass these instructions on to the next owner of the appliance.
Always follow basic safety precautions and accident prevention measures when
using an electrical appliance, including the following:
Electrical safety and cord handling
• Connection: Only connect the fully assembled appliance to a readily accessible
electrical wall outlet, and make sure that your outlet voltage and frequency
correspond to the voltage stated on the appliance rating label.
• Protect from moisture: Do not place the appliance near a sink or basin so that
the appliance, the mains plug and the power cord cannot accidentally come into
contact with water. If the appliance, mains plug or cord falls into water, turn off the
power immediately. Do not reach into the water!
• WARNING: Do not immerse! To reduce the risk of electrocution, never operate
this product with wet hands. Never immerse the product, the mains plug and/or
the power cord in water or other liquid.
• Power cord: Do not kink, squash or damage the power cord and protect it
from sharp edges and heat. Do not let the cord hang over the edge of a table or
benchtop; do not let it touch hot surfaces. Keep it out of children's reach.
• Extension cord: We recommend you do not use the appliance with an extension
cord. But if you must use one, make sure it has the same technical specifications
as the one of the appliance.
• Cord handling: Unwind the power cord completely for use. Run the cord in such a
way that there will be no risk of anyone pulling it inadvertently or tripping over it.
• Damage: Do not pick up or operate the appliance if the power supply cord, plug
or housing is damaged, or after it malfunctions or has been damaged in any
manner. If the power cord is damaged, it must be replaced by the manufacturer or
a qualified person in order to avoid a hazard.
• Switch o and unplug the mixer from the outlet when it is not in use and before
changing accessories. Grip the plug when disconnecting, do not pull the cord.
• RCD: Unless your home is already fitted with a residual current device (safety
switch), we recommend installing an RCD with a rated residual operating current
not exceeding 30mA to provide additional safety protection when using electrical
appliances. See your electrician for professional advice.

AFTER SALES SUPPORT
1300 886 649
AUS MODEL: 2120C-BLK PRODUCT CODE: 63410 12/2018
6
General Safety Instructions (Cont.)
Usage conditions and restrictions
• Domestic use only: This appliance is intended for private domestic use only. It is
not suitable for commercial, industrial or trade use. Do not use it outdoors.
• Intended purpose: This appliance is intended for mixing, kneading and beating foods
in a domestic environment. Only use it for its intended purpose and as described in
this manual. Any other use may expose you to danger and void the warranty.
• Usage restriction: The appliance is not intended for use by persons (including chil-
dren) with reduced physical, sensory or mental capabilities, or lack of experience and
knowledge, unless they have been given supervision or instruction concerning use of
the appliance by a person responsible for their safety.
• Children: Supervise children to ensure they do not play with the appliance. Close
supervision is necessary when any appliance is used near children.
• CAUTION: Do not leave unattended! Never leave the appliance unattended during
use. Unplug it when you leave the room, even if it is just for a moment.
• Accessories: Do not use any accessory attachments that are not sold with the
appliance. Only use one set of mixing tools at a time. Never fit tools with different
functions at the same time (one dough hook and one beater).
• Work environment: Do not use the appliance where highly flammable gases are
present, or where it is exposed to extreme temperatures, water or high humidity.
Use the appliance on a stable, level, dry surface. Do not use it on a surface that can
become hot, such as on a cooktop or near a gas stove.
• Before use: Before connecting the appliance to power, ensure the speed control is
in the OFF position [ 0 ] and the appliance is correctly assembled. Failing to do so
may expose you to danger and cause damage to the appliance.
• Operating speeds and times: The supplied beaters and dough hooks can be used
on all speed settings. With either tool, do not allow the mixer to operate for more
than 3 minutes continuously, otherwise the motor may overheat. After 3 minutes'
continuous operation, allow the motor to cool for 5 minutes before reuse.
• CAUTION: Switch off and disconnect the appliance before approaching parts
that move in use! Keep hands, hair, clothing as well as spatulas and other utensils
away from the mixing tools during operation to reduce the risk of injury or damage.
• Cleaning: Remove the mixing tools from the appliance before washing them in warm,
soapy water, or in a dishwasher. Allow the parts to dry thoroughly before reassembly.
• Disconnect: When you have finished, and before attaching or removing a tool, switch
off and unplug the mixer. Grip the plug when disconnecting, do not pull the cord.
• Misuse of the product may result in potential injury and/or the risk of fire or electric
shock. We accept no liability for any eventual damages or injury due to improper
use, incorrect handling, or noncompliance with the instructions.

MODEL: 2120C-BLK PRODUCT CODE: 63410 12/2018 7
Product Overview
Scope of delivery
A Hand mixer
1 TURBO button
2 EJECT button
3 ON/OFF and SPEED control
4 Handle
5 Motor housing
6 Attachment sockets
B Attachments
7 Beaters
8 Dough hooks
9 Washers
C Documentation (not shown)
Instruction manual
Quick start guide
Warranty certicate
6
Top view Bottom view
Attachments
78
99
1
2
3
4
5

AFTER SALES SUPPORT
1300 886 649
AUS MODEL: 2120C-BLK PRODUCT CODE: 63410 12/2018
8
Getting Started
Before first use
• This product has been packaged to protect it against transportation damage.
Unpack the appliance and keep the original packaging carton and materials
in a safe place. It will help prevent any damage if the product needs to be
transported in the future, and you can use it to store the appliance when it is
not in use. In the event that the packaging is to be disposed of, please recycle it
where possible.
• Plastic wrapping can be a suffocation hazard for babies and young children, so
ensure all packaging materials are out of their reach and disposed of safely.
• Inspect all parts of the appliance for visual damage. Unwind the power cord
to its full length and inspect the cord and plug for damage. Do not use the
appliance if the appliance or its cord have been damaged or are not working
properly. In case of damage, contact our after sales support line for advice.
• Make sure you have read and understood all instructions and warnings in this
manual. Refer to the Product Overview, page 7, to familiarise yourself with the
product and identify all parts. Pay particular attention to the safety instructions
on the previous pages.
• Wash the beaters and dough hooks with a soft cloth or sponge in warm water
and a little dish detergent to remove any dust from transport. Rinse with clean
water and dry thoroughly.
CAUTION: Never wash the hand mixer under water or immerse it in water or
other liquid.
Assembling the mixing tools
• Before assembling the mixing tools, ensure that the power cord is unplugged
from the power outlet and the SPEED control is on the OFF [ 0 ] position.
• Choose the attachments appropriate for the task to be performed.
• Beaters are for whipping eggwhites or cream and for mixing liquids,
batters or lighter cake and biscuit doughs.
• Dough hooks are for kneading heavier doughs.
• Insert the tool with the washer into the slightly larger attachment socket and
the tool without washer into the smaller socket. Push the tools firmly into the
sockets, one at a time, making sure they click securely into place.

MODEL: 2120C-BLK PRODUCT CODE: 63410 12/2018 9
Instructions
Using the hand mixer
• Insert the appropriate mixing tools as described on the opposite page.
• Make sure the SPEED control is in the OFF [ 0 ] position, then plug the cord
into an appropriate power outlet and switch on power to the outlet.
• Place the ingredients into a bowl suitable for mixing purposes. Grip the
mixer firmly by the handle and position the tools in the centre of the food to
be mixed.
• To start mixing, slide the SPEED control to a low setting.
• Once the ingredients are roughly mixed together, increase the speed as
appropriate for the task. There are five speed settings plus a turbo button
which, when pressed, increases the speed. See page 10 for recommended
speed settings.
CAUTION: Do not stick spatulas, knives, metal spoons, forks or any other
utensils into the bowl when the mixer is operating.
• If more ingredients need to be added during mixing, return the SPEED control
to the OFF [ 0 ] setting and rest the appliance on its heel. Add the ingredients
and then resume mixing, again starting with a slow speed.
• When mixing heavier dough it may be necessary to switch off the appliance
occasionally, rest it on its heel and scrape the mixture with a plastic scraper
from the walls back into the centre of the bowl.
• When mixing is completed, turn the SPEED control to the OFF [ 0 ] position
and unplug the cord from the power outlet.
• If necessary, scrape any excess food particles from the beaters or dough
hooks with a rubber or wooden spatula.
• While firmly pressing down the EJECT button to release the beaters/dough
hooks, pull the tools out gently for cleaning.
CAUTION: Remove the tools only when the mixer is turned off and unplugged
from the power outlet.
SHORT OPERATION TIME
Do not allow the mixer to operate for more than 3 minutes continuously,
otherwise the motor may overheat. After 3 minutes' continuous operation, allow
the motor to cool for 5 minutes before reuse.
AFTER SALES SUPPORT
1300 886 649
AUS MODEL: 2120C-BLK PRODUCT CODE: 63410 12/2018
10
Instructions (Cont.)
Recommended speed levels and mixing tools
Speed level Tool Mixing task
1Beaters or
dough hooks
Stir/blend
Use a low speed to fold ingredients into the
mixture, for example, coconut, chocolate
chips, nuts, cheese, etc., or to combine dry
ingredients (such as flour and cocoa).
2Beaters or
dough hooks
Combine
Use a medium low speed to incorporate dry
ingredients into wet ingredients, for example,
flour into liquids.
3 Dough hooks
Blend heavier mixtures
Use a medium speed to blend heavy mixtures,
for example, short pastry, pasta dough,
mashed potatoes, bread or pizza dough.
4 Beaters
Blend lighter mixtures
Use a medium high speed to cream butter and
sugar, prepare icings, fluffy frostings and mix
lighter cake dough.
5 Beaters
Whip
Use a high speed to whip cream, beat egg-
whites, whisk eggs and create batters with a
light, fluffy texture, such as for sponge cakes.
TURBO Beaters or
dough hooks
Extra Power
Press the TURBO button from any speed
setting for a short boost of extra power.

MODEL: 2120C-BLK PRODUCT CODE: 63410 12/2018 11
FAQs and Troubleshooting Guide
If you encounter problems with your hand mixer, check in the table below for
solutions to common problems. If none of the suggested solutions help you solve
the problem, or if you experience any other problems with your hand mixer, do not
try and manage them by yourself. Contact our after sales support centre for advice
on repair or replacement.
Problem / Question Solution / Answer
The mixer does not work. Check and ensure that the appliance is properly
connected to the wall outlet and that power is
switched on at the outlet.
Make sure that the power outlet is not defective,
check it with another appliance, or use a different
outlet.
Check and ensure that the speed control is set to
the appropriate mixing speed (between 1 and 5).
The mixer stops during
operation.
Make sure your mixing bowl is not overfilled,
especially when preparing heavier mixtures. If the
bowl is too full, the motor may overheat and stop
working. In such a case, switch off and unplug the
appliance and remove some dough from the bowl.
Wait for at least 30 minutes and then continue
processing half of the dough until ready, then
process the remainder separately.
Can I process hard
ingredients with the
hand mixer?
This appliance has no cutting blades and is not
suitable for cutting or grinding ingredients. However,
you should be able to mix small quantities of hard
ingredients (such as chocolate chips or nuts) into a
dough, if your recipe includes them.
Can I mix hot ingredients? While the appliance is able to mix cold or hot
ingredients, you must take special care when
mixing hot ingredients to avoid getting burnt from
hot food splashing out of the bowl. Make sure you
do not fill the container very high.
Are the tools dishwasher
safe?
Yes, the dough hooks and beaters may be washed
in a dishwasher.

AFTER SALES SUPPORT
1300 886 649
AUS MODEL: 2120C-BLK PRODUCT CODE: 63410 12/2018
12
Other Useful Information
Cleaning and maintenance
CAUTION!
• Unplug: Before cleaning (and before attaching or removing tools), make sure
the appliance is switched off and disconnected from the power supply.
• Do not immerse: Ensure that no liquid enters the housing. Never immerse the
appliance in water or other liquid, or hold it under running water.
• No harsh cleaners: Do not use any sharp, abrasive, alkaline or any other
harsh cleaning agents on any part of the appliance.
Cleaning the motor unit
• Clean the housing with a dry or slightly damp cloth only. If necessary, add a little
mild detergent on the cloth. Wipe the appliance dry with a clean cloth.
• If necessary, wipe any food particles from the power cord.
Cleaning the mixing tools
• Wash the mixing tools in warm, soapy water. For ease of cleaning, rinse the
accessories immediately after use.
• If necessary, soak the mixing tools in warm, soapy water to soften stubborn
food remnants for easy removal during the wash.
• Allow the parts to dry thoroughly before reassembly.
• The dough hooks and beaters may also be washed in a dishwasher.
Storage
Store the clean and dry appliance in a dry, clean place that is not accessible to
children. Storing it in the original packaging will keep it protected from dust.
Service, repair and spare parts
• The unit has no user-serviceable parts contained within. Do not attempt to
repair, disassemble or modify the appliance. Trying to repair the appliance
yourself, undertaking incorrect repairs or making any modifications to the
appliance or the power cord will expose you to considerable danger and will
void your warranty. If your hand mixer requires repair or service, contact our
after sales support centre for advice.
• Our after sales support centre stocks spare beaters and dough hooks for the
hand mixer. To purchase a part, call the centre on 1300 886 649 or email us at
MODEL: 2120C-BLK PRODUCT CODE: 63410 12/2018 13
Technical specifications
Other Useful Information (Cont.)
Responsible disposal
At the end of its working life, do not throw this appliance out with your household
rubbish. Electrical and electronic products contain substances that can have
a detrimental effect on the environment and human health if disposed of
inappropriately. Observe any local regulations regarding the disposal of electrical
consumer goods and dispose of it appropriately for recycling. Contact your local
authorities for advice on recycling facilities in your area.
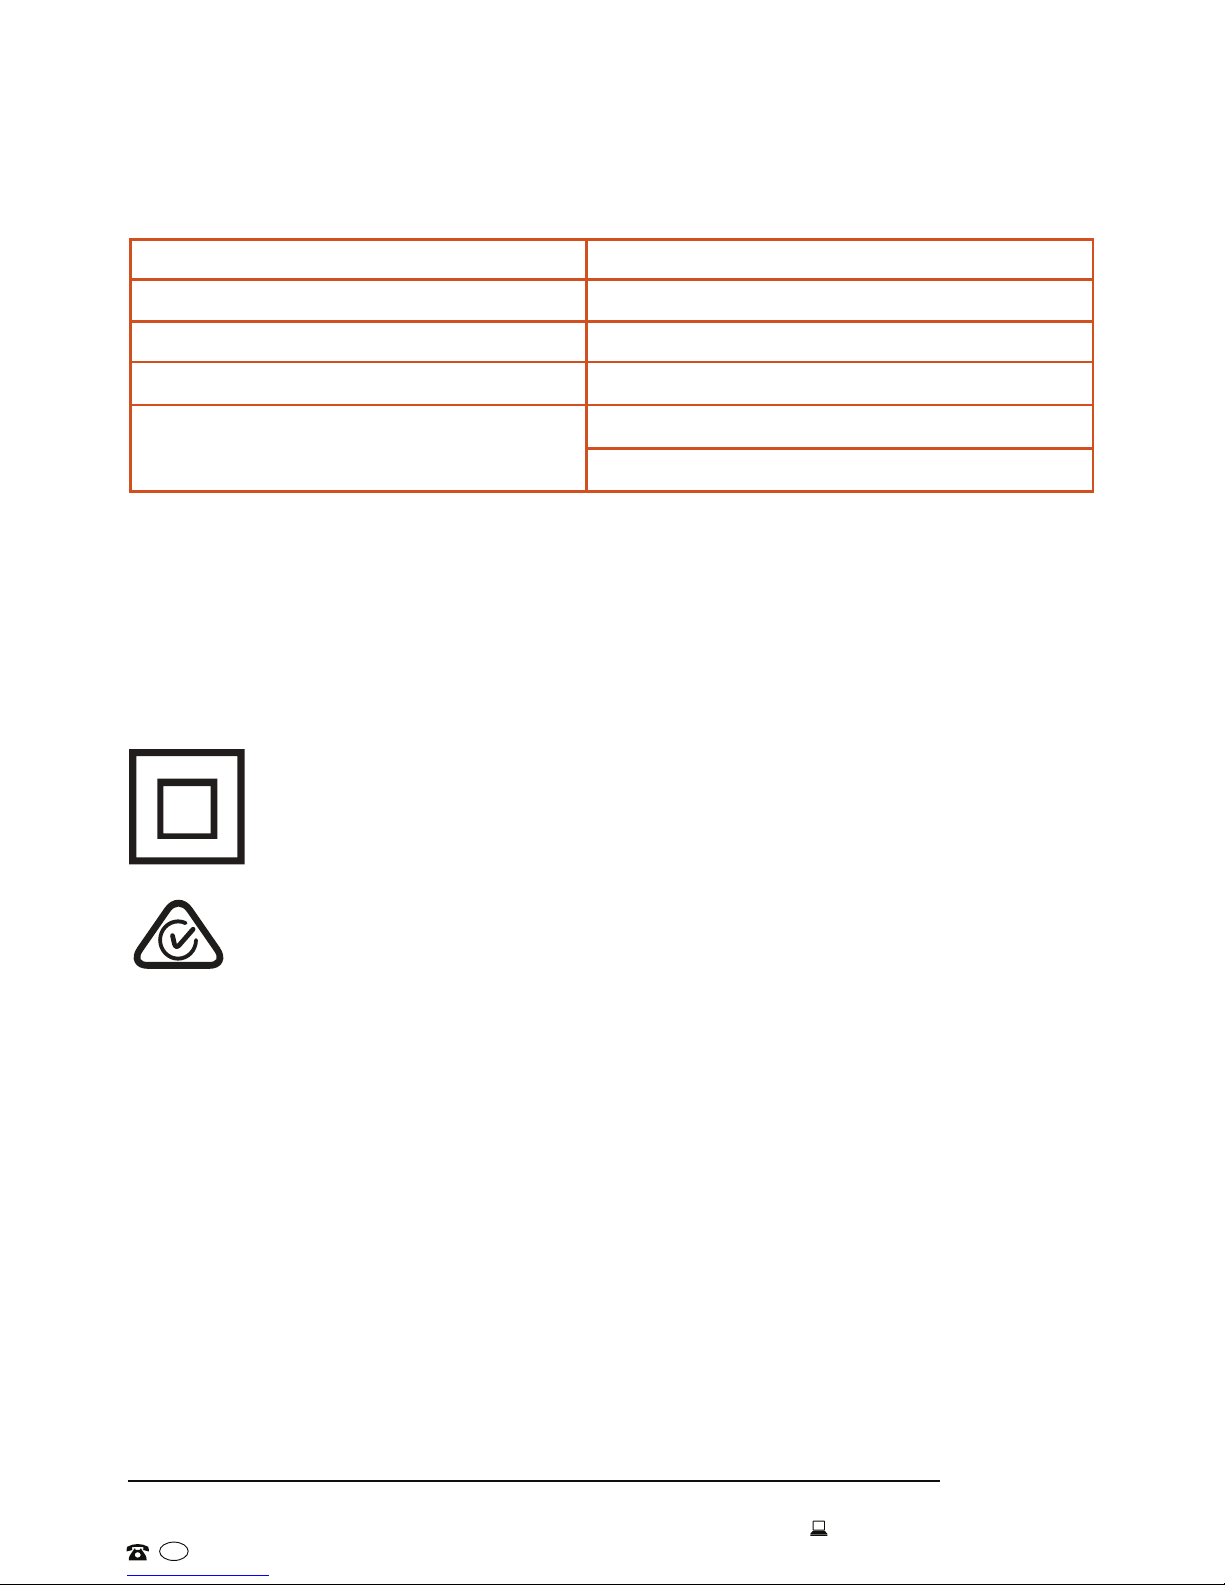
DOUBLE INSULATION
This symbol indicates that the appliance has been designed in such a way
that it does not require a safety connection to electrical earth (ground).
* Power achieved with a load of 2000g flour and 1300mL water, mixed on speed
setting 5 for a maximum time of 3 minutes.
NOTE:
Due to continued product improvement, images and illustrations in this manual may vary
slightly from the product purchased. All images in this manual are for reference purposes
only. Parts are not necessarily pictured to scale.
Power 350W*, 220–240V~, 50-60Hz
Speed control 5 speeds plus Turbo button
Dimensions (assembled) approx. 21cm (L) x 29cm (H) x 9cm (D)
Weight (excluding / including tools) approx. 1.1kg / 1.2kg
Accessories 1 set of beaters
1 set of dough hooks
Compliance
This appliance has been fully tested and meets all requirements as set out by
standards AS/NZS 60335.1 and AS/NZS 60335.2.14.
The RCM Mark (Regulatory Compliance Mark) indicates that the product
complies with the relevant guidelines of the ACMA as well as corresponding
government requirements for the safety of electrical devices.
E209

AFTER SALES SUPPORT
1300 886 649
AUS MODEL: 2120C-BLK PRODUCT CODE: 63410 12/2018
14
Recipes
Carrot Cake
Ingredients
2 cups Self-raising flour, sifted
1 tsp Allspice
1 tsp Ground cinnamon
1 cup Brown sugar
2 cups Grated carrot
1 cup Chopped walnuts (or pecan nuts)
1 cup Vegetable oil
3 Eggs
Method
• Preheat a conventional oven to 180°C (fan-forced 160°C). Grease a loaf pan
and line the base and sides with baking paper.
• In a large mixing bowl, combine the sifted flour and spices, sugar, carrot, nuts,
oil and egg.
• Using the beaters, start mixing the ingredients on a medium speed setting,
then increase the speed until thoroughly combined.
• If the mixture sticks to the sides of the bowl, stop the mixer and scrape the
mixture off the sides back into the centre, then resume mixing.
• When the dough is properly mixed, stop the mixer and unplug it. Spread the
dough into the prepared pan.
• Place the cake into the oven and bake for about 75 minutes, keeping an eye
on it while it is baking. If it browns too quickly, cover the pan loosely with
aluminium foil. The cake is baked when a skewer inserted into the centre
comes out clean.
• Let the cake cool in the pan for 10 minutes before turning it out onto a wire
rack. When cool, spread frosting on top, if desired, and add a few walnuts.
Cream cheese frosting
125g Cream cheese
2 tsp Lemon rind, grated
1½ cups Icing sugar mixture
Walnuts, to decorate
• Add the cream cheese and lemon rind into a mixing bowl and beat until
combined using the beaters.
• Gradually add the icing sugar and beat until smooth.

MODEL: 2120C-BLK PRODUCT CODE: 63410 12/2018 15
Recipes (Cont.)
Basic Butter Cake
Ingredients
185g Unsalted butter or margarine, softened
1 cup Caster sugar
1 tsp Vanilla essence
1 pinch Salt
3 Eggs
2 cups Self-raising flour
¼ cup Milk
Method
• Preheat a conventional oven to 200°C (180°C fan-forced) and grease a 20cm
cake tin.
• Place the butter, sugar, vanilla and salt in a large mixing bowl.
• Using the beaters, start mixing the ingredients on a medium speed setting,
then increase the speed until the mixture is smooth and creamy.
• If the mixture sticks to the sides of the bowl, stop the mixer and scrape the
mixture off the sides back into the centre, then resume mixing.
• Add the eggs, one at a time, and beat well after each addition.
• Sift the flour over the mixture and mix, on low speed, while gradually adding the
milk.
• When the dough is properly mixed, stop the mixer and unplug it. Spread
the dough into the prepared cake tin and bake in a moderate oven for
approximately 50-60 minutes, or until it is cooked through and skewer inserted
into the centre comes out clean.
• Cool the cake in the tin for a few minutes before turning it out onto a wire rack
to cool completely.
You can modify the basic butter cake mix by adding different extras or
flavourings (cocoa, choc chips, sultanas, nuts) at the end.

AFTER SALES SUPPORT
1300 886 649
AUS MODEL: 2120C-BLK PRODUCT CODE: 63410 12/2018
16
Chocolate Orange Cake
Ingredients
150g Self-raising flour
1 pinch Salt
1 tsp Baking powder
50g Cocoa powder
Juice and grated rind of 1 large orange
175g Unsalted butter or margarine
175g Caster sugar
3 Eggs
Method
• Preheat a conventional oven to 180°C (160°C fan-forced). Grease two round
cake tins (20cm Ø) and line the base and sides with baking paper.
• Sift the flour, salt, baking powder and cocoa into a large mixing bowl.
Add 1 tablespoonful of the orange juice, orange rind, butter, sugar and eggs.
• Using the beaters, start mixing on a medium speed setting, then increase the
speed until the mixture is pale and fluffy.
• Divide the mixture between the cake tins, making a well in the centre of each
cake.
• Bake the cakes in a preheated oven for 20-25 minutes until springy to the
touch.
• Remove cakes from the oven, allow to cool in the tins, then turn onto a wire
rack. When the cakes are completely cool, pierce them with a skewer and
spoon the remaining orange juice over the cakes and let it soak in.
Chocolate-orange ganache
350g orange-flavoured chocolate
300ml cream
• Chop the chocolate and place it in a saucepan with the cream. Bring to the
boil without stirring, then remove from heat. Allow to stand for 10 minutes until
the chocolate has melted, then stir until smooth. Leave to cool until it is stiff
enough to spread onto the cake.
• Sandwich the two cakes together with a third of the ganache, then spread the
rest over the top and sides of the cake.
Recipes (Cont.)

MODEL: 2120C-BLK PRODUCT CODE: 63410 12/2018 17
Recipes (Cont.)
Creamy Chocolate Dessert
Ingredients
200mL Fresh pure cream
150g Dark cooking chocolate
3 Eggs
50–60g Sugar
1 pinch Salt
1 packet Vanilla sugar
1 tbsp Cognac, brandy or rum (optional)
Chocolate flakes for decoration
Method
• Add the cream to a large mixing bowl.
• Using the beaters, start whipping the cream on a medium speed setting, then
increase to high speed and whip until stiff.
• Place the whipped cream in a separate bowl and refrigerate.
• Melt the cooking chocolate in accordance with the instructions on the packet,
either over simmering water or in the microwave.
• While the melted chocolate is cooling, add the eggs, sugar, vanilla sugar,
alcohol (optional) and salt to a clean mixing bowl and start mixing, using the
beaters, on a low speed until light and fluffy.
• Add the melted chocolate and stir in evenly on a medium speed.
• Leaving a little of the whipped cream for decoration, add the remaining cream
to the chocolate mixture and stir in briefly.
• Cover the bowl with cling wrap and chill in the refrigerator.
• Serve decorated with cream and chocolate flakes.

AFTER SALES SUPPORT
1300 886 649
AUS MODEL: 2120C-BLK PRODUCT CODE: 63410 12/2018
18
Recipes (Cont.)
Basic Pizza Dough
Ingredients
200mL Lukewarm water
25g Yeast
1 tsp Salt
Optional: ½ tsp dried onion or garlic powder, or dried herbs to taste
Splash of extra virgin olive oil
300g Flour
Method
• Combine the water, yeast, salt (and any optional flavouring ingredients) in a
large mixing bowl.
• Using the dough hooks, start mixing the ingredients gently on a low speed
setting until the yeast dissolves.
• Add the oil and the flour and continue mixing until the dough becomes elastic
and starts to pull away from the bowl. Then increase the mixing speed and mix
until the dough is sticky and smooth.
NOTE: Do not mix continuously for more than 3 minutes at any one time.
Should a longer mixing time be required, let the machine rest for
at least 5 minutes before using it again.
• Grease a large metal bowl with olive oil. Form the dough into a ball, transfer
it to the bowl and cover it with plastic wrap and a towel. Let the dough rise
in a warm place for about 2 hours, or until it doubles in size (in hot, humid
conditions this may take less time).
• After rising, briefly knead the dough for a few minutes with a little olive oil. For
a thin crust, divide the dough in half and roll out the pizza crust on a lightly
floured surface to fit your pizza stone, tray or pizza maker. For a thicker crust,
stretch out all the dough with your hands and roll until it is the size of a large
pizza pan.
• Preheat your oven to its maximum temperature, or preheat your pizza maker
according to the instructions. Spread a sauce and/or cheese over the base,
add your toppings and finish with a sprinkling of grated mozzarella cheese.
Do not use too much filling on the pizza.
• Bake the pizza until the base is crisp and the topping hot and melted.

MODEL: 2120C-BLK PRODUCT CODE: 63410 12/2018 19
Unfortunately, from time to time, faulty products are manufactured which need to
be returned to the supplier for repair.
Please be aware that if your product is capable of retaining user-generated data
(such as files stored on a computer hard drive, telephone numbers stored on
a mobile telephone, songs stored on a portable media player, games saved on
a games console or files stored on a USB memory stick) during the process of
repair, some or all of your stored data may be lost. We recommend you save this
data elsewhere prior to sending the product for repair.
You should also be aware that rather than repairing goods, we may replace them with
refurbished goods of the same type or use refurbished parts in the repair process.
Please be assured though, refurbished parts or replacements are only used
where they meet ALDI’s stringent quality specifications.
If at any time you feel your repair is being handled unsatisfactorily, you may
escalate your complaint. Please telephone us on 1300 886 649 or write to us at:
Tempo (Aust) Pty Ltd ABN 70 106 100 252
PO BOX 6056 Frenchs Forest, Sydney, Australia NSW 2086
Tempo Help Desk: 1300 886 649 (Aust)
(Operating Hours: Mon-Sat 09:00am to 06:00pm AEST)
Email: [email protected]g
YEAR WARRANTY
3
Hand Mixer
Repair and Refurbished
Goods or Parts Notice

AFTER SALES SUPPORT
1300 886 649
AUS MODEL: 2120C-BLK PRODUCT CODE: 63410 12/2018
Instruction Manual Revision Index
Version No Issue Date Description
V1.0 18 July 2016 Original release (Ambiano)
V2.0 11 August 2017 Second release (Stirling)
V3.0 10 August 2018 Third release
Warranty returns
Should you for any reason need to return this product for
a warranty claim, make sure to include all accessories with
the product.
Product does not work?
If you encounter problems with this product, or if it fails to
perform to your expectations, make sure to contact our
After Sales Support Centre on 1300 886 649 for advice.
For an electronic copy of this manual, go to www.stirlingappliances.com.au and download a copy.
Other manuals for 2120C-BLK
1
Table of contents
Other Stirling Hand Mixer manuals


