Stirling IA4259 User manual

Model Number IA4259
INSTRUCTION MANUAL
AFTER SALES SUPPORT
1300 777 137
MODEL: IA4259 PRODUCT CODE: 707211 01/2022
ICE CREAM MAKER
WITH COMPRESSOR

02
AFTER SALES SUPPORT
1300 777 137
MODEL: IA4259 PRODUCT CODE: 707211 01/2022
Welcome
Congratulations on choosing to buy a Stirling®appliance.
All appliances brought to you by Stirling®are manufactured to the highest
standards of performance and safety and as part of our philosophy of customer
service and satisfaction are backed by our comprehensive 12 month warranty.
We hope you will enjoy using your purchase for many years to come.

03
AFTER SALES SUPPORT
1300 777 137
MODEL: IA4259 PRODUCT CODE: 707211 01/2022
Contents
02 Welcome
04 Warranty Details
05 General Information & Safety Instructions
09 Product Overview
11 Getting Started
12 Frozen Dessert Guide
13 Instructions
18 Recipe Guide
22 Cleaning and Maintenance
23 Storage
24 Frequently Asked Questions
25 Repair and Refurbished Goods or Parts Notice
26 Other Useful Information

YEAR WARRANTY
1
04
AFTER SALES SUPPORT
1300 777 137
MODEL: IA4259 PRODUCT CODE: 707211 01/2022
Ice Cream Maker
Warranty Details
REGISTER YOUR PURCHASE AT www.aldi.com.au/en/about-aldi/product-registration TO KEEP UP-TO-DATE WITH IMPORTANT PRODUCT INFORMATION
The appliance is guaranteed to be free from defects in workmanship and parts for a period of 12
months from the date of purchase. Defects that occur within this warranty period, under normal
use and care, will be repaired, replaced or refunded at our discretion. The benefits conferred by this
warranty is in addition to all rights and remedies in respect of the appliance that the consumer has
under the Competition and Consumer Act 2010 and similar state and territory laws.
Our goods come with guarantees that cannot be excluded under the Australian Consumer Law.
You are entitled to a replacement or refund for a major failure and for compensation for any other
reasonably foreseeable loss or damage. You are also entitled to have the goods repaired or replaced
if the goods fail to be of acceptable quality and the failure does not amount to a major failure.

05
AFTER SALES SUPPORT
1300 777 137
MODEL: IA4259 PRODUCT CODE: 707211 01/2022
General Information & Safety Instructions
Read this manual thoroughly before first use, even if you are familiar with this type of product. The
safety precautions enclosed herein reduce the risk of fire, electric shock and injury when correctly
adhered to. Please keep this instruction manual in a safe place along with your purchase receipt and
carton for future reference. If applicable, pass these instructions and packaging on to the next owner
of the appliance. Always follow basic safety precautions and accident prevention measures when
using an electrical product.
Pay particular attention to messages that follow this safety alert symbol or the words
DANGER, WARNING or CAUTION. These words are used to alert you to a potential
hazard that can seriously injure you and others. The instructions will tell you how to reduce
the chance of injury and let you know what can happen if the instructions are not followed.
This symbol alerts you to take care as the appliance contains flammable materials:
isobutane as refrigerant and cyclopentane as insulation blowing gas. While isobutane
(R600a) is a gas with a high level of environmental compatibility, it is nevertheless
flammable. Do not expose the appliance to high heat, sparks and open flames.
Refrigerant Matters
WARNING: Do not damage the refrigerant circuit! Never use an appliance with a damaged
refrigerant circuit! If the refrigerant circuit becomes damaged during transport or installation, avoid
proximity to open fires and all types of heat and ignition sources. Thoroughly ventilate the room in
which the appliance is located. The amount and type of refrigerant in the appliance can be found in
the technical specifications on page 26 and on the appliance rating plate. It is hazardous for anyone
other than an authorised service person to service this appliance.
Electrical Safety and Cord Handling
1. Read all instructions before using the Stirling® Ice Cream Maker.
2. Before turning on the Ice Cream Maker, ensure the electrical voltage and frequency of the
circuit corresponds to those indicated on the rating label of the product.
3. Do not use an extension cord unless completely necessary with the Ice Cream Maker. If an
extension cord is used, please ensure that it has a rating equal or exceeding the rating of this
product.
4. Do not pull or carry by the cord, use the cord as a handle, close a door on the cord, or pull the
cord around sharp edges or corners. Keep the cord away from heated surfaces.
5. Do not bend or damage the power cord and never force the plug into an outlet.
6. Always unplug the Ice Cream Maker when not in use. To disconnect from the power supply,
grip the plug and pull from the power outlet. Never pull by the cord. The plug must be
removed from the power outlet before cleaning, servicing, maintenance or moving the Ice
Cream Maker.

06
AFTER SALES SUPPORT
1300 777 137
MODEL: IA4259 PRODUCT CODE: 707211 01/2022
General Information & Safety Instructions (cont.)
7. Do not move or lift the Ice Cream Maker while the power cord is still connected to the power
outlet or still on. Always ensure it is switched o and has cooled down before moving.
8. Do not use the Ice Cream Maker if the plug, cord or the Ice Cream Maker itself is damaged.
Please contact our After Sales Support line on 1300 777 137 for further advice.
9. Unless your home is already fitted with a residual current device (safety switch), we
recommend installing an RCD with a rated residual operating current not exceeding 30mA to
provide additional safety protection when using electrical appliances. See your electrician for
professional advice.
Usage Conditions and Restrictions
1. The Ice Cream Maker is not to be used for commercial purposes and is intended for indoor
household use only.
2. Do not use the Ice Cream Maker outdoors.
3. Do not use the Ice Cream Maker for reasons other than its intended purpose, and only use it as
described in this manual. Do not attempt to alter or modify this appliance in any way.
4. The Ice Cream Maker is not a toy. Supervise children to ensure they do not play with this product.
5. The Ice Cream Maker is not intended for use by persons (including children) with reduced
physical, sensory or mental capabilities or lack of experience or knowledge unless they have
been given supervision or instruction concerning use of the product by a person responsible
for their safety.
6. Do not position the Ice Cream Maker in a tight space. Ensure there is at least 15cm clearance
on all sides of the Ice Cream Maker. Do not position near heat sources such as radiators,
heaters, ovens, air ducts or direct sunlight.
7. Make sure you position the Ice Cream Maker in a well ventilated area. To ensure sucient
ventilation, the rear, sides and top of the unit must be completely unobstructed. Keep any
ventilation openings clear of obstructions. Choose a well ventilated area with temperatures
below 30˚C.
8. Do not cover the Ice Cream Maker whilst in use. Do not block any ventilation openings. Ensure
that vents are not covered by newspapers, tablecloths, curtains, etc.
9. Do not attempt to repair, disassemble or modify any part of the Ice Cream Maker. Refer all servicing
to a qualified technician or contact the After Sales Support line on 1300 777 137 for advice.
10. Improper installation may result in the risk of fire, electric shock or injury to person.
11. The manufacturer is not responsible for any eventual damage caused by improper or faulty use.
12. The use of attachments not sold or recommended by the manufacturer may cause fire, electric
shock or injury.
13. The Ice Cream Maker is not intended to be operated by means of an external timer or any type
of separate remote control system.

07
AFTER SALES SUPPORT
1300 777 137
MODEL: IA4259 PRODUCT CODE: 707211 01/2022
General Information & Safety Instructions (cont.)
14. Do not clean with metal scouring pads. Pieces of a metal scouring pads may break o and
come in contact with the electrical parts creating a risk of electric shock.
15. Do not immerse the Ice Cream Maker into water or any other liquid as this may cause an
electrical shock.
Handling and Usage
1. The refrigerant isobutene (R600a) is contained within the refrigerant circuit of the Ice Cream
Maker. This is a natural gas with a high level of environmental compatibility, which is very
flammable. During transportation and installation of the appliance, ensure that none of the
components of the refrigerant circuit become damaged. In the event of damage please contact
our After Sales Support line on 1300 777 137.
2. Before plugging in your new Ice Cream Maker, allow it to stand in an upright position with the
lid removed for at least 2 hours before first use or if the Ice Cream Maker has been moved.
This will allow the refrigerant gases to settle into the compressor and reduce the possibility of a
malfunction in the cooling system from handling during transportation.
3. When moving and transporting the Ice Cream Maker, make sure the Ice Cream Maker stays in
an upright position. Do not tilt the unit more than 45˚ in any direction.
4. Always operate the Ice Cream Maker on a clean, dry, level surface. Operating on carpet, sinks
or uneven surfaces should be avoided.
5. Always ensure that the Ice Cream Maker is clean before use. If the inner bowl is dirty, the ice
cream may be contaminated and unfit for consumption.
6. The inside of the Ice Cream Maker will be extremely cold and may cause cold burns. Do not
touch the inside of the Ice Cream Maker or handle the inner bowl with your hands. Always use
the oven mitts when removing the inner bowl.
7. The ingredients will expand during the Ice Cream Making process. Do not overfill the Ice
Cream Maker with more than the recommended amount (750mL) of ingredients.
8. Arrange the cord away from high trac areas where it will not become a trip hazard.
9. Do not place the Ice Cream Maker on carpet, as it may create a blockage to the air ventilation
and create risk of fire, spontaneous combustion, or injury to persons.
10. Never clean this appliance with flammable cleaning agents. Do not store or use volatile,
flammable or explosive propellants such as aerosol cans or liquids inside or near the Ice Cream
Maker. The fumes can create a fire hazard or explosion.
11. Never allow open flames or ignition sources to enter the Ice Cream Maker.
12. Do not use solvent based or abrasive cleaning agents on the interior of the Ice Cream Maker as
these may damage or discolour the surfaces of the appliance.
13. Keep the Ice Cream Maker away from all substances that may cause ignition.

08
AFTER SALES SUPPORT
1300 777 137
MODEL: IA4259 PRODUCT CODE: 707211 01/2022
General Information & Safety Instructions (cont.)
14. Do not position the Ice Cream Maker in a damp place or anywhere it may come in contact with
water.
15. The refrigerant and insulation blowing gas is flammable, when disposing of the appliance, do
so only at an authorised waste disposal centre. Do not expose to flame.
16. Do not store electrical appliances inside the Ice Cream Maker.
WARNING: Do not damage the refrigerant circuit! Never use an appliance with a damaged
refrigerant circuit! If the refrigerant circuit is damaged, please contact the After Sales Support line on
1300 777 137.
WARNING: When positioning the Ice Cream Maker, ensure the power cord is not trapped
underneath or damaged.
WARNING: Do not use the Ice Cream Maker if the power cord has any cracks or abrasion damage.
Any damage to the cord may cause a short circuit, fire and/or electric shock. If the power cord is
damaged, it must be replaced by the manufacturer or its service agent. Contact the After Sales
Support line on 1300 777 137 for advice.
WARNING: This appliance is designed to be freestanding only and should not be recessed or built in.
WARNING: Do not tilt the Ice Cream Maker more than 45° from upright when moving it.
WARNING: This Ice Cream Maker contains the refrigerant isobutane (R600a), a
flammable, natural gas. Ensure any open flame or other sources of ignition are
removed from the vicinity of the Ice Cream Maker.
WARNING: Do not use mechanical devices or other means to accelerate the defrosting process,
other than those recommended by the manufacturer.
WARNING: Do not use electrical appliances inside the food storage compartments of the
appliance, unless they are of the type recommended by the manufacturer.
WARNING: Do not locate multiple portable socket-outlets or portable power supplies at the rear of
the appliance.

Product Overview
1. Lid Handle
2. Lid
3. Motor
4. Mixing Paddle
5. Inner Bowl
6. Main Unit
7. LCD Screen
8. Start/Stop Button
9. Mode Button
10. Power Button
09
AFTER SALES SUPPORT
1300 777 137
MODEL: IA4259 PRODUCT CODE: 707211 01/2022
7
8
9
10
1
2
3
4
5
6
Included (not pictured): Instruction Manual, Quick Start Guide and Warranty Certificate.

1. Timer
2. Chill Symbol
3. Mixing Symbol
4. Ice Cream Making
Symbol
10
AFTER SALES SUPPORT
1300 777 137
MODEL: IA4259 PRODUCT CODE: 707211 01/2022
Product Overview (cont.)
Symbol Mode Function
Mixing Select this mode first, to mix and add any additional ingredients such as
fruits, nuts or chocolate, prior to using the ice cream making mode. The
symbol will flash when selected and start rotating once you press the start/
stop button. The timer will start counting down from 30 minutes. The
Ice Cream Maker will beep when the mixing process is complete.
Ice Cream
Making
(Chill and
Mix)
Select the ice cream making mode to chill and churn the ingredients
at the same time. All three symbols will illuminate when the start/stop
button is pressed and the symbol will also rotate. The timer will
start counting up from 0 to 90 minutes. The Ice Cream Maker will
beep when the ice cream making process is complete.
Chill Select to chill the ingredients further after the ice cream making
mode has finished. The symbol will flash when selected and stay
illuminated when you press the start/stop button. The timer will
start counting down from 10 minutes. The Ice Cream Maker will
beep when the chill process is complete.
NOTE: The Ice Cream Maker will default to the ice cream making mode when first turned on. Refer
to the additional modes above by pressing the mode button.
NOTE: Ensure the lid and inner bowl is correctly installed before a mode is selected otherwise
the Ice Cream Maker will make a beeping sound for up to 5 minutes, until the lid and inner bowl
is correctly installed. If the lid and inner bowl has not been installed correctly in that time, the Ice
Cream Maker will go into standby mode.
8888
1
2 3 4

11
AFTER SALES SUPPORT
1300 777 137
MODEL: IA4259 PRODUCT CODE: 707211 01/2022
Getting Started
Before First Time Use
This product has been packaged to protect it against transportation damage. Remove the Ice Cream
Maker and all parts from the packaging materials and thoroughly read the instruction manual before
using this appliance for the first time. Ensure all parts indicated on the parts list diagram have been
included in the gift box.
1. Unpack the Ice Cream Maker but keep the original carton and all packaging materials. It will
help prevent any damage if the product needs to be transported in the future, and you can use
it to store the appliance when it is not in use.
2. Plastic wrapping can be a suocation hazard for babies and children, so ensure all packaging materials
are kept out of their reach. Remove all packaging found internally and externally before use.
3. Remove the twist-tie which is securing the electrical cord. Uncoil the cord to straighten it to
remove any kinks. Do not use if these parts are damaged. In case of damage, phone the After
Sales Support line on 1300 777 137.
4. Find a suitable position for the Ice Cream Maker on a clean, dry, level surface. Do not position it
on carpets or any other surfaces which could block the ventilation.
5. Check there is at least 15cm clearance on all sides of the Ice Cream Maker and ensure
adequate ventilation.
6. Make sure the Ice Cream Maker is disconnected from the power supply before cleaning. Clean
the interior surfaces with a soft, damp cloth. Then use a soft dry cloth to remove any dust from
transit and storage. Wash the removable mixing paddle and inner bowl in warm, soapy water
and dry thoroughly. Ensure the mixing paddle is thoroughly dry before reattaching to the lid.
Ensure the inner bowl is thoroughly dry before placing back inside the Ice Cream Maker.
NOTE: The mixing paddle comes already attached (assembled) to the lid. To remove the mixing paddle,
simply pull it away from the lid. To attach the mixing paddle, simply align the socket of the paddle with cog
of the lid and push gently until it is securely attached. It does NOT need to be twisted into place.
NOTE: Only wash the mixing paddle and inner bowl in warm soapy water, do not put these parts in a
dishwasher.
7. Do not turn on the Ice Cream Maker immediately after unpacking. Allow the Ice Cream Maker
to rest upright for at least 2 hours. This allows the gas to settle within the compressor to allow
for proper operation.
WARNING: Do not store electrical appliances inside the Ice Cream Maker.
NOTE: Position the Ice Cream Maker on a clean, dry, level surface. To ensure sucient ventilation, all
the sides of the Ice Cream Maker should have at least 15cm clearance.
WARNING: Before plugging in your new Ice Cream Maker, allow it to stand in an upright position for at
least 2 hours before first use or if the Ice Cream Maker has been moved. This will allow the refrigerant
gases to settle into the compressor and reduce the possibility of a malfunction in the cooling system
from handling during transportation.
WARNING: Never immerse the Ice Cream Maker or lid in water or any other liquids.
WARNING: Keep all the Ice Cream Maker vents and ventilation clearance around the Ice Cream Maker
clear of obstructions at all times.
12
AFTER SALES SUPPORT
1300 777 137
MODEL: IA4259 PRODUCT CODE: 707211 01/2022
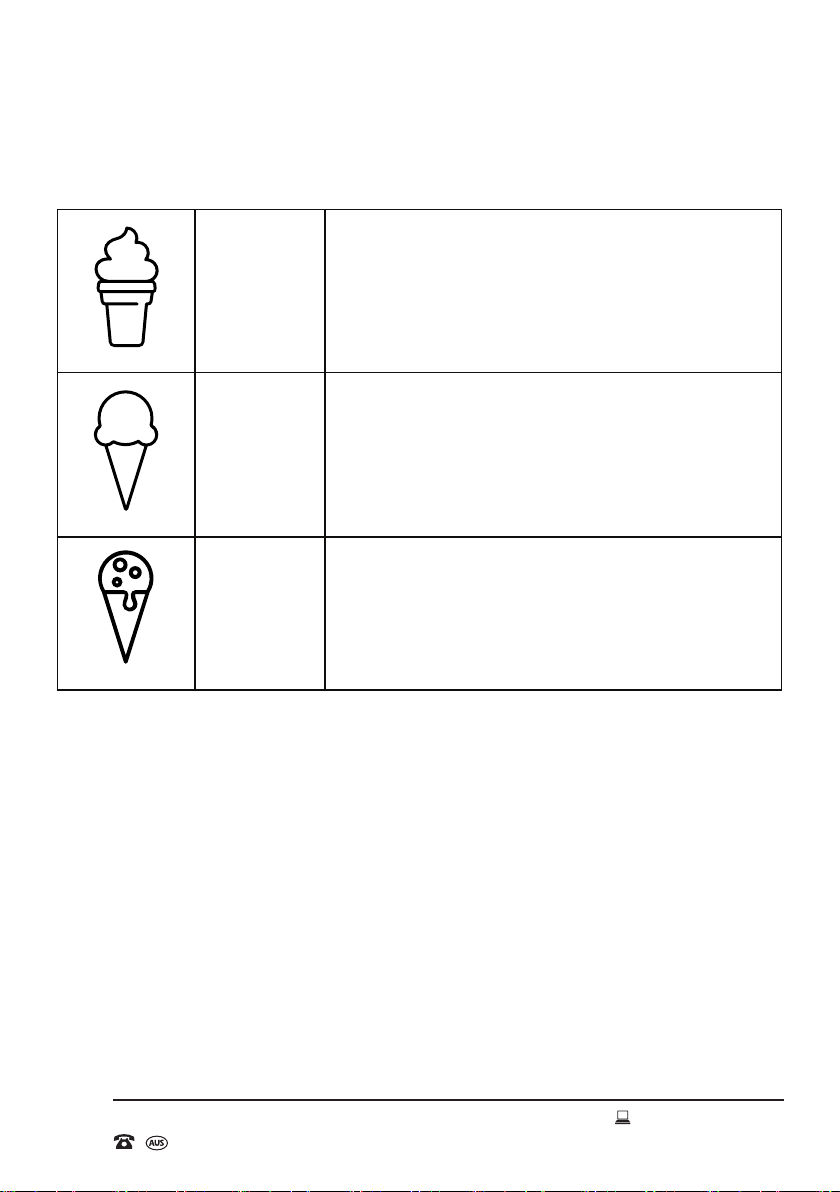
Frozen Dessert Guide
The Stirling Ice Cream Maker can make ice cream, gelato and sorbet with ease. Please see the table
below for information on these types of frozen desserts.
Created by Made by Made
from the Noun Project
Ice Cream Sweet, soft frozen dessert made with milk and cream.
Created by Made by Made
from the Noun Project
Gelato
A similar custard base as ice cream using a lower
proportion of cream and eggs (or no eggs at all) and a
higher proportion of milk.
Created by Vectors Market
from the Noun Project
Sorbet Frozen water sweetened with sugar or syrups such as fruit
juice, fruit puree or honey.
13
AFTER SALES SUPPORT
1300 777 137
MODEL: IA4259 PRODUCT CODE: 707211 01/2022
Using the Ice Cream Maker
NOTE: Before first use and after prolonged storage, it is
recommended to remove the lid and leave open for at least 2 hours
to allow the compressor to air and any stale air or smells to escape.
1. Place the Ice Cream Maker on a clean, dry, level surface with
at least 15cm clearance on all sides. Allow the Ice Cream
Maker to rest upright for at least 2 hours before first use or if
the Ice Cream Maker has been moved.
2. Ensure the Ice Cream Maker is switched o and unplugged
from the power outlet.
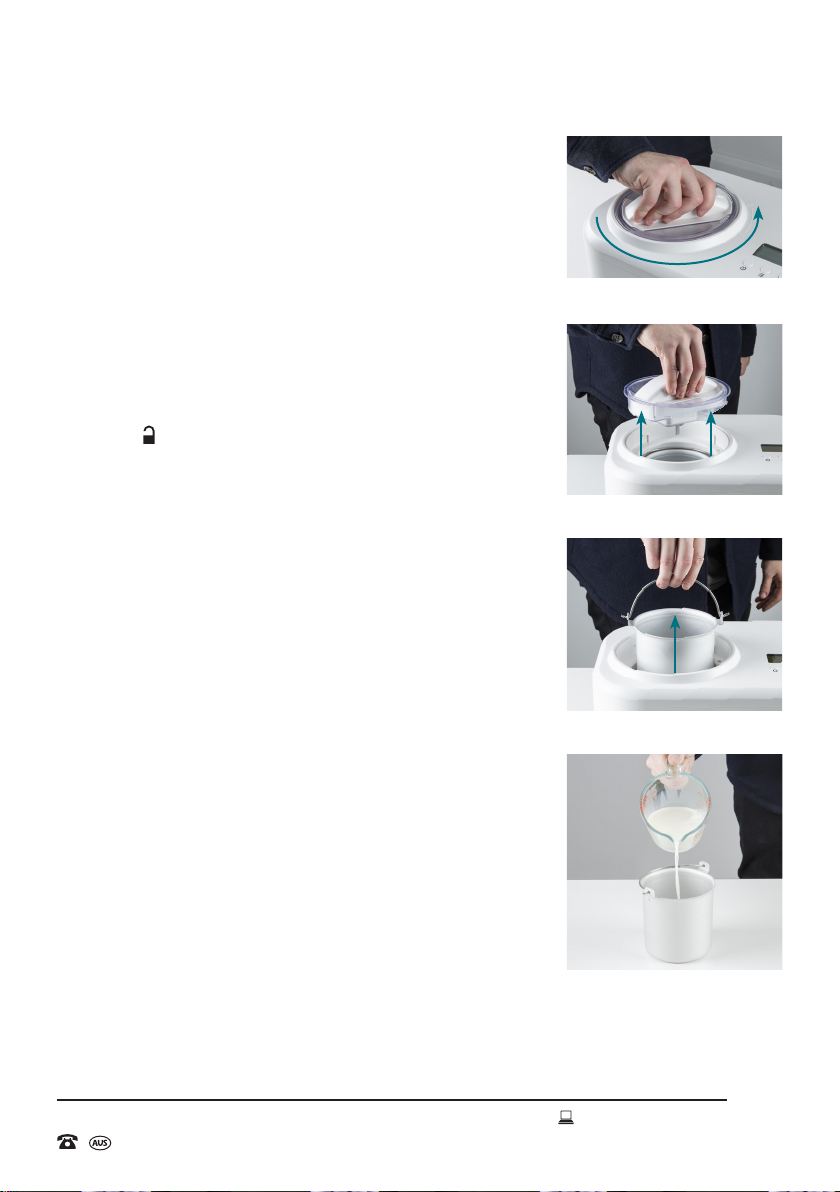
3. Turn the lid handle anticlockwise in the direction of the arrow
to the unlock symbol and lift the lid out of the Ice Cream
Maker (Fig. 1 and Fig. 2).
4. Using the handle located on the inner bowl, lift the bowl out
using reasonable force (Fig. 3).
5. Prepare and add the ingredients to the inner bowl. Please refer
to the recipe guide on pages 18 to 21 for the ingredients and
amounts. Take care not to exceed the recommended maximum
amount (750mL) of ingredients (Fig. 4).
NOTE: For optimum consistency, it is recommended to chill all
mixtures (covered with plastic wrap) in the fridge for a minimum of
2 hours before adding them to the inner bowl. Always re-whisk the
mixture after chilling to be sure all ingredients are well combined.
While chilling the mixture is not required, this step will prevent any
“ice” or “fat” crystals from forming during the mixing and chilling
process. A chilled mixture will result in a faster setting of the ice
cream, gelato or sorbet, and resting in a chilled environment helps
bind the ingredients together, which will improve the flavour.
WARNING: When adding additional ingredients such as fresh or dry
fruit, chocolate or nuts; ensure that they are finely chopped before
placing into the inner bowl. Large pieces can block the mixing paddle
and may cause the motor to stop. These ingredients can be added
at the start of the mixing and freezing process, but we recommend
adding them towards the end of the process for initial mixing ease.
5-10 minutes before the end of the process is a good guide.
NOTE: To add a chocolate or a caramel swirl to ice cream, gelato or
sorbet, drizzle the melted chocolate, hot fudge or salted caramel into
the mixture slowly. The melted chocolate will harden quickly once it
makes contact with the freezing mixture, adding it in as a slow drizzle
will ensure that the chocolate doesn’t clump together.
Instructions
Fig. 4
Fig. 1
Fig. 2
Fig. 3

14
AFTER SALES SUPPORT
1300 777 137
MODEL: IA4259 PRODUCT CODE: 707211 01/2022
Instructions (cont.)
NOTE: The maximum capacity of the inner bowl is 1L. The mixture will expand during the churning and
freezing process. Do not exceed 750mL of mixture to allow for the expansion.
WARNING: Never use the Ice Cream Maker without ingredients in the inner bowl. Always check the
ingredients have been added to the inner bowl before use.
NOTE: It is recommended to remove the inner bowl from the Ice Cream Maker before adding the
ingredients/mixture. Pouring ingredients into the inner bowl while it is inside the Ice Cream Maker may
result in spillages which could damage the motor pins located on the main unit. If the motor pins are
damaged, the Ice Cream Maker will not operate.
NOTE: There are no measurement markings on the inner bowl. Please ensure to measure the ingredients
(up to 750mL), in a separate measuring cup or measuring jug, before adding to the inner bowl.
6. Place the inner bowl inside the Ice Cream Maker. Line up both sides of the inner bowl handle with
the grooves on the inside of the Ice Cream Maker and push down using reasonable force.
7. Attach the mixing paddle to the lid, then insert the mixing paddle into the Ice Cream Maker
inner bowl. Next, align the arrow on top of the lid handle with the unlock symbol on top of the
Ice Cream Maker. Turn the lid handle clockwise until it aligns with the lock symbol and locks
securely in place. You will hear a clicking sound.
NOTE: The mixing paddle comes already attached (assembled) to the lid. To remove the mixing paddle,
simply pull it away from the lid. To attach the mixing paddle, simply align the socket of the paddle with
cog of the lid and push gently until it is securely attached. It does NOT need to be twisted into place.
NOTE: If the lid is not correctly and securely attached, the motor will not start. This is a safety feature
of the appliance and not a product fault.
8. Plug the cord into a power outlet and switch on at the outlet. The LCD screen will flash on briefly then
o, and the Ice Cream Maker will make a beeping sound indicating that the Ice Cream Maker is in
standby mode.
WARNING: Before plugging in the Ice Cream Maker, allow it to stand in an upright position for at least
2 hours before first use or if the Ice Cream Maker has been moved. This will allow the refrigerant gases
to settle into the compressor and reduce the possibility of a malfunction in the cooling system from
handling during transportation.
WARNING: Never plug the Ice Cream Maker into a power outlet and switch on unless the lid is closed
and the inner bowl is filled with ingredients.
9. Press the power button to turn the Ice Cream Maker ON. The LCD screen will turn on and the
ice cream making mode symbol will flash.
NOTE: The Ice Cream Maker will default to ice cream mode when first turned ON. Press the mode
button to select a dierent mode. Refer to the mode settings on page 10 of the instruction manual for
the dierent mode settings and functions.
NOTE: You may prefer to pre-mix your ingredients (depending on the recipe), prior to using the ice
cream making mode.

15
AFTER SALES SUPPORT
1300 777 137
MODEL: IA4259 PRODUCT CODE: 707211 01/2022
Instructions (cont.)
10. Press the mode button twice until the mixing mode is selected. The timer will display 30
minutes and the symbol will flash.
11. Press the start/stop button to begin the mixing process. The timer will begin counting down
from 30 minutes and the symbol will illuminate and rotate. The Ice Cream Maker will make a
beeping sound once the mixing process is complete.
NOTE: Press the start/stop button to stop the mixing process of the Ice Cream Maker, but please
note, the timer will also start again if the button is pressed. Press the start/stop button to start the
mixing process again. You can use this function to taste test or check the soft or hard consistency of the
ice cream, gelato or sorbet, however the timer will reset back to 30 minutes once the process is resumed.
NOTE: For best results, it is recommended to mix the ingredients for the full 30 minutes.
12. Once the mixing process has been completed, press the mode button again to change to ice
cream making mode .
13. Press the start/stop button to begin making the ice cream, gelato or sorbet. The timer will begin
counting upwards from 0 to 90 minutes. All three symbols will illuminate and the symbol will
also rotate.
14. The Ice Cream Maker will now start mixing and chilling your ingredients. Although the timer goes
up to 90 minutes, your mixture may be ready much earlier than this. The Ice Cream Maker has
an inbuilt feature that determines when your mixture is ready. When it has detected that your
mixture is ready, it will automatically switch o the ice cream making mode and the keep cool
mode will be automatically activated. See page 16 for detailed information on this mode.
15. Once the Ice Cream Maker has finished making the ice cream, gelato or sorbet, it will make a
beeping sound to indicate the frozen dessert is ready.
16. Press the power button to turn the Ice Cream Maker OFF, then switch o and unplug from the
power outlet.
NOTE: When the Ice Cream Maker is in ice cream making mode , the timer will count upwards from
0-90 minutes. The amount of time it takes to complete the ice cream making process will depend on
the amount, type and temperature of the ingredients of the mixture. Once the ice cream, gelato or
sorbet is ready, the Ice Cream Maker will automatically stop the ice cream making mode and switch
over to the keep cool mode.
NOTE: If the ice cream making mode does not stop after 90 minutes, there may be something
wrong with the mixture which is preventing it from thickening. In this case it is recommended to stop
the Ice Cream Maker and remove the mixture from the Ice Cream Maker. Dispose of the mixture and
start the whole mixture making process again from the beginning.
NOTE: To reach soft serve ice cream consistency, allow between 10-30 minutes in ice cream making mode.
Press the start/stop button and open the lid, to check on the desired consistency at any time.
NOTE: The Ice Cream Maker will make a slight friction sound when making ice cream. This is normal
and not a product fault.
NOTE: If you wish to keep using the keep cool function, do not press the power button.

16
AFTER SALES SUPPORT
1300 777 137
MODEL: IA4259 PRODUCT CODE: 707211 01/2022
Instructions (cont.)
NOTE: If you have already pressed the power button, you can still keep your ice cream cool for
up to 10 minutes at a time by selecting the chill mode manually.
17. Open the lid of the Ice Cream Maker by turning the lid handle anticlockwise to the unlock
symbol and lift out gently. Grab the lid handle of the inner bowl and lift out using reasonable
force. Now you can enjoy your ice cream, gelato or sorbet.
NOTE: The ice cream, gelato, sorbet made is of a spoonable consistency. It is recommended that
if you are serving on plates, the keep cool function should be used for approximately 60 minutes,
or until the ice cream, gelato or sorbet mixture is to your desired consistency. Or alternatively, place
the ice cream, gelato or sorbet mixture in the freezer (in a freezer safe container) for 2 hours prior to
serving. Do not use keep cool mode for soft serve ice cream consistency. Please see below for more
information on using the keep cool function.
NOTE: Once the ice cream, gelato or sorbet mixture is hard, do not attempt to use the mixing or ice
cream modes again as this may damage the mixing paddle and motor.
WARNING: Never leave the Ice Cream Maker unattended during operation.
NOTE: It is recommended to consume the ice cream, gelato or sorbet within 1 week of churning,
however it can be kept for up to 2 weeks in the freezer (in a freezer safe container).
NOTE: The mixing paddle may become stuck in the ice cream, gelato or sorbet once the keep cool
function has finished. You may need to manually remove the mixing paddle from the inner bowl.
NOTE: If you are serving the ice cream, gelato or sorbet from the freezer, it is best to let the ice
cream sit at room temperature for approximately 5 minutes prior to serving.
Keep Cool Function
The Ice Cream Maker features an automated inbuilt keep cool function. Once the ice cream making
process has completed, the automated keep cool function will activate and the symbols will
remain illuminated and ‘COOL’ will show on the LCD display. The compressor will automatically
turn o for 10 minutes and turn on for 7 minutes to maintain the texture of the ice cream, gelato or
sorbet. After approximately one hour, the Ice Cream Maker will make a beeping sound and the keep
cool function will deactivate. The Ice Cream Maker will return to standby mode and the symbol will
illuminate and flash.
NOTE: Alternatively, you can use the chill mode to keep the ice cream cool at 10 minute increments.
NOTE: Do not place the inner bowl inside the freezer. Always transfer the ice cream, gelato or
sorbet to a freezer safe container prior to placing in the freezer.
NOTE: For a firmer texture, it is recommended to leave the ice cream, gelato or sorbet in the
Ice Cream Maker for up to one hour on the keep cool function. After one hour the keep cool
function will deactivate. The ice cream, gelato or sorbet should then be removed and consumed or
transferred to a freezer safe storage container and placed in the freezer, otherwise it will melt.
NOTE: Do not use the keep cool mode for soft serve consistency as the ice cream will become too hard.

17
AFTER SALES SUPPORT
1300 777 137
MODEL: IA4259 PRODUCT CODE: 707211 01/2022
Instructions (cont.)
Tips for Making a Better Crème Anglaise (base of a good ice cream)
Traditional creamy ice cream is made with a crème anglaise custard base. Please see the below tips
for how to achieve the perfect creme anglaise each time.
• Ensure all the ingredients are fresh. It is recommended to use room temperature eggs.
• Measure all ingredients first and have them ready to go before you start to cook.
• Beat the egg yolks and sugar until they are pale and thick (use either a wire whisk or electric hand
mixer).
• When cooking the crème anglaise it is best to use a heavy bottom saucepan.
• Remove the milk/cream from the heat when little bubbles form around the edge of the milk/
cream. Do not allow the milk/cream to boil.
• While the milk/cream is heating, beat the egg yolks and sugar. Waiting to do this until after the
milk/cream mixture has heated, may result in the milk/cream mixture to overheat and separate.
• Stir the mixture constantly using a flat bottom wooden spoon until it thickens. To check the
consistency, coat the spoon in the crème anglaise and run your finger through the mixture on
the back of the spoon. If your finger mark remains, then the mixture is thick enough. Remove the
mixture from the heat immediately.
• The crème anglaise will take approximately 5-15 minutes to thicken depending on the quantity
of the mixture.
• If the heat is too high the mixture will curdle or separate. If this happens, you will need to dispose
of the crème anglaise mixture and start again.
• Never leave the crème anglaise unattended while cooking.
• Once the mixture is ready, remove from the heat immediately and allow to cool at room
temperature. Stir occasionally to release the heat from the mixture until there is no steam visible.
• Once cooled, cover with plastic wrap and place in the refrigerator to chill.
• Placing plastic wrap over the top while chilling will prevent a skin forming on top of the crème
anglaise.
• To chill the mixture quickly, pour the crème anglaise into a metal bowl and then place the bowl
into an ice bath. Stir constantly until the crème anglaise is chilled.

18
AFTER SALES SUPPORT
1300 777 137
MODEL: IA4259 PRODUCT CODE: 707211 01/2022
Recipe Guide
We have included a basic ice cream, gelato and sorbet recipe to help get you started. We encourage
you to experiment with your own recipes and mixtures by changing, adding and supplementing
ingredients. Have fun experimenting with your own creations!
Vanilla Ice Cream
Ingredients Method
1 cup heavy pouring cream
1 1/4 cup full cream milk
3/4 cup sweetened
condensed milk
1 tsp vanilla extract*
* You can substitute real
vanilla bean instead of
extract for a vanilla bean
ice cream flavour
1. Place the ingredients into a measuring jug and stir to
combine the ingredients.
2. Cover with plastic wrap and refrigerate for a minimum of 2
hours.
3. Once chilled, pour the ingredients into the inner bowl.
4. Refer to the instructions on pages 13-17 for how to make
the ice cream. It should take approx. 30-40 minutes for the
consistency of ice cream to be achieved, but you can stop
the mode at any time to check the mixture.
5. Once the Ice Cream Maker has finished, the ice cream is
ready to enjoy.
NOTE: Please remember that the Ice Cream Maker will automatically stop the ice cream making
mode when the mixture is ready and automatically switch over to the keep cool mode. But you may
prefer a softer consistency, so please check your mixture at any time by pressing the start/stop
button.
NOTE: Some ingredients including milk and cream may be substituted with skim, soy or dairy free
types. However, please keep in mind that the higher the fat content, the creamier the result. Using
low fat substitutes may change the taste, consistency and texture of the dessert. When substituting
with low fat ingredients, be sure to use the same volume of the substitute as you would have used of
the original recipe.
WARNING: When adding additional ingredients such as fresh or dry fruit, chocolate or nuts, ensure
that they are finely chopped before placing into the inner bowl. Large pieces can block the mixing
paddle and may cause the motor to stop. These ingredients can be added at the start of the mixing
and freezing process, but we recommend adding them towards the end of the process for initial
mixing ease. 5-10 minutes before the end of the process is a good guide.
NOTE: When swapping or adding ingredients, you may need to adjust quantities to ensure the total
amount of ingredients/mixture does not exceed 750mL.

19
AFTER SALES SUPPORT
1300 777 137
MODEL: IA4259 PRODUCT CODE: 707211 01/2022
Recipe Guide (cont.)
Chocolate Ice Cream
Ingredients Method
3/4 cup cocoa powder,
sifted
1/2 cup white sugar
1/3 cup packed brown
sugar
pinch flaked salt
1 cup full cream milk
2 cups thickened cream
2 teaspoons pure vanilla
extract
1. Whisk together the cocoa, sugars and salt in a mixing bowl.
2. Add the milk and, using a whisk or a hand mixer on low speed,
beat to combine until the cocoa, sugars and salt are dissolved.
3. Stir in the thickened cream and vanilla.
4. Cover with plastic wrap and refrigerate for a minimum of 2
hours.
5. Whisk the mixture together again before pouring into the Ice
Cream Maker inner bowl.
6. Refer to the instructions of page 13-17 for how to make
the ice cream. It should take approx. 30-40 minutes for the
consistency of ice cream to be achieved, but you can stop the
mode at any time to check the mixture.
7. Once the Ice Cream Maker has finished, the ice cream is ready
to enjoy.
NOTE: Please remember that the Ice Cream Maker will automatically stop the ice cream making
mode when the mixture is ready and automatically switch over to the keep cool mode. But you may
prefer a softer consistency, so please check your mixture at any time by pressing the start/stop
button.
NOTE: Some ingredients including milk and cream may be substituted with skim, soy or dairy free
types. However, please keep in mind that the higher the fat content, the creamier the result. Using
low fat substitutes may change the taste, consistency and texture of the dessert. When substituting
with low fat ingredients, be sure to use the same volume of the substitute as you would have used of
the original recipe.
WARNING: When adding additional ingredients such as fresh or dry fruit, chocolate or nuts, ensure
that they are finely chopped before placing into the inner bowl. Large pieces can block the mixing
paddle and may cause the motor to stop. These ingredients can be added at the start of the mixing
and freezing process, but we recommend adding them towards the end of the process for initial
mixing ease. 5-10 minutes before the end of the process is a good guide.
NOTE: When swapping or adding ingredients, you may need to adjust quantities to ensure the total
amount of ingredients/mixture does not exceed 750mL.

20
AFTER SALES SUPPORT
1300 777 137
MODEL: IA4259 PRODUCT CODE: 707211 01/2022
Recipe Guide (cont.)
Vanilla Gelato
Ingredients Method
1/2 cup heavy pouring
cream
2 cups full cream milk
5 egg yolks
3/4 cup caster sugar
1 tsp vanilla extract*
* You can substitute real
vanilla bean instead of
extract for a vanilla bean
ice cream flavour
1. Place the pouring cream, milk and vanilla extract ingredients
into a saucepan and heat until the ingredients start to simmer.
2. Place the egg yolks and sugar into a separate bowl and whisk
until the ingredients are thickened.
3. When the cream, milk and vanilla extract is hot, add the
ingredients into the egg yolk and sugar mixture and whisk
together.
4. Add the ingredients back in to the saucepan on low heat.
Keep stirring until the mixture has thickened.
5. Pour the ingredients into a bowl (cover with plastic wrap) and
place in the refrigerator until chilled.
6. Pour the ingredients into the Ice Cream Maker inner bowl and
set to ice cream making mode. It should take approx. 50-60
minutes for the consistency of gelato to be achieved, but you
can stop the mode at any time to check the mixture.
7. Once the ice cream making mode has finished, leave the
gelato in the Ice Cream Maker on the automated keep cool
function for approximately 20-30 minutes.
NOTE: Please remember that the Ice Cream Maker will automatically stop the ice cream making
mode when the mixture is ready and automatically switch over to the keep cool mode. But you may
prefer a softer consistency, so please check your mixture at any time by pressing the start/stop
button.
NOTE: Some ingredients including milk and cream may be substituted with skim, soy or dairy free
types. However, please keep in mind that the higher the fat content, the creamier the result. Using
low fat substitutes may change the taste, consistency and texture of the dessert. When substituting
with low fat ingredients, be sure to use the same volume of the substitute as you would have used of
the original recipe.
WARNING: When adding additional ingredients such as fresh or dry fruit, chocolate or nuts, ensure
that they are finely chopped before placing into the inner bowl. Large pieces can block the mixing
paddle and may cause the motor to stop. These ingredients can be added at the start of the mixing
and freezing process, but we recommend adding them towards the end of the process for initial
mixing ease. 5-10 minutes before the end of the process is a good guide.
NOTE: When swapping or adding ingredients, you may need to adjust quantities to ensure the total
amount of ingredients/mixture does not exceed 750mL.
Table of contents


