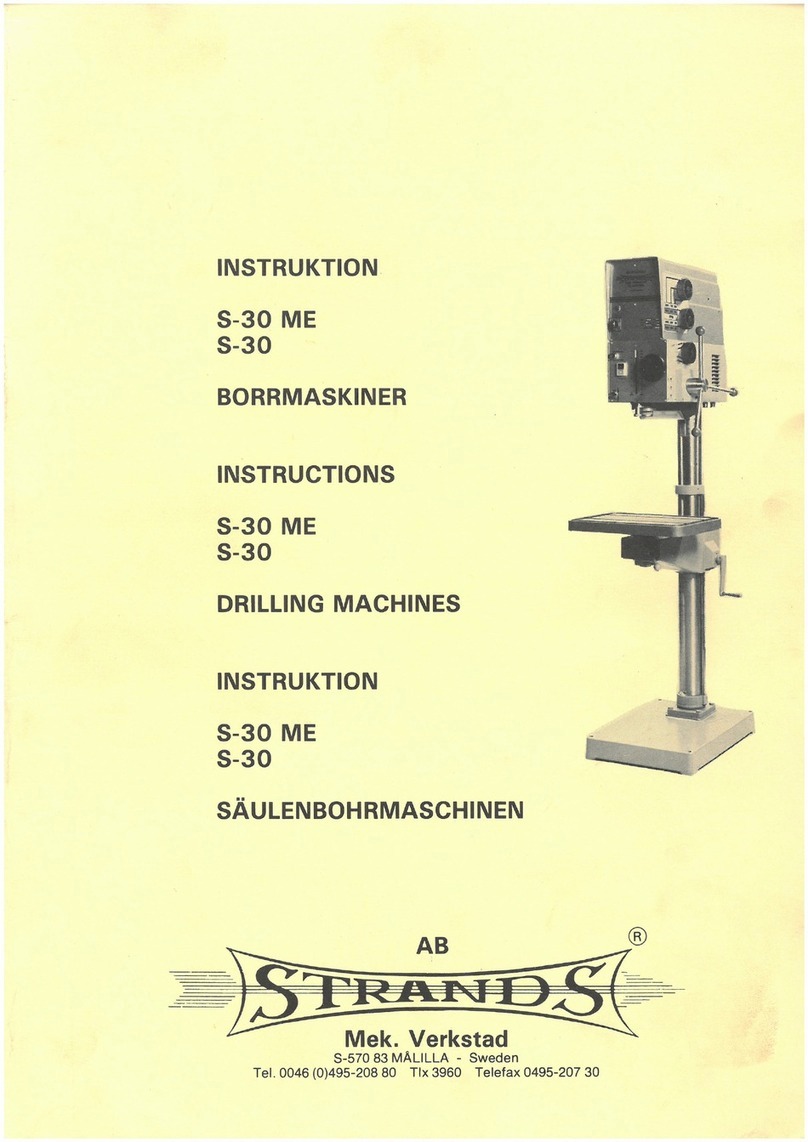
STRANDS S 40 U Guide

S 40 U (M)
SKÖTSELINSTRUKTIONER OCH RESERVELAR
INSTRUCTIONS AND SPARE PARTS LIST
BEDIENUNGSANLEITUNG UND ERSATZTEILLISTE
Machinery Scandinavia AB
SE-570 83 Rosenfors, Sweden
Tel.+46(0)495 497 00 Fax +46(0)495 207 30

2

REGISTER
SVENSKA SIDA
GARANTI 4
ALLMÄNT 5
SÄKERHETSFÖRESKRIFTER 5
GENERELLA SÄKERHETSFÖRESKRIFTER 6
INSTALLATION 6
MASKININSTRUKTION 7-10
RESERVDELSLISTOR 26-47
ENGLISH PAGE
GUARANTEE 11
GENERALLY 12
SAFETYREGULATIONS 12
GENERAL SAFETY REGULATIONS 13
INSTALLATION 13
INSTRUCTIONS FOR THE MACHINE 14 - 17
SPAREPARTSLIST 26-47
DEUTSCH SEITEN
GARANTIE 18
ALLGEMEINES 18
SICHERHEITSVORSCHRIFTEN 19
ALLGEMEINE SICHERHEITSVORSCHRIFTEN 19
INSTALLATIONSVORSCHRIFT 20
MASCHINEN-INBETRIEBNAHME 21 - 25
ERSATZTEILLISTE 26 – 47
3

GARANTI
Vi garanterar för en tid av ett år, räknat från fakturadatum, för maskinens fullgoda
beskaffenhet på så sätt;
•att om någon del bevisligen blir obrukbar under garantitiden p.g.a. material- eller
fabrikationsfel.
•vi i eget val gratis antingen levererar ny fullgod del eller iståndsätta den gamla mot
att densamma utan kostnad för oss återsändes till vår verkstad.
•Köparen eller agenten skall meddela oss snarast när ett eventuellt garantifall
uppstår, för att ge oss möjligheter att undersöka och åtgärda felet.
•Köparen eller agenten skall icke själv åtgärda felet på plats utan först ha kontaktat
oss. Om sådan reparation göres utan vårt godkännande, sker detta helt på
köparens/agentens risk och denne får själv stå för kostnaderna.
•För fel på maskinen uppkomna genom yttre åverkan , slitage, vanskötsel eller
felaktigt handhavande påtar vi oss inget ansvar. Inte heller påtar vi oss någon som
helst ersättningsskyldighet för andra direkta eller indirekta kostnader i samband
med garantifall.
I övrigt gäller Machinery Scandinavia AB generelle leveransvillkor och Allmänna
Leveransbestämmelser.
4

Skötselinstruktioner och Reservdelslista
Denna skötselinstruktion och reservdelslista är utarbetad för Er som använder,
ansvarar eller ger service för denna maskin. Därför bör den som närmast ansvarar för
om/eller använder maskinen ha bekväm tillgång till den instruktion och
reservdelslista
Läs innan Ni installerar och startar maskinen. Maskinen är enkelt och robust byggd,
men vi kan ej garantera dess perfekta funktion om den behandlas felaktigt. Gör er
därför väl förtrogen med maskinen och prova de olika detaljerna i manöversystem
och inställningar. Behärskar Ni maskinen kan Ni också utnyttja dess egenskaper fullt
ut och få maximal livslängd på alla ingående komponenter.
Varje maskins noggrannhet och kapacitet provas vid fabriken. Erfaren personal kon-
trollerar både mekaniska och elektriska funktioner enligt ett standardiserat program.
Vi kan därför garantera att utförandet ligger på en hög nivå.
Följer Ni våra anvisningar och Ert goda omdöme är vi övertygade om att Ni blir
belåtna med Er nya maskin. Skulle trots allt problem uppstå, kontakta vår
återförsäljare eller oss direkt
Säkerhetsföreskrifter
Rätt använd är denna maskin en av de bästa avseende design och säkerhet. Varje
maskin som använts felaktigt kan emellertid alltid vara en olycksrisk. Det är absolut
nödvändigt att de som använder maskinen är informerade om hur man använder den
korrekt. de skall läsa och förstå denna manual såväl som alla skyltar som finns på
maskinen. Underlåtenhet att följa säkerhetsföreskrifter kan orsaka olyckstillbud.
Varning
•Felanvändning av denna maskin kan orsaka allvarliga olyckor.
•Maskinen måste installeras, användas och underhållas korrekt
5

Generella säkerhetsföreskrifter
Alla maskiner med roterande verktyg eller detaljer kan orsaka olyckor, och det är
därför viktigt att Du som operatör är medveten om olycksrisken och undviker alla
möjligheter till olyckor.
•Använd kläder och personlig skyddsutrustning som gör att Du inte kan fastna i
roterande verktyg.
•Använd skyddsglasögon om risk för spån eller kylvätskestänk föreligger eller om
lokala regler om detta finnes.
•Håll rent runt maskinen för att undvika att falla mot roterande verktyg.
•Tillse att arbetsstycket är ordentligt låst i bordet. Använd aldrig handen för att hålla
arbetstycket.
•Tillse alltid att maskinens strömbrytare är i läge 0 när Du ska byta verktyg eller
rengöra maskinen. Borsta aldrig bort spån under tiden maskinen arbetar.
•Använd korrekta verktyg. Rätt varvtal och rätt matning för verktyget. Försäkra dig
om att verktyget är avsett för arbetet.
•Tillse att huvud och bord är ordentligt fastlåsta innan start.
Vid installation
•Undvik att installera maskinen i fuktig, smutsig eller dåligt belyst miljö.
•Försäkra Er om att maskinen har alla nödvändiga skydd.
•Elektriska installationer skall utföras av behörig elektriker.
•Försäkra Er om att maskinen är stadigt uppställd eller förankrad.
Vid användande
•Använd aldrig maskinen om den saknar nödvändiga skydd.
•Följ gängse regler för maskinanvändning avseende personlig skyddsutrustning.
•Arbeta inte i maskinen med löst sittande klädsel eller smycke. Använd hårnät om
nödvändigt.
•Sträck Dig aldrig över maskinen när den är igång.
•Lämna aldrig maskinen påslagen.
•Stoppa alltid maskinen när den inte används.
Vid service och underhåll
•Tillse alltid att spänningen till maskinen är avslagen.
•Följ alltid instruktionerna i denna manual.
•Modifiera aldrig maskinen utan att rådfråga vår återförsäljare.
6

MASKININSTRUKTIONER
Rengöring:
Alla maskinens blanka delar är vid leveransen från fabriken behandlade med
rostskyddsmedel. Vid avlägsnandet av detta bör ej för starkt rengöringsmedel
användas, maskinfärgen kan då lätt skadas.
Uppställning:
Maskinen ställes på stadigt underlag. Stativet understödes vid fastdragning av
fästbultarna, så att den inte erhåller någon skadlig spänning.
Smörjning:
Huvudväxellådans alla axlar och kugghjul, som roterar med högre varvtal, är lagrade
i kullager, vilka vid monteringen inpackas med prima kullagerfett. Om inget onormalt
inträffar räcker detta för flera års drift innan någon förnyad smörjning behöver göras.
Samma gäller för motorhissens växellåda. Genom att ta bort huvudväxellådans främre
lock får man den och borrspindeln fria för insyn och kan vid behov smörja lager och
kugghjul.
På maskiner med maskinmatning arbetar matningens snäckväxel i ett oljebad.
Påfyllning av olja ca 0,4 l, sker genom hålet bakom matningsaxeln på spindelhusets
sida. Oljenivån kontrolleras i nivåglaset under påfyllningshålet.
Lämplig olja bör ha en viskositet av 11o E vid 50oC .
Se separat oljerekommendation.
Avtappning sker genom ett hål på matningsväxellådans undersida.
Inkoppling:
Tag bort täckplåten på gejdens baksida. Anslut linje, jord och MP enl. bifogat
kopplingsschema. Kontrollera att borrspindeln har rätt rotationsriktning.
7

Start och manövrering:
Med strömbrytaren på borrhuvudets framsida, som är en kombination av vred och
tryckknapp, regleras alla elfunktioner. Som tillbehör kan den även utrustas med
automatisk reversering, användbar vid gängning.
START BORRNING:
Vrid strömbrytarens vred åt vänster till START.
Vredet återgår automatiskt till läge 1.
För ned borrspindeln med hjälp av matningsspaken.
START GÄNGNING:
Vrid strömbrytarens vred åt höger till START.
Vredet återgår automatiskt till läge 1.
Den automatiska reverseringen är nu inkopplad.
Tillse att borrspindelns varvtal ej är högre än 440 r/m.
Önskat gängdjup inställes med hjälp av stoppet.
Vid inställt gängdjup ändrar spindeln rotationsriktning.
Om maskinen är utrustad med automatisk reversering för gängningsoperationer,
innebär detta inte att maskinerna kan användas vid kontinuerlig gängning under långa
tidsperioder.
Den automatiska reverseringen är avsedd att endast användas vid gängning av
mera sporadisk natur. Vid kontinuerlig gängning måste reverserande
gängtapphållare användas.
STOPP:
Vredet återföres till läge 0.
SNABBSTOPP:
Vredet trycks in, varvid maskinen omedelbart stannar.
Trots att vredet nu står i läge 1 måste det vridas till START för att maskinen skall
starta igen.
VARNING
Vid lossandet av verktyg med hjälp av den inbyggda borrjagaren, kontrollera alltid
först att den röda startknappens vred står på 0.
8

Växling av spindelvarvtal:
De olika spindelvarvtalen inställes med de tre vreden på spindelhusets vänstra sida
enligt skylten, som sitter under vreden. Växling får ej ske under gång.
Hissanordning:
Maskinen är utrustad med en motorhiss för borrhuvudets vertikalrörelse.
Lossa först de två handtagen på spindelhusets högra sida, som låser fast det på sliden.
Rörelsen regleras av en strömbrytare på borrhuvudets framsida.
En inbyggd friktionskoppling i hissens växellåda förhindrar skada om borrhuvudets
köres mot stopp i någon riktning eller om det är fastlåst.
Maskinmatning:
Valet av de 4 olika matningshastigheterna sker med ratten på spindelhusets framsida.
OBS!
Ratten kan ej vridas direkt från högsta till lägsta matning eller tvärtom utan
man måste alltid gå över de mellanliggande matningarna.
Inställningen kan ske under gång, dock ej under belastning. Inställning av borrdjup
sker med stoppet och skalorna på spindelhusets framsida. Matningen inkopplas
genom att inställningsratten föres åt höger och sedan nedåt enl. anvisning på skylten.
Vid uppnått borrdjup återgår spindeln automatiskt till sitt översta läge, och rotationen
avstannar.
OBS! Tillse alltid att finmatningen är urkopplad innan maskinmatningen kopplas
in.
Finmatning:
Finmatningen kopplas in och ur med spaken som sitter under finmatningsratten.
När spaken står i lodrätt läge är finmatningen urkopplad, när den står i vågrätt läge är
den inkopplad. Koppla alltid ur finmatningen efter avslutat arbete.
Låsning av spindelhylsa:
Nedre bandet i spindelhusets passning för spindelhylsan är delvis uppskuret och
försett med en låsskruv med vilket man kan låsa fast hylsan i önskat läge ( se vidare
under rubriken fräsning ).
9

Fräsning:
Borrhuvudet är vridbart 0 - 45o åt vardera hållet efter en graderad skala.
Fastlåsningen sker med tre muttrar, en på vardera sida av, och en under spindelhuset.
Huset fixeras i nolläget med en gängad konpinne.
Vid fräsningsarbeten låses spindelhylsan fast. På grund av de vibrationer eller slag,
som uppstår vid fräsning, måste verktygen vara fastlåsta för att inte lossna ur
infästningskonan. För att minska vibrationerna är det fördelaktigt att använda fräsar
med mer än två skär, helst snedskurna, så att alltid minst ett skär arbetar. För
stabilitetens skull är det helt naturligt att man bör arbeta med så korta verktyg som
möjligt.
Vid tillsättning efter skalan av ett skär, bör låsskruven inte lossas mer än som
fordras, för att spindelhylsan skall kunna mats ned. Om låsskruven lossas helt, kan
utbalanseringsfjädern på matningsaxeln lyfta upp spindelhylsan så mycket som
glappet i fininställningen tillåter, varvid inställningen på skalan går förlorad.
Kontroll bör tid efter annan göras att bordets styrlinjaler är rätt ansatta.
Den slid som inte användes bör vara fastlåst.
Arborrning:
Trots att stor omsorg läggs ned på att erhålla så litet kuggspel som möjligt mellan
kuggstång och matningsaxel, finns där alltid något glapp. Vid arborrning finns risken
att spindelhylsan rycks med nedåt av stålet, så långt glappet medger. Om stålets skär
lutar så, att ev. uppträdande axialkraft blir riktad uppåt, kan denna risk minskas.
Verktygsutdrivare:
Denna maskin är utrustad med automatisk verktygsutdrivare. Mellan spindelhylsans
nos och spindelhuset finns en spärr som gör att spindeln aldrig går upp i sitt absolut
översta läge. Genom att vika ut denna spärr samt med nedmatningshandtaget föra
spindelhylsan upp till översta läget stöter man ut verktyget. Genom hårt borrtryck och
värmeförändring i spindeln kan verktyget ha fastnat hårt i spindeln. I sådant läge
rekommenderar vi att utdrivningskil användes istället för den automatiska
verktygsutdrivaren.
OBS!
Tillse alltid att verktygens tunga är väl rengjord för att undvika onödigt
slitage på borrspindelns infästning samt undvika att verktyget fastnar i
spindeln.
10

GUARANTEE
This machine is guaranteed by us for one year, counted from date of invoice.
•Should during the guarantee period any part of the machine be proved defective in
material workmanship.
•We guarantee at our own descretion to supply free of charge a new part to repair
the defective part, provided that it is returned to our factory freight pre-paid.
•The purchaser or agent shall notify us in writing without delay, of any defects that
have appeared and shall give us every opportunity of inspecting and remedying
them.
•The purchaser or agent will not effect repair on-site, without first having consulted
us. Should such repair on-site be effected without previous acceptance from us,
this will be done at the purchasers or agents own risk and expence.
•We assume no liability for defects in the machine due to extraneous circumstances,
wear, lack of due care and attention or faulty handling, nor can we accept any
obligation whatsoever to provide compensation for other direct or indirect costs in
connection with cases covered by this guarantee.
Otherwise are Machinery Scandinavia AB General Conditions and Orgalime S 92
valid.
11

Instruction and Spare Parts List
This is your copy of the instructions and spare parts list for Drilling Machine. It has
been prepared for those using the machine or who are responsible for its maintenance
and service and should therefore be made readily available for all those concerned.
Read through the manual carefully before installing and starting up.
The machine is of simple design and robustly built, but we cannot guarantee perfect
function if it is incorrectly handled. It is therefore necessary to make yourself
thoroughly acquainted with the function and to carry out practical tests on the various
parts in the control system and the machine settings. Once these are mastered the
excellent properties of the machine can be fully utilized and the component parts will
give maximum service life.
Every machine is tested for accuracy and capacity at the factory. Experienced staff
check both the mechanical and electrical functions according to a standardized
programme, meaning that we can guarantee workmanship of the highest and most
consistent quality.
By following our directions and you own good judgement we are convinced that your
new machine will give every satisfaction. However, should any problems arise,
please do not hesitate to contact our dealer or us.
Safety regulations
Used correctly your machine is one of the best concerning design and safety.
However, any machine which is used incorrectly can be a safety risk. It is of vital
importance, that those who use the machine are informed how to handle it correctly.
They should read and understand these instructions as well as all plates available on
the machine. Omitment to follow the safety regulations might cause an accident.
Warning
•Using the machine incorrectly can cause serious accidents.
•The machine has to be installed, used and maintained correctly.
12

General safety regulations
All machines with rotating tools or details can cause accidents. It is therefor
important that you as an operator are aware of those risks for any accident and that
you avoid all possibilities for accidents.
•Always use such clothes and personal equipment so you cannot get caught by
rotating tools.
•Always use protective goggles if there exist a risk for chips or splashes from the
coolant. Follow local instructions if existing.
•Keep it clean around the machine to avoid to stumble against rotating tools.
•See to it that the work piece is securely fastened at the table. Never use your hand
to hold the work piece.
•See to it that the switch is in the 0 position when changing tools or when cleaning
the machine.
•Never brush away chips while the machine is operating.
•Use faultless tools and the correct speed and feed for the tool. Be sure that the tool
is the correct one for you operation.
•See to it that the drill head and the table are thoroughly damped before starting up
the machine.
Installation
•Avoid to install the machine in a humid, dirty or badly illuminated environment.
•Be sure that the machine possesses all necessary protections.
•Electric installations have to be executed by a qualified electrician.
•Be sure that the machine is staedly put up and positioned.
Using
•Never use the machine if it lacks necessary protections.
•Follow applicable regulations for use of machine regarding, personal protective
equipment.
•Do not operate the machine with loose clothes or juwelleries. Use hair-net if
necessary.
•Never strech yourself over the machine when it is running.
•Never leave the machine when running.
•Always stop the machine when not in use.
By service and maintenance
•See to that the current is disconnected.
•Always follow the instructions in this manual.
•Do not modify the machine without contacting our dealer.
13

INSTRUCTIONS FOR THE MACHINE
Cleaning:
All bright parts of the machine are treated with rust preventive. By removing this, be
careful not to use too strong cleaning compond. The paint might then get
damaged.
Installation:
The machine must be installed on a firm foundation. The baseplate must be levelled
with washers on the foundation bolts to prevent harmful stresses when the nuts are
tightened.
Lubrication:
All high-speed shafts and gears are journalled in bolt bearings or roller bearings, so
that the machine needs very little lubrication. Same is valid for the gear box of the
elevating drive. By removing the front cover on the gear box the main gear box and
the spindle are availble for lubrication of bearings and gears if necessary.
On machines equipped with power feed the worm gear operates in an oil bath. Oil,
about 0,4 l, is filled in a hole situated behind the feed drive shaft on the side of the
spindle housing. The oil lever is controlled in the oil gauge sight glass. The oil is
drained in the bottom of the feed gear box. A good branch gear box oil of 11oat 50o
should be used.
Please see separate oilrecommendation.
Connections to mains:
Remove the cover plate on the back side of the column. Connect line, earth and ZP
according to attached wiring diagram. Before putting back the cover plate, start the
machine in order to control the correct rotation of the spindle.
14

Starting up and operating:
All electrical functions are operated from the combined pressand turn switch on the
front of the drill head. As option the machine can be equipped with automatic
reversing device for tapping operations.
START DRILLING:
Turn the knob of the switch to the left to START.
The knob returns automatically to position 1.
Pull down the spindle by means of the feed lever.
START TAPPING:
Turn the knob of the switch to the right to START.
The knob returns automatically to position 1.
The automatic reversing is now engaged. See to it that the revolutions of the spindle
do not exceed 440 r/m. The desired depth is set by the adjustable depth stop. By
reaching the preset tapping depth the spindle changes direction of rotation.
If the machine is equipped with automatic reversing for tapping, does it not mean
that the machines can be used for continuous tapping during long periods of time.
The automatic reversing should only be used when performing tapping of a more
sporadic nature. By continuous tapping a reversing tap holder should be used.
STOP:
By repositioning the knob to 0 the machine comes to a standstill.
QUICK STOP:
Press the knob and the spindle stops rotating immediately.
In spite of the fact that the knob stands in position 1 it has to be turned to START to
engage the machine again.
WARNING:
By loosening the tool using the built in drill ejector, always see to it that the knob of
the red starting button is positioned at zero ( 0 ) in order to prevent the quill to
start rotating by mistake.
15

Spindle speed selection:
Is effected by the three knobs on the left side of the spindle housing according to the
plate situated under the knobs. Gear shifting may not take place while the machine is
running.
Elevating drive:
The machine is equipped with an elevating drive for the vertical movement of the
drill head. First loosen the two handles on the right hand side of the spindle housing,
clamping it to the column. The movement is actuated by means of a switch situated in
the front of the drill head. A built in friction clutch in the gear box of the elevating
device prevents damages in case the drill head moves against stop in either direction
or if it gets locked.
Power feed:
The selection of the four different feed rates is effected by means of the dial on the
front of the spindle housing.
NOTE!
The dial cannot be turned directly from the highest to the lowest feed or
vice versa, it is necessary to go step by step.
Selecting of feed rates can be made at lower speeds when the drill is running but not
under load. The desired drilling depth is set by the depth stop and scales on the front
side of the spindle housing. The engagement of the power feed is effected by moving
the dial to the right and then down as per instructions on the sign. By reaching the
preset drill depth the spindle returns automatically to its upper position and stops to
rotate.
NOTE!
Always see to it that the fine feed is disengaged before engaging the power
feed.
Fine feed:
The fine feed is connected and disconnected by the lever situated under the fine feed
wheel. In vertical position of the lever the fine feed is disconnected, and when in
horizontal position it is connected. After the operation has been finished always
disconnect the fine feed.
Locking the quill:
The drill is locked with the screw on the lower front of the quill housing.
( See further Milling ).
16

Milling:
The drill head can be swivelled through 45o vertically to either side on a graduated
scale.Provision is made for locking the head by three nuts, one of each side and one
beneath of the spindle housing.
The head is secured in the zero position by means of a fixed stop.
When milling, the quill should be firmly locked. Vibrations and strokes occur when
milling, therefore, the tool has to be firmly locked in order not to loosen from the
taper. To reduce the vibrations, we recommend the use of cutters with more than two
cutting edges, preferably spiral fluted, in order that at least one cutting edge is
working at all times. For the sake of stability, one should work with as short tools as
possible.
By setting a cutting according to the scale, one should not loosen the locking screw
more than necessary to be able to lower the quill. If the locking screw is loosened
completely, the return spring on the feed shaft can raise the quill as much as the play
in setting of fine feed will allow. Consequently, the setting on the scale is lost.
See to it that the slide bars of the table are correctly tightened. The slide not in use
should be locked.
Boring:
Despite the fact that great care is always devoted to get as minimal a play as possible
between the teeth of the rack and those on the feed shaft, there always exists a little
play. When boring there is a risk that the quill will be pulled down by the tool as far
as the play will allow. This risk can be reduced by having the cutting edge inclined,
so that any axial force that might occur will be directed upwards.
Automatic drill ejector:
This machine is equipped with automatic drill ejector. Between the nose of the quill
and the spindle house there is a pivoting finger stop which prevents the spindle to
reach its top position.
By swinging outward the pivoting finger stop away from the spindle and raising the
quill by means of the feed lever the tool get loose. In case of tight direct pressure and
change of heat in the spindle the tool might have got caught firmly in the spindle. In
such a case we recommend to use an ordinary drill ejector instead of the automatic
one.
NOTE!
Always see to it that the tongue of the tool is properly cleaned in order to
avoid unnecessary wear and tear in the holder of the quill.
17

GARANTIE
•Für einwandfreie Beschaffenheit der Machine leisten wir ein Jahr Garantie,
nachdem sie unser Werk verlassen hat.
•Sollte ein Teil innerhalb der Garantiezeit durch Material- oder Herstellungsfehler
nachseitlich unbrauchbar werden, liefern wir gratis ein neu oder reparieren den
alten Teil.
•Dieser Teil ist kostenlos an unser Werk zu senden. Für etwaige an der Maschine
durch äussere Beschädigung, Verschleiss, vernachlässigte Wartung oder falsche
Behandlung entstandenen Fehler besteht kein Garantieanspruch.
•Wir übernehmen auch keinerlei Entschädigungsverpflichtungen für sonstige
direkte oder indirekte Kosten im Zusammenhang mit einem Garantiefall.
•Der Käufer oder der Vertreter kann sich auf diesen Artikel nur berufen, wenn er
dem Verkäufer unverzüglich und schriftlich die aufgetretenen Mängel anzeigt. Er
muss diesem jede Möglichkeit geben, diese Mängel festzustellen und zu beseitigen.
•Der Käufer oder der Vertreter muss die Reparatur nicht am Aufstellungsort
machen, ohne der Verkäufer zu kontakten. Eine Reparatur ohne Gutheissung des
Verkäufers macht der Käufer oder der Vertreter auf eigene Gefahr und er
übernimmt auch die Kosten.
Im übrigen gelten Machinery Scandinavia AB Allgemeine Lieferbedingungen und
Orgalime S 92.
Bedienungsanleitung und Ersatzteilliste
(muss stets an der Maschine zugänglich sein)
Diese Bedienungsanleitung und Ersatzteilliste ist für den Bediener
der Maschine und den Servicemann ausgearbeitet.
Bevor die Maschine in Betrieb genommen wird, muss diese Bedienungsanleitung
ausführlich gelesen werden. Die Maschine ist robust und einfach gebaut, es kann
jedoch nur eine perfekte Funktion garantiert werden, wenn die
Bedienungsvorschriften beachtet werden.
Jede Maschine wird im Werk auf Genauigkeit und Kapazität auch bezüglich der
elektrischen Einrichtung geprüft und abgenommen. Sollten dennoch bei
Inbetriebnahme Unklarheiten sein, müssen Sie sich mit Ihrem Wiederverkäufer oder
mit uns in Verbindung setzen.
18

Sicherheitsvorschriften
Bei der richtigen Anwendung dieser Maschine ist jegliche Sicherheit gewährleistet.
Bei Bedienungsfehlern, besteht immer ein Risiko für Verletzungsgefahr des
Bedieners. Wesentlich ist auch, dass die Schilder an der Maschinen für die
notwendigen Anwendungsbereiche gelesen werden.
Warnung
•Bei Falschanvendung dieser Maschine kann sich der Bediener gefährlich verletzen.
•Die Maschine muss richtig installiert und unterhalten werden.
Allgemeine Sicherheitsvorschriften
Technische Änderungen oder Ergänzungen an der Maschine sind nur nach
Rücksprache mit dem Hersteller gestattet. Alle Maschinen mit rotierenden
Werkzeugen sind immer gefährlich für den Bediener deshalb soll dieser stets
versuchen kein Risiko einzugehen um evtl. Unfälle zu vermeiden.
•Verwende Arbeitskleidung und persönliche Schutzausrüstung, welche sich nicht in
rotierenden Werkzeugen verfangen kann. Falls erforderlich sollten Schutzbrillen
getragen werden.
•Halte Deinen Arbeitsplatz um die Maschine sauber damit Sie nicht mit dem
rotierenden Werkzeug in Berührung kommen.
•Beachte dass das Werkstück ordentlich an der Maschine festspannt ist. Halte das
Werkstück nie mit der Hand fest.
•Beachte stets bei Werkzeug-, Werkstückwechsel oder Maschinenreinigung, dass
der Strom abgeschaltet ist und die Maschine steht. Niemals während dem Lauf der
Maschine Späne mit einem Handbesen oder dergleichen abkehren.
•Verwende stets die richtigen Werkzeuge für die entsprechende Arbeit und den
richtigen Vorschub.
•Beachte dass der Bohrkopf sowie auch der Tisch entsprechend geklemmt ist,
bevor die Maschinenarbeit beginnt.
19

Installationsvorschrift
•Es soll vermieden werden dass die Maschinen in feuchten, schmutzigen und
schlecht beleuchteten Räumen aufgestellt werden.
•Die Schutzvorschriften müssen beachtet werden.
•Der elektrische Anschluss muss von einem Fachmann durchgeführt werden.
•Die Maschine muss mit einer Maschinen-Wasserwaage ordentlich ausgerichtet
sein.
Folgende Punkte sind zu besonders zu beachten
•Die vorhandenen Schutzeinrichtungen mitverwenden.
•Die persönlich erforderliche Schutzeinrichtung (Schutzgläser) etc. verwenden.
•Nicht mit lose hängender Kleidung langen Haaren und jeglichen Schmuck
arbeiten. (Haarnetz oder Mütze verwenden).
•Nicht über Maschine beugen wenn diese in Betreib ist.
•Die Maschine niemals verlassen ohne abzuschalten.
•Bei Nichtanwendung der Maschine immer ausschalten.
•Bei Reparaturen beachte immer den Strom ausschalten und die Maschine
spannungsfrei machen.
•Folge stets den instruktionen dieser Bedienungsanleitung.
•Technische Änderungen oder Ergänzungen an der Maschine sind nur nach
Rücksprache mit dem Hersteller gestattet.
20
This manual suits for next models
1
Table of contents
Languages:
Other STRANDS Drill manuals
