2
CONTENTS
SAFETY WARNINGS AND GUIDELINES.......................................................................................................................................4
INTRODUCTION................................................................................................................................................................................................5
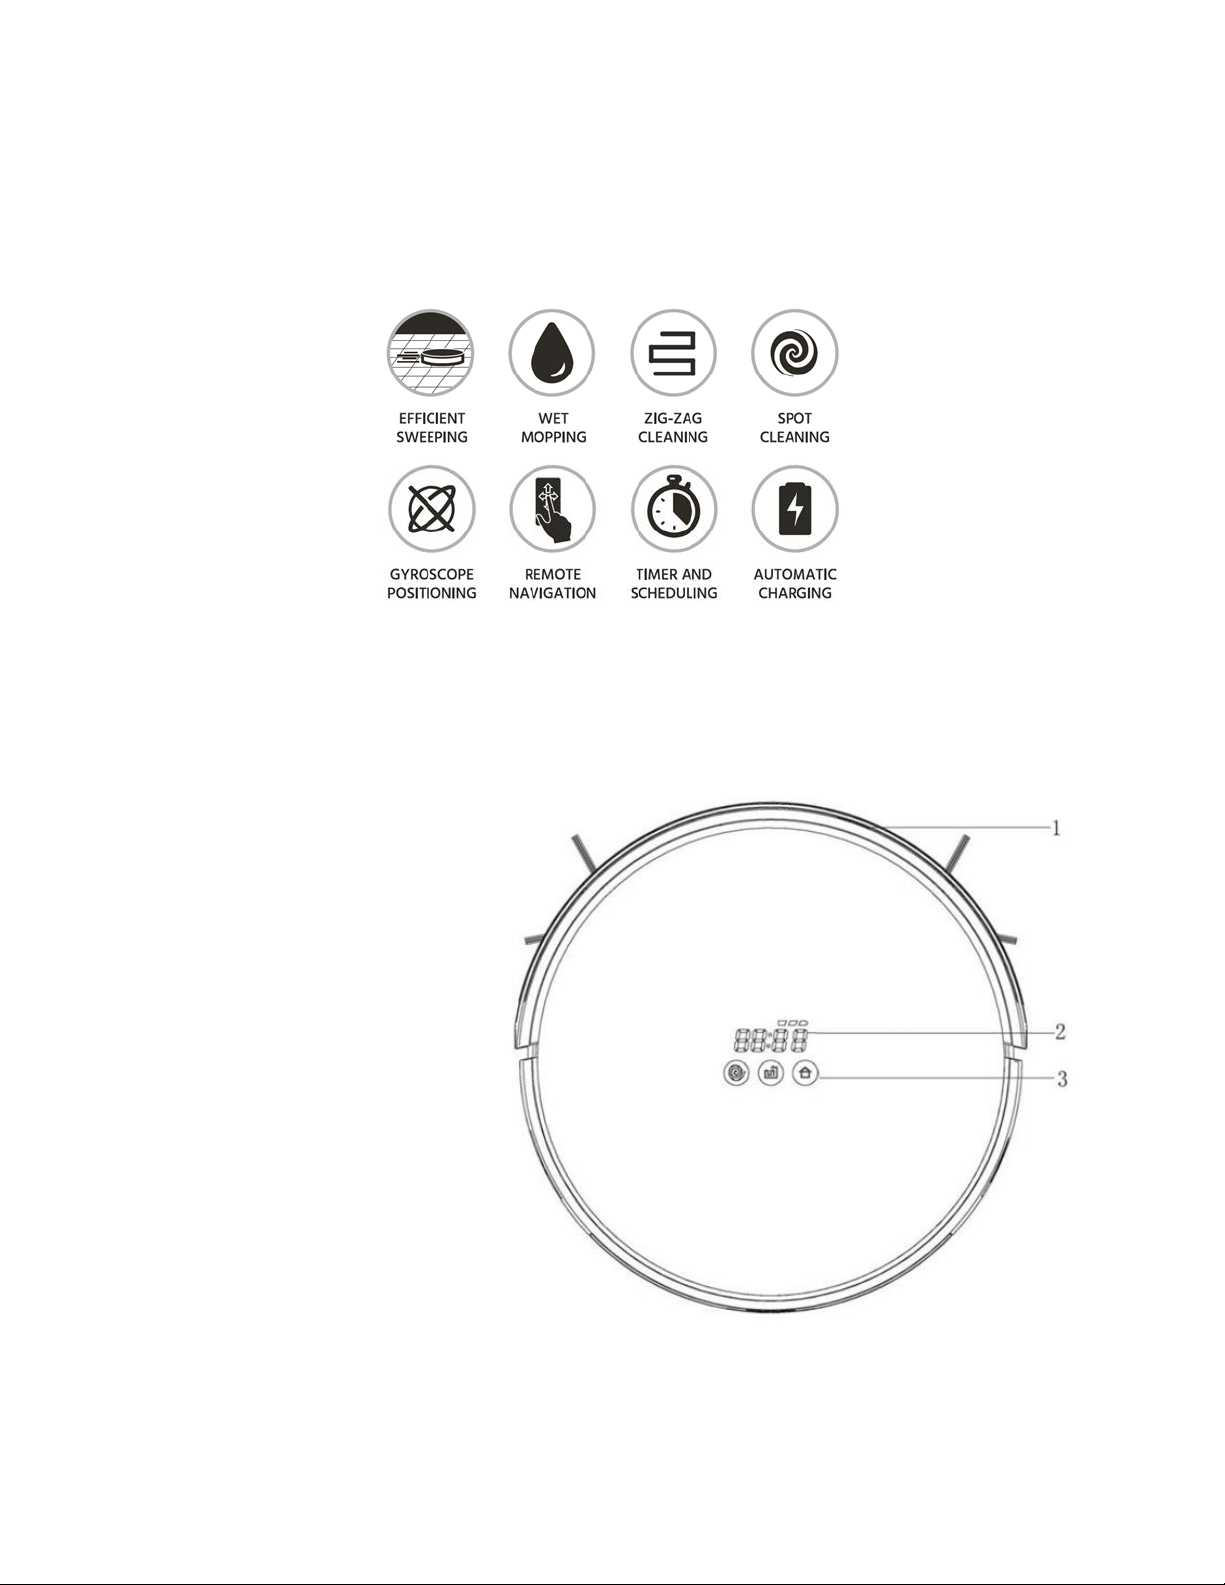
FEATURES..............................................................................................................................................................................................................5
CUSTOMER SERVICE....................................................................................................................................................................................6
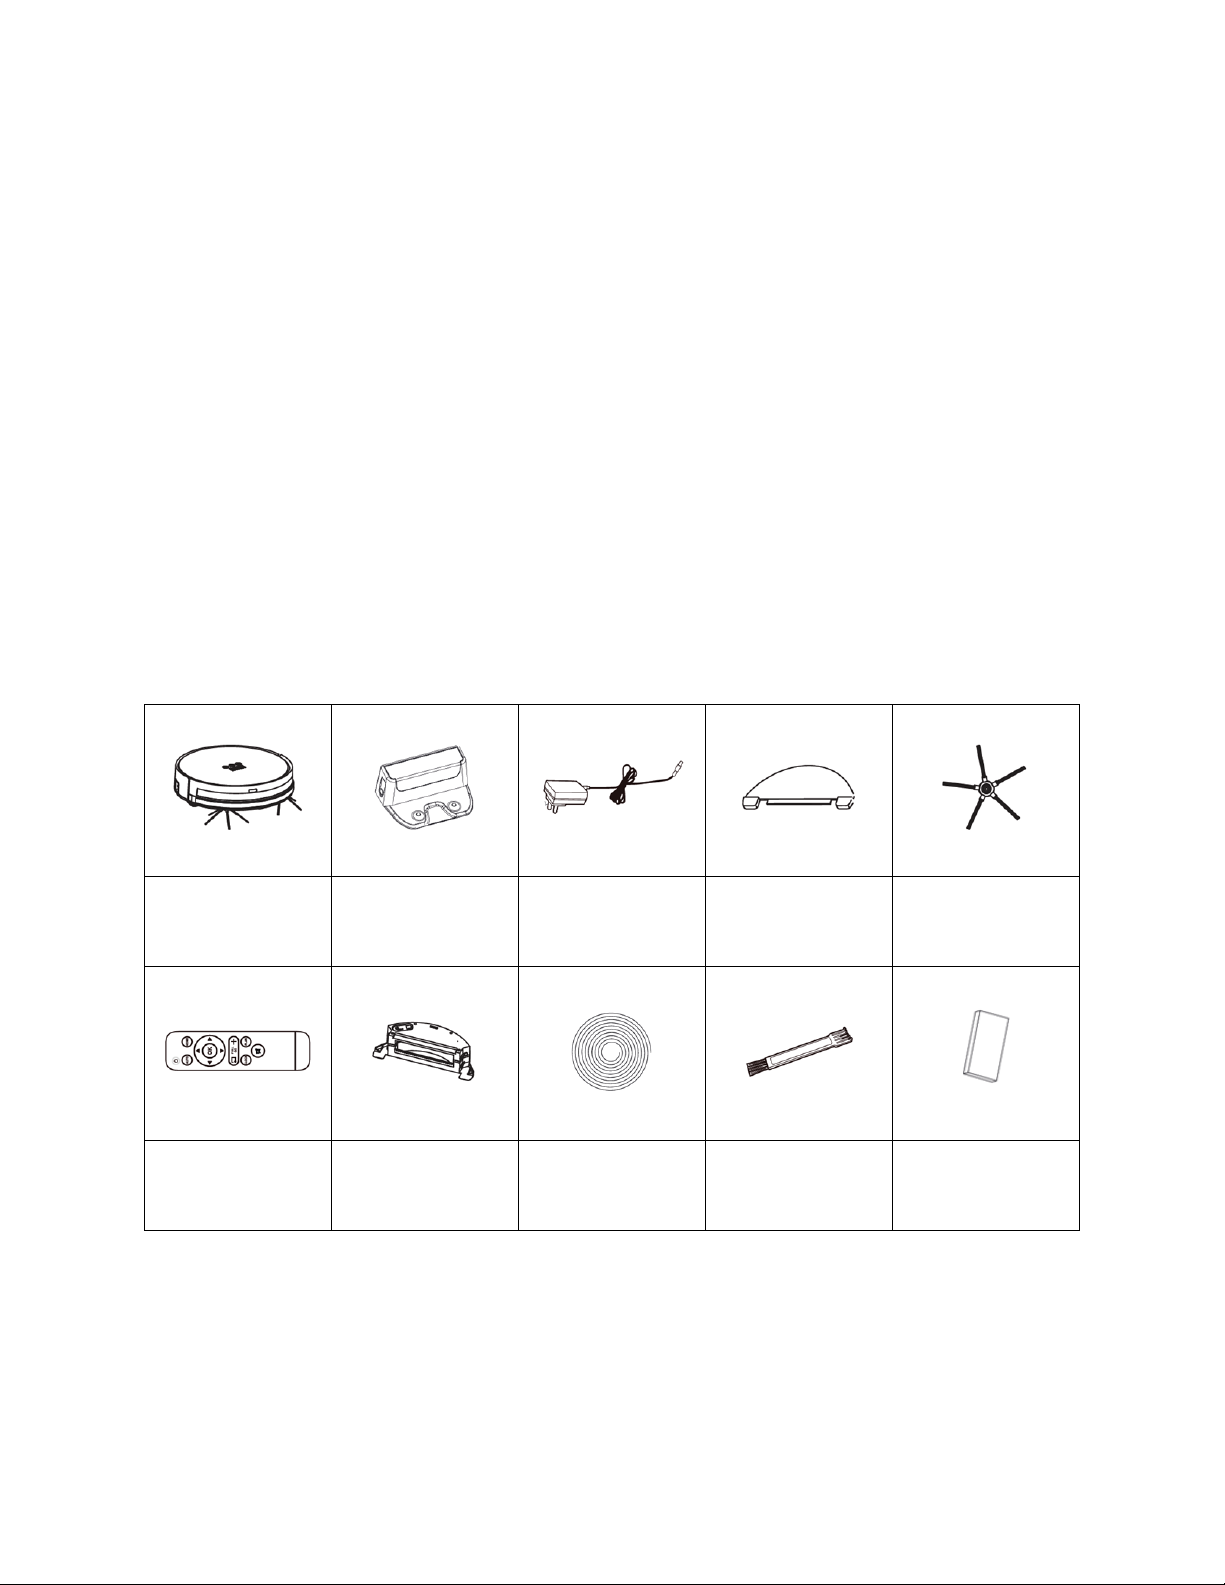
PACKAGE CONTENTS.................................................................................................................................................................................6
APPLICATIONS.................................................................................................................................................................................................. 7
PRODUCT OVERVIEW................................................................................................................................................................................. 7
Vacuum Top View................................................................................................................................................................................... 7
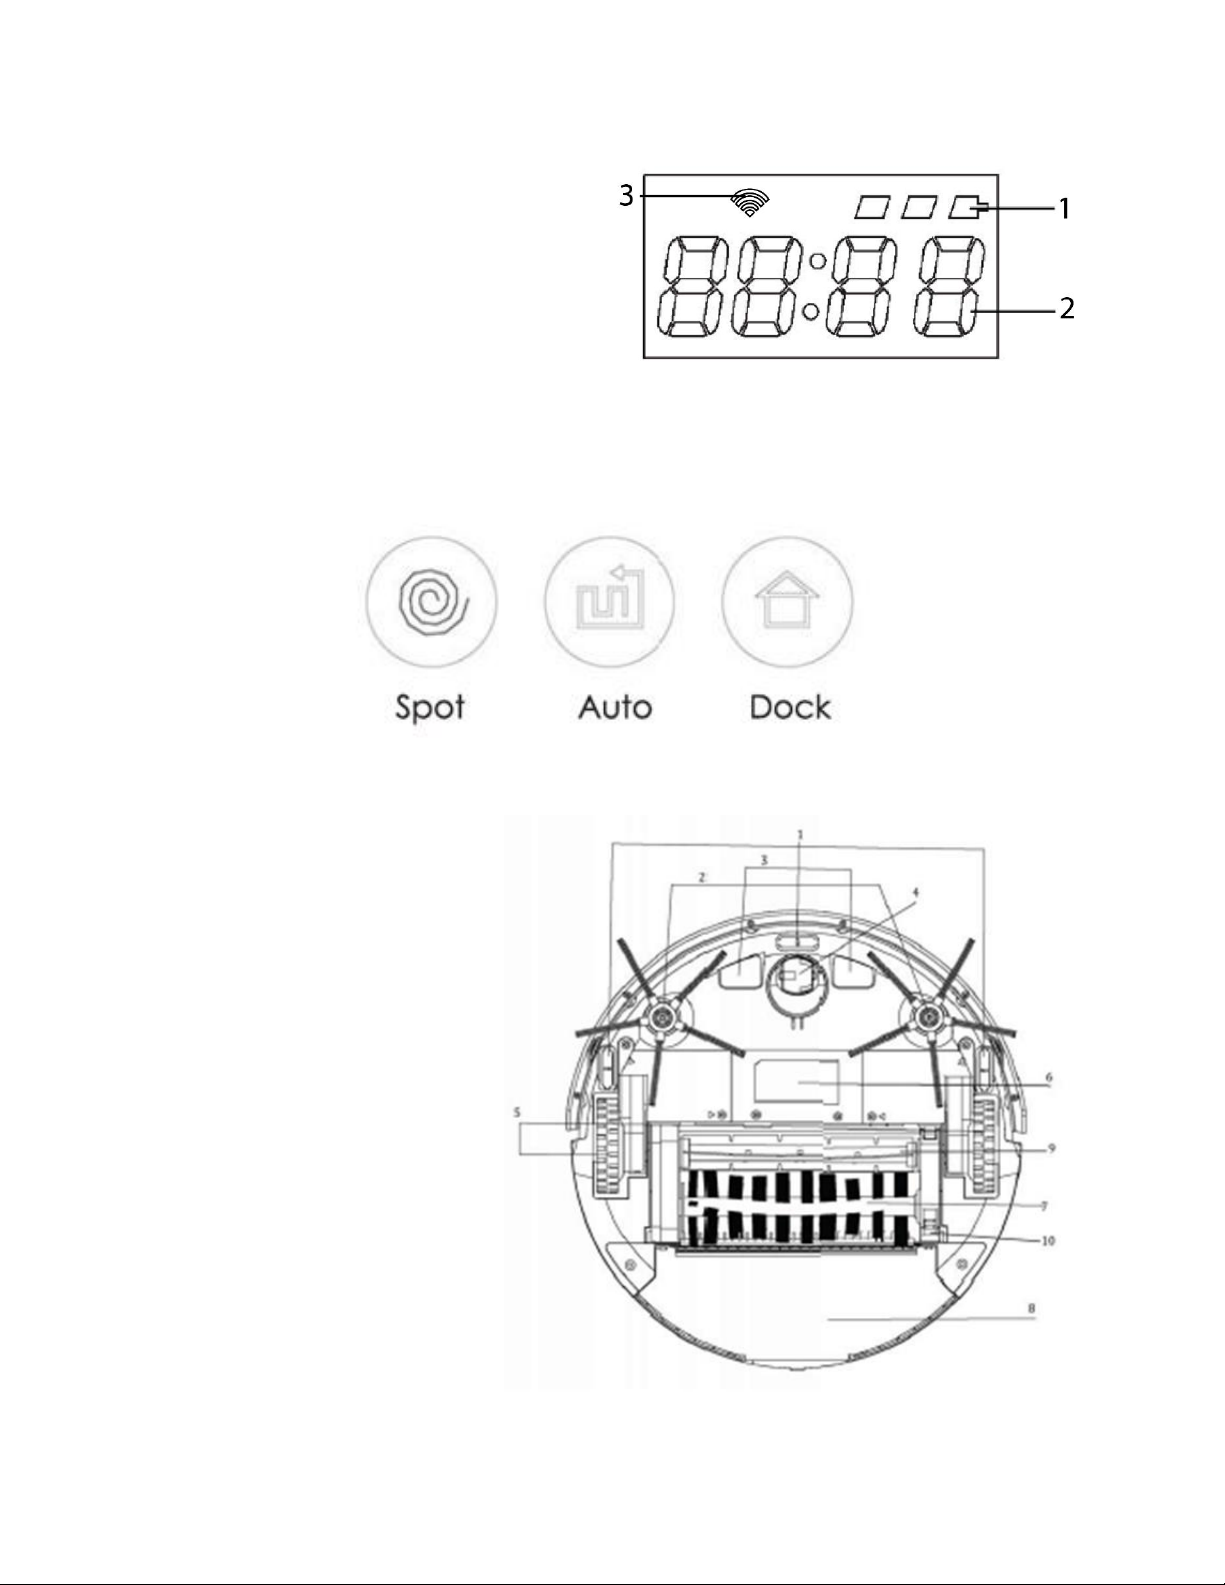
LED Display....................................................................................................................................................................................................8
Control Buttons.........................................................................................................................................................................................8
Vacuum Bottom View.........................................................................................................................................................................8
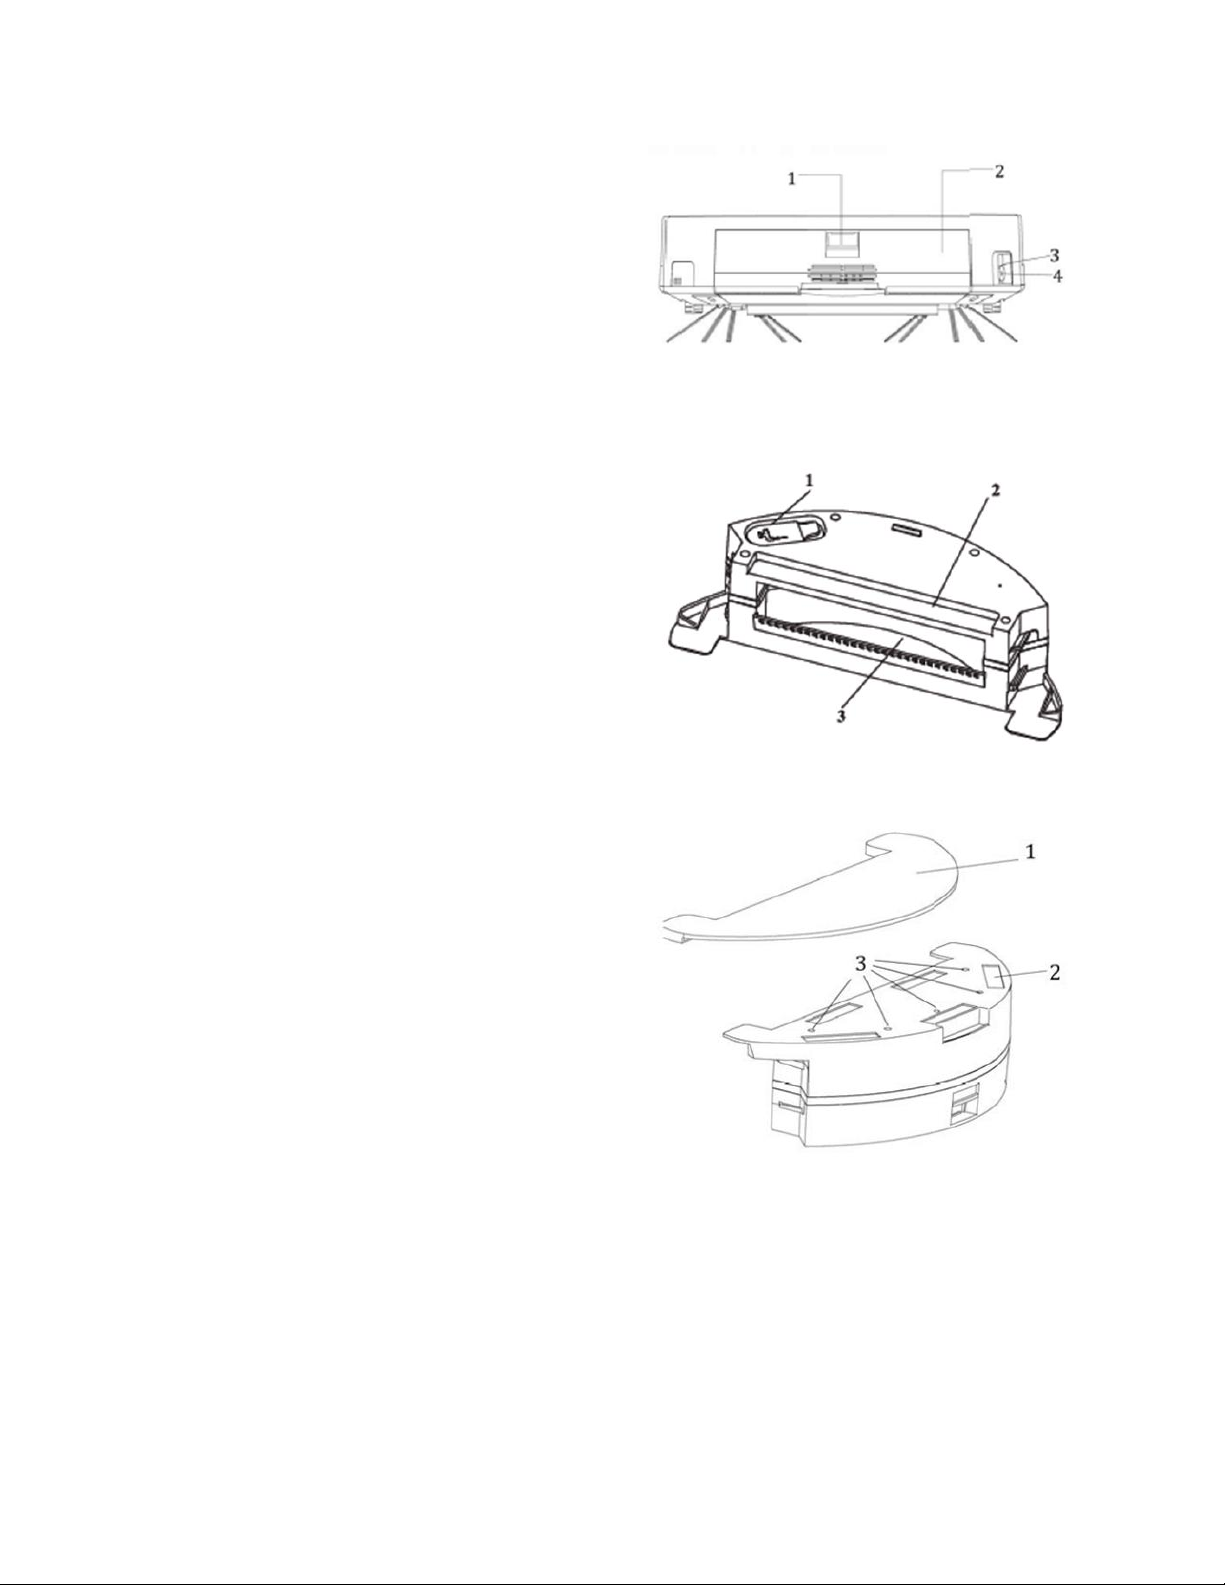
Vacuum Rear View .................................................................................................................................................................................9
Water Tank Side/Top View.............................................................................................................................................................9
Water Tank Bottom View.................................................................................................................................................................9
Dust Box without Water Tank....................................................................................................................................................10
Charging Dock..........................................................................................................................................................................................10
Remote Control........................................................................................................................................................................................11
Magnetic Strip...........................................................................................................................................................................................11
CHARGING..........................................................................................................................................................................................................12
Manual Charging ....................................................................................................................................................................................12
Automatic Charging............................................................................................................................................................................ 13
SETTING THE TIME.......................................................................................................................................................................................14
SCHEDULING....................................................................................................................................................................................................14
Time Mode...................................................................................................................................................................................................14
Full Go Mode .............................................................................................................................................................................................15