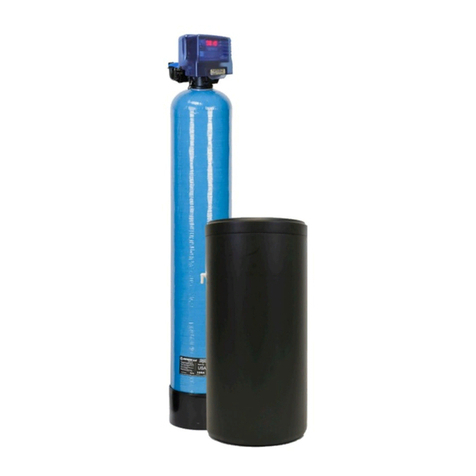
STRATOS 15 Installation manual

Household
Water Softener STRATOS Series
INSTALLATION, START-UP
AND MAINTENANCE MANUAL


MAIN FEATURES OF THE STRATOS SERIES
Meter delayed or immediate
Metered regenerations can be programmed.
Mixing valve
Allows the adjustment of the residual hardness degree.
Built-in By-pass
The system can be isolated from the installation.
Transformer
External transformer.
Multilingual programmer
The user can select the following languages: English, French and Spanish .
Certified product
Ocial certicates.
Easy salt refilling
Easy water softener salt relling.
ESP
FRA
ENG
Optimized regeneration
The regeneration process has been adjusted in order
to reduce salt and water consumption (up to 50% of
salt and a 40% of water).
Functional and smart design
It will t in your home like any other electrical
appliance.
Holiday Mode
It allows the user to program low consumption
periods in which the system will carry out small
washes.
Adjustable regenerating degree
Several regeneration degrees can be adjusted according to the
hardness of water to be treated and the desired eciency.
State-of-the-art display
Interactive display with multicolour icons.
PLEASE KEEP THIS MANUAL, SINCE IT INCLUDES THE SERVICE BOOK AND THE
WARRANTY, IN ORDER TO BE ABLE TO OFFER YOU A BETTER AFTER-SALES SERVICE.


1. Presentation
5
01. PRESENTATION
01.1 Water Softener Safety
01.2 What To Do Before
02. INTRODUCTION
02.1 What Is Hardness?
02.2 How Does Your System Work?
02.3 Regeneration of the System
02.4 Regeneration Degree and Capacity
02.5 Working flows
02.6 Hardness Leakage
02.7 Residual hardness
02.8 Sodium Increase
03. TECHNICAL SPECIFICATIONS
04. UNPACKING AND VERIFICATION OF THE CONTENTS
05. PREVIOUS WARNINGS
05.1 Conditions for the proper operation of the system
05.2 Installation of the system
05.3 Start-up and maintenance
06. INSTALLATION OF THE SYSTEM
06.1 Required Tools and Pieces
06.2 Step-by-Step Installation
06.3 STRATOS Programmer
06.4 How to Program the System
07. START-UP
07.1 Hydraulic Start-up
07.2 Residual Hardness Regulation
07.3 How to check for Hardness
08. MAINTENANCE / HYGIENISATION
09. GUIDE FOR THE IDENTIFICATION AND SOLUTION OF PROBLEMS
10. MAINTENANCE SERVICE BOOK
11. NOTES
12. EC DECLARATION
13. GUARANTEE
Page
6
6
6
7
7
7
8
9
9
9
9
10
11
12
12
12
13
14
14
14
14
16
17
19
19
20
21
21
23
24
26
27
27
Content

1. Presentation
6
1. PRESENTATION
The system you have just bought is a state-of-the-art equip-
ment, able to deliver softened water to your home.
Developed and designed by IONFILTER, a leading company
from the industry with more than 20 years of experience; this
equipment will deliver softened water without scaling salts,
thus protecting your water supplies, avoiding the obstruction
of all pipes and allowing you to enjoy the benefits of softened
water.
The quality of the water in our environment is getting worse
every day, leading to an increase in water hardness, which
causes problems in pipes and affects the proper operation of
appliances using water, by increasing the maintenance and
reducing their service life.
The reality of this is what has driven us to design this series of
domestic water softeners, in order to provide you with a water
of the highest quality.
Your STRATOS H.E. water softener will provide you and your
family the benefits and advantages outlined below:
- ENERGY SAVING
- Greater wellness feeling.
- Soft and smooth skin.
- Increases the service life of electrical appliances and
heaters.
- ECONOMIC SAVING: it reduces the consumption of
soap, fabric softeners and chemical products.
- Low maintenance cost.
- Operation is completely automatic.
It is very important that you read and keep this manual before
installation and start-up of the system. If you have any questions
regarding the use or maintenance of this system, please contact the
Technical Assistance Service (TAS) of your distributor.
1.1 Safety of the Water Softener
Your safety and that of others is very important. We have inclu-
ded some safety messages in this manual.
This is the symbol for a safety alert. This symbol will
warn you about possible situations in which you or
those around you could be at risk.
All safety messages will have the alert symbol or the words
‘DANGER’ or ‘WARNING’.
USE WITHIN THIS MANUAL
‘DANGER’
Serious or life-threatening risk if the following instructions are not im-
mediately followed.
‘WARNING’
All safety messages will inform about the possible danger, how to re-
duce the injury risk and what might happen if the instructions are not
followed.
1.2 What To Do Before
See section ‘Previous warnings’ before installing the water
softener.
Carefully follow the instructions for the installation.
(Warranty may be considered void, should the installation be
faulty).
Please read the entire manual before undertaking installation.
Then, collect all necessary materials and tools for the insta-
llation.
Check the plumbing installations and the electric connectors.
All installations must be done according to the law in force in
each region or country.
Please be careful when handling the water softener. Do not
knock it over, let go of it or place it onto sharp objects.
Under no circumstances should the softener be installed on
the outside, since it must be protected against sunlight and
bad weather conditions.

1. Presentation
7
2. INTRODUCTION
These systems come with a residual hardness regulator as
standard, which allows selecting the appropriate hardness for
your home.
Its friendly-use electronic programmer will allow you to put the
system into operation in an easy and fast manner.
2.1 What Is Hardness?
Hardness is the quantity of scaling salts present in water,
which are mainly composed of low solubility salts of calcium
and magnesium. The main salts causing hardness are listed
below:
Calcium bicarbonate:
Calcium chloride:
Calcium sulphate:
Magnesium bicarbonate:
Magnesium chloride:
Magnesium sulphate:
Ca(CO3H)2
CaCl2
CaSO4
Mg(CO3H)2
MgCl2
MgSO4
These salts, due to its chemical properties, have a tenden-
cy to precipitate, producing scale on pipes and obstructing
them as they accumulate. In the same way, hardness has a
high tendency to scale on electrical resistors from heaters
and to precipitate into heaters when temperature increases.
The combination of hard minerals and soap produces a soap
curdling. This soap curdling reduces the cleansing properties
of soap. Hard minerals precipitation builds a layer on cooking
utensils, connections and plumbing fixtures. It may even alter
the taste of food.
MAIN PROBLEMS
Precipitation on pipes, fixtures and appliances.
Precipitation on electrical resistors, increase on energy
consumption due to the generated isolation.
Higher consumption of soap and chemical products.
Reduction of the electrical appliances’ service life and
greater maintenance.
All these problems are solved when using a water softener,
since water obtained after being treated by the system is
completely free of scaling salts.
For the most part of Europe, hardness is indicated in French
hydrometric degrees, but there are also other measuring
units, according to each region.
Below are the most usual equivalences.
UNITS
1 ppm of Calcium
1 ppm of Magnesium
1 ppm of CaCO3
1º French (ºHF)
1º German (ºd)
1º English (ºe)
1 mmol/L
1 mval/L=meq/L
ppm of CaCO3
2,5
4,13
1
10
17,8
14,3
100
50
º French
0.25
0.413
0.1
1
1.78
1.43
10
5
2.2 How Does Your System Work?
Water softening is carried out by means of an ion exchange
process. On this purpose, the system uses resins with the
chemical capacity of capturing Calcium (Ca) and Magne-
sium (Mg) ions and removing them from water.
When Calcium and Magnesium ions are captured by the
resin, two Sodium (Na) ions are released which, due to its
chemical properties, produce salts with a higher solubility
avoiding all hardness-related problems.
Therefore, when water gets softened, its sodium level in-
creases.
Further information on this procedure can be found in ‘Sec-
tion 2.8’.
ION EXCHANGE RESINS:
They are synthetic compounds, usually with an spherical
shape, able to capture certain chemical substances pre-
sent in water, which then exchanges for other substances.
Water softening uses strong cation resins, which are com-
posed of styrene copolymers and divinylbenzene with a
sulphur base.

2. Introduction
8
The exchange resin charge is inside the column of the water
softener and takes up a significant part of the total volume
(between 60 and 75%, according to each model). A part of
the column must remain empty, in order to allow for a proper
regeneration of the resin bed.
During the treatment process, water goes into the multi-way
valve through the inlet connection, flows towards the upper
part of the tank through the top nozzle and goes downwards
through the bed resin, thus producing the ion exchange.
Treated water is collected by the bottom nozzle and led to
the multi-way valve through the inner tube of the tank. Treated
water is sent for consumption using the outlet connection. At
this point, the system has a treated water meter in order to
measure the water volume.
2.3 Regeneration of the System
The quantity of calcium and magnesium ions that the resin
may retain is limited; therefore, the water volume a water sof-
tener can treat is limited as well.
The system must periodically carry out a process known as
regeneration, which allows the resin to recharge with sodium
ions, so it can continue softening water.
In STRATOS systems, the regeneration process starts auto-
matically when the configured water volume is achieved. The
programmer allows the user to set several regeneration start
modes (see ‘Section 6.3’ to obtain further information how to
operate the programmer).
The regeneration of a softener system is composed of several
stages, which are described below:
BACKWASH:
Water comes into the column through the lower manifold,
washing the suspended mater and fluffing the resin bed up,
thus facilitating the subsequent regeneration process.
Water
outlet to
service
Inlet from
supply network
Water
outlet
to drain
BRINE ASPIRATION:
By means of an aspiration process relying on a Venturi effect,
the system sucks the brine solution, which has previously
been prepared in the regenerating tank. This brine solution is
introduced downwards in the softening column, gets in con-
tact with the ion exchange resin and regenerates it.
Salida
de agua a
servicio
Salida
de la solución de
salmuera hacia
desagüe
Entrada
de agua de red
Succión
de salmuera por
efecto venturi
SLOW WASH:
In this stage the brine solution, which has been previously
sucked up, goes through the resin bed. Throughout this pro-
cess, the contact between the brine and the resin is complete,
which optimizes the regeneration.
Water
outlet to
service
Brine
solution outlet
towards drain
Inlet from
supply network
Brine
suction by a
Venturi effect
QUICK WASH:
Washing water goes downwards through the resin bed, get-
ting it settled and ensuring the complete removal of the brine,
which might remain inside the bottle.
Tap water inlet
Water outlet to
service
Brine removal,
quick wash

2. Introduction
8
9
TANK FILLING:
The necessary water volume is sent to the brine tank in order
to prepare the same amount of consumed brine for the next
regeneration process. This process is fully automatic, thus it
is not necessary to add any water to the brine tank (except
during the start-up, as indicated in ‘Section 7’).
NOTE: During the regeneration process, the systems may allow
untreated water to go through, in order to guarantee the water
supply.
2.4 Regeneration Degree and Capacity
The exchange capacity is the quantity of hardness that a cer-
tain resin volume can retain before getting exhausted. This va-
lue is usually expressed as ºHFxm3/litre.
The higher the resin volume of the system is, the higher will be
the quantity of hardness that can be retained before the resin
gets exhausted. It is very important to choose the appropriate
system for each type of installation.
Depending on the quantity of sodium chloride used to rege-
nerate each litre of resin, the exchange capacity of the resin
may change.
STRATOS softeners have six different regeneration degrees,
depending on the conditions in which the system must work
(for further information, please read ‘Section 3’).
Systems are supplied as a standard with a regenerating de-
gree of 80g NaCl/litre of resin, which is appropriate to work up
to the maximum hardness indicated below:
MODEL
STRATOS 15
STRATOS 25
Salt consumption
1.2 Kg (80g/lt)
2 Kg (80g/lt)
Maximum hardness
45ºHF
70ºHF
2.5 Working Flows
Water softeners working by means of an ion exchange must
respect certain contact periods between water to be treated
and resin, in order to ensure that the softening process is ca-
rried out properly. For STRATOS softeners the working ranges
indicated below must be respected:
Minimum flow (litres/hour): Resin volume x 4
Maximum flow (litres/hour): Resin volume x 40
Should working ranges be outside the recommended ranges,
the proper operation of the system could be affected (exces-
sive loss of charge, hardness leakage, etc.)
For further information on the minimum and maximum flows for
each softener, please check the general specifications table.
2.6 Hardness Leakage
The ion exchange process on which water softening is based
may be affected by different factors, which can reduce its effi-
ciency, thus causing a certain level of hardness leakage.
ELEVADA CONCENTRACIÓN DE SODIO EN EL AGUA A TRATAR
It may interfere in the exchange process.
OVERFLOW
Since there is not enough contact time, some of the hardness
may not be retained by the resin.
REGENERATION DEGREE
The higher the regeneration level is, the lower is the risk of a
hardness leakage.
2.7 Residual Hardness
Depending on the final use of treated water, it may be neces-
sary to obtain fully softened water or, on the contrary, it may be
desirable to leave some residual hardness.
These systems have been designed to supply fully softened
water, but the control valve integrates a residual hardness
mixer, which allows for the regulation of the desired hardness
degree in treated water (see ‘Section 7’).
Note: In water for human consumption it is recommended
to have a residual hardness between 5 and 8 ºHF if pipes
are made of copper, and between 8 and 10 ºHF if they
are made of iron (for the latter, it is also recommended to
install a silicopolyphosphates filter afterwards).

10
2. Introduction
10
2.8 Sodium Increase
Most of the sodium we consume on a daily basis comes from
food, specially processed food, since salt is an excellent pre-
servative and is used as an additive in prepared products.
Sodium consumption through the water we drink is rather low
when compared with that obtained from food.
In spite of this, it is very important to bear in mind, as mentio-
ned above, that water softeners increase the sodium concen-
tration present in treated water when compared to the con-
centration measured on the inlet.
WARNING: The maximum recommended sodium level in water for
human consumption is of 200 ppm. Depending on the sodium concen-
tration and the hardness of water to be treated, it is possible that softe-
ned water contains a higher concentration of sodium than recommended.
Should this be the case, or if water is to be consumed by persons who
must follow a low sodium diet, it is recommended to install a household
reverse osmosis system in order to be able to drink the water.
The table below can be used as a guideline to know the
increase on sodium concentration in treated water depending
on the inlet hardness:
INITIAL HARDNESS
IN WATER ºHF)
10
15
25
30
35
40
45
50
60
SODIUM ADDED BY THE SOFTE-
NER (mgNa/litre)
43
65
108
130
152
173
195
217
260

3. Technical Specifications
10
11
10
Model
STRATOS 15 STRATOS 25
Code
795113 795224
Resin volume
15 Litres 25 Litres
Working flow
1,2 1.8
Maximum flow
1,0 1.6
Regeneration 80 g/L
Salt/regeneration 1.2 Kg 2.0 Kg
Exchange capacity 61ºHFxm3102ºHFxm3
Backwash 3 min 6 min
Counterflow 3.3 min 2.7 min
Quick rinsing 3 min 6 min
Brine Aspiration 40 min 49 min
Regeneration 120 g/L
Salt/regeneration 1.8 Kg 3.0 Kg
Exchange capacity 75ºHFxm3122ºHFxm3
Backwash 3 min 6 min
Counterflow 5 min 4.2 min
Quick rinsing 3 min 6 min
Brine Aspiration 43 min 52 min
Regeneration*
Salt/regeneration *200g/L: 3,0 Kg *250g/L: 6,25 Kg
Exchange capacity 90ºHFxm3175ºHFxm3
Backwash 3 min 6 min
Counterflow 8,3 min 8,7 min
Quick rinsing 3 min 6 min
Brine Aspiration 49 min 64 min
Dimensions
Height: A900 1130
Width: B335 335
Depth: C570 570
3. TECHNICAL DATA FOR THE STRATOS MODEL
Inlet
hardness
15ºHF
20ºHF
25ºHF
30ºHF
35ºHF
40ºHF
45ºHF
50ºHF
55ºHF
60ºHF
(61ºHFxm³)
4.06 m³
3.05 m³
2.44 m³
2.03 m³
1.74 m³
1.53 m³
1.36 m³
1.22 m³
1.11 m³
1.02 m³
STRATOS 25 (795224)
(122ºHFxm³)
8.13 m³
6.10 m³
4.88 m³
4.06 m³
3.49 m³
3.05 m³
2.71 m³
2.44 m³
2.22 m³
2.03 m³
(175ºHFxm³)
11.66 m³
8.75 m³
7.00 m³
5.83 m³
5.00 m³
4.38 m³
3.89 m³
3.50 m³
3.18 m³
2.92 m³
(102ºHFxm³)
6.80 m³
5.10 m³
4.08 m³
3.40 m³
2.91 m³
2.55 m³
2.27 m³
2.04 m³
1.85 m³
1.70 m³
(75ºHFxm³)
5.00 m³
3.55 m³
3.00 m³
2.50 m³
2.14 m³
1.88 m³
1.67 m³
1.50 m³
1.36 m³
1.25 m³
(90ºHFxm³)
6.00 m³
4.50 m³
3.60 m³
3.00 m³
2.57 m³
2.25 m³
2.00 m³
1.80 m³
1.64 m³
1.50 m³
VOLUME OF TREATED WATER ACCORDING TO INLET HARDNESS
STRATOS 15 (795113)
Inlet
hardness
15ºHF
20ºHF
25ºHF
30ºHF
35ºHF
40ºHF
45ºHF
50ºHF
55ºHF
60ºHF

12
4. Unpacking and verification of the contents
12
4. UNPACKING AND VERIFICATION OF THE
CONTENTS
It is important that prior to installing and starting the system
you check the received materials, with the aim of guarantee-
ing that it has not been damaged during transport.
Any claims for damages during transport must be presen-
ted together with the delivery note or invoice to the distri-
butor, including the name of the carrier, within a period of
24 hours following the reception of goods.
All systems are supplied fully assembled and are composed
of the elements below:
• Metered STRATOS H.E. valve. It is fully automatic and made
of Noryl. It has a built-in isolation by-pass and a mixing valve
for residual hardness.
• Bottle containing resin made of reinforced polyethylene with
glass fibre.
• The strong cation ion exchange resin, specially made for
softening, is supplied inside the bottle.
• Compact STRATOS cabinet, made of plastic, which can
contain enough salt for several regenerations.
• Brine suction system.
• Packaging and protections, including a pressurised air ba-
lloon to prevent the bottle from moving.
Before starting the installation of the system, please read this
manual carefully.
The air balloon must be removed before starting the installation.
The packaging materials can be recycled and must be thrown
away in the appropriate selective recycling bins or the specific
centre for the Collection of waste material.
The machine that you have acquired has been designed and
manufactured with high quality materials and components
that can be recycled and reused. This product must not be
thrown away into the usual urban rubbish bins. When you
want to throw the machine away, it must be taken to a specific
local centre for the collection of materials, stating that it has
circuits, and electric and electronic components, as well as
ion exchange resin.
In order to obtain more information about how to dispose of
your electrical and electronic machine once they have fulfilled
their use, contact the management of urban waste service or
the establishment in which you acquired the system.
The proper collection and treatment of the machines that can
no longer be used contributes to the preservation of natural
resources and also to avoiding potential public health risks.
5. PREVIOUS WARNINGS
STRATOS water treatment systems ARE NOT POTABLE WATER
SYSTEMS.
Should the water to be treated not come from a public water su-
pply, that is, from an unknown source, a physical-chemical and
bacterial analysis of the water shall be necessary, with the aim of ensu-
ring its proper purification applying the proper techniques and systems
appropriate to each case, PRIOR TO THE INSTALLATION of the system.
Contact your distributor in order to obtain advice about the most
appropriate treatment for you.
5.1 Conditions for the proper
operation of the system
• Do not use hot water in the system (T<36ºC).
• The room temperature must be between 4ºC and 45ºC.
• The system should be installed in a dry environment, free of
acid vapours. Otherwise, please ensure a proper ventilation.
• A minimum pressure of 2.5 bars must be ensured. Should
this minimum pressure not be available, a pressure system
shall be installed.

5. Previous warnings
12
13
12
• If inlet pressure is higher than 5.5 bars, a pressure regulator
must be installed.
• Water to be treated must be properly filtered, therefore, it is
recommended to install a pre-filter to guarantee the removal
of suspended particles, which may be swept along by inlet
water. It is recommended to use FILTERMAX self-cleaning
filters. Please contact your distributor for further information.
Failure to install an appropriate filter would result in particles obs-
tructing the inner holes or injectors of the system, thus affecting its
proper operation. .
5.2 Installation of the system
•If the water softener must treat all the water supply of your
home, connect it to the general supply pipe before connec-
ting the rest of pipes, except for pipes supplying the outside.
Taps located outside the house must supply hard water. Due
to the sodium increase in softened water, it is not recommen-
ded to use it for watering, since it can negatively affect the
growth of plants and vegetables.
• Should it be necessary to condition the installation of the
home in order to install the system in the foreseen location,
it must be carried out in accordance with the national regula-
tions in force, concerning internal electric and hydraulic ins-
tallations.
• The planned location for the installation must have enough
space for the system itself, its accessories, connections, and
to carry out a proper maintenance.
• The system should not be installed next to a heat source or
where it receives a direct flow of hot air.
• The drain connection, where water from regeneration will be
driven, must be underneath the installation if possible. Drain
connection must always have a free outlet. The diameter of
this connection must have a minimum size of 1”. The maxi-
mum distance between the water softener and the drain in-
take cannot be placed higher than 6 m.
Drain hose Drain hose Drain hose
Underground drain Supply pipe Sink outlet
4 cm for
aeration
4 cm for
aeration
• The surroundings and the environment where the system
and faucet are to be installed must meet the appropriate hy-
gienic and sanitary conditions.
• Avoid external drips from pipes, drains, etc. onto the system.
• Under no circumstances must the system be installed on
the outside.
• Should softened water be supplied to a hot water or vapour
generator, it will be necessary to install a dependable check
valve between the water softener and the generator, in order to
prevent hot water from returning to the system and damaging
it.
• It is recommended to install some valves for sample taking
both for treated and untreated water, as close as possible to
the water softener.
• If there are quick-closing valves, it is recommended to install
a device to prevent water hammers.
• The water softener only works with a power supply of 12
volts – 50 herz, which comes from the transformer included
in the system. Please make sure that the transformer is used
and that it is connected to a power supply of 220 – 240 V,
50Hz. Also, it must be ensured that the electrical installation of
the house is properly protected by a circuit breaker or a fuse.
• If daytime pressure is higher than 5.5 bars, night-time pres-
sure may exceed the maximum. Please use the pressure-
reducing valve if necessary. (a pressure-reducing valve may
reduce the flow).
• It is recommended to install a silicopolyphosphates filter in
the system’s outlet to protect the pipes from the corrosion of
softened water.

6. Installation of the system
14
5.3 Start-up and maintenance
• The system must be hygienised periodically. See ‘Section 8’
for further information.
• Maintenance must be carried out by qualified technical
personnel, under the proper hygienic conditions. (For further
information contact the technical service of your distributor.)
6. INSTALLATION OF THE SYSTEM
The installation of the water softener must be carried out by
skilled technical personnel. Follow the recommendations in
‘Section 5’ Previous warnings of this manual.
Given that the system that you are going to install impro-
ves the quality of the water you consume and is conside-
red a food, all of the tools that you are going to use for
the assembly and installation must be clean and, under no
circumstances, contaminated or impregnated with grea-
se, oils or rust. Please be extremely careful when handling
the materials that are going to be in contact with treated
or untreated water. (For further information contact your
distributor.)
6.1 Required Tools and Pieces
Before starting the installation, please take all the necessary
tools and follow the instructions included in ‘Section 6.2’.
IF WELDED COPPER PIPES ARE USED
Tube-cutter
Blowtorch
Clamps
Tin-Silver
Sandpaper or steel wool
IF THREADED PIPES ARE USED
Pipe-cutter or steel saw
Thread rolling machine
Sealing paste for pipes
Clamps
IF CPVC PLASTIC IS USED
Pipe-cutter
Steel saw
Adjustable wrench
Glue for PVC
Clamps
IF ANY OTHER MATERIAL IS USED
Other appropriate pipes and fasteners for drinking water su-
pply, according to the requirements from the manufacturer
and the local regulations.
6.2 Step-by-Step Installation
1. The system must always be installed with the supplied by-
pass valve. Additionally, a three-valve by-pass can be installed.
The by-pass of the STRATOS systems has several positions.
By-pass
Service
Inlet
Outlet

6. Installation of the system
14
15
6. The system is supplied with a set of inlet and outlet con-
nections. Please make sure that fastening clips are tightened
on the connectors.
7. The tubes and accessories used to connect the main su-
pply pipe to the inlet and outlet of the water softener valve
must be loosely measured, cut and assembled.
Please keep all fastenings, joints and tubes centred and
straight. Check that water flows from the pipe towards the
inlet of the water softener.
NOTE: The inlet and outlet are indicated in the valve. Draw
the sense of the flow to be sure.
IMPORTANT: Check that the pipes are fixed, aligned and leaned
on something in order to avoid any pressures on the inlet and
outlet of the water softener. A wrong pressure coming from a misaligned
pipe, or which has not enough place to lean on, could damage the valve.
WELDED COPPER
1. Carefully clean and apply welding paste on all joints.
2. Carry out all the welding.
NOTE: Do not weld to the installation the pipes of the by-
pass valve. The heat from the welding could damage the
valve.
IMPORTANT: In order to install the copper pipes and assemble
the earth-grounding clamp, this must be already fastened. It is
necessary to screw on this piece.
RECOMMENDED INSTALLATION
Service
Valve
Valve
Pressure gauge
Sample taking
point
Sample
taking point
Valve for by-pass Supply network inlet
Water Softener Drain
Optional
sediment
filter
2. Close the general water supply valve, which should be next
to the main pump or the water-meter.
3. Open all taps in order to empty the pipes from all water.
NOTE: Make sure that the heater is not emptied, in order
to prevent any damages on it.
‘DANGER’ There is a danger of injury due to an excess of
weight. It is necessary that at least two persons move and install
the system, as well as move and rise the salt bags. There is a danger of
suffering back injuries and other body injuries.
4. Move the water softener towards the installation place. Pla-
ce it on an even surface. If necessary, place it on a plywood
platform at least 2 cm thick. Then, level the platform using a
wedge.
Plywood
Wedge used to level the platform
Installation ground
Minimum 2 cm
thickness
IMPORTANT: Do not place the wedges directly underneath the
salt tank. The weight of the tank filled with water and salt may
cause the tank to break against the wedge.
5. First make a visual check and clean the inlet and outlet
connections of the softener to remove any residues.

6. Installation of the system
16
This programmers will provide you with information concerning
the operation of the system, as well as allowing you to set up
all parameters.
MAIN FEATURES:
User-friendly and intuitive programming.
Multicolour interactive digital display.
Holiday Mode
Here the desired regeneration can be chosen by time, de-
layed, immediate or mixed.
MULTICOLOUR LCD DISPLAY: It shows the information concer-
ning the state of the system. Depending on each moment, the
display will show different types of messages:
Service: It offers information concerning the operation of the system.
15:57
Last Regen. : jul. 01, 2012
Mode: Meter Override
Capacity
Remaining
Flow
Rate
Regeneration: It shows the regeneration stage of the system and
the remaining time. It shows as well the current time.
21:02
Advancing to
Backwash
Programming: It shows the internal parameters and allows its
modification.
Time Region &
Language
Hardness &
People
Holiday
Mode
Advanced
Settings
System
Information
THREADED PIPE
1. Apply a sealing paste for pipes or Teflon tape on all male
threaded pipes.
2. Tighten all threaded connections.
CPVC PLASTIC PIPE
1. Clean, prepare and glue all joints according to the
manufacturer’s instructions.
OTHER
Please follow the instructions from the pipes’ manufacturer
when using other types of pipes and fixtures approved for
drinking water.
INSTALLATION OF THE DRAIN
Measure and cut the necessary length, and then connect the
drain line of ½” to the accessory for the drain connection of
the water softener. Fasten the hose with a clamp.
NOTE: Hook the hose of the drain to the underground dra-
in. Tighten the drain hose. This will prevent any pipe whip
during regenerations.
HOW TO INSTALL THE ELBOW OF THE OVERFLOW
DRAIN OF THE SALT TANK
Connect the overflow drain elbow from the system to a near
drain. This drain intake must be at a lower height than the
overflow drain.
NOTE: The overflow hose must be installed in such way
that water cannot return from the drain hose.
6.3 STRATOS Programmer
DESCRIPTION OF THE PROGRAMMER
All systems have a built-in state-of-the-art electronic program-
mer with a multicolour interactive display. This advanced con-
troller allows to fully monitor the operation of the system. The
display is installed on the upper part of the compact cabinet.

6. Installation of the system
16
17
Time Region &
Language
Hardness &
People
Holiday
Mode
Advanced
Settings
System
Information
Date and Time
15:57
jul. 22 , 2013
‘MENU’ BUTTON: Press this button to go to the menus and sub-
menus. Once inside, you can go back through the program-
ming process.
‘SET/REGEN’ BUTTON: Press this button to trigger immediate or
delayed regenerations. When programming, it allows to select
the parameter as well as to confirm it.
‘+ and -’ BUTTON: Press this button to select and modify the
parameter.
HOW TO LOCK THE PROGRAMMER: : If no button is pressed during
certain time, the programmer gets locked for security reasons,
and shows the message below when any button is pressed.
15:57
Last Regen. : jul. 01, 2012
Mode: Meter Override
Capacity
Remaining
Flow
Rate
Key Locked, Press and
Hold “MENU” Key for 3
Seconds to Unlock
To unlock the programmer, press the ‘MENU’ button during
3 seconds.
6.4 How to Program the System
STRATOS systems are configured to carry out delayed rege-
nerations at 2 a.m.
USER PROGRAMMING:
1. Connect the supplied transformer with the electrical con-
nector located on the rear part of the system. The program-
mer must be in service and show a message similar to that in
the previous section.
IMPORTANT: When connecting the system the fo-
llowing message may appear:
15:57
Last Regen. : jul. 01, 2012
Mode: Meter Override
Capacity
Remaining
Flow
Rate
Advancing to Service
Wait Please
This means that the system is entering the service mode.
If two minutes have gone by, and this message is still
showing, please contact your distributor.
2. Press the ‘MENU’ button for 3 seconds to get into the inter-
nal program of the system. At this point you may have access
to the following parameters:
Time Region &
Language
Hardness &
People
Holiday
Mode
Advanced
Settings
System
Information
Time: The current date and time can be configured.
Time Region &
Language
Hardness &
People
Holiday
Mode
Advanced
Settings
System
Information
Date and Time
15:57
jul. 22 , 2013

18
6. Installation of the system
18
Miscellany: Here the following parameters can be
selected:
1.Units of measure, in the metric or American system. It is
supplied by default in the metric system.
Time
Region &
Language
Hardness &
People
Holiday
Mode
Advanced
Settings
System
Information
Region & Language
Region
Language
Tiempo Miscelanea Datos De
Entrada
Modo
vacaciones
Conguración
avanzada
Información
del sistema
Region
Metric
US Gallon
2.Language: There are three languages available: Spanish,
English, French, German. It is supplied by default in Spanish.
Time
Region &
Language
Hardness &
People
Holiday
Mode
Advanced
Settings
System
Information
Language
English Français
Español Deutsch
Input data: It must be programmed.
1. Hardness: Inlet water hardness in ppm of CaCO3 (ºHFx10).
Time
Region &
Language
Hardness &
People
Holiday
Mode
Advanced
Settings
System
Information
Hardness & People
Water Hardness
People Number
Time
Region &
Language
Hardness &
People
Holiday
Mode
Advanced
Settings
System
Information
Water Hardness
0 1 7 0 PPM
2. Inhabitants: Number of persons who usually live in the home.
Time
Region &
Language
Hardness &
People
Holiday
Mode
Advanced
Settings
System
Information
People Number
0 1 Person
Holiday Mode: Here the user can set when there will
be nobody at home for a long period of time.
During this period, the system will carry out small washes
without consuming salt, in order to prevent water from stagna-
ting inside the system.
Time
Region &
Language
Hardness &
People
Holiday
Mode
Advanced
Settings
System
Information
Holiday Mode
ON OFF
End Date of Holiday
July 24 , 2013

7. Start-Up
18
19
18
System information: This feature delivers informa-
tion on the water softener:
• Total number of regenerations.
• Total volume of treated water.
• Regeneration hour.
• Volume of treated water between each
regeneration.
• Safety regeneration frequency.
• Length of the regeneration stages.
• Current ow.
• Maximum registered peak ow.
• Software version.
ADVANCED PROGRAMMING (ONLY FOR PROFESSIONAL USE):
This internal level is only intended for the Technical Service and
is password protected. Under no circumstances should the
programmed parameters be modified without checking pre-
viously with the Technical Service of the dealer.
HOW TO START A REGENERATION:
STRATOS water softeners allow you to program both delayed
or immediate regenerations. On this purpose, press the ‘RE-
GEN’ button for 3 seconds to get into the menu below:
15:57
Last Regen. : jul. 01, 2012
Mode: Meter Override
Capacity
Remaining
Flow
Rate
Manual Regen.
DELAY
IMMEDIAT
By pressing the ‘SET/REGEN’ button, the user can select the
type of regeneration and with the ‘MENU’ button, the user
can trigger the regeneration.
HOW TO MOVE THE REGENERATION FORWARD:
Once the regeneration has started, the user can move
forward to the next stage by cancelling the current one. On
this purpose, just press any of the buttons on the program-
mer. This function will be disabled during the time in which
the motor is moving forward to the next stage.
7. START-UP
7.1 Hydraulic Start-up
Before starting the system up, please check that all steps pre-
vious to installation, assembly and programming have been
properly followed, according to this instructions’ manual, as
well as the regulations in force. To start the system up, please
follow the instructions below:
Do not charge the system with salt until the end of the start-up. In
order to prevent any air pressure on the water softener and the
pipes, please follow these instructions in order.
1. Place the by-pass valve on the ‘service’ mode.
2. Fully open two or more cold and treated water faucets loca-
ted near the water softener.
3. Plug the programmer to the power supply using the trans-
former included in the system.
4. The program must be in ‘service’, otherwise please check
‘Section 6.3’.
5. Press the ‘REGEN’ button for 3 seconds to start a regene-
ration. Now you are inside the regeneration menu. Select the
immediate regeneration. After some minutes, the system will
move to the Backwash stage.
6. Slowly open the water inlet valve to allow the entrance of
water inside the system. At this point, the inlet flow must be
rather low, since in this position water will come in from the
bottom of the bottle and flow upwards to the drain.
7. When water starts flowing continuously through the drain,
fully open the water inlet of the system. At this point, the bottle
will be full of water and so a higher flow will not produce any
damage. Water going out to the drain may be a bit yellowish
or brown. This is completely normal, since it is due to the pre-
servatives of the resin.
8. Let the water flow through the drain until it runs clear.
9. Close the water supply to the system for five minutes, so
the resin can settle down the bottom of the bottle, and the air
that might be left inside can flow towards the upper part of the
bottle.
10. Open the inlet valve of the system and wait for some mi-

20
7. Start-Up
20
Then measure the water hardness present on the outlet of
the system and check that it fits within the desired values.
Otherwise, adjust the regulator and check again.
WARNING: The hardness regulator is supplied in the closed
position, therefore, if the system is not adjusted, it will supply fully
softened water.
nutes in order to make sure that the remaining air has been
purged.
11. Cancel the current regeneration stage and move forward
to the filling stage of the tank. Now the brine tank will auto-
matically start to fill up with water. Let this stage run the full
process. At the end of the stage, the system will finish the
regeneration which was started in point 6.
12. Start another regeneration according to point 6 and wait
until the system reaches the Backwash stage. Press any button
to mover forward to the Brine suction stage.
13. The system should suck water from the brine tank. Let
the suction work for some minutes just to make sure that it is
working properly.
14. Cancel all the remaining stages of the regeneration.
15. Put the by-pass in the service mode and check that trea-
ted water is properly softened (see ‘Section 7.3’).
16. Charge the brine tank with salt.
17. The system is ready to operate.
’DANGER’ There is a danger of injury due to an excess of weight.
It is necessary that at least two persons move and rise the salt
bags. There is a danger of suffering back injuries and other body injuries.
7.2 Residual Hardness Regulation
As mentioned in ‘Section 2.7’, it is not recommended to su-
pply completely softened water to household supplies.
In order to modify the residual hardness, lightly open the regu-
lating valve, as indicated in the image below.
This manual suits for next models
3
Table of contents
Popular Water Dispenser manuals by other brands

Water Care
Water Care TotalCare Series Installation instructions & owner's manual

WaterLogic
WaterLogic WL7 Technical manual

Everpure
Everpure ESO7 Replacement Cartridge EV9607-25 Specification sheet
Honeywell
Honeywell HWB1083S owner's manual
vita
vita SP-A6D-CS user manual
Galaxy
Galaxy VDR 14/100 owner's manual

Elkay
Elkay ezH2O Liv LBWD00 C Series INSTALLATION, CARE & USER MANUAL

Kenmore
Kenmore ULTRASOFT 400 625.3884 owner's manual
Follett
Follett Symphony 01089580 instructions
socorex
socorex CALIBREX solutae 530 Operating instruction
Borg & Overstrom
Borg & Overstrom T2 user guide

Follett
Follett Symphony Plus 25 series Operation and service manual
