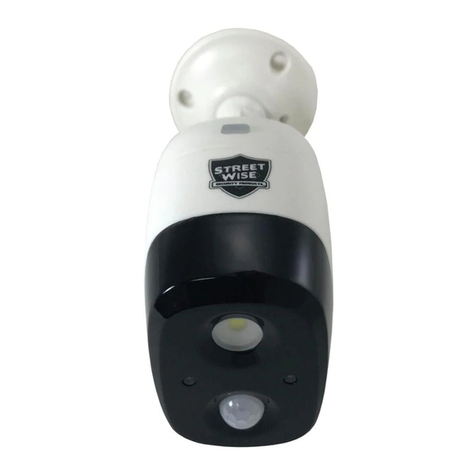
STREET WISE NightWatcher User manual

Model #
USE AND CARE GUIDE
MOVEMENT TRACKING FLOOD LIGHT
AND HD SECURITY CAMERA WITH WI-FI
Questions, problems, missing parts?
Before returning to the store,
call Streetwise Security Products Customer Service at
1-866-220-0272
OS Windows 2000 / XP / Vista / 7 / MAC
Micro SD Card 1GB SD ~ 64GB SDHC (max) Class 4
LISTED

2
Table of Contents
Table of Contents................................................................... 2
Safety Information................................................................. 2
Warranty................................................................................ 3
Pre-Installation...................................................................... 4
Planning Installation ........................................................... 4
Tools and Hardware Required ............................................ 4
Package Contents............................................................... 5
Specifications ..................................................................... 5
Nightwatcher Overview .........................................................6
Installation………………………………………………......7
Operation-Programing your Nightwatcher...................... 8-21
Troubleshooting…………………………………………....22
Care and Cleaning………………………………………….22
F.A.Q Section.................................................................. 23-24
Error -19 Diagram................................................................25
Safety Information
1. This device complies with Part 15 of the FCC Rules.
Operation is subject to the following two conditions:
(1) this device may not cause harmful interference,
and (2) this device must accept any interference
received, including interference that may cause
undesired operation.
2. This equipment has been tested and found to
comply with the limits for a Class B digital device,
pursuant to Part 15 of the FCC Rules. These limits
are designed to provide reasonable protection
against harmful interference in a residential
installation. This equipment generates, uses and can
radiate radio frequency energy and, if not installed
and used in accordance with the instructions, may
cause harmful interference to radio communications.
However, there is no guarantee that interference will
not occur.
If this equipment does cause interference to radio or
television reception, (which can be determined by
turning the equipment off and on) correct the
interference by one or more of the following
measures:
- Reorient or relocate the receiving antenna.
- Increase the separation between the equipment
and receiver.
- Connect the equipment into an outlet on a different
circuit from the one the receiver is connected to.
- Consult an electrician or an experienced radio/TV
technician for help
3. Due to the inherit risks of working with electricity, we
recommend that the installation of this light fixture be done
by a qualified electrician.
4. The motion sensor may not operate correctly if it is installed:
□Near the outlet of a central heating boiler.
□Near an air condition unit.
□Pointing directly at moving vehicles.
□Within sight of the reflection from water.
□Where other lights could be pointed onto the sensor.
□Avoid installing the product where the direct sunlight could
shine on the detector.
CAUTION:
Do not immerse in the water.
Do not mount against flammable surfaces.
WARNING:
Changes or modification to this unit could damage it and
will void the warranty.
This NightWatcher Wi-Fi camera is a precision
electronic device. Do not attempt to service this
camera yourself, as opening or removing covers
may expose you to electric shock and will void the
warranty.
IMPORTANT:
This light fixture must be grounded.

3
Warranty
12 MONTH WARRANTY
Streetwise Security Products extends a 12-month warranty to the SWNW760 against defects in
materials or workmanship, with the following exceptions:
1. The warranty does not cover damage resulting from accident, misuse or abuse, lack of reasonable
care, the affixing of any attachment not provided with the product, loss of parts, or improper
installation.
2. The warranty will be voided if the unit has been opened or tampered with in any way or if any
unauthorized replacement parts have been used.
Conditions of Sale: This product is designed to illuminate and record, it will not prevent the
perpetration of any act, legal or illegal. The manufacturer and sellers assume no liability for any
damage to property, injury to person, or death. As such, purchase of this product is an agreement by
the purchaser/user to hold all sellers and manufacturer harmless of all liabilities and damages.
To Obtain Service: Contact Streetwise Security Products Customer Service at
1-866-220-0272 or the Authorized Dealer from whom you purchased this unit for a Return
Merchandise Authorization Number. The returned unit must be sent postage prepaid and proof of
purchase is required. Damage or loss occurring during shipment is not covered by this warranty. The
manufacturer reserves the right to replace or repair the faulty unit at their discretion.

4
Pre-installation
WARNING: DUE TO THE INHERIT RISKS OF WORKING WITH ELECTRICITY, WE RECOMMEND THAT THE
INSTALLATION OF THIS PRODUCT BE DONE BY A QUALIFIED ELECTRICIAN.
PLANNING INSTALLATION
Never attempt to turn the light head by hand as this can damage the internal motor components and will void the
warranty.
NOTE:
Before attempting any installation or maintenance,
ensure that the electrical supply is switched off and the
circuit fuses removed or the circuit breaker is in the
“OFF” position.
TOOLS REQUIRED (NOT INCLUDED)
Hammer
Safety
goggles
Phillips
screwdriver Level
HARDWARE INCLUDED
NOTE: not shown in actual size.
Part
Description
Quantity
AA
Mounting screw
2
BB
Drywall screw
2
CC
Plastic masonry plug
2
DD
Wire nut
3
EE
Cross bar
1
FF
Allen Key
1
AA
B
C
D
E
FF

5
Pre-installation (continued)
PACKAGE CONTENTS
SPECIFICATIONS
Detection Method
Passive infrared sensor
(with continuous detect function)
Sensor Range
Up to 32.8ft x 220°
Power Source
AC120V 60Hz
Light Source
AC COB 16W LED
Illumination Time
Fixed at 3 minutes
IP Rating
IP55 (Weather-Proof)
Suitable for outdoor permanent
use
Part
Description
Quantity
A
Light fixture
1
B
Backplate screw
2
C
Screw nut
2
D
Micro card and card adapter
(Micro card is already inside the
card compartment of the light)
1
E
User manual
1
F
EVA gasket
1
NOTE:
Nightwatcher Wi-Fi camera is designed to illuminate, record
video and produce audio warnings when a person enters the
detection area. While it will detect a moving heat source,
there is no guarantee implied that it will provide total security
or prevent illegal entry.
D
-Records 20 second video events at 15 frames per
second. 720 pixels (HD) resolution.
-Built-in Micro card slot for Micro memory card
-Micro card slot can accommodate up to 32GB
(SDHC). 4GB card included
-Micro card video file format: FAT or FAT16 (SD)
FAT32 (SDHC)
-Automatic exposure control, white balance and
sharpness
-Effective viewing angle: 65 degrees ±5% (horizontal
angle)
-Effective viewing distance: 7.9 m (26.2 ft.)
-Image format: JPEG AVI File
E
A
EE
AA
C
B
F

6
NightWatcher Overview
Bottom View
Front View
Top View
Camera angle adjustable downward by 25
degrees
Side View

7
Installation
1Mounting and wiring
2Mounting and wiring (Continued)
DANGER:
Incorrect voltage may cause an electric shock. If you have
any questions, consult with an electrician.
CAUTION:
Do not remove the tape until you finish the installation. If the
tape comes off the light, please replace it or hold the light head
to avoid swiveling and damage to the product.
CAUTION:
LED lamps are extremely bright. Under no circumstances
should you stare into an LED beam since this may cause
irreparable damage to the eye.
IMPORTANT:
Please make sure the voltage and polarity are correct before
connection.
NOTE:
To ensure correct operation of the sensor, mount the light
fixture so that the center of the motion detector faces toward
the area you want to protect.
The recommended mounting height of the unit is between
2m (6.6ft) and 3m (10ft) – 2,5m (8ft) is the best
performance height - Do not mount the unit higher
than 3 meters (10ft) as this will affect the motion
detection function of the unit.
When selecting your installation area it’s important to be
aware of the positioning of the NightWatcher detection
sight line due to possible factors that could cause false
triggering such as direct sunlight, window refection, air
condition units, swimming pool reflection, direct street
lighting or large vegetation in the installation area
To prolong the lifespan of the NightWatcher it is advised
to install the unit in an area that is not directly exposed to
extreme weather conditions and if possible under an eave
(if the recommended mounting height allows)
Installing your NightWatcher on a wall or
building surface - use cross bar
□Attach the crossbar to junction box and secure using
mounting screws (AA).
□Connect the black wire (live wire) from the AC power
cord to the single black wire coming from unit using
one of the supplied wire nuts (DD).
□Connect the white wire from the AC power cord to
the white wire coming from unit using one of the
supplied wire nuts (DD).
□Connect the green/yellow wire from the AC power
cord to the green/yellow wire coming from the unit
using one of the supplied wire nuts (DD).
□Make sure the polarity is correct.
□Attach the unit (A) and EVA gasket (F) to the
crossbar (EE) and secure using backplate screw (B)
and screw nut (C).
CAUTION:
Please allow 30 seconds warm-up time after switching on.
Do not touch unit during warm-up time to avoid interruption of
start-up sequence. Push the RESET button after switching on.
IMPORTANT:
Remove the security tape from unit and
plastic lens cover from camera after
installation.
Recommended installation
E
AA
B
F
A
C

8
Operation
1
Detection range 2
Adjusting the settings
□This light is equipped with three motion sensors:
zone 1 covers 60 degrees, zone 2 covers 100
degrees and zone 3 covers 60 degrees. The total is
220 degrees in all three zones.
Ensuring correct operation
□To ensure correct operation of the sensor, mount
the unit so that the motion passes across the
motion sensor according to the “Good Sensitivity”
pictures below.
□Selecting working mode: There is a “Mode” LED
indicator hidden inside the motion detector window
that will display different colored lights when
switching between modes. Once a mode has been
selected, the colored LED light will turn off after 30
seconds.
□Mode 1: Recommended for home or business
(default setting)
- Camera will follow motion and record during the
day and night
- Light will illuminate at night only
- Speaker (optional dog bark, chime, or recordable
message) will operate at night only
□Mode 2:
- Light illuminates during the day and night
- Camera records motion during the day and night
- Speaker operates during the day and night
□Mode 3:
- Camera will follow motion and record during the day
and night
- Light will illuminate at night only
- Speaker will operate during the day only
NOTE:
For the above 3 modes, after audio has been triggered, no
audio (speaker) will be triggered again during the following 30
seconds.
Mode LED indicator
(Hidden inside the lens) Symbol
Mode 1 RED
Mode 2 ORANGE
Mode 3 GREEN
Top
Good Sensitivity
Less Sensitivity

9
Operation (continued)
3
Adjusting the settings 4
Removing and formatting the
memory card
Camera LED indicator
□The LED light next to the micro card compartment
indicates the function status of the camera by using
different colored LED lights.
- Red: Micro card is not inserted into the Micro card
slot or the system is malfunctioning.
- Green: The unit is recording.
NOTE:
Before removing the micro card from the slot, please press the
mode button on the bottom of the NightWatcher for 3 seconds
to stop the light from turning – the “Mode” LED will flash
orange. To resume working, press the mode button once.
NOTE:
Please reformat your micro card every 6 months for optimal
performance.
□Fixed Light Mode: allows the unit to function as a
traditional motion activated flood light where the light and
camera will not move. Press the mode-button for 3
seconds to stop the light from turning, the hidden
LED will flash RED in Night Mode and flash
GREEN in ALL Day Mode in a quick flash pattern.
To resume working, press the mode button for 3
seconds again.
Mode LED indicator
(hidden inside the lens) Symbol
Static mode
(hidden LED)
Mode 1 RED
Flash RED
Mode 2 ORANGE
Flash ORANGE
Mode 3 GREEN
Flash GREED
Note: for more details, please refer to F.A.Q. section
□Before removing the micro card from the card slot, press the
mode button on the bottom of the NightWatcher for 3
seconds to stop the light from turning – the Mode LED will
flash orange. (To resume working, press the mode button
again.)
□To remove micro card, open the card compartment
using the provided Allen key and push in micro card
to eject then pull out.
□For viewing and/or formatting, slide the micro card
into the card adapter that has been provided. Then,
slide the card adapter into the card slot on your
laptop.
Formatting the micro card
□It is good practice to format the micro card each time
it is removed and files are viewed on your PC. Once
the necessary files have been saved to your
computer, follow these steps for formatting.
□Ensure that any required images are saved to an
alternative folder prior to formatting.
- Place micro card into the card adapter supplied
- Place the adapter in a spare card slot on your PC /
laptop
- Right click on the micro card location
- Select Format
- Ensure the correct file system is selected FAT16
(or FAT) for SD and FAT32 for SDHC
- Select quick format

10
Operation
5
On-board controls 6
Recording audio message
NOTE:
You must press the “Mode” button on the bottom of the unit for
3 seconds to disable the rotation of the light.
□Reset button: restore functions to default settings
- Press this RESET button, the camera will turn to
AP mode
- Press this RESET button for 5 seconds, the
camera will restore the functions to default settings.
□Audio mode:for selecting which audio message
will play when motion sensor detects movement.
- Pre-set default is “silent mode”
- Push once for “doorbell chime”
- Push again for “dog barking”
- Push once more for the message you recorded
(Message 1)
- Push again for additional message you recorded
(Message 2- you can record up to 2 messages at a
time)
□Recording:
1. Press the SET/REC button for 3 seconds, and you
will hear a single beep. After the beep, start recording
your message by talking into the microphone. Push
the button again to stop recording, and you will hear
a series of 2 beeps, meaning the recording is
finished. If you do not push the button again after you
have recorded the message, the recording will stop
automatically after 10 seconds.
2. The NightWatcher SWNW760 can hold 2 custom-
recorded messages. If you have recorded one
message, repeat above step for message 2.
3. If you hear a series of 3 beeps when trying to
record your message (by pressing the SET/REC
button for 3 seconds) this means the self-recorded
messages are full, please erase previous messages.
□Play/Erase: allows you to listen to and erase
messages.
1. If you have only recorded 1 message, push the
button one time to listen to recorded Message 1. If
you wish to erase it, press the PLAY/ERASE button
and hold it for 3 seconds. You will hear a series of 2
beeps, indicating the message has been erased.
2. If you have recorded 2 messages, push the button
one time to listen to the first message, and push it
again to listen to the second message. If you want to
erase a message, select that message, and after
listening to it, push the PLAY/ERASE button and hold
it for 3 seconds.
3. If message 1 is erased, message 2 will
automatically become message 1. The next message
you record will then become the new message 2.

11
Operation (continued)
7
Viewing recorded videos
Viewing images by computer through a card
reader.
□Press the mode button on the bottom of the unit for
3 seconds to stop the unit from turning.
□Open the weatherproof cover on the unit.
□To remove micro card, press on the card to eject
then pull out.
□Slide the card into supplied card adapter as
indicated in the pictures to the right.
□If your computer has a card slot you may insert the
micro card directly into the computer. Otherwise
you will need to use a USB card reader (not
supplied).
□Once your computer is powered on, insert the card
adapter into your computer. Regardless of whether
you are using Windows or MAC OS, your card
should be recognized by your computer after a few
seconds.
□Follow your computers instructions to view the
contents of the removable storage device (micro
card). Each recorded event will be listed in order by
date. Simply click on the filename to view the file.
□After viewing the files, remove the card from your
computer and remove the micro card from the
adapter.
□Insert the micro card into the slot on the light until it
is secure. Then close the card compartment door
and tighten the screw with the Allen key.
□Press the “Mode” button once to resume normal
tracking operation.

12
Operation
8
System Set Up (Link camera with WIFI Network)
1.1 Link camera with Smart phone/Tablet (AP Mode)
□Using smartphone or tablet to launch “Streetwise NightWatcher” APP from APP store (iOS) or Google Play store (android). Download.
□Go to smart phone’s Wi-Fi setting and site survey UID “Smart Guard HD-XX”. (-XX stands for serial number, it varies according to
different unit.)
□Once the connection is established, open “Streetwise NightWatcher” app and the camera screen will appear on your smart phone or
tablet.
※Note if the message “Cannot connect to internet through Smart Guard HD-XX” or “Internet connection
unstable Smart Guard HD-XX“ appears on the screen, please disregard the message, you still can continue
to the next step. Different smartphones/tablets may show a different message.
Connect “Smart Guard HD-XX”
with default password
“12345678”

13
Operation (continued)
1.2 Link camera with home AP
□Link camera with home AP allows user to watch their camera from anywhere in the world as long as they have internet access.
□Touch the screen twice, you will see 5 red function keys on the right side.
□Touch the screen twice again, the 5 red function keys will be hidden.
□On your smart phone/tablet screen, click on “SETTING” icon . Enter camera default password “12345678”.
The following screen will pop up, select “Join Home AP”

14
Operation (continued)
□Select your home AP from the Site Survey menu.
□Enter Home AP password if is encrypted, and click “Join”
□Click “OK” and exit the app.
□Wait for 60 seconds for the camera to boot up again and link to WIFI AP router.
If Join home AP connection is successful, LED indicator next to the weatherproof cover will display a RED light.
If Join home AP connection has failed, LED indicator besides weatherproof cover will flash quickly in Red & Green
light.
Press Reset button for 30 seconds on the light and re-in put all information from step 1.1 (page 12) to return to AP
mode and follow the steps. Make sure your router account and password is correct.
LED indicator

15
Operation (continued)
Launch “Streetwise NightWatcher” APP again and you will see video streaming from Smart Guard HD.
Note: You may access your camera from anywhere as long as there is internet access.
1.3 Set Camera name and password
□Select Wi-Fi Setting. You can change SSID name and password, the password should be 8 digital numbers or English letters. After
the change, it will return to AP mode, go to smart phone’s Wi-Fi setting and site survey UID to find the name you have changed.
Follow up the steps in “1.2 Link camera with home AP” to reset Join home AP router.
NOTE: Your “Push Notification” name will be same as this new SSID name.
1.4 Camera Setting
□Set Camera Time: Change this APP time to the same time on your smartphone.
□Select Camera Setting, click on the time to do the setting, once you see “Setting”, the time is updated successfully,
click OK.

16
Operation (continued)
1.5 Frequency Setting: Set Power Frequency
1.6 PIR Notification: Notifies your smartphone/tablet when the unit detects motion
□Click OFF: Will not send PIR Notification
□Click ON: Will send PIR Notification
□You also can go to Camera List and press “ →” for the selected camera. Clicking “Notification” will also send the PIR
notification to your smartphone/tablet.

17
Operation (continued)
1.7 Set Description name: You can set your own name for this Description.
NOTE: The change of this description will not change “Push Notification” name & SSID
1.8 Reset to Default: Pressing “Reset to Default”, will restore the functions to default settings and LED indicator on the
unit will flash quickly in RED light. Please wait about 3 minutes until the RED light changes to a slow flash.
□Press “Reset to Default”, then press “YES”, the camera will restore the functions to the default settings.
□LED indicator on the product will flash quickly in RED. Wait about 3-4 minutes until the RED light changes to a slow flash.
NOTE: If you click ”PIR Notification” and there is
no micro card inside the unit when motion is
triggered, it will send PIR (motion) Notification
signal continuously to your smart phone until there
is no more motion detected

18
Operation (continued)
2.0 Images Functions
2.1 SNAP SHOT: Take one still picture for each snap shot and picture will be saved to your smart phone.
2.2 RECORD
□Click “REC” icon to start Manual Recording. The left bottom side will show Red Ball icon. Record a video of 20 seconds and
video will be saved to your smart phone.
□When PIR is activated to start Auto Recording, the left bottom side will show Orange Ball icon. Record a video of 20 seconds and
video will be saved on your NightWatcher’s micro card.
2.3 PLAY BACK
□Click icon, you can choose to view recorded pictures or video from “Camera micro card” or “Mobile phone”.

19
Operation (continued)
2.3.1 Camera micro card: View the recorded files from the NightWatcher’s micro card
2.3.2 Mobile Phone: View the recorded files from your smartphone
2.4 Light control:
□The user can click this Bulb Icon to change the light from AUTO to Manual control.
□If the bulb icon is RED: the light is AUTO control. Only when the PIR (motion) sensor is detecting movement the light will turn on
automatically.
□If the bulb icon is GREEN: the light is MANUAL control. The light will stay on whether there is movement detected or not. If one user
clicks the bulb icon to GREEN (MANUAL control), the other users will also see this bulb icon in GREEN. When all the users close the
Streetwise NightWatcher APP, this icon will return to RED (AUTO control) and the NightWatcher’s LED light will also turn off.
NOTE:If the last user does not change the bulb icon to RED color and closeAPP software or turn off the smartphone,
NightWatcher’s LED light will turn off in 5 minutes and return to auto control.
2.5 SETTING: review section 1.1~1.7

20
Operation (continued)
2.6 Check APP version
•If there is an micro card inside the NightWatcher, the screen will show this icon
•If there has no micro card inserted or the micro card can not be read, the screen will show this icon
2.7 Check APP version
•Pressing the bottom icon , will show APP version and Firmware version.
\\
•When you open the APP software, it also will show APP version in the top left corner.
This manual suits for next models
1
Table of contents
Other STREET WISE Security Camera manuals
Popular Security Camera manuals by other brands
visual engineering
visual engineering TMC 3 user manual
Iqinvision
Iqinvision IQeye Alliance-mini series Installation and operating instructions
Elmo
Elmo TSN280D Specifications
Fastrax
Fastrax EDCH-144E/C Installation and operating manual
Sanyo
Sanyo VDC-C1574VA - CCTV Camera Specifications
D-Link
D-Link DCS-2230L Quick installation guide


