Striale SB2015 User manual

WARNING
-This bench must be assembled and used by an adult.
-Use of this bench requires a minimum surface area of approximately 250 cm x 200 cm.
-For use in complete safety, a stable and even surface is required.
-Do not allo children to play ith the equipment. The STRIALE company accepts no
responsibility for any damage they could suffer as a result.
-Do not allo children to go near the equipment hile you are training.
-In order to maintain the appropriate level of safety, the bench must be inspected regularly.
It is essential that all faulty components are replaced and that the equipment remains out
of use until it is repaired.
-STRIALE accepts no responsibility in the event of technical changes being made to one of
our products by the user.
-It is essential that you consult your doctor before you start training to determine the
appropriate intensity level of your program.
-Please read the recommendations carefully before starting. Excessive training or a poorly
devised training schedule can be harmful to your health.
-It is recommended that appropriate clothing and foot ear are orn.
-Check that the adjusting devices are set and tightened correctly.
-Load and unload the bar at both ends simultaneously in order to avoid tipping up.
-Maximum load during use: 110 kg
-Maximum load hile bar is not in use: 100 kg
-Maximum load for leg lever: 50 kg
-Maximum load for butterfly: 50 kg on each arm
Maintenance:
•STRIALE exercise equipment is lo -maintenance.
•Do not allo s eat to come into contact ith the upholstery or enameled parts of the
equipment due to its corrosive nature. Wipe immediately after training.
•The upholstery and enameled parts can be cleaned ith using a damp sponge. Do not use
damaging or corrosive products.
Check every month to ensure that the scre s and nuts used to hold the equipment together
are tight.

-1-
PART LIST
PART NO:
DES TIPTION
Q‘TY
01.
Rt . barbell crutch
1
02.
Lt . barbell crutch
1
03.
Support bar
1
04.
Main base
1
05.
Central brace
1
06.
Front leg
1
07.
Leg lift support
1
08.
Leg lift
1
09.
Rt .butter
fly arm
1
10.
Lt .butterfly arm
1
11.
Backrest ht. bar
1
12.
Backrest support
2
13.
Leg lift pad bar
3
14.
Butterfly pad tube
2
15.
Seat
1
16.
Back seat
1
17.
Leg lift pad
6
18.
Butterfly pad
2
19.
Round bushing
4
20.
Safety pin
3
21.
50mm square cap
2
22.
38mm square cap
10
23.
33m
m square cap
1
24.
25mm square cap
4
25.
25mm round bumper
1
26.
25mm round cap
9
27.
19mm round cap
6
28.
M10*65 bolt
1
29.
M10*60 bolt
2
30.
M10*20 bolt
2
31.
M8*70 bolt
4
32.
M8*65 bolt
4
33.
M8*40 bolt
4
34.
M8*20 bolt
2
35.
M8*15 bolt
4
36.
M10 nylon
nut
3
37.
M8 nylon nut
8
38.
M6 nylon nut
2
39.
M10 asher
8
40.
M8 asher
24
41.
Od 28mm*id 8.5mm asher
2
42.
Buffer bushing
2
43.
Barbell safety lock
2
-2-
44.
Spring clip
3
01
02 03
04
21
42
31
37
37
40
40
32
32 40 37
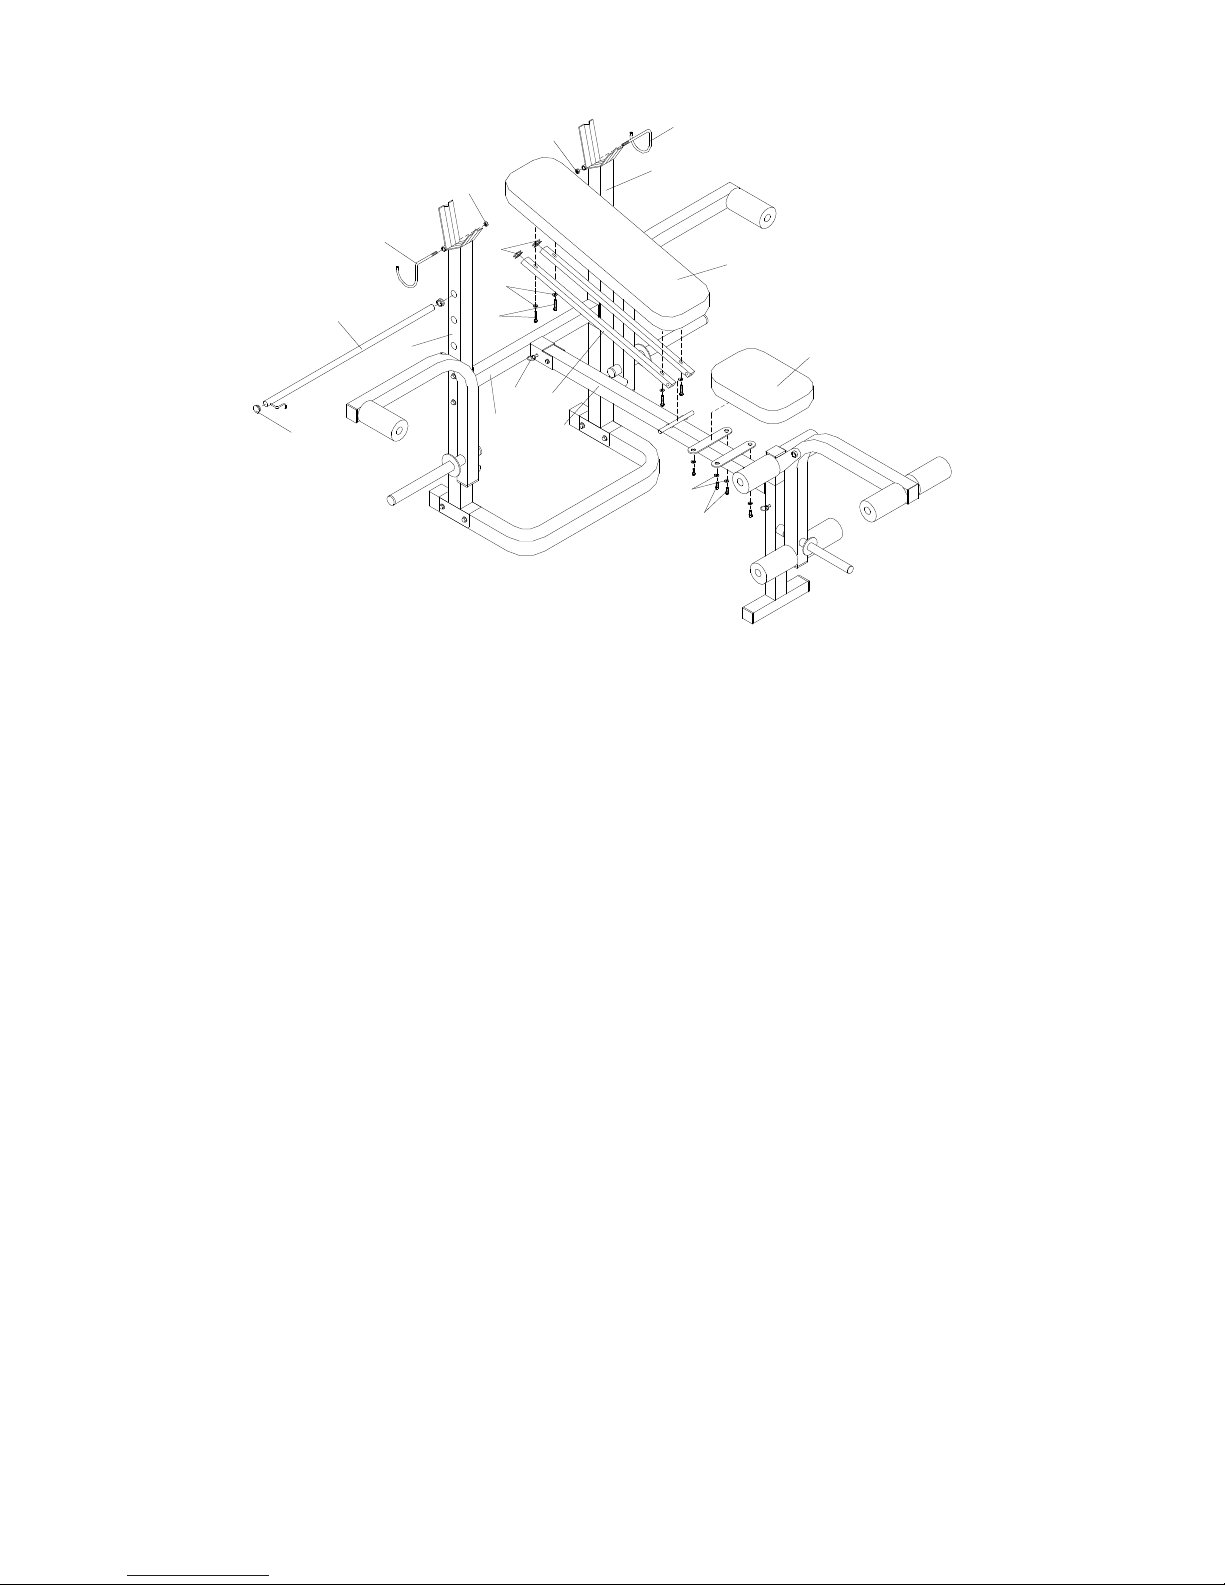
STEP 1
1. PLACE 50mm SQUARE CAP (21) ONTO BOTH ENDS OF MAIN BASE (04).
2. ATTACH R. & L. BARBELL CRUTCH (01,02) TO MAIN BASE (04) SECURE
WITH BOLTS (31) WASHERS (40) AND NYLON NUT (37) AS SHOWN.
3. ATTACH SUPPORT BAR (03) TO R. & L. BARBELL CRUTCH (01,02),
SECURE WITH BOLTS (32) WASHERS (40) NYLON NUT (37) AS SHOWN.
4. PLACE BUFFER BUSHING (42) ONTO R., L. BARBELL CRUTCH (01,02).

-3-
-4-
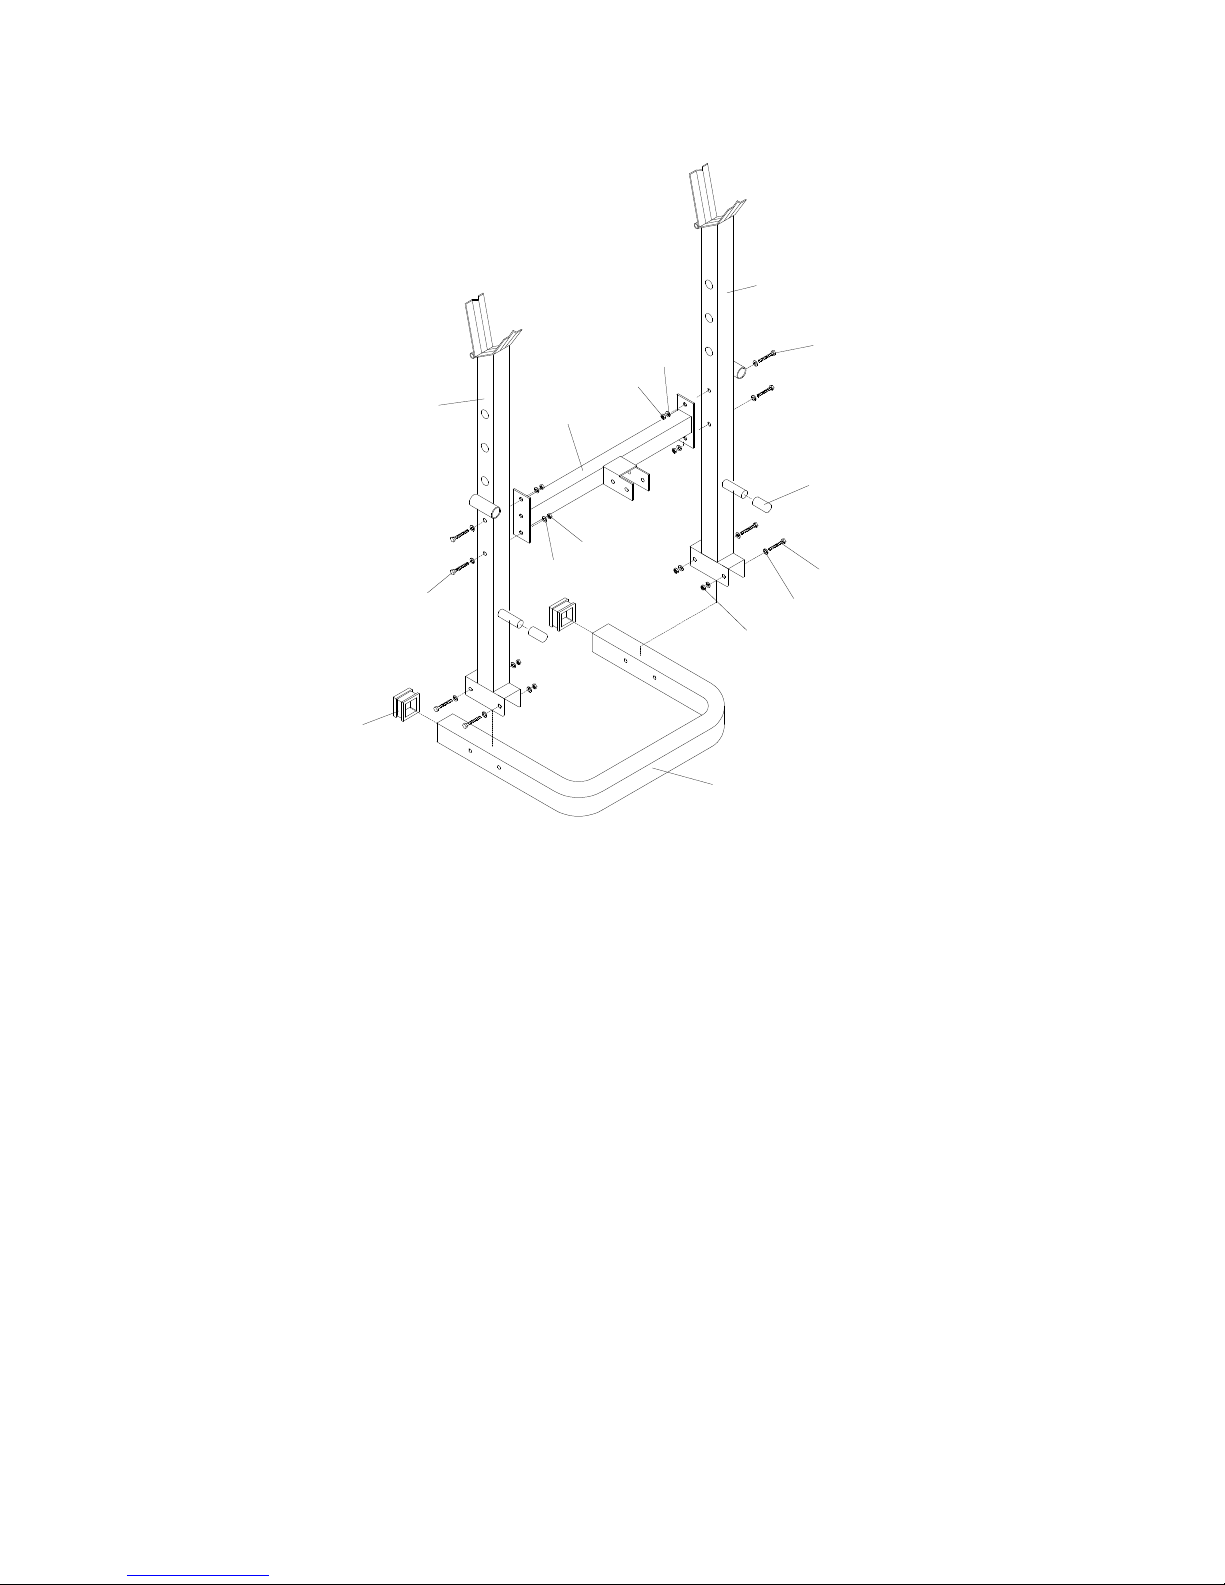
05
06
22
22
29
20
29
07
23
36
39
36
39
03
22
20
STEP 2
1. PLACE 38mm SQUARE CAP (22) ONTO BOTH ENDS OF CENTRAL BRACE
(05) AND FRONT LEG (06) AS SHOWN.
2. ATTACH THE CENTRAL BRACE (05) TO FRONT LEG (06), THEN
ATTACH THE OTHER END OF CENTRAL BRACE (05) TO SUPPORT BAR
(03), SECURE WITH BOLTS (29), WASHERS (39), AND NYLON NUT (36) AS
SHOWN.
3. PUT THE SAFETY PIN (20) ONTO BOTH ENDS OF THE CENTRAL BRACE
(05) AS SHOWN.
4. PLACE 33mm SQUARE CAP (23) ONTO LEG LIFT SUPPORT (07).
5. INSERT LEG LIFT SUPPORT (07) INTO FRONT LEG (06) WITH

-5-
SAFETY PIN (20) AS SHOWN.
-6-
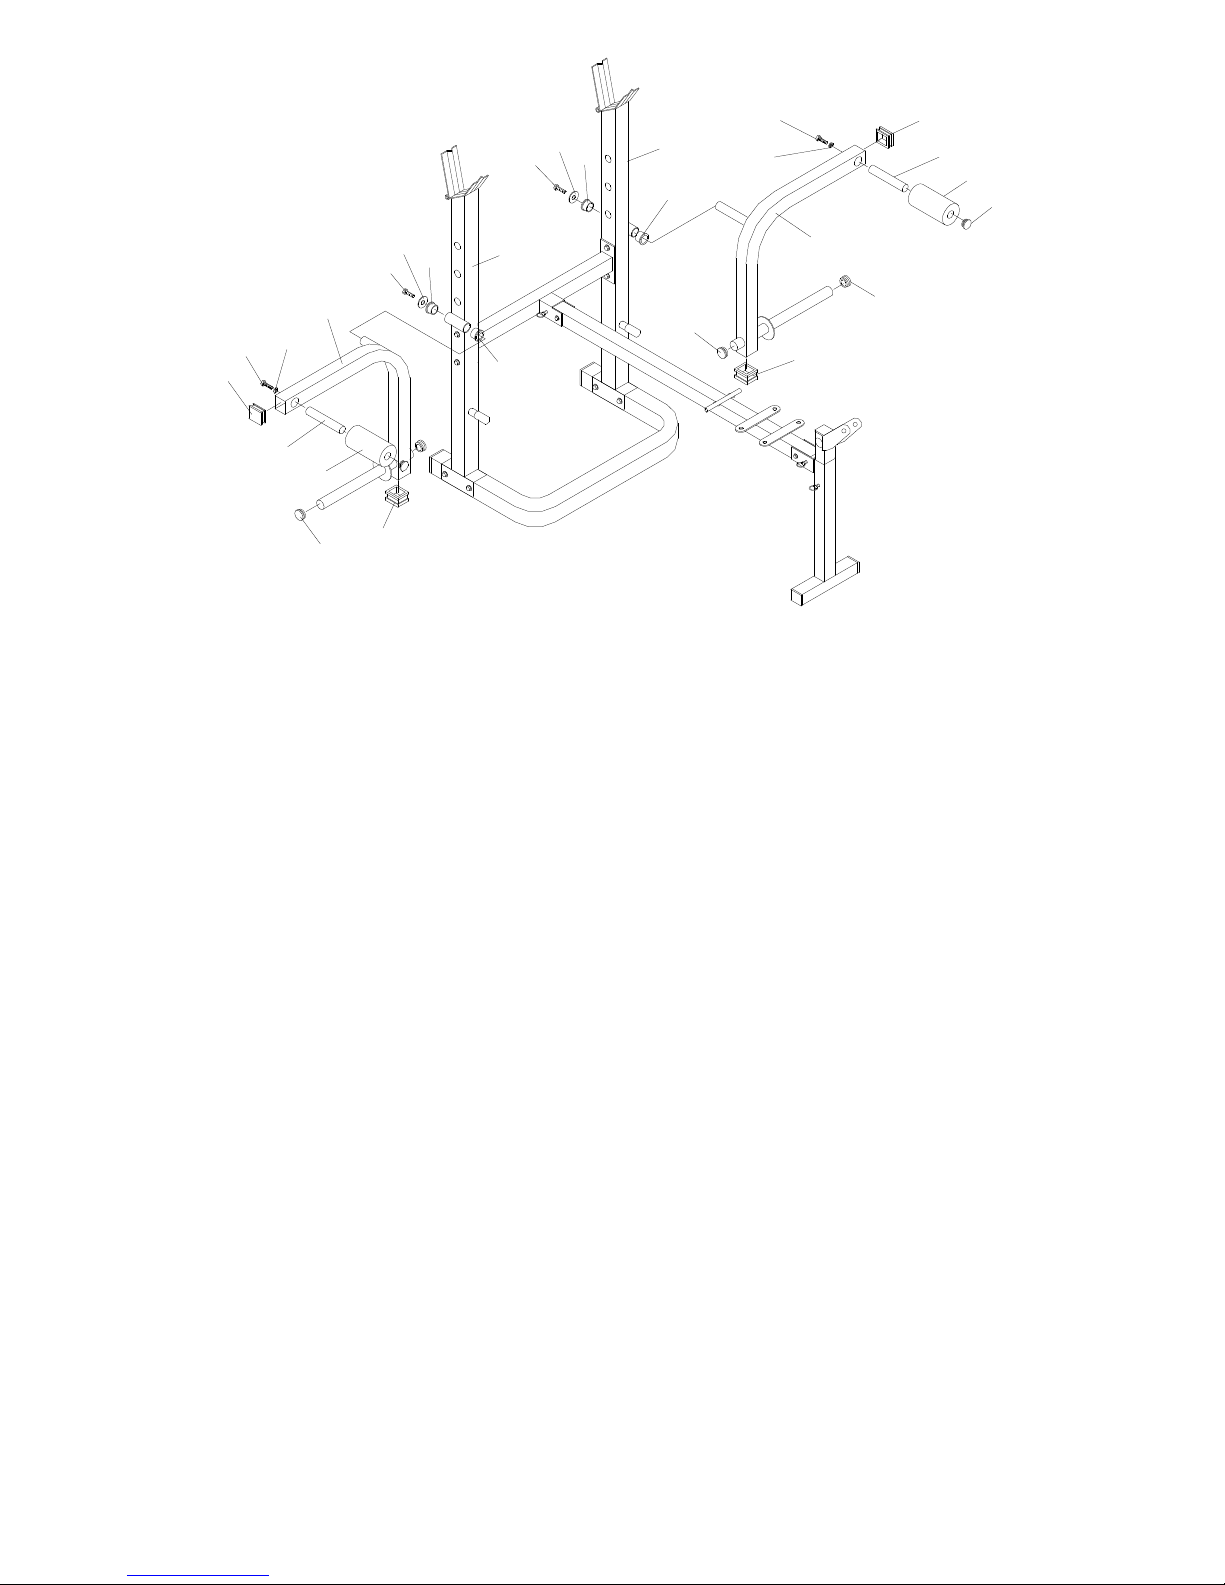
09
10
14 18
22
26
26
19
30
39
3441
22
26
41
34 19
30 39
22
14 18
26 22
19
19
01
02
STEP 3
1. PLACE 38mm SQUARE CAP (22) ONTO BOTH ENDS OF BUTTERFLY ARM
(09,10) AS SHOWN.
2. INSERT ROUND BUSHING (19) INTO WELDED TUBES ON R., L.
BARBELL CRUTCH (01,02).
3. INSERT R., L. BUTTERFLY ARM (09,10) THROUGH BUSHINGS, SECURE
WITH WASHERS (41) AND BOLTS (34), AS SHOWN.
4. INSERT BUTTERFLY PAD TUBE (14) INTO THE BUTTERFLY ARM
(09,10) SECURE WITH WASHERS (39) AND BOLTS (30) AS SHOWN.
5. SLIDE ON BUTTERFLY PAD (18) AND 25MM ROUND CAP (26) ONTO
BUTTERFLY ARM (09,10) AND BUTTERFLY PAD TUBE (14) AS SHOWN.

-7-
-8-
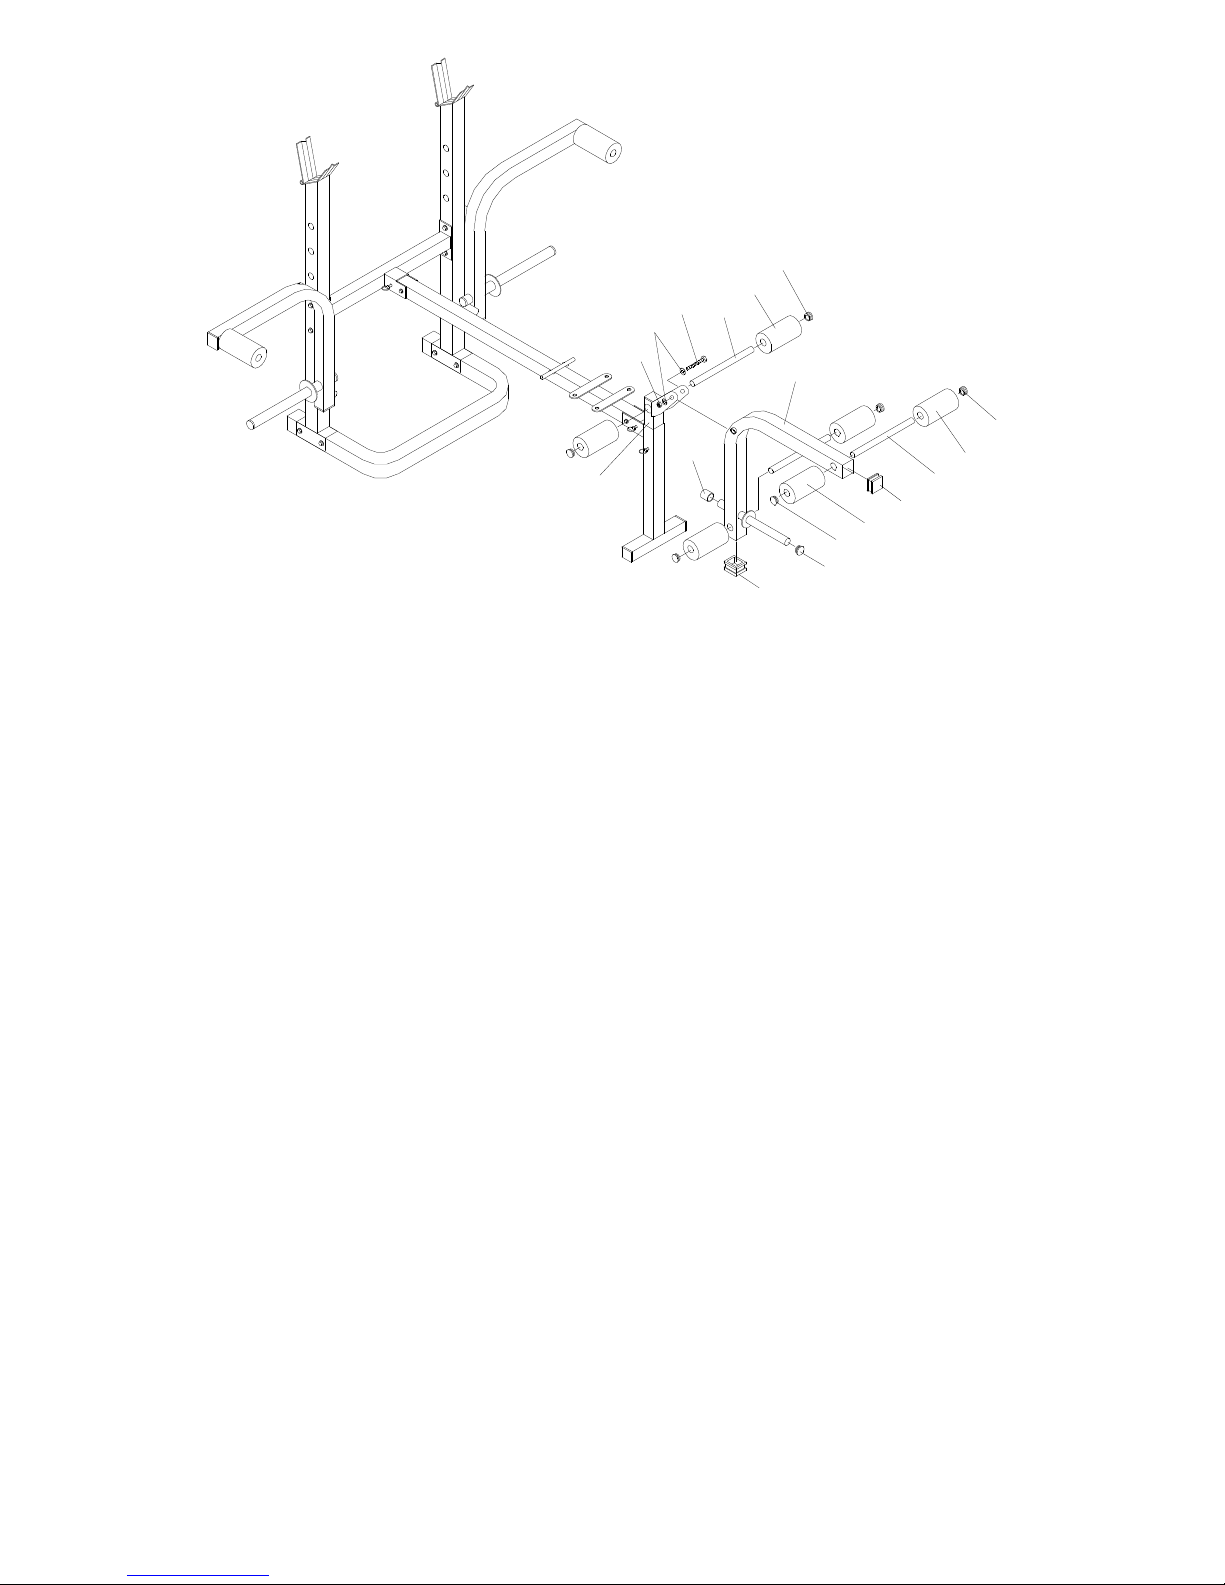
07
08
13 17
17
22
25
26
27
27
28
36
39
22
27
17
13
STEP 4
1. PLACE 38mm SQUARE CAP (22) ONTO LEG LIFT (08).
2. ATTACH LEG LIFT (08) TO LEG LIFT SUPPORT (07), SECURE WITH
BOLTS (28), WASHERS (39), AND NYLON NUT (36) AS SHOWN.
3. SLIDE LEG LIFT PAD BAR (13) THROUGH THE LEG LIFT (08) AND LEG
LIFT SUPPORT (07) AS SHOWN.
4. SLIDE THE LEG LIFT PAD (17) AND 19MM ROUND CAP (27) ONTO LEG
LIFT PAD BAR (13) AS SHOWN.
5. PLACE 25MM ROUND BUMPER (25) AND25MM ROUND CAP (26) ONTO
LEG LIFT (08).

-9-
-10-
12
15
16
24
33
40
4035
11
26 05
01
02
20
03
43
38
43
38
STEP 5
1. PLACE 25MM SQUARE CAP (24) ONTO BACKREST SUPPORT (12).
2. ATTACH BACKREST SUPPORT (12) OVER WELDED ROD OF CENTRAL
BRACE (05), ATTACH BACK SEAT (16) AND BACKREST SUPPORT (12)
TO CENTRAL BRACE (05). SECURE WITH BOLTS (33) AND WASHER (40)
AS SHOWN.
3. ATTACH SEAT (15) TO CENTRAL BRACE (05) SECURE WITH BOLTS (35)
AND WASHER (40) AS SHOWN.
4. PLACE25MM ROUND CAP (26) ONTO BACKREST HT.BAR (11).
5. LIFT THE BACK SEAT (16), INSERT THE BACKREST HT.BAR (11)
THROUGH THE R., L. BARBELL CRUTCH (01,02) TO YOUR DESIRED
HEIGHT.

-11-
6. INSERT BARBELL SAFETY LOCK (43) IN TOP MAIN UPRIGHT FRAME (01,02)
SECURE WITH NUTS (38) AS SHOWN.
-12-
20
06
20
03
05
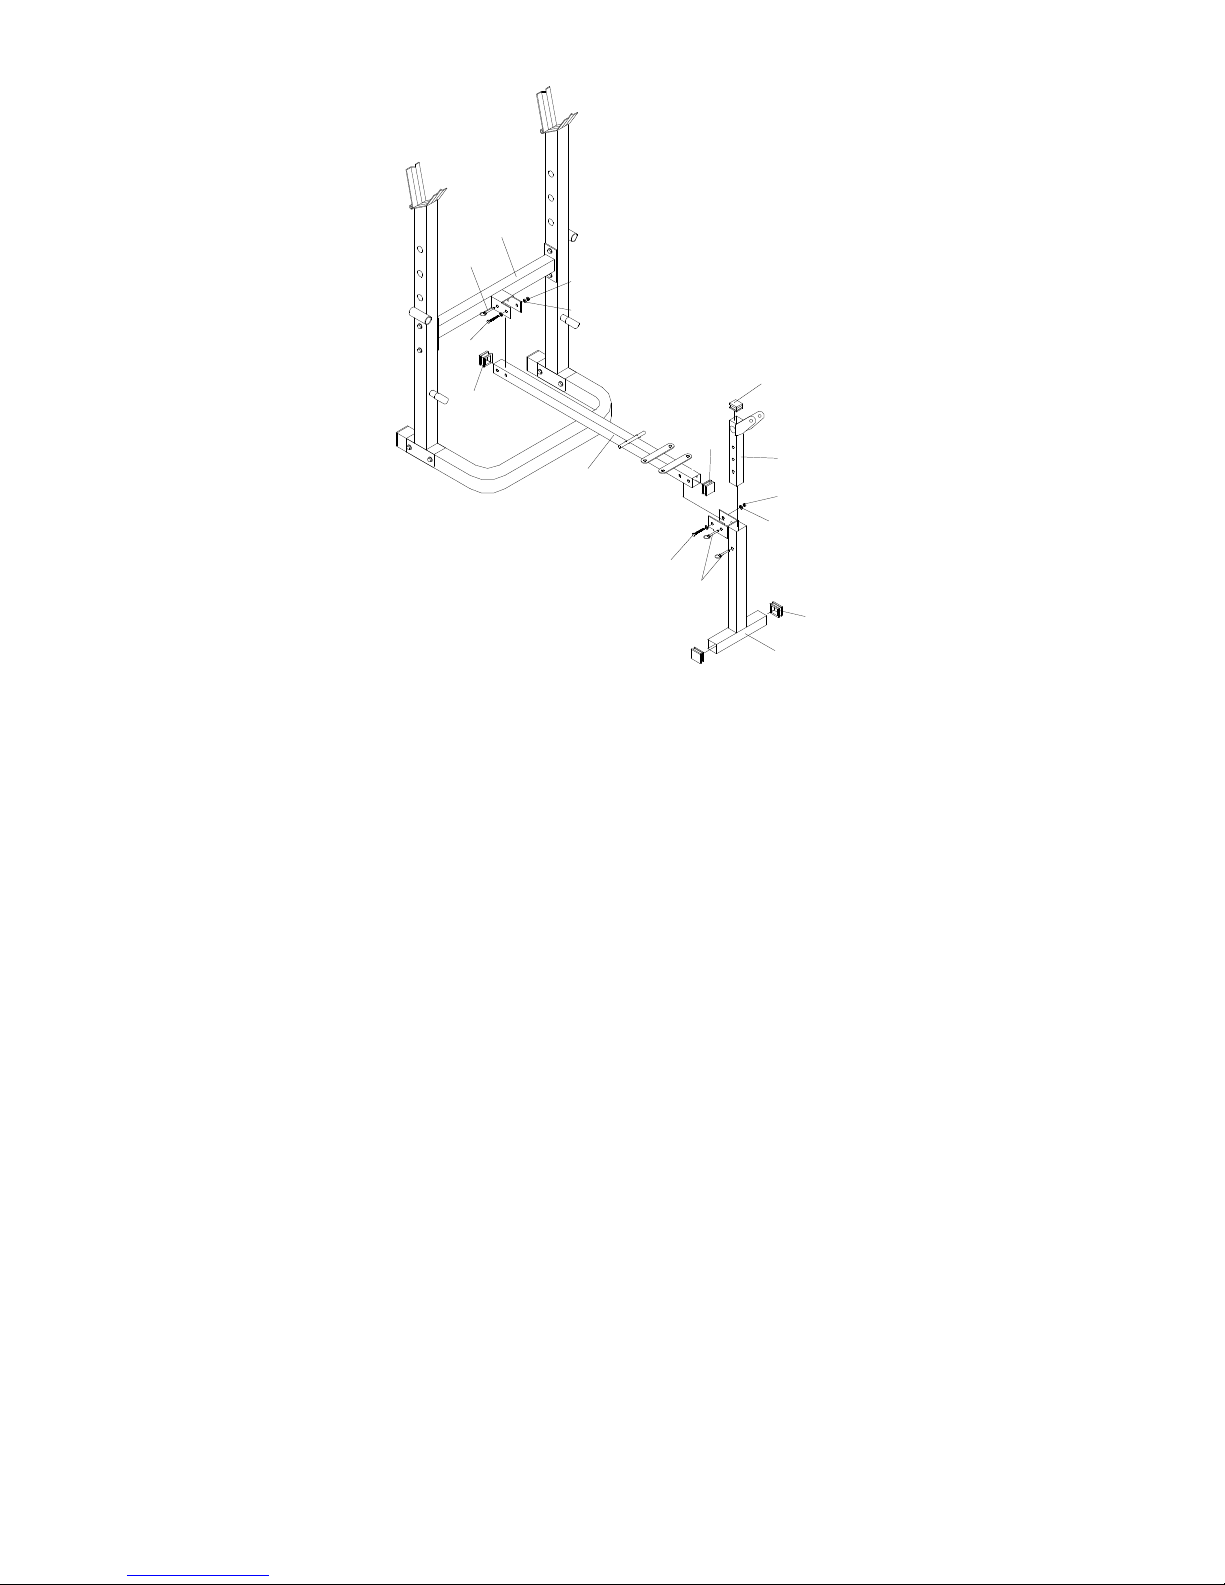
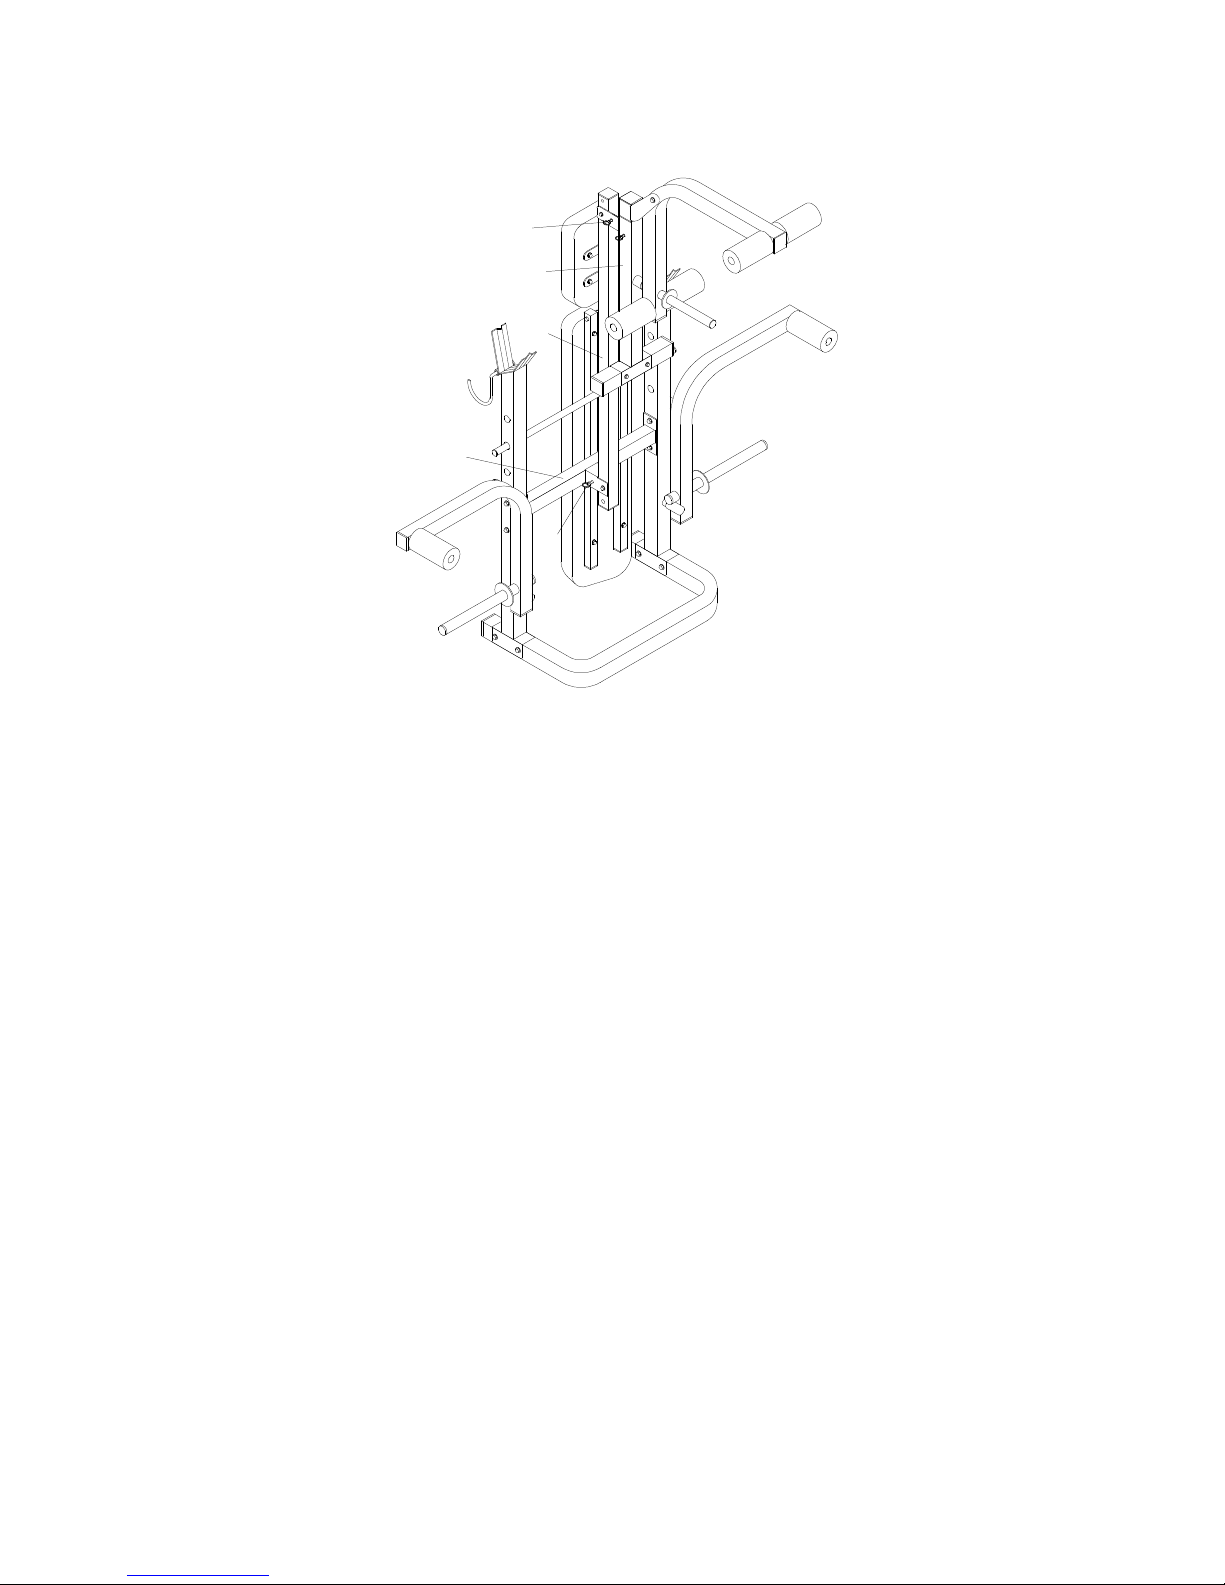
FOLDING INSTRU TIONS
1. PULL THE PIN (20) OFF THE CENTRAL BRACE (05) THEN PUSH THE CENTRAL BRACE (05)
BACKWARD TO SUPPORT BAR (03) FOR FOLDING.
To order spare parts
To guarantee an efficient service, make sure you have the follo ing items before you
contact our After Sales Service:
The name or reference of the product.
The manufacturing number sho n on the main chassis and on the packing box.
The number of the missing or faulty part sho n on the exploded vie of the
Product described in this manual.
Contact us from Monday to Thursday bet een 9h00 and 12h00 and 13h00 and
17h00 and on Friday bet een 9h00 and 12h00 (except for public holidays).
.A.R.E. / STRIALE After Sales Service
hristian FERRAT
18 / 22 rue Bernard – Z.I. les Vignes

-13-
93012 BOBIGNY edex
Tel.: 00 33 1 48 43 04 44 Fax: 00 33 1 48 91 06 24 Email:
Training:
- Once your level of fitness has been determined by your doctor, do not try to achieve your
maximum after the first fe session.
- If you are a beginner, start ith the light eights to get your body used to the routine. Be
patient and your performance ill improve. Excessive or badly-planned training can be
harmful to your health.
- One cardio-vascular orkout of 10 minutes for people aged over 50.
- Start each session ith a orkout ithout eights, ith a series of pull-ups. Doing some
pull-ups before the main exercise ill increase the suppleness of the muscles and help avoid
strains or injuries. After the session this ill stretch the muscles and avoid aching and
stiffness.
- Increase the load progressively. If you start your session too heavily, you risk running out of
energy too quickly and increase the possibility of injury.
- Each movement should be carried out ithout jerking. The back must remain absolutely flat,
properly placed on the padding, and must not be bent during the movement.
- For a beginner, four series of 10 to 15 repetitions per session are sufficient.
- Alternate the orking of the muscle groups. It is not advisable to ork on all the muscle
groups on the same day. Spread your training schedule over several days, and do not forget
the rest periods.
Example of a schedule:
Monday
Back/biceps
Tuesday
Shoulders/abdominals
Wednesday
Pectorals/triceps
Thursday
Rest
Friday
Thighs/abdominals
-14-
Saturday
Rest
Sunday
Rest
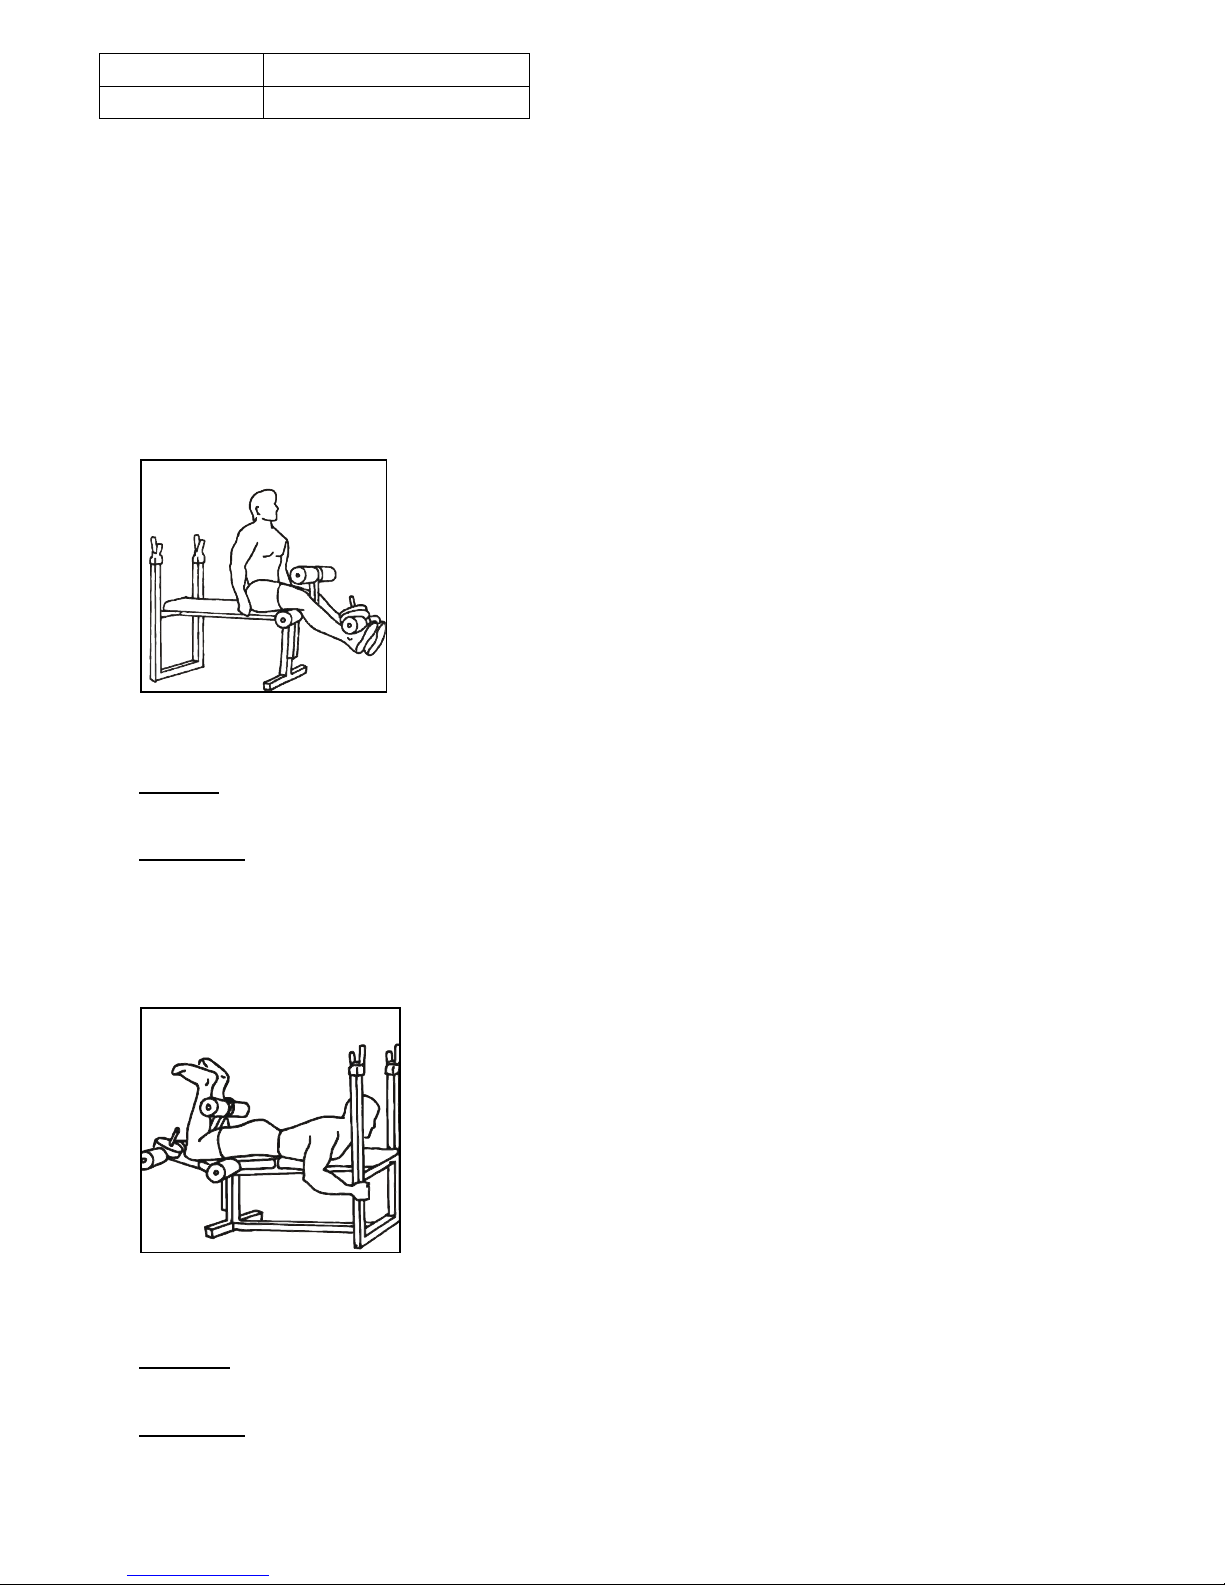
Leg extension
Position: Seated, ith the back straight, ith your feet positioned behind the foam padding
elements.
Movement: Exhale as you raise the legs, ithout locking the knees (legs not fully extended).
Return to the original position hile continuing to bear the load.
Leg flex
Positions: Lying on your front, your feet positioned behind the foam padding elements at the
level of the heels.
Movement: Bring your heels as close to the buttocks as you can, exhaling as you do so. Return to
-15-
the original position hile continuing to bear the load. The hips must remain stationary.
Muscles: Hip and leg muscles
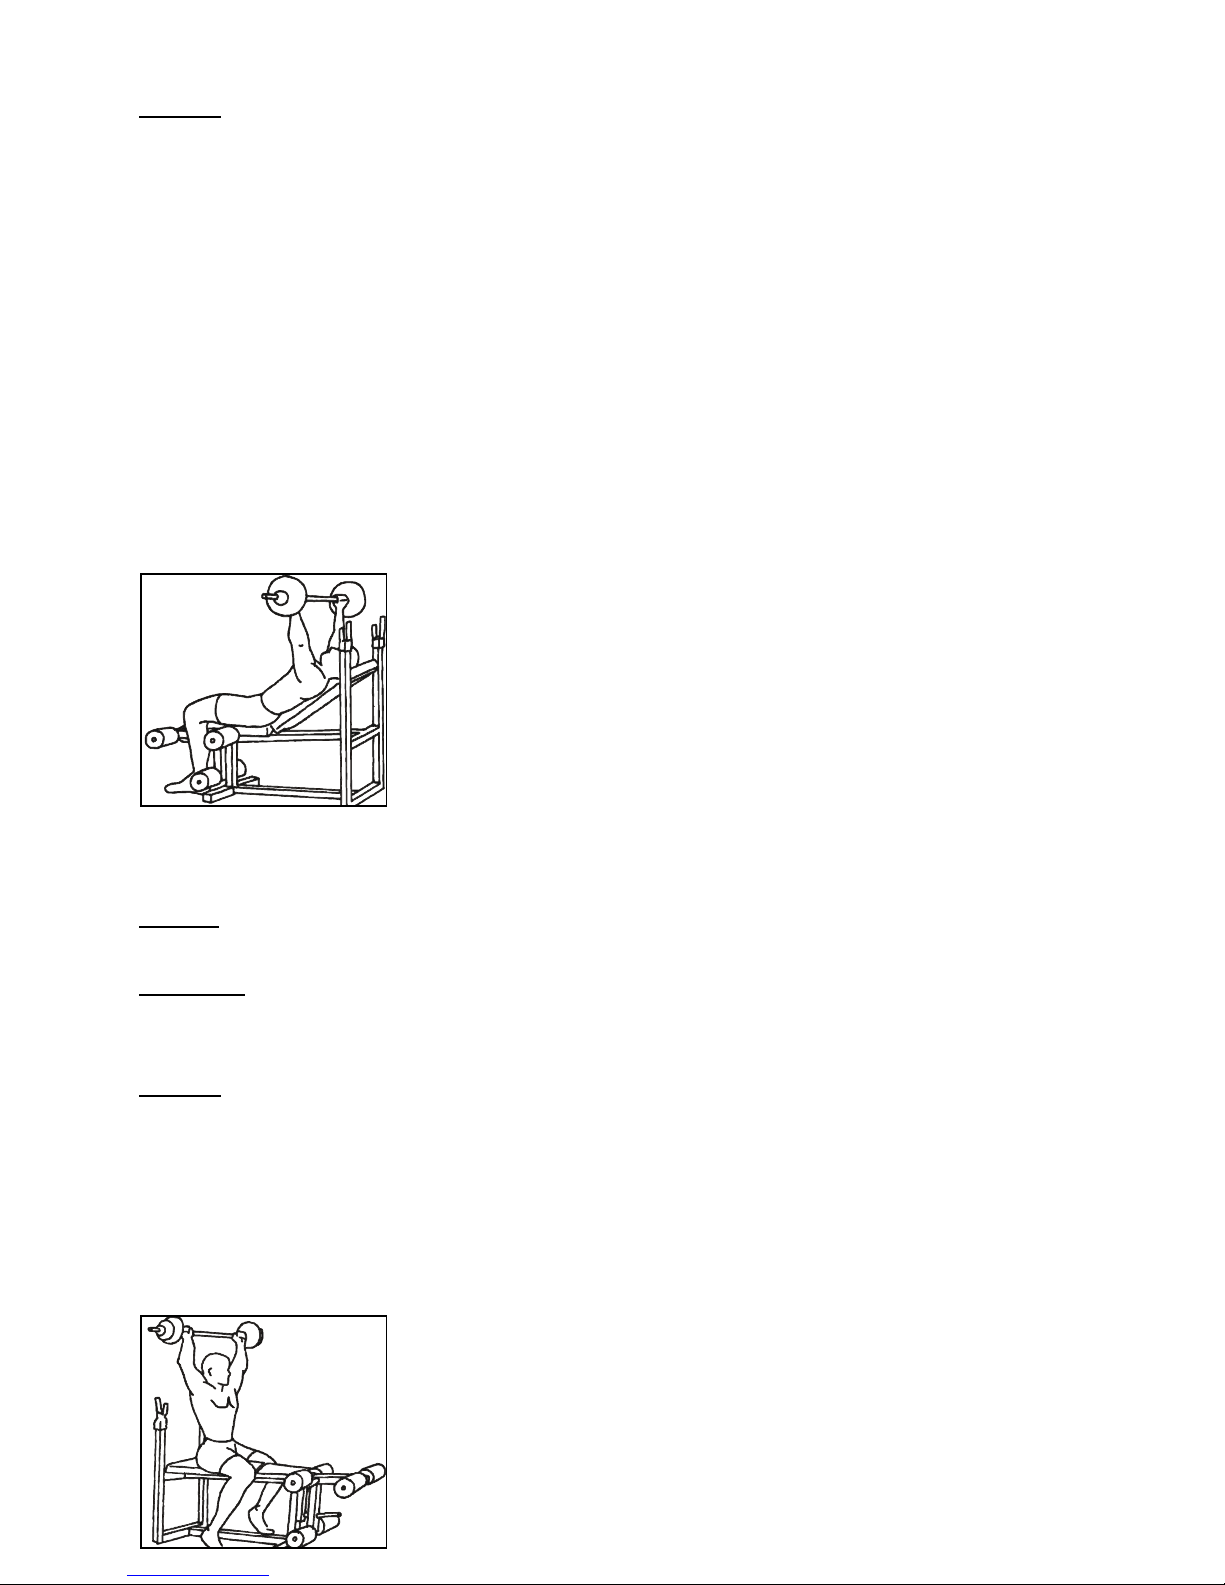
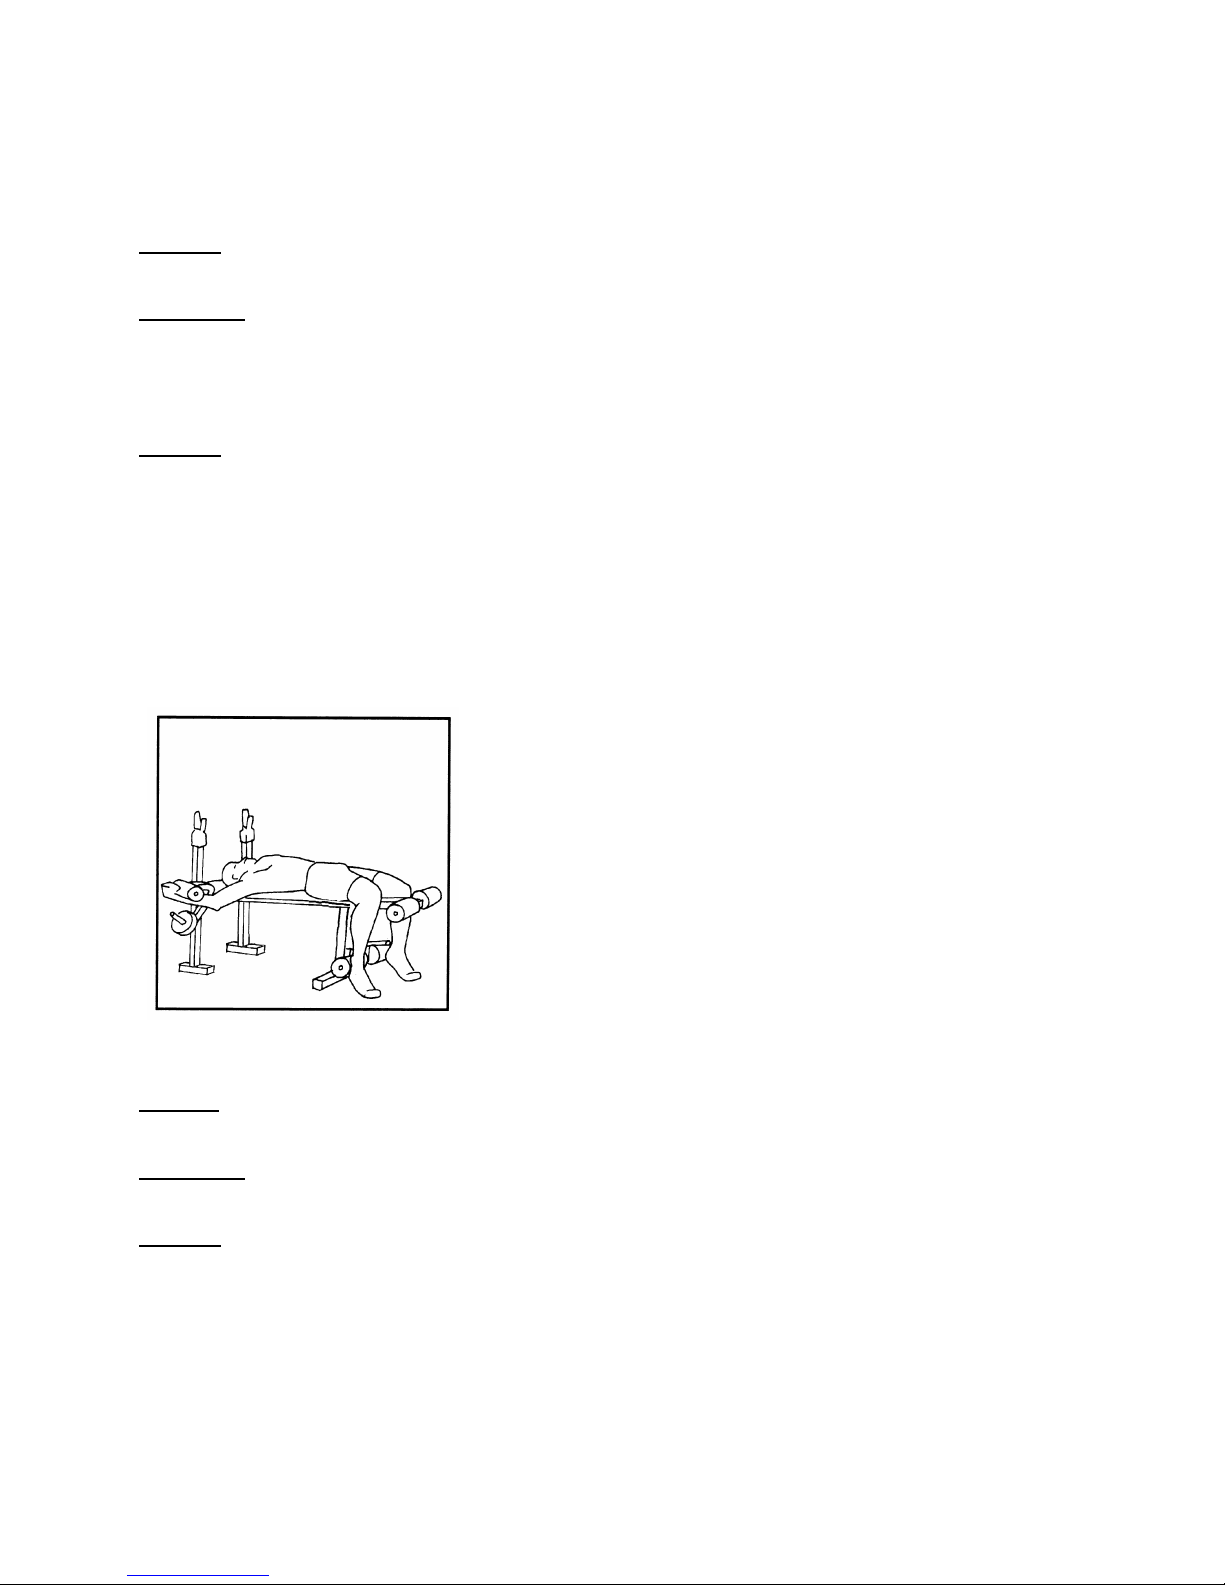
Inclined work
Position: Bench inclined, lying flat on the back, head resting on the back of the bench. The grip
on the bar should be slightly greater than the idth of your shoulders.
Movement: Bring the bar back to the chest hile inhaling. Exhale hen you press the bar,
ithout jerking, and ith the elbo s flexed. Return to the initial position hile continuing to
bear the load. The lumbar region (lo er part of the back) must remain in contact ith the bench.
Muscles: Pectorals (upper part), triceps, anterior deltoids.
Press work
The same as before, but ith the bench flat. This movement involves all of the pectoral muscles.
"Military" work
-16-
Position: Bench flat, horse-riding stance, back straight. The grip on the bar should be slightly
greater than the idth of your shoulders.
Movement: Bring the bar in front of you to the level of your shoulders. Exhale as you raise the
bar above your head, ithout jerking and ith the elbo s flexed (do not lock the elbo s at the
end of the movement). Return to the initial position hile continuing to bear the load. The lumbar
region (lo er part of the back) must remain in contact ith the bench.
Muscles: Pectorals (upper part), triceps, anterior deltoids.
Variant: Same movement, but ith the movement behind the head, starting on the nape of the
neck.
Butterly
Position: Flat on the back, the arms extended (but not locked), positioned beneath the foam
padding of each arm of the butterfly.
Movement: Exhale as you raise the arms above the head. Return to the original position hile
continuing to bear the load.
Muscles: Pectorals, anterior deltoids.
Table of contents
Other Striale Fitness Equipment manuals


Popular Fitness Equipment manuals by other brands

Energetics
Energetics CT 520pc Assembly manual

Paramount Fitness
Paramount Fitness FS-52 Assembly manual

ETENON Fitness
ETENON Fitness LEG EXTENSION owner's manual

Matrix
Matrix G3-S51 Assembly guidelines

CYBEX
CYBEX Prestige Total Access 21400-999-4 AC owner's manual

Vision Fitness
Vision Fitness AR700 owner's manual


Hoist Fitness
Hoist Fitness HD-3000 owner's manual

Hammer Strength
Hammer Strength HD Tread owner's manual

idealfit
idealfit 5.013.06 user manual

Body Clock
Body Clock 3-in-1 COMBO Instructions for use
ICON Health & Fitness
ICON Health & Fitness NORDICTRACK RW 900 user manual

Aeromic
Aeromic Cyclemic Care Instructions