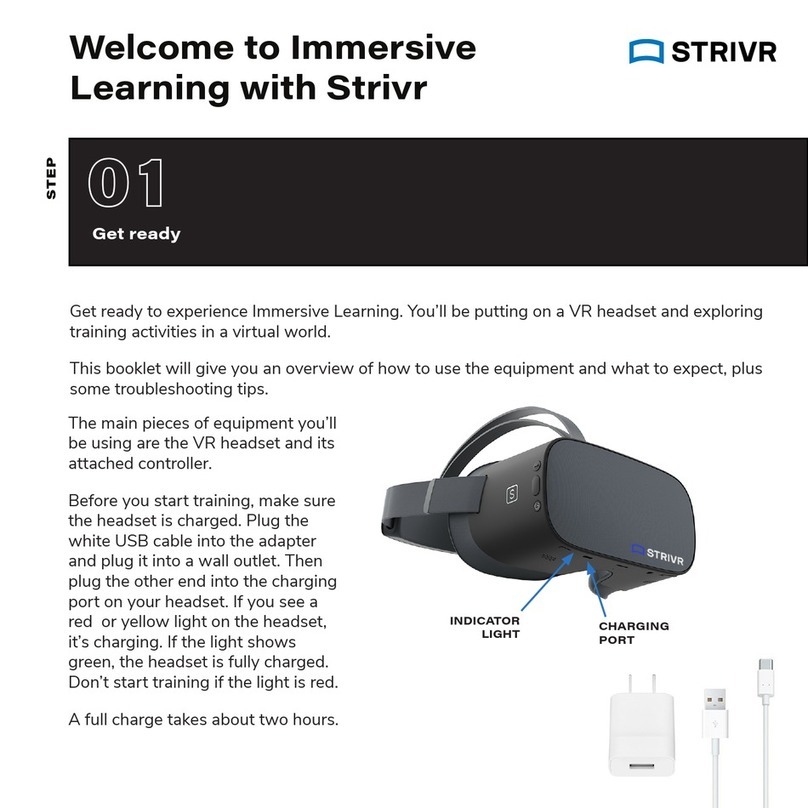
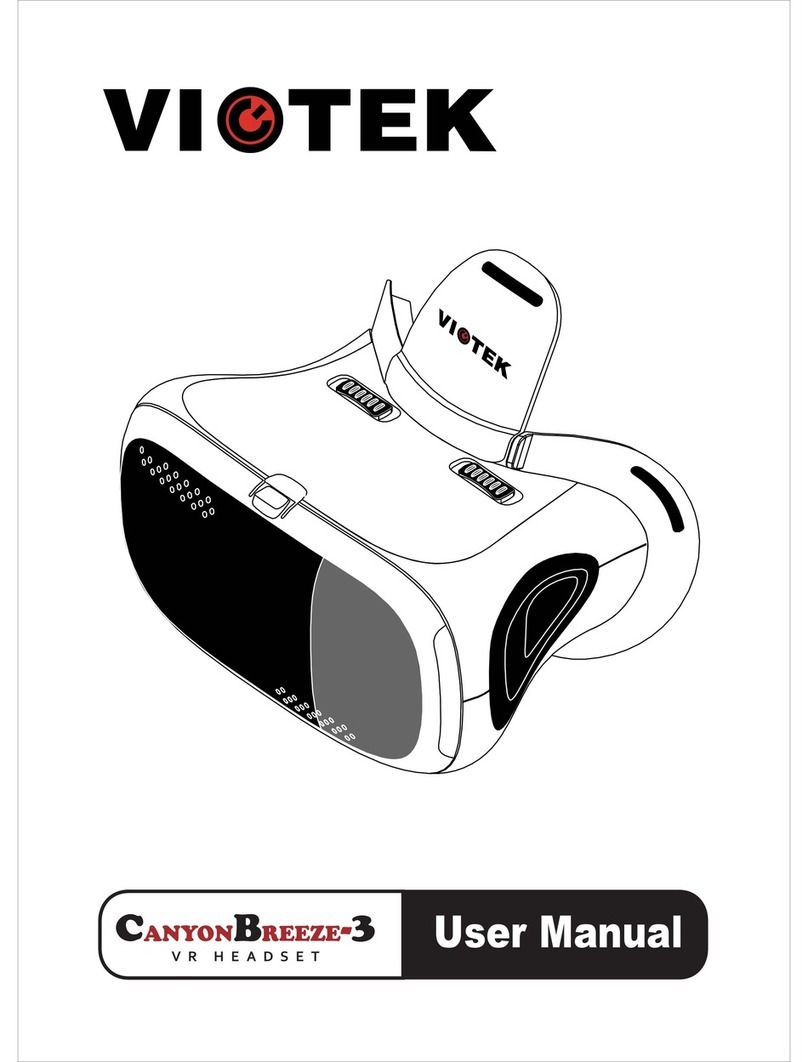
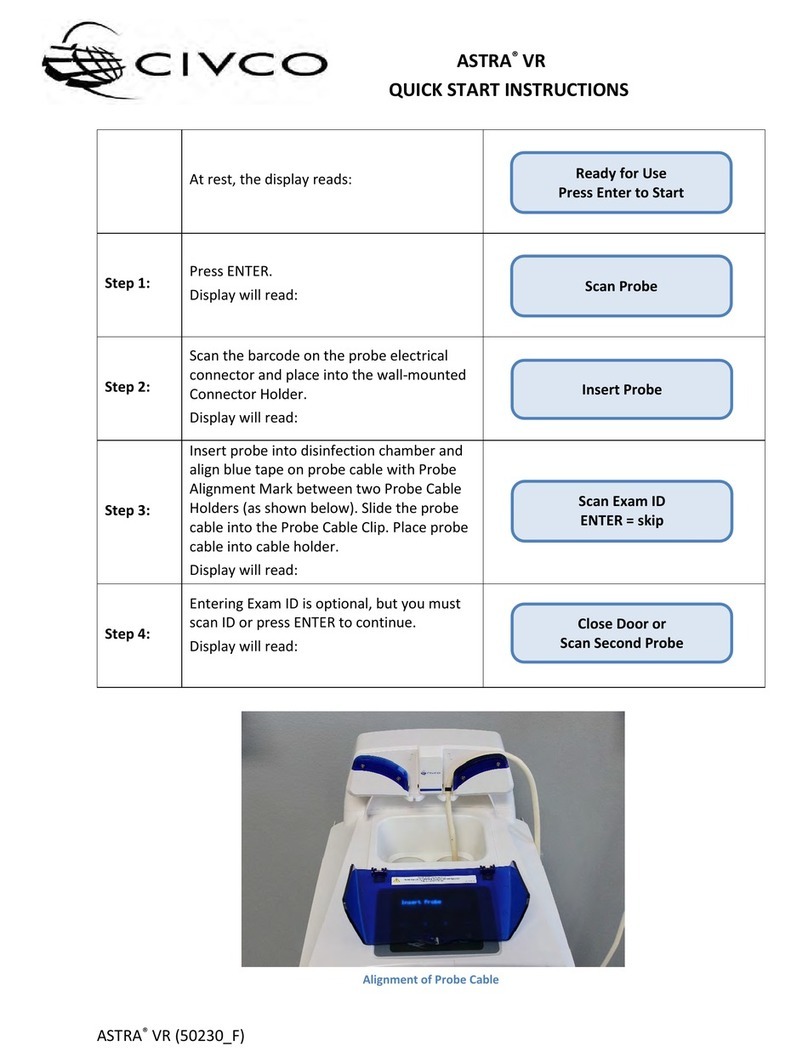
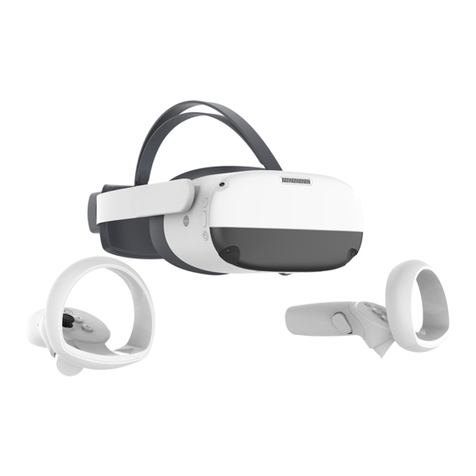
STRIVR PICO NEO 3 User manual

User
manual
v1.0 09/16/2022
Immersive Learning
with Pico Neo 3

Strivr is a registered trademark of Strivr Labs, Inc. Copyright ©2022 Strivr Labs, Inc.
All rights reserved.

Contents
Welcome to Immersive Learning..................................................................................................................................................................1
Quick start...............................................................................................................................................................................................................2
Headset and controller basics ......................................................................................................................................................................3
Using the controllers..................................................................................................................................................................................4
Controller calibration.................................................................................................................................................................................4
Charging the headset................................................................................................................................................................................5
Powering on the headset.........................................................................................................................................................................5
Adjusting the volume.................................................................................................................................................................................5
Built-in speakers vs. headphones .......................................................................................................................................................5
Setting a boundary for safe use ...........................................................................................................................................................6
Wearing the headset..................................................................................................................................................................................6
Product care & maintenance.........................................................................................................................................................................9
Changing controller batteries................................................................................................................................................................9
Handling the headset ................................................................................................................................................................................9
Storage space................................................................................................................................................................................................9
Long-Term Storage .....................................................................................................................................................................................9
Equipment hygiene...................................................................................................................................................................................10
Facilitating training............................................................................................................................................................................................11
Headset wi-fi connection .......................................................................................................................................................................11
Preparing the equipment .....................................................................................................................................................................12
Choosing a training space....................................................................................................................................................................12
Retrieving the headset and getting the learner ready............................................................................................................12
Putting on and adjusting the headset.............................................................................................................................................13
Acclimation screens.................................................................................................................................................................................14
Logging out ..................................................................................................................................................................................................15
Returning the headset.............................................................................................................................................................................15
The Strivr Portal..................................................................................................................................................................................................16
FAQ & troubleshooting...................................................................................................................................................................................17
Health & safety warnings..............................................................................................................................................................................19
Contact us............................................................................................................................................................................................................20

Welcome to Immersive LearningUser manual
support.strivr.com 1
Welcome to Immersive Learning
Strivr’s platform accelerates skill-building from design through implementation, scaling VR-based immersive
content, and delivering unique employee performance insights and predictive analytics.
In this manual you’ll get an overview of your VR equipment, learn best practices for facilitating training at your
company, get a reference for troubleshooting, and learn about the Strivr Portal, where you can view and track
training results and analytics.
This manual covers Strivr Immersive Learning with the Pico Neo 3 headset.
Find more documentation and a link to contact support at https://support.strivr.com.

User manual Quick start
support.strivr.com 2
Welcome to Immersive Learning with Strivr. Let’s look at quick steps to get up and running:
1. Unbox your gear
In each headset box, you’ll find a VR headset with 2 controllers, plus a charge cable, wall adapter, and batteries.
In a separate accessory bag, you’ll find a dry lens-cleaning cloth and a bag of wet disinfecting wipes. Take the
headset out and peel o the protective lens covers.
2. Install controller batteries
For each controller, slide the bottom of the controller down to open the battery compartment and, if not already
installed, insert the batteries. Make sure to remove the plastic insulator tab if you see one.
3. Charge your headsets
Charge headsets for about 2 hours, or until the indicator light turns green. If you have a USB hub, plug each
headset into a USB port on the hub and plug the hub into a wall outlet.
4. Connect to wi-fi*
Put the headset on and wake the controller by holding the home button. Press the thumbstick IN and UP and
pull the trigger to open the wi-fi screen. On the wi-fi screen, make sure Use Wi-Fi is set to On. Then select your
network, key in the password, and press the home button on the controller to return to training.
5. Train
Select an Immersive Learning experience from the menu and dive in. After your training session is over, make
sure to log o before returning the headset and plugging it back in.
* NOTES:
If your company uses a Mobile Device Manager like Workspace ONE, headsets should connect
automatically once Use Wi-Fi is set to On.
Connecting to wi-fi is only necessary the first time you use a headset at a new location.
Quick start

User manual Headset and controller basics
support.strivr.com 4
Controller calibration
If the controller is not working, press the home button to wake it.
If the position of the in-headset view is not properly centered, hold the home button for 2 seconds and it will be
re-centered.
NOTE: Pause may not be available in all experiences.
WARNING: Learners can unpair controllers with button combinations. If a controller becomes
unpaired from the headset, you will need to contact Strivr support. Make sure learners do not hold
down home + pause or home + trigger for more than 4 seconds.
Using the controllers
• To move in the virtual environment, use the
thumbstick.
• To select menu items and interactive elements,
pull the trigger button.
• To grab objects in the virtual environment, use the
grip button.
• For experiences that use only one controller, pull
either trigger to switch between controllers.
• To pause, use the back button.
• To exit to the menu, use the home button
• To recalibrate (re-center) the display, press and
hold the home button for 2 seconds.
• If a controller is disconnected, press the home
button to wake it
• If a controller becomes unpaired, contact support.
THUMBSTICK
TRIGGER
INDICATOR LIGHT
HOME
PAUSE
GRIP

Headset and controller basicsUser manual
support.strivr.com 5
COLOR STATE MEANING
Red Solid Low battery (less than 15%)
Red Blinking Screen is on and battery is low
Blue Solid Screen is on
PLUGGED IN:
Green Solid Battery is charging (above 90%)
Yellow Solid Headset is charging (below 90%)
Red Solid Low battery (less than 15%)
HEADSET LIGHT INDICATOR MEANINGS
Charging the headset
Plug the headset into the charge cable whenever it is not in use for training. You never need to power the
headset o completely—after training, just plug in it. From a full charge, the headset will last approximately two
hours. You may check the precise battery level percentage in the menu of the headset. When the light on the top
of the headset turns red, the battery is low.
Powering on the headset
To turn the headset on, press and hold down the power button located on the top of the headset for about
5 seconds or until the indicator light next to the power button turns blue. To check to see that it is powered
on, hold the headset up to your eyes and the screen inside will illuminate. If the power button is accidentally
pressed during training, the display will go to sleep. Short press it again to turn the display back on and resume
training.
Adjusting the volume
Use the volume control on the headset to adjust the sound level.
Built-in speakers vs. headphones
The headset has built-in speakers. These speakers are good for self-guided training or training in small groups.
However, in larger open settings with many people or a lot of external noise, we recommended using over-ear
headphones (as opposed to on-ear or earbuds) for comfort, noise cancellation, and sanitation purposes. Plug
the headphones into the headphone jack on the headset.

User manual Headset and controller basics
support.strivr.com 6
Wearing the headset
Before putting on the headset, loosen
the straps using the adjustment dial
on the back. Then rotate the straps up
and put the face visor over your eyes
(and glasses if you are wearing them).
Then, holding the face visor in place,
rotate the straps down and tighten
them using the adjustment dial until
comfortable. If the headset is too tight,
you can remove the inner top strap.
To accommodate headwear and larger
hairstyles, make sure to loosen the
adjustment dial as far as possible
before putting the headset on.
For more information about wearing
the headset, see “Facilitating training”
on page 11.
Setting a boundary for safe use
The Pico Neo 3 headset is designed to work with active 6 Degrees of Freedom (6DoF) experiences and
stationary 3 Degrees of Freedom (3DoF) experiences. In 6DoF experiences you take an active role, moving
through the virtual world and interacting with objects, while in 3DoF experiences you remain stationary
and view the experience, using your pointer to select objects and answer questions. Because active 6DoF
experiences require more room for safe use, you’re required to set a boundary for safe use every time you put on
the headset, even when you’ll be in a stationary 3DoF experience.
Each time you put on the headset, the passthrough cameras activate, allowing you to see your surroundings,
and you are prompted to choose a boundary type. Choose Quick Setup to select a predefined boundary, or
Custom to draw your own boundary. Strivr recommends drawing a custom boundary. When setting a custom
boundary, you’ll first set the virtual ground by touching the ground with the controller, then draw a boundary on
the floor with the controller, then confirm.
If you choose Quick Setup, make sure to select Sitting or Standing and verify that the floor level is set correctly
by using the Adjust floor level command.

Headset and controller basicsUser manual
support.strivr.com 7
Custom boundary
1. Select Custom. The passthrough cameras activate, allowing you to see the area around you.
a. If the floor level appears to match the real floor, select Next.
b. If the floor level does not appear to match the real floor, select Set Manually. Then touch the controller to
the floor and pull the trigger.
3. After floor level is set, you are prompted to draw the boundary.
a. Point the controller at the floor and press and hold the trigger to draw a safe use area free from any trip
hazards or obstacles.
2. Set the floor level.
NOTE: If waking a headset, you may see a Welcome Back popup instead of this initial choice.

User manual Headset and controller basics
support.strivr.com 8
4. When happy with the boundary area, select Finish to start training.
NOTE: If waking a headset, you may see a Welcome Back popup instead of this initial choice.
Quick Setup
Strivr recommends using Quick Setup only for stationary 3DoF experiences.
1. Select Quick Setup.
2. Choose Sitting or Standing and Medium or Large area.
3. Select Adjust floor level and follow onscreen instructions.
4. Select Finish.

Product care & maintenanceUser Manual
support.strivr.com 9
Product care & maintenance
Changing controller batteries
To open the battery compartment, press the side of the controller in and slide down. Pico Neo 3 controllers take
2 AA batteries each. After changing controller batteries, you may need to re-sync the controller.
Handling the headset
• To avoid damaging the lenses and display, keep your headset away from direct sunlight.
• Avoid sharp objects near the lenses.
• Be gentle when adjusting your headset and tightening the straps.
• Do not leave the headset in extremely hot locations or near heat sources.
Storage space
Most Strivr Immersive Learning systems are stored in trays, lockers, or portable carts that have cutouts for
storing each headset. To ensure proper cooling when headsets are not charging in the storage solution:
• Never stack any of the electronic components on top of each other.
• Do not store in or on insulated/fabric areas.
• Do not store in direct sunlight.
Long-Term Storage
If you won’t be training for over two months, Strivr recommends you remove the batteries from each controller. If
batteries sit in the controllers for an extended period of time they can decay and potentially leak.
Strivr recommends you keep your headsets plugged in at all times when not training. If you do disconnect or
power o headsets during a period of inactivity, make sure to power them back on and plug them in at least 24
hours before a training session so your system can receive the latest content and software updates from Strivr.
PRESS IN AND
SLIDE DOWN

User Manual Product care & maintenance
support.strivr.com 10
23
Before and after cleaning and
disinfecting equipment, wash your
hands thoroughly with soap for at
least 20 seconds.
Use disinfecting wipes on
headsets, controllers, and working
surfaces (including desks, chairs,
etc) and leave to dry for 10 minutes.
Use recommended skin-friendly,
non-abrasive wipes on headset
contact areas (face pads and
straps.)
DRY MICROFIBER CLOTH LENSES
Use the dry lens micro-fiber cloth
included with your system to clean
the headset lenses as needed. Don’t
use liquid or chemical cleansers.
Starting from the center of the lens,
gently wipe the lens in a circular
motion moving outwards.
Equipment hygiene
Keep your equipment clean and disinfected with a course of two wet wipes. The steps shown here are
the minimum steps Strivr recommends and should be performed between every use of the equipment.
Your company works with Strivr to develop its own plan for VR equipment hygiene. Check your internal
documentation and always follow manufacturers’ instructions.
1

Facilitating trainingUser Manual
support.strivr.com 11
Facilitating training
Headset wi-fi connection
It’s important that headsets are connected to the Strivr cloud to transmit training results and to receive content
and system updates. Check the connection before each training session and at the end of the day.
1. Put the headset on and
log in.
2. On the program
selection screen, select
the About button.
The status should say
Connected to Strivr.
If you see Wi-Fi not enabled or Not Connected to Wi-Fi
on the About screen:
1. Open wi-fi settings by pulling the controller trigger
while tilting the thumbstick UP and pressing it IN.
2. Make sure Use Wi-Fi is set to On.
3. Select your wi-fi network and key in the password.
NOTE: If your company uses a Mobile Device Management (MDM) system, you may not be allowed to
select a wi-fi network. Contact your MDM admin for more information.
HOLD FOR
SECOND

User Manual Facilitating training
support.strivr.com 12
Preparing the equipment
The day before delivering training, make sure all your headsets are charged, the controllers are paired with the
headsets, and the headsets have the latest content.
• Make sure headsets are charged.
°Charge the headsets by connecting them to the USB hub with the charging cables. If your system does
not include a USB hub, charge the headsets with wall outlet adapters and charging cables.
°From 0%, headsets will charge fully in about 2 hours.
• Make sure controllers are paired.
°Put on the headset and ensure you can see and select with the pointer.
°If a controller does not function, make sure that it’s awake by pressing the home button for 2 seconds.
°If a controller appears to be unpaired, see “The controller is not working.” in the FAQs and
Troubleshooting section.
• Make sure the latest content is uploaded
°Leave all headsets plugged in overnight.
°If an update is queued, they will automatically update to the latest content version.
Choosing a training space
• If possible, train in a quiet area with minimal noise and distraction.
• Ensure that foot traic is low in the area chosen and the area is free of hazards and obstacles.
• If the experience will be taken seated, have a swivel chair available for the learner to sit and turn in. Taking
the experience seated is recommended when a facilitator is not present or the learner feels discomfort.
• If the experience will be taken standing, you may want to have a chair or table nearby for the learner to rest
a hand on to ground themselves in the physical space.
• Ensure that learners have adequate room to draw a safe use boundary. For active 6DoF experiences, Strivr
recommends a 10’ x 10’ area. If learners will be training on stationary 3DoF experiences only, they can
choose the predefined boundary Sitting - Medium or Standing - Medium.
Facilitators may check on learners during training sessions to ensure safe training.
Retrieving the headset and getting the learner ready
When a learner is to begin training,
1. Carefully unplug the headset from its charge cable.
2. Clean and disinfect the headset (and follow your company’s specific instructions for cleaning and
disinfecting.)
3. Ensure the space around the learner is free from obstacles and give the learner the headset and controller.
4. Direct the learner to have their Login ID at hand, as they will need it to log into the training session.
5. Prepare the learner to draw a safe use boundary.

Facilitating trainingUser Manual
support.strivr.com 13
Putting on and adjusting the headset
• Make sure the learner is aware of their surroundings before putting on the headset.
• Movement tracking: The headset uses
movement tracking to orient the learner in
space. Be careful not to block the passthrough
cameras on the front of the headset when
putting it on—doing so can interfere with
movement tracking. If you see a message
that movement tracking is lost, make sure the
passthrough cameras are not blocked and look
around your surroundings. Movement tracking
should automatically reset. Do not disable
movement tracking. If movement tracking does
become disabled, contact Strivr support.
• Interpupillary Distance: If the view appears blurry,
and moving the headset up and down does not
improve the image quality, you can manually
adjust the distance between the lenses to line
them up with the distance between your pupils.
Take o the headset and use your thumbs and
forefingers to grip and move the lenses toward
or away from the middle. There are 3 distance
settings: 58mm, 63.5mm, and 69mm.
• The headset has two side straps and one top
rubber strap. Learners should loosen the side
straps by rotating the adjustment dial on the
back, then rotate the straps up and put the face
visor over their eyes (and glasses if they are
wearing them). Then, holding the face visor in
place, they should rotate the straps down and
tighten them using the adjustment dial until
comfortable. If the headset is too tight, they can
remove the inner top strap.
• Glasses: If the learner wears glasses, they should wear their glasses inside of the headset. Learners should
make sure to loosen the straps as much as possible using the adjustment dial before putting the face visor
over their eyes. In the rare case that the glasses frames are too large to fit inside of the headset, they may
remove their glasses.
• Larger hairstyles, headwraps, or other headwear: The headset’s straps can accommodate almost any
hairstyle or headwrap. First, learners should use the adjustment dial to adjust the side straps to their loosest
setting. Then, put the headset display up over their eyes first. The learner can remove the inner portion of
the rubber top strap if necessary. The learner may then tighten the side straps using the adjustment dial
such that the headset’s display remains secure over their eyes.
• Headphones: If using external headphones, instruct learners to put them around their neck first, then, after
putting on and adjusting the headset, lift the headphones over their ears.

User Manual Facilitating training
support.strivr.com 14
After they log in, learners see training menus, pick an
immersive learning experience, and dive in.
. ALIGNMENT
. FOCAL ADJUSTMENT
. LOG IN
. HEADSET ADJUSTMENT
. HEALTH & SAFETY AGREEMENT
NOTE: The screens learners see at your company may not match these screens exactly.
Acclimation screens
When learners first put on the headset, after setting a safe use boundary, they see several screens that tell them
how to use the controllers, adjust the headset, and log in to Strivr training.

Facilitating trainingUser Manual
support.strivr.com 15
Logging out
• Learners should select Log O inside the headset before ending their training session and taking o the
headset. A complete training session includes three steps: Successful login, successful completion of
training, and successful logout.
• Auto Logout: The headset will automatically log out of the current session and start a new one when it is
plugged into the charge cable.
Returning the headset
When a learner finishes training,
• Clean the headset and controller as specified in “Equipment hygiene” on page 10.
• Return the headset and controllers to their storage location.
• Plug the headset back into the charge cable.
NOTE: Do not power o the headset. The headset must remain on to send training results and
receive updates to and from Strivr.

User manual The Strivr portal
support.strivr.com 16
The Strivr Portal
If you have access, you can visit the Strivr Portal at https://portal.strivr.com to:
• View and analyze training results including usage, score, and more.
• Check to see if headsets are properly connected.
• View statistics for connection over a given time period.
• Deploy, manage, and track training courses on specific headsets.
Learn about the Strivr Portal and request access at support.strivr.com.

FAQs & troubleshootingUser Manual
support.strivr.com 17
FAQ & troubleshooting
The controller is not working.
If your controllers are unresponsive and the battery
level is flashing, wake the controllers by pressing the
home button. When the controllers wake, the battery
level should display the true percentage.
f you’re having trouble using the controllers, try the
following in order:
• Hold the home button for 2 seconds to recalibrate
the controller, aligning the view to where you are
looking.
• If you see a message that one or both of the
controllers is disconnected, press the home button
on the controller(s) to reconnect.
• Pull down on the lower half of the controller to
access the battery compartment and make sure
the batteries are clicked down all the way. Make
sure there is no insulator tab protecting the
batteries.
• Restart the headset.
Hold the power button on the headset for about
10 seconds. The indicator light will flash blue and
then turn o. Wait a few seconds, then hold the
Power button down again until the blue light turns
back on.
• If the solutions above do not work, try replacing
the controller batteries.
• If replacing the batteries does not work, contact
Strivr support using the Submit a Request form
on support.strivr.com. We will walk you through
re-pairing.
I can’t find the training program inside the headset.
• Be sure to look all around in the 360-degree view.
There may be a menu option behind you.
• Try plugging the headset into the USB cable for
about 15 seconds, then unplug it and resume
training. If you still cannot locate the program,
please contact Strivr support.
• Try restarting the headset.
Hold the power button on the headset for about
10 seconds. The indicator light will flash blue and
then turn o. Wait a few seconds, then hold the
Power button down again until the blue light turns
back on.
The screen inside the headset is black. How do I turn
it on?
If you see all black in the headset try the following in
order:
• Short press the power button on the of the headset
once to wake the headset, then resume.
• Hold the power button on the headset for about 5
seconds, or until the blue indicator light comes on.
• If it is still dark. the battery may be low. Plug
the headset into the charge cable for at least
15 minutes to charge and then repeat the steps
above.
Can I reset the boundary area?
If you exceed the boundary area during training, the
passthrough cameras will activate and you will be
prompted to return to the boundary area or press the
confirm button on the side of the headset to redraw
the boundary.
The screen is not in focus.
Most focus problems are fixed by moving the headset
up and down until the picture is clear. You can also
adjust the distance between the headset lenses. There
are 3 lens spacing settings. To adjust the distance,
gently move both lenses inward or outward to find the
clearest setting.
CONFIRM
BUTTON
Other manuals for PICO NEO 3
1
Table of contents
Other STRIVR Virtual Reality Headset manuals

