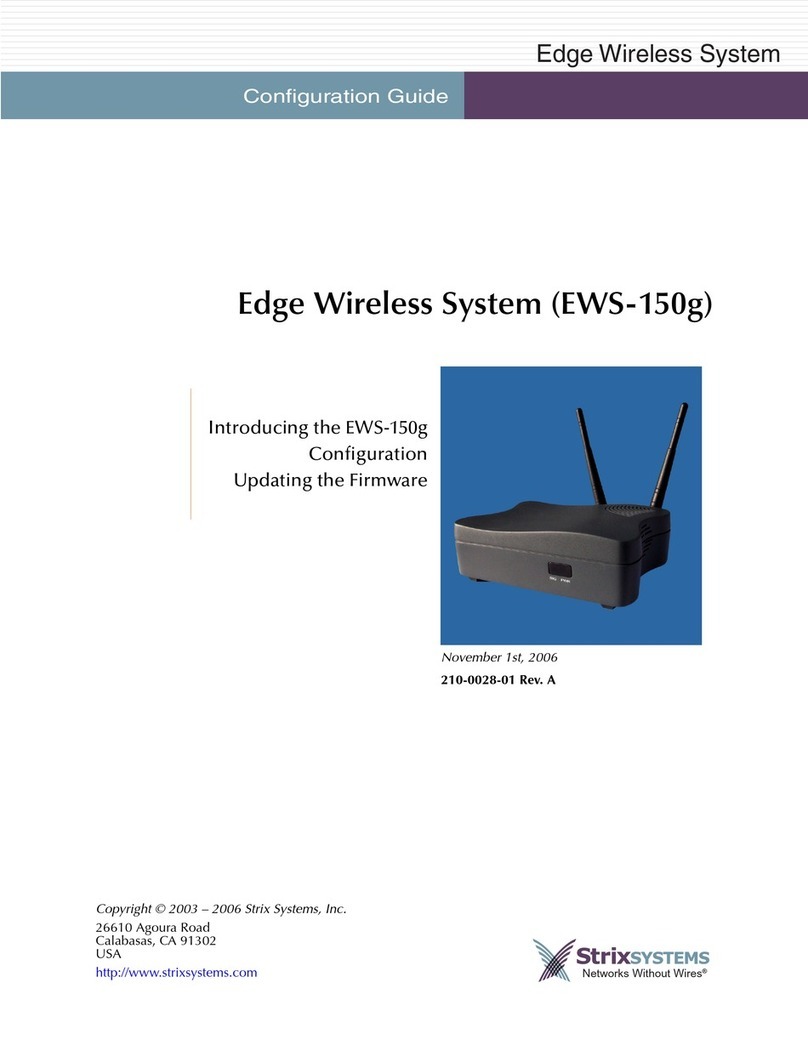
Strix Systems EWS-100 User manual

Configuration Guide
Edge Wireless System
Front Matter
Edge Wireless System (EWS-100)
Introducing the EWS-100
Configuration
Updating the Firmware
June 10th, 2007
210-0026-01 Rev. D
Copyright © 2003 – 2007 Strix Systems, Inc.
26610 Agoura Road
Calabasas, CA 91302
USA
http://www.strixsystems.com Networks Without Wires®

ii EWS-100 Configuration Guide
EWS-100 Configuration Guide

EWS-100 Configuration Guide iii
EWS-100 Configuration Guide
Copyright Notice
Copyright © 2006 Strix Systems, Inc. All rights reserved. This document may not be reproduced or disclosed
in whole or in part by any means without the written consent of Strix Systems, Inc. Trademarks and brand
names are marks of their respective holders.
FCC Notice
The enclosed wireless network device complies with Part 15 of the FCC Rules. Operation is subject to the
following two conditions:
1. This device may not cause harmful interference.
2. This device must accept any interference received, including interference that may cause undesired
operation.
This wireless network device has been tested and found to comply with the limits for a Class B digital device,
pursuant to Part 15 of the FCC Rules. These limits are designed to provide reasonable protection against
harmful interference in a residential installation. This wireless network device generates, uses, and radiates
radio frequency energy and, if not installed and used in accordance with the instructions, may cause harmful
interference to radio communications. However, there is no guarantee that interference will not occur in a
particular installation. If this wireless network device does cause harmful interference to radio or television
reception, which can be determined by turning the wireless network device off and on, the user is
encouraged to try to correct the interference by one or more of the following measures:
◗Reorient or relocate the receiving antenna.
◗Increase the separation between the wireless network device and the affected receiver.
◗Connect the wireless network device into an outlet on a circuit different from that to which the
receiver is connected.
◗Consult the dealer or an experienced radio/TV technician for help.
European Community (EC) Directives and Conformity
This wireless network device is in conformity with the Essential Requirements of R&TTE Directive 1999/5/EC
of the European Union.
Non-Modification Statement
Unauthorized changes or modifications to Strix devices are not permitted. Modifications to Strix devices will
void the warranty and may violate FCC or other regulations.
RF Exposure Requirements
To ensure compliance with FCC RF exposure requirements, the antenna used for this wireless network device
must be installed to provide a separation distance of a minimum of 12 inches or more from all persons, and
must not be co-located or operated in conjunction with any other antenna or radio transmitter. Installers and
end-users must follow these installation instructions.
Other Notices
You may only use the supplied antennas with this product. Use of any other antennas may damage the
product, may violate local regulatory requirements, and will void the warranty.

EWS-100 Configuration Guide v
EWS-100 Configuration Guide
Table of Contents
Front Matter .................................................................................................................................. i
Copyright Notice ...................................................................................................................................iii
FCC Notice ...........................................................................................................................................iii
European Community (EC) Directives and Conformity ..........................................................................iii
Product Images ..................................................................................................................................... iv
Table of Contents ..........................................................................................................................v
An Introduction to the EWS-100 .................................................................................................. 1
Overview ...............................................................................................................................................1
Bridging the Network ......................................................................................................................1
A Dual Radio Design .......................................................................................................................2
Modes of Operation for Each Radio ..........................................................................................2
Wireless Configuration Options ................................................................................................2
Installing the EWS-100 ................................................................................................................. 3
Factory Default Settings ..........................................................................................................................3
Resetting the EWS-100 to its Factory Default State .................................................................................3
Managing the EWS-100 ................................................................................................................ 4
Connecting to the Unit ...........................................................................................................................4
Logging In ..............................................................................................................................................4
The Home Page ...............................................................................................................................5
Establishing Your Country Code .............................................................................................................6
Configuring the Operational Mode of the Radios ...................................................................................7
Setting Up the User Login Parameters ....................................................................................................8
Setting Up the System Management Options ..........................................................................................9
Establishing the TCP/IP Network Settings ..............................................................................................10
DHCP Over LAN ...........................................................................................................................10
Setting Up the 802.11a Radio ..............................................................................................................11
Radio Parameters (802.11a Radio is Configured as a Station) .........................................................12
Radio Parameters (802.11a Radio is Configured as an AP) .............................................................13
Station Configuration (802.11a Radio is Configured as a Station) ...................................................14
AP Configuration (802.11a Radio is Configured as an AP) .............................................................16
Setting Up the 802.11g Radio ..............................................................................................................19
Radio Parameters (802.11g Radio is Configured as a Station) .........................................................20
Radio Parameters (802.11g Radio is Configured as an AP) .............................................................22
Station Configuration (802.11g Radio is Configured as a Station) ...................................................24
AP Configuration (802.11g Radio is Configured as an AP) .............................................................26
Monitoring Your Network .......................................................................................................... 29
Troubleshooting ...................................................................................................................................30
Antenna Aimer .....................................................................................................................................31

vi EWS-100 Configuration Guide
EWS-100 Configuration Guide
Updating the Firmware .............................................................................................................. 32
Index .......................................................................................................................................... 33

EWS-100 Configuration Guide 1
EWS-100 Configuration Guide
An Introduction to the EWS-100
Overview
The EWS-100 Edge Wireless System is a CPE device specifically targeted at metropolitan WISPs who are
offering low-cost residential wireless service to their customers. When deploying a metropolitan Wi-Fi
solution, in many cases the signal is not sufficiently strong enough to penetrate residential buildings and
establish a reliable connection with low-end consumer wireless network interfaces. The EWS-100 overcomes
this problem by providing a higher transmit power with high gain antennas, ensuring that your wireless
customers stay connected. The EWS-100 also offers a suite of management features—including remote Telnet,
a powerful Web Management Interface (WMI), and SNMP—that have been tailored for residential users,
including the ability to upgrade the EWS-100 firmware remotely, performance monitoring, and usage history
logs.
Bridging the Network
The EWS-100 bridges connectivity between a Wireless Wide Area Network (WWAN), consisting of multiple
Strix Outdoor Wireless System (OWS) nodes formed as a structured mesh, an indoor wired Local Area
Network (LAN), and/or an indoor Wireless Local Area Network (WLAN). This bridging function is provided
with Layer 2 Network Address Translation (NAT) so that multiple computers can be supported by a single
association between the OWS and the EWS-100, while still receiving IP address assignments from the WISP
gateway via DHCP. Figure 1 shows a generalized application for the EWS-100.
Figure 1. Bridging the Network

2 EWS-100 Configuration Guide
EWS-100 Configuration Guide
A Dual Radio Design
The EWS-100 is a dual radio device, supporting both 802.11a and 802.11g wireless technologies. When
looking at the rear of the unit, the 802.11a radio is located at the left side, close to the Reset button. The
802.11g radio is located at the right side, close to the DC power receptacle.
Figure 2. EWS-100 (Rear View)
Modes of Operation for Each Radio
Both radios are capable of operating as either an Access Point or a wireless client station.
◗Access Point
The radio operates as an Access Point (AP) and receives connections from up to 16 other wireless
devices on the network.
◗Wireless Client Station
The radio operates as a Wireless Client Station (STA) and connects to a remote Access Point.
Wireless Configuration Options
With two modes of operation available for each radio, the EWS-100 can be configured in any one of the
following four combinations:
◗The 802.11a radio operates as an Access Point and the 802.11g radio operates as a Wireless Client
Station. This is the default mode for the EWS-100.
◗The 802.11g radio operates as an Access Point and the 802.11a radio operates as a Wireless Client
Station.
The most common configuration is to have the 802.11g radio operating as a Wireless Client Station
connecting to a wireless network, and the 802.11a radio operating as an Access Point.
802.11a 802.11g
Reset DC power
Ethernet port

EWS-100 Configuration Guide 3
EWS-100 Configuration Guide
Installing the EWS-100
This User’s Guide is intended for use by Service Providers who are pre-configuring the device for their
subscribers. The physical installation of the EWS-100 is performed by the subscriber. It is the subsciber’s
responsibility to ensure that the unit is connected to their computer or home network properly, using the
components provided. The following items are shipped in the product’s carton:
◗1 x Strix EWS-100 unit
◗1 x Ethernet cable, 5ft length (blue)
◗2 x Omni-directional dual band antennas
◗1 x Power supply
Factory Default Settings
The following table shows the default settings established at the factory for the EWS-100.
Resetting the EWS-100 to its Factory Default State
To reset the EWS-100 to its factory default state, use a paper clip—or other similar tool—to press the Reset
button (see Figure 2) on the rear panel. Hold the Reset button down until all LEDs on the front panel go OFF
and the Power LED comes ON again (about 5 seconds) to restore all configuration settings to their factory
default values.
Function Factory Default Setting
IP Address 169.254.1.250
User Name Admin
Password Admin
802.11a Radio Mode Enabled, and configured as an Access Point.
802.11g Radio Mode Enabled, and configured as a wireless client station.
SSID Strix Wireless Network
The EWS-100 will always connect to the Strix Wireless Network
SSID, when available.
DHCP Enabled
Layer 2 NAT Enabled
Accessibility Accessible via the Ethernet port or AP port
Manager/One Plug-In Enabled

4 EWS-100 Configuration Guide
EWS-100 Configuration Guide
Managing the EWS-100
The EWS-100 is preconfigured for basic functionality by the WISP using the unit’s embedded Web
Management Interface (WMI). The unit can also be configured remotely.
This User’s Guide describes how to configure and monitor your EWS-100 using its embedded Web
Management Interface.
Connecting to the Unit
Use an Ethernet cable (provided) to connect the EWS-100 to a computer. Alternatively, you can connect the
unit to the computer via an Ethernet switch, hub or router. If the network is using a DHCP server, the EWS-100
will be assigned an IP address automatically (even when DHCP assigns an IP address the unit can always be
reached by its default IP address, which is 169.254.1.250). If no DHCP is server available, the unit can only
be reached via its default IP address (169.254.1.250). To establish a connection, the EWS-100 and your
computer must be on the same IP segment.
Use your Web browser to connect with the EWS-100.
◗When using a DHCP server, you can identify the IP address assigned by the server by looking in the log
files of the DHCP server, or by using the Strix Manager/One plug-in; however, the Manager/One plug-
in is only compatible with Microsoft® Internet Explorer, version 6.1 or higher. You can download the
plug-in from http://www.strixsystems.com/support/downloads.asp.
◗If no DHCP server is available, use the unit’s default IP address (169.254.1.250).
Logging In
At the Login prompt, use the default user name and password to log in to the EWS-100. The default user name
and password is Admin (for both). After entering the user name and password, click on the OK button to log
in to the EWS-100’s Web Management Interface.
Figure 3. Login Prompt

EWS-100 Configuration Guide 5
EWS-100 Configuration Guide
The Home Page
With a successful login, the EWS-100 home page is displayed. The home page shows the current status
information for both radios, including the operational mode of each radio. It also provides information about
the top wireless neighbors that are within range of each radio, as well as system details (IP address, MAC
address, uptime and firmware version).
A selection of buttons in the left pane of the home page provides immediate access to system monitoring
information (Quick Links), and a choice of tools for resetting the unit to its factory default state, loading new
firmware and rebooting the unit (Actions).
The top 3 frames of the home page containing station, AP and wireless neighbor information will refresh
themselves automatically every 10 seconds, but you can force a refresh of these frames at any time by clicking
on the Refresh button. The bottom frame containing the unit’s statistical data can be refreshed manually by
clicking on the Refresh button (this frame does not refresh itself automatically).
Figure 4. Home Page (with Station and APs Associated)
From the home page you can click on either the Configure tab to access the unit’s configuration options, or
click on the Monitor tab to view the current operational status of the unit. You can return to the home page at
any time by simply clicking on the Home tab.
Left Pane
Tabbed Windows (Home/Configure/Monitor)
Refresh

6 EWS-100 Configuration Guide
EWS-100 Configuration Guide
Establishing Your Country Code
If you do not establish your country code, the EWS-100 uses the US (United States) as the default country
code. You are solely responsible for setting the correct country code to ensure full compliance with your local
regulatory laws for wireless communications. For units that are sold in the United States, only the US and
Canada are presented in the list of available country codes.
To set the country code, click on the Configure tab then click on General to display the General Settings
window.
Figure 5. General Settings Window
In the Country Code field, select the country code from the pull down list that applies to your geographic
location. All examples from this point forward assume that the US is your country of choice. If you are
operating under a different country code, the content of some Wi-Fi windows (including configurable fields)
may be different. If you change the country code you are presented with a warning to remind you that it is
your responsibility to comply with your local regulatory laws for wireless communications. You must click on
the OK button to acknowledge that you understand your responsibility.
Figure 6. Warning
After selecting your country code, click on Update to apply your change then click on Reboot to reboot the
EWS-100. Only after the unit reboots will your selected country code become active.

EWS-100 Configuration Guide 7
EWS-100 Configuration Guide
Configuring the Operational Mode of the Radios
Either radio can be configured to operate as a wireless client station or an Access Point. The most common
configuration—and the factory default—is to have the 802.11a radio operating as an Access Point and the
802.11g radio operating as a wireless client station, effectively bridging connectivity between the outdoor
Strix wireless mesh network and the customer’s indoor home network (or computer).
To configure the operational mode of the radios, click on the Configure tab then click on General to display
the General Settings window.
Figure 7. General Settings Window
In the Wireless Station Radio field, select which radio will act as the wireless client station (either 802.11a or
802.11g) from the pull-down list. When you select the wireless station radio, the condition of the AP Radio
field (below) changes accordingly. For example, if you select the 802.11a radio as the wireless station radio
the AP Radio field is displayed as AP Radio (802.11g). Conversely, if you select the 802.11g radio as the
wireless station radio the AP Radio field is displayed as AP Radio (802.11a). After defining which radio will
act as the wireless station radio, enable or disable the AP radio (as desired). If you disable the AP radio, clients
will not be able to associate to this radio.
When you have finished configuring the operational modes of the radios, click on Update to apply your
changes then click on Reboot to reboot the EWS-100. Only after the unit reboots will the radios function in
the modes you selected. Figure 8 shows the icons that are used in the WMI to denote the operational state of
the radios.
Figure 8. Operational Mode Icons
Station AP

8 EWS-100 Configuration Guide
EWS-100 Configuration Guide
Setting Up the User Login Parameters
Establishing user login parameters determines both the administrator and guest user privileges. To set up these
parameters, click on the Configure tab then click on User Login to display the User Login window.
Figure 9. User Login Window
1. In the User Name field, select the type of user (either Admin or Guest) from the pull-down list.
2. In the Password field, enter a password (between 5 and 32 characters). The password is case-
sensitive.
3. In the Confirm Password field, retype your password (otherwise the system will reject it).
The default for the user name and the password is Admin (with a capitalized A) for both. We strongly
recommend that you change the default password immediately after your initial login.
4. In the Guest User Login field, check the enabled box if you want to allow guest access. Leave this box
unchecked to deny all guess access.
5. In the Guest User AP Management field, check the enabled box if you want to allow guests to
manage the AP side of the EWS-100 via the Web Management Interface (Telnet management is never
granted to guests). Leave this box unchecked to deny all AP management functionality to guests.
6. When finished, click on Update to apply your changes then click on Reboot to reboot the EWS-100.
Only after the unit reboots will the user login parameters you defined here be in effect.

EWS-100 Configuration Guide 9
EWS-100 Configuration Guide
Setting Up the System Management Options
The EWS-100 can be managed from any of the following management options:
◗Web—from your Web browser using its embedded Web Management Interface (WMI).
◗LAN—This option allows you to manage the EWS-100 using either Web, Telnet or SNMP with a direct
connection from the unit’s LAN port.
◗SNMP—Allows management via an SNMP (Simple Network Management Protocol) management
console. The EWS-100 supports the 802.11 MIB (Management Information Base), as well as Strix
proprietary MIBs. Any MIB I or MIB II compliant SNMP management console (such as HP OpenView)
can be used to manage the unit.
To set up the system management options, click on the Configure tab then click on Management to display
the Management window.
Figure 10. Management Window
Enable or disable your preferred system management options, as desired. If you enable the Telnet option you
must also provide the Telnet timeout (in seconds)—the default is 180. If you enable SNMP management, you
must also provide the SNMP communities you are using and the system contact information. When finished,
click on Update to apply your changes then click on Reboot to reboot the EWS-100. Only after the unit
reboots will you be able to manage the EWS-100 from any of the selected management options.

10 EWS-100 Configuration Guide
EWS-100 Configuration Guide
Establishing the TCP/IP Network Settings
You have the option of obtaining all IP addresses (unit, default gateway, DNS server and SNTP server)
automatically using DHCP, or you can configure static IP addresses manually. The default is to have the
DHCP server assign all IP addresses. In addition, there is an option to enable or disable DHCP functionality
over the LAN port. The default is to have this option enabled so that DHCP can assign IP addresses for the
initial configuration; however, after completing the TCP/IP configuration you must disable this option to
prevent the reassignment of IP addresses over the unit’s Ethernet port—see also, DHCP Over LAN (below).
To set up the TCP/IP options, click on the Configure tab then click on TCP/IP to display the TCP/IP Settings
window.
Figure 11. TCP/IP Settings Window
If you want to assign any IP addresses manually (static IP addresses), enter the addresses in the corresponding
fields, otherwise allow DHCP to assign the addresses for you.
DHCP Over LAN
This option should be checked (enabled) during the initial configuration process, but when you have
completed the TCP/IP configuration and all IP addresses have been assigned you must disable this option to
prevent users from reassigning IP addresses over the unit’s Ethernet port.
When finished, click on Update to apply your changes then click on Reboot to reboot the EWS-100. Only
after the unit reboots will the IP addresses defined by your TCP/IP configuration options be in effect.
Disable the DHCP over LAN option!

EWS-100 Configuration Guide 11
EWS-100 Configuration Guide
Setting Up the 802.11a Radio
When setting up the 802.11a radio, the configurable fields that are displayed in the Web Management
Interface will differ, depending on whether the 802.11a radio is configured as a Wireless Client Station or as
an AP. Figure 12 shows and example of the differences between the station version of the 802.11a Radio
Parameters window and the AP version of the same window.
Figure 12. 802.11a Radio Parameters Window (Differences)
Station
Access Point

12 EWS-100 Configuration Guide
EWS-100 Configuration Guide
Radio Parameters (802.11a Radio is Configured as a Station)
To set up the 802.11a radio parameters when the radio is configured as a Wireless Client Station, click on the
Configure tab then click on Radio Parameters to display the 802.11a Radio Parameters window.
Figure 13. 802.11a Radio Parameters Window (Radio is Configured as a Station)
1. In the Data rate field, choose the preferred data rate from the pull-down list. The default for this field
is Best, which means the EWS-100 will select the best data rate available automatically.
2. In the Transmit Power field, choose the preferred transmit power from the pull-down list (either Full,
Half, Quarter, One Eighth, or Minimum). The default for this field is Full, which means the 802.11a
radio is always operating at full (maximum) power.
3. In the Background Scan Enabled field, check this box to enable background scanning for wireless
client stations. the default for this field is enabled.
4. In the Background Scan Interval field—If you enabled background scanning—enter a value between
1000 and 60000 ms to define the interval (elapsed time) between scans. The default for this field is
5000 milliseconds.
5. In the Background Scan Duration field—If you enabled background scanning—enter a value
between 10 and 10000 ms to define the duration of each scan. The default for this field is 50
milliseconds.
6. When finished, click on Update to apply your changes then click on Reboot to reboot the EWS-100.
Only after the unit reboots will these changes take effect.

EWS-100 Configuration Guide 13
EWS-100 Configuration Guide
Radio Parameters (802.11a Radio is Configured as an AP)
To set up the 802.11a radio parameters when the radio is configured as an AP, click on the Configure tab then
click on Radio Parameters to display the 802.11a Radio Parameters window.
Figure 14. 802.11a Radio Parameters Window (Radio is Configured as an AP)
1. In the Data Rate field, choose the preferred data rate from the pull-down list. The default for this field
is Best, which means the EWS-100 will select the best data rate available automatically.
2. In the Radio Frequency field, choose the preferred channel from the pull-down list, or choose
SmartSelect. The default for this field is SmartSelect, which means the EWS-100 will choose the best
channel automatically.
3. In the Beacon Interval field, enter a value between 20 and 1000 (milliseconds) that specifies the
beacon interval. The default value for this field is 100 ms. The beacon is a uniframe system packet
broadcast by the AP to keep the network synchronized.
4. In the Fragment Length field, enter a value between 256 and 2346. This setting determines the size of
the wireless frame. Wireless frames are reassembled by the EWS-100 before being forwarded to the
Ethernet port, but only if the frame is smaller than the Ethernet MTU (1536 bytes). The default value
for this field is 2346.
5. In the DTIM Period field, enter a value between 1 and 255 that specifies the Delivery Traffic
Indication Message (DTIM). Increasing this interval allows the station to sleep for longer periods of
time resulting in power savings (in exchange for some degradation in performance). The default value
is 1.

14 EWS-100 Configuration Guide
EWS-100 Configuration Guide
6. In the RTS/CTS Threshold field, enter a value between 256 and 2346. This is a value that determines
at what frame length the RTS-CTS function is triggered. By default, the threshold is set at its highest
value (2346). A lower value means that the RTS-CTS function is triggered for smaller frame lengths. A
lower threshold value may be necessary in environments with excessive signal noise, but may result
in some performance degradation.
7. In the Protection Type field, choose either CTS-only or RTS-CTS. This option is only relevant when
the Protection Mode is enabled. With CTS-only, the client is not required to send an RTS (Request-to-
Send) to the AP. As long as the client receives a CTS (Clear-to-Send) frame from the AP then the client
is free to send data. With the RTS-CTS option enabled, the client is required to send an RTS to the AP
and wait for a CTS from the AP before it can send data (this option creates additional overhead and
can cause performance degradation). The default is CTS-only.
8. When finished, click on Update to apply your changes then click on Reboot to reboot the EWS-100.
Only after the unit reboots will these changes take effect.
Station Configuration (802.11a Radio is Configured as a Station)
To establish the 802.11a Station Configuration parameters when the radio is configured as a Wireless Client
Station, click on the Configure tab then click on Configuration to display the 802.11a Station Configuration
window.
Figure 15. 802.11a Station Configuration Window
Table of contents
Other Strix Systems Network Router manuals
Popular Network Router manuals by other brands
Digi
Digi XPressWireless user guide

Island Consulting
Island Consulting Wirie AP+ Installation and user manual
ADTRAN
ADTRAN NetVanta 3100 Series quick start guide

Atlantis Land
Atlantis Land Edge-Core A07-ES4626-SFP Specification sheet
D-Link
D-Link DVG-7044S Quick installation guide
versa
versa VX-583WR user manual

