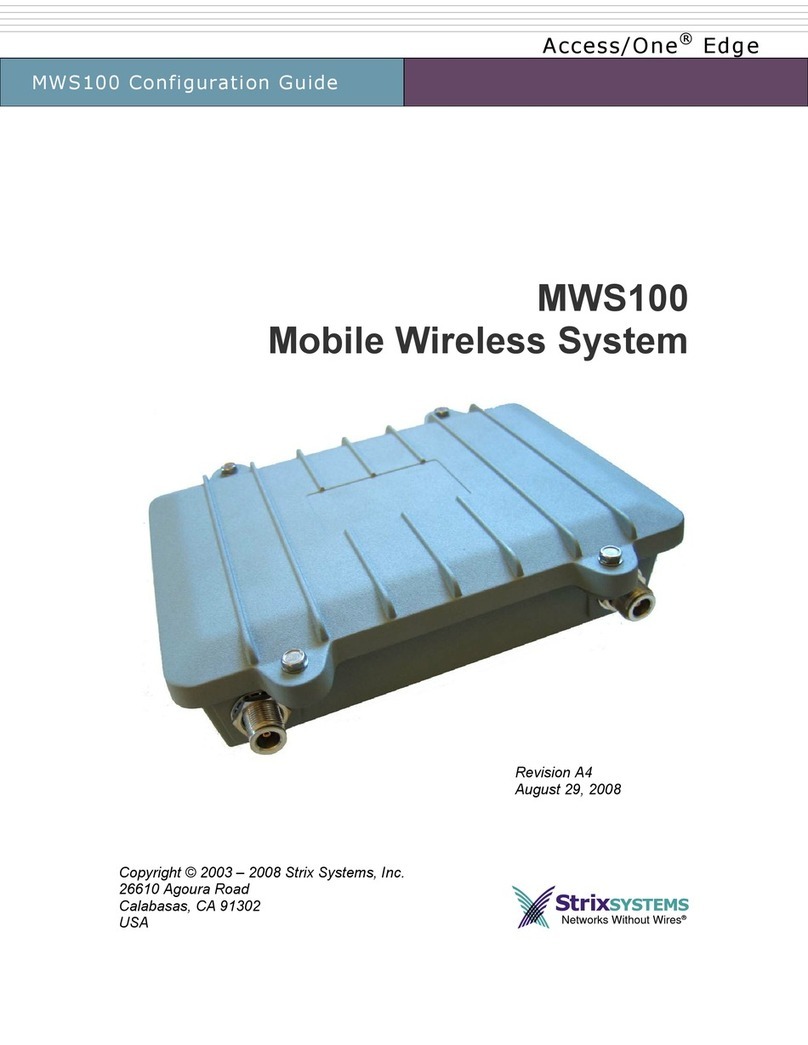
Strix Systems Strix Access/One MWS100-HSX10 User manual

MWS100-HSX10 Installation Guide
Strix Access/One®
MWS100-HSX10
Guide
(Antennas optional)
Revision
March, 2010
Copyright © 2003 – 2010 Strix Systems, Inc.
2350 Mission Co ege B vd. #1070
Santa C ara, CA 95054
USA

MWS100-HSX10 Guide
FCC Notice
This wire ess network device comp ies with Part 15 of the FCC Ru es. Operation is subject to the
fo owing two conditions: 1. This device may not cause harmfu interference. 2. This device must
accept any interference received, inc uding interference that may cause undesired operation.
This wire ess network device has been tested and found to comp y with the imits for a C ass B
digita device pursuant to Part 15 of the FCC Ru es. These imits are designed to provide
reasonab e protection against harmfu interference in a residentia insta ation. This wire ess
network device generates, uses, and radiates radio frequency energy and, if not insta ed and
used in accordance with the instructions, may cause harmfu interference to radio
communications. However, there is no guarantee that interference wi not occur in a particu ar
insta ation. If this wire ess network device does cause harmfu interference to radio or te evision
reception, which can be determined by turning the wire ess network device off and on, the user is
encouraged to try to correct the interference by one or more of the fo owing measures: Reorient
or re ocate the receiving antenna; Increase the separation between the wire ess network device
and the affected receive; Connect the wire ess network device into an out et on a circuit different
from that to which the receiver is connected; Consu t the dea er or an experienced radio/TV
technician for he p.
European Community (EC) Directives and Conformity
This wire ess network device is in conformity with the Essentia Requirements of R&TTE Directive
1999/5/EC of the European Union.
Non-Modification Statement
Unauthorized changes or modifications to Strix devices are not permitted. Modifications to Strix
devices wi void the warranty and may vio ate FCC or other regu ations.
RF Exposure Requirements
To ensure comp iance with FCC RF exposure requirements, the antenna used for this wire ess
network device must be insta ed to provide a separation distance of a minimum of 40cm or
more from a persons, and must not be co- ocated or operated in conjunction with any other
antenna or radio transmitter. Insta ers and end-users must fo ow these insta ation instructions.
Professiona Insta ation On y
This unit must be insta ed by a trained professiona insta er on y.

MWS100-HSX10 Guide
Table of Contents
1. Introduction ............................................................................................................................ 4
2. Physical Specification.............................................................................................................. 5
3. Electrical Specification............................................................................................................ 5
4. op Panel Connectors............................................................................................................. 6
5. Bottom Panel Connectors....................................................................................................... 6
6. Powering he Unit .................................................................................................................. 7
7. Mounting Options................................................................................................................... 7
8. Antenna Options..................................................................................................................... 8
9. Installation .............................................................................................................................. 9
10. Shipping Content .................................................................................................................. 10
11. Configuration ........................................................................................................................ 11

MWS100-HSX10 Guide
1. Introduction
1 Introduction
Strix Systems introduces the Integrated wireless MWS100-HSX10 to its award winning
Access/One® family of wireless indoor, outdoor, mobile and video surveillance products.
Enclosed in a weatherized, air and watertight outdoor enclosure, Utilizing Strix DMA™, the
Access/One MWS100-HSX10 dual radio mesh system uses advanced algorithms to deliver high
performance intelligent radio algorithms that dynamically adjust to the environment for
superior multi-frequency, multi-channel, multi-radio technology that delivers multi-megabit and
low latency performance.
Designed to address key markets, Strix MWS100-HSX10 is easily deployable, automatically and
instantly self-configuring, and provides superior performance, security and flexibility. City and
municipal public safety deployments as well as mobile/RV parks, marinas, outdoor malls, fixed
and temporary event venues, outdoor enterprise, industrial and strategic locations, for
applications ranging from general WISP / hot spots, mobile data, video surveillance, VoIP and
backhaul transport for SCADA and AMR, efficiently increasing the reach of the networks in a
robust and a cost effective way.
Strix MWS100-HSX10 offers unique set of finely tuned features including robust high
performance 802.11a, 802.11g and high power licensed 4.9 GHz (DSRC-C) for a combination of
high density user access and high-speed backhaul to Strix Access/One Outdoor Wireless Mesh
Networks. Strix MWS100-HSX10 also supports industry-standard security algorithms for secured
backhaul and client connectivity, multiple SSIDS and VLANs as well as end-to-end Quality of
Service. Extended operating temperature ranges and flexible mounting options make Strix
MWS100-HSX10 suitable for all types of deployment scenarios. he MWS100-HSX10 scales
efficiently and economically while maximizing coverage areas affordably. It greatly reduces
deployment, operating costs bringing down the otal Cost of Ownership.

MWS100-HSX10 Guide
2.
Physical Specification
2 Physical Specification
•Dimensions: 7. 2 5” H x 8. 25” W x 2. 25” D
•Weight: 2.4 Lbs (1.08 Kg)
•NEMA 4X rated, IP 67
•N - ype Female Connectors
•Weather proof Power Connector
•Weather proof Ethernet Connectors
•Pole mount included and Wall mount (optional)
3. Electrical Specification
3 Electrical Specification
•AC Input: Auto- sensing 100- 24 0 VAC, 50/60 Hz (Optional External Power Supply)
• DC Input: 12V – 48 VDC, 6A maximum
• High Power Passive PoE Input, Up to 48 VDC
• AC Power Consumption: 18W - 20 W

MWS100-HSX10 Guide
4. Top Panel Connectors
4 Top Panel Connectors
5.
Bottom Panel Connectors
5 Bottom Panel Connectors
N
-
Type
N
-
Type
High Power ~ 20W
12
–
48 VDC (in)
2.4
GHz
5
GHz

MWS100-HSX10 Guide
6. Powerin The Unit
6 Po ering The Unit
Strix MWS100-HSX10 supports 12 - 48 VDC and high power, assive ower Over Ethernet
( oE). External AC power is available as an optional AC/DC power supply and accessory
item. Another available option is a high power, oE Injector and accessory item.
7.
Mountin Options
7 Mounting Options
his section provides instructions for mounting MWS100-HSX10 unit. he unit comes with
vertical pole mount (as a standard accessory) and Wall / Vehicle mount is optional. It is must for
this unit to be mounted vertically, so that the heat dissipation happens properly and unit
functions as per the temperature specification.
Below pictures show two different ways for MWS100-HSX10 unit mounting.
Pole mount comes standard with unit Wall/Vehicle mount is optional

MWS100-HSX10 Guide
8. Antenna Options
8 Antenna Options
he Strix MWS100-HSX10 does not include antennas but any style and gain antenna – OMNI
directional, directional or sector is an optional accessory item. Please follow required
weatherproofing techniques of all cables and connectors.
Notes About Antenna Installations
Read the following notes before installing any antenna.
•OMNI antennas can be used either directly attached to the N- ype connectors or
through an RF cable extension
•A sector antenna should point towards the center of the sector covered by the antenna
•Fixed point-to-point backhaul antennas should point towards the desired Strix Systems
Access/One Network device intended for the backhaul connection
•Unused antenna ports should be weather protected and a 50 ohm terminator is
recommended
•Depending on the application and deployment scenario, Strix Systems can assist in
process of antenna selection for the design
Antenna 2
Connector
Antenna 1
Connector

MWS100-HSX10 Guide
9. Installation
9 Installation
Note: he MWS100-HSX10 is designed for professional installation. Failure to comply fully with these
instructions may void the MWS100-HSX10 warranty and/or violate local safety or radio regulations.
1.
Select a mounting location for the MWS100-HSX10. he MWS100-HSX10 is designed for indoor,
outdoor and in-vehicle applications. Mount the MWS100-HSX10 using the chassis mounting holes
and hardware suitable for the particular installation.
Note: In the U.S. for the full range of 5 GHz band, specifically the 515 -525 MHz band is only available for
indoor applications. It is the responsibility of the installer to configure the MWS1 -HSX1 to use this band
only when it is installed indoor.
2. Select antennas with gain specifications and factor in cable loss by frequency to meet maximum
allowable regulatory EIRP levels by Country for point to point and point to multi-point applications.
3. Mount the selected antennas securely following all antenna manufacturer instructions and
recommendations. Provide a suitable length of LMR-400 type antenna cable between each antenna
and the MWS100-HSX10.
RF Exposure Requirements
o ensure compliance with FCC RF exposure requirements, the antenna used for this wireless
network device must be installed to provide a separation distance of a minimum of 40cm or
more from all persons, and must not be co-located or operated in conjunction with any other
antenna or radio transmitter. Installers and end-users must follow these installation instructions.
4. he MWS100-HSX10 supports several power options. It includes 12 – 48 VDC and optionally an
AC/DC power supply and High Power PoE (~20 W). For DC only power, an included power cable is
terminated to the Strix power connector and un-terminated end can be used for termination into a
DC power source.
5. Provide an outdoor rated Ethernet cable for connecting the MWS100-HSX10
i. o any Switch/Router at the wired core network
ii. o any networks or devices behind it when acting as a wireless mesh node with backhaul
to a wireless repeater location or wired network
iii. o a High Power Passive PoE Injector (~ 20W or more) to power the HSX10
iv. o another HSX10 wireless mesh node for back to back connectivity, flexible deployments,
increased capacity, etc.
6. Attach the outdoor rated power cable to the PWR connector on the MWS100-HSX10 bottom panel.

MWS100-HSX10 Guide
10. Shippin Content
10
Shipping Content
he MWS 100 HSX- 10 contains the following items. If any of these items are missing please contact
Connector
Washer
O
-
Ring
Pin 1 (
-
)
Pin (+)

MWS100-HSX10 Guide
11. Confi uration
11
Configuration
his function provides you with the tools you need to configure your Access/One Network at the
network level and includes the following commands:
•System
oUser Login
oNetwork Management
General
SNMP
rusted IP Addresses
oCP/IP Settings
oNetwork opology
oPriority/One - Class of Service
oRadius Accounting
oSyslog
oDate and ime
oOperating Environment
oFirmware Updates
•Wi-Fi
oRadio Parameters
oClient Connect
oNetwork Connect
oRogue Scan
System
his area of Manager/One contains the primary configuration commands for your Access/One Network
in the system environment. Any commands executed here are automatically propagated across the
network, so make sure the changes you initiate are changes that you want to apply to the entire
network, otherwise go to “Managing Subnets and Nodes” or “Managing Modules”.
User Login
his command displays the User Management window, allowing you to change the login password for
users and enable/disable password encryption.

MWS100-HSX10 Guide
Managing User Logins
he following options are available with this command:
•User Name
Choose a user name from the pull-down list. A valid user name is required to access the Web
server interface within the network server module.
•Password
Enter a meaningful password (between 5 and 32 characters) that you are likely to remember.
he password is case-sensitive.
•Confirm Password
Confirm your password here otherwise the system will reject it.
The default for the user name and the password is Admin (with a capitalized A) for both. We
strongly recommend that you change the default password immediately after your initial
login.
•Password Encryption
Check this box if you want Access/One Network to encrypt your password for additional security.
After inputting data (or making selections), click on the Update button to update this page, then
click on the Apply Configuration tab to propagate your changes across the network. If necessary,
you can click on the factory default (FD) button in the toolbar to reset all data on this page to its
factory default state.

MWS100-HSX10 Guide
Network Management
General
his command allows you to define the level of security for the various management interface options
used to manage your Access/One Network, and provides options for enabling or disabling SNMP
Management and F P server functionality.
General Management Interface Security
he following options are available with this command:
•Shell
Choose Clear & Secure to allow network management via an unsecured elnet connection and a
Secure SHell (SSH) connection, or choose Secure nly to restrict management to an SSH
connection only. Alternatively, you can choose None to prevent access from either option.
If you are allowing access via elnet or SSH, enter a value—in seconds—in the Shell imeout field to
define how long the connection will remain open during idle periods. Setting the shell timeout value to 0
(zero) will disable the timer and keep the session open, even when idle.
•Web
Choose Clear & Secure to allow network management from your Web browser via H P (clear)
and H PS (secure), or choose Secure nly to restrict management via a secure H PS
connection only. Alternatively, you can choose None to prevent all Web management access.
•CIMS (Cloud Infrastructure Management System)
Choose Clear & Secure to allow network management via CIMS, where security levels are
controlled automatically. Alternatively, you can define the security level manually by choosing
Secure nly or Clear nly.
•SNMP Management

MWS100-HSX10 Guide
Check this box to enable network management via an SNMP (Simple Network Management
Protocol) management console. Your Access/One Network supports the 802.11 MIB
(Management Information Base), as well as Strix proprietary MIBs. Any MIB I or MIB II compliant
SNMP management console (such as CiscoWorks or HP OpenView) can be used to manage your
network remotely.
•FTP Server
Check this box to enable F P server functionality (this box must be checked if you want to
update your firmware or transfer system configuration files).
After inputting data (or making selections), click on the Update button to update this page, then click on
the Apply Configuration tab to propagate your changes across the network. If necessary, you can click
on the factory default (FD) button in the toolbar to reset all data on this page to its factory default state.
SNMP
his command allows you to define the SNMP Communities, the SNMP System, and any specific SNMP
rap Managers. With SNMP enabled and the settings on this page defined, your Access/One Network
will support most common SNMP management consoles.
he system also supports Syslog (System Logging) via an SNMP manager (in parallel with basic Syslog
services) where Syslog text information is encoded in an SNMP trap message and presented to the end
user.
SNMP (Simple Network Management Protocol is a standard protocol that regulates network
management over the Internet. SNMP uses CP/IP to communicate with a management platform, and
offers a standard set of commands that make multivendor operability possible. SNMP uses a standard
set of definitions, known as a MIB (Management Information Base), which can be supplemented with
Enterprisespecific extensions. Strix provides its own proprietary MIBs. For more information about Strix
MIBs, contact Strix technical support.

MWS100-HSX10 Guide
Configuring Access/One Network for SNMP
he following options are available with this command:
•SNMP Communities
Enter your GE Community (read), SE Community (write) and RAP Community in the
corresponding fields. he defaults for these fields are:
•GE Community: public
•SE Community: netman
•RAP Community: public
•SNMP System
Enter the Contact and Location information for the person managing your Access/One Network.
•SNMP Trap Managers
Enter a valid IP address for any SNMP rap Manager you intend to use. he SNMP rap Manager
you choose must be enabled, so ensure that the appropriate box is checked. If you have multiple
SNMP rap Managers assigned, you can delete a manager by clicking on the X icon associated
with each manager.

MWS100-HSX10 Guide
Strix Systems Access/One Edge
MWS100-HSX10
1
•Traps
Choose pen to expand the primary elements of the SNMP rap Manager tree. From here
you can make management selections by checking (or unchecking) the appropriate check
boxes. When finished making your selections, choose Close to collapse the tree.
After inputting data (or making elections),
click on the Update button to update this
page, then click on the Apply Configuration
tab to propagate your changes across the
network. If necessary, you can click on the
factory default
(FD) button in the toolbar to reset all data
on this page to its factory default state.
Managing Traps

MWS100-HSX10 Guide
Strix Systems Access/One Edge
MWS100-HSX10
2
Trusted IP Addresses
his command allows you to enable or disable the rusted Mode and assign specific trusted IP
addresses. When this mode is enabled, only addresses assigned here will be trusted by the
network for management at any network module.
Assigning Trusted IP Addresses
he following options are available with this command:
•Trusted Mode
You can only enable this option if you have added at least one trusted IP address. Once
a trusted IP has been added, check this box to enable the trusted mode (or uncheck the
box if you want to disable this feature).
•IP Address
You must add at least one IP address if you want to enable the trusted mode feature. o
add an address, simply enter a valid IP address in this field then click on the Add button
(the new address is listed below this field). You can add as many trusted IP addresses as
you want. o delete an address, click on the X icon alongside the address, then confirm
your request at the pop-up dialog. However, if you have only one trusted IP address
listed, you cannot delete the address if the trusted mode is enabled—you must disable
the trusted mode before attempting to delete a sole trusted IP address.
After inputting data (or making selections), click on the Update button to update this
page, then click on the Apply Configuration tab to propagate your changes across the
network. If necessary, you can click on the factory default (FD) button in the toolbar to
reset all data on this page to its factory default state.
TCP/IP Settings
his command allows you to specify whether Access/One will obtain the Default Gateway and
DNS IP addresses automatically, or use pre-configured static IP addresses.

MWS100-HSX10 Guide
Strix Systems Access/One Edge
MWS100-HSX10
2
TCP/IP Settings
he following options are available with this command:
•Default Gateway
he system is set up to use DHCP (Dynamic Host Configuration Protocol) to obtain the default
gateway IP address automatically (default).
When using wire ess up inks between nodes, Access/One Network’s se f-tuning
feature requires that a defau t gateway and/ or DNS is specified to determine
de ays to the host Ethernet. When DHCP is used across the network (defau t),
specifying both of these wi satisfy this requirement.
•DNS Server
Choose whether you want the system to use DHCP to obtain the DNS IP address
automatically (default), or use a pre-configured static IP address. If you choose the latter
option, enter IP addresses for the primary and secondary (if any) DNS server. DNS is
used by your Access/One Network modules to lookup the names of various servers (for
example, the RADIUS
and F P servers). You must specify a Domain Name when static IP addresses are used.
his has the effect of appending the Domain Name to non-fully qualified address
requests (for example, the F P server host name configured as F P123 will become
F P123.yourdomain.com).
After inputting data (or making selections), click on the Update button to update this page, then
click on the Apply Configuration tab to propagate your changes across the network. If necessary,
you can click on the factory default (FD) button in the
toolbar to reset all data on this page to its factory default state.

MWS100-HSX10 Guide
Strix Systems Access/One Edge
MWS100-HSX10
3
Network Topology
his command allows you to define whether your Access/One Network will obtain its Master
Network Server IP address automatically or use a pre-configured static IP address. It also
provides you with the option of defining any static network servers.
Network Topology
he following options are available with this command:
•Master Network Server Configuration
Establishing a master/slave relationship between network servers facilitates efficient
Wide Area Network management by reducing the amount of traffic between two
subnets on the same network, as well as providing a single network server responsible
for all Strix devices within its subnet. his feature enables a Master Network Server to
be statically or dynamically assigned for every subnet (even within the same network),
which Manager/One users are redirected to if they try to log into a non-Master Network
Server.
he Master Network Server supports SN P (Simple Network ime Protocol) and is
responsible for sending out the correct clock for the subnet as part of the CIMS protocol.
In this way, only the Master Network Server need derive the clock from an independent
stratum 1 or 2 clock source. If the Master Network Server fails, your Access/One
Network quickly detects the failure, at which point the network server with the next
lowest IP address assumes the role of master. In this case, when the failed Master
Network Server comes back online, it immediately re-establishes its role as master.
Choose whether you want the system to obtain the Master Network Server IP
address automatically (default), or use a pre-configured static IP address. If you choose
the latter option, enter a valid IP address in the appropriate field.

MWS100-HSX10 Guide
Strix Systems Access/One Edge
MWS100-HSX10
4
•Static Network Servers
Static network servers are added to bond subnets together, allowing you to configure
and manage multiple subnets. You do this by starting with one subnet and adding the
Master Network Server IP addresses of other subnets to tie them together.
Enter the IP address of a network server module on another subnet (the default subnet
mask is 255.255.255.255), then click on the Update button. o add the server to a list. If
you enter multiple static network servers, you must click on the Update button after
each entry for your changes to take effect. o delete a static network server’s IP address,
simply click on the X icon alongside the address.
After inputting data (or making selections), click on the Update button to update this page, then
click on the Apply Configuration tab to propagate your changes across the network. If necessary,
you can click on the factory default (FD) button in the toolbar to reset all data on this page to its
factory default state.
Priority/One - Class of Service
his command allows you enable and define Class of Service (CoS) filters to prioritize traffic
throughout your Access/One Network. Supported filters include:
•VLAN
•IP OS ( ype of Service)
•IP Protocol
CoS filters establish separate queues for different priority streams based on the filters you
define here. Data streams are then serviced according to their priority. In addition, this
command allows you to enable or disable the SpectraLink® Voice Support feature.
Table of contents
Other Strix Systems Wireless Access Point manuals
Popular Wireless Access Point manuals by other brands
GIGAMEDIA
GIGAMEDIA GGM WAPCD3 quick guide

Huawei
Huawei AP4050DN-HD Product description
TRENDnet
TRENDnet TEW-450APB - Wireless Super G Access Point Quick installation guide
HPE
HPE Aruba AP-318 Product End-of-Life Disassembly Instructions
3Com
3Com 3CRWE91096A - Wireless LAN Building-to-Building... datasheet
ZyXEL Communications
ZyXEL Communications VMG8623-T50A quick start guide
