Suitmate Swimsuit Water Extractor 115V Maintenance and service guide

115V/60Hz Manual
Installation & Maintenance


©2017 Extractor Corporation
115-V 20-Amp 60-Hz SUITMATE
®
Unit
1
TABLE OF CONTENTS
Introduction................................................................................................................2
Important Installation Options .................................................................................2
Safety..........................................................................................................................2
SUITMATE®Installation Instructions .......................................................................3
Wiring Diagram ....................................................................6
Testing and Operation..........................................................7
Installation Troubleshooting .................................................7
SUITMATE®Utilities Location Diagram....................................................................8
SUITMATE®Maintenance Instructions.....................................................................9
SUITMATE®Troubleshooting Guide.......................................................................11
Remove / Replace Mechanical Assemblies...........................................................14
Remove SUITMATE®from the Wall Mount Bracket ...........14
Reinstall SUITMATE®to the Wall Mount Bracket...............14
Top and Sub Top Assemblies .............................................15
Lid ......................................................................................19
Actuator Screw...................................................................19
Riser Cable Assembly ........................................................21
Drive Unit Assembly ...........................................................23
Liner ...................................................................................25
Brake Rods, Basket, Hub, and Brake Disc Assembly........27
Brake Disc and Basket.......................................................29
Brake Lever Assembly .......................................................31
Shock Mounts ....................................................................33
Shock Bumper Rings .........................................................35
Motor from Mounting Plate and Motor................................39
Replace Electrical Assemblies...............................................................................41
GFCI...................................................................................41
Micro Switch.......................................................................43
Motor Timer ........................................................................45
Motor Timer Bypass ...........................................................45
SUITMATE®Micro Switch Adjustment Procedure ................................................47
SUITMATE®Exploded Drawing...............................................................................48
SUITMATE®Assemblies Chart................................................................................49
SUITMATE®Parts and Assemblies List .................................................................50
SUITMATE®Maintenance Log.................................................................................54

©2017 Extractor Corporation
115-V 20-Amp 60-Hz SUITMATE
®
Unit
2
INTRODUCTION
The SUITMATE®unit is a high-speed swimsuit water extractor. It is powered by a 1/3 horsepower,
115-V / 60-Hz fully grounded and fault protected electric motor. The SUITMATE®unit weighs approximately
55 pounds (25kg), and measures 15” x 15” x 23” (38cm x 38cm x 58.4cm).
This manual contains Installation Options, Safety Precautions, Installation Instructions, Wiring Diagram,
Utilities Location Diagram, Maintenance Instructions, Troubleshooting Guide, Instructions detailing the
removal/replacement of mechanical or electrical assemblies, a Micro Switch Adjustment Procedure, plus an
exploded drawing and a Parts List.
The SUITMATE®unit should only be worked on by a Tuali¿ed mechanic, electrician, or maintenance individual.
All maintenance and troubleshooting procedures are located in the appropriate sections of this manual.
Follow the service procedures carefully. Always note the location and position of parts and wires before
removing them so that reassembly can be done easily and correctly. If no speci¿c reassembly instructions are
given, simply reverse the disassembly procedure.
IMPORTANT INSTALLATION OPTIONS
Prior to installation of the SUITMATE®unit determine how the utilities will be connected.
1) Internal electrical and plumbing connection.
2) Internal electrical connection and external plumbing connection.
3) External electrical connection and internal plumbing connection.
4) External electrical and plumbing connection.
SAFETY
When servicing the SUITMATE®unit, observe the following safety precautions:
• Always turn off the power at the circuit breaker – place a lockout tag on the circuit breaker panel indicating
that the breaker is not to be turned on except by authorized personnel and disconnect the unit before doing
any work on the SUITMATE® unit. Simply turning off a switch is NOT enough.
• Use only proper tools, test equipment, and work practices when servicing the SUITMATE®unit. If there are
any questions concerning proper tools, equipment or practices, please contact the factory for
• Due to critical tolerances, use only speci¿ed replacement parts. See the SUITMATE®UNIT PARTS AND
ASSEMBLIES LIST on page 50 of this manual.

©2017 Extractor Corporation
115-V 20-Amp 60-Hz SUITMATE
®
Unit
3
INSTALLATION INSTRUCTIONS
115-V 20-Amp 60-Hz SUITMATE®Unit
The SUITMATE®Swimsuit Water Extractor has been designed and manufactured with safety as the primary
consideration. Therefore, it is important that the unit be installed correctly. It is also important that the
installation comply with all local building codes and regulations. Please consult your local licensed plumbing
and electrical engineers or contractors about your installation. Read the entire INSTALLATION
INSTRUCTIONS before beginning your installation. Remember: DO IT RIGHT and DO IT SAFE!
PROPER LOCATION FOR THE SUITMATE®UNIT
Following is a list of factors to consider in determining a location for the SUITMATE®unit.
1) The unit should be located in an area that is near where people remove and rinse out their swimsuits.
2) The unit should NOT be located in a cluttered area or where it is exposed to direct shower water or
water hose down.
3) The unit should be mounted on a wall structure that will support the unit’s approximate 55 pounds (25kg)
hanging weight plus the added weight or pressure of people leaning on the unit. Consult the PROPER
WALL MOUNTING section of these instructions to determine an appropriate location.
4) There should be a means to dispose of the wastewater from the unit. Consult the PROPER DRAINAGE
section of these instructions (page 5) to determine an appropriate location.
5) The unit should be wired to a 115-V(AC) 20-Amp 60-Hz dedicated circuit. Consult the PROPER
ELECTRICAL CONNECTIONS section of these instructions (page 5) to determine proper location.
PROPER WALL MOUNTING OF THE SUITMATE®UNIT
The SUITMATE®unit should be mounted to the wall with the Wall Mount Bracket that is provided with the unit.
The UTILITIES LOCATION DIAGRAM (page 8) shows the recommended location for the mounting holes, the
electrical service, and the wastewater outlet (if utilized). The Wall Mount Bracket must be secured to a wall
stud, or to concrete block or cinder block wall.
WARNING!
$QFKRUVLQGU\ZDOODUHQRWVXI¿FLHQWWRPRXQWWKH68,70$7(®unit.
Locating and Securing the Wall Mount Bracket to the Wall
The suggested height from the Àoor to the top of the SUITMATE®
unit is 42 inches (107cm). At least an additional 10 inches (25.5cm)
of clearance above the SUITMATE®unit is needed for the
opening and closing of the lid. The upper center hole of the Wall
Mount Bracket should be 38 +/- 1/16 inches (96.5cm +/- 2mm)
from the Àoor. The top of the Wall Sign should be 60 +/- 1/16 inches
(152.5cm +/- 2mm) above the Àoor and centered over the
SUITMATE®unit. Determine a location on the wall that provides
adequate clearance, a strong and secure place for the
Wall Mount Bracket as well as easy access to electrical and
drainage connections.
WARNING!
7KH :DOO 0Runt %UDFNHt PuVt EH OHYHO DItHU it iVVHFuUHG tRtKH ZDOO.
CHECK WITH LEVEL
USE APPROPRIATE FASTENERS
FOR YOUR APPLICATION
TO WALL

©2017 Extractor Corporation
115-V 20-Amp 60-Hz SUITMATE
®
Unit
4
To secure the Wall Mount Bracket, center the bracket at the desired location and mark the locations of the two
center holes. Secure the Wall Mount Bracket at the center holes using fasteners appropriate for your
conditions. All fasteners must be capable of supporting 55 pounds (25kg) in addition to the added weight or
pressure of people leaning on the unit. Make certain the Wall Mount Bracket is level. Next secure the outer
holes of the Wall Mount Bracket to the structure using fasteners appropriate to your conditions. After the
bracket has been properly anchored to the wall and the electrical and drainage requirements have been
allowed for, the SUITMATE®unit is ready to be mounted to the wall.
Mounting the SUITMATE®Unit to the Wall
Remove the SUITMATE®unit from its shipping box. Remove and discard the packaging material that is
protecting the SUITMATE®unit, including the material protecting the SUITMATE®motor. The upper back lip of
the SUITMATE®unit should be lowered down and centered on the Wall Mount Bracket. After the unit is cen-
tered, push down on the back of the unit to make certain that it is securely wedged onto the bracket. Make
certain the unit is level. If it is not level, remove the unit, adjust the Wall Mount Bracket and re-hang the unit. A
level installation is necessary to minimize vibration and insure proper drainage of wastewater. Finish securing
the unit to the wall using appropriate fasteners and anchors on the lower mounting channel at the bottom rear
of the unit. This will prevent the unit from being lifted from the bracket or being moved.
Note: Several holes in the lower mounting bracket may be obstructed by the GFCI Cover. Remove the GFCI
cover to provide access to these holes.
SUITMATE®UNIT
(front)
WALL MOUNT
BRACKET
USE APPROPRIATE ANCHORS AND
FASTENERS TO MOUNT THE UNIT
FOR YOUR SPECIFIC INSTALLATION
CUTAWAY VIEW OF SUITMATE®UNIT
FLOOR
PRESS HERE TO FIRMLY
SET SUITMATE®UNIT
WALL
WALL
MOUNT
BRACKET
UPPER
BACK
LIP OF UNIT EASE
UNIT
OVER
BRACKET
AND
LOWER
MOUNTING
SCREWS

©2017 Extractor Corporation
115-V 20-Amp 60-Hz SUITMATE
®
Unit
5
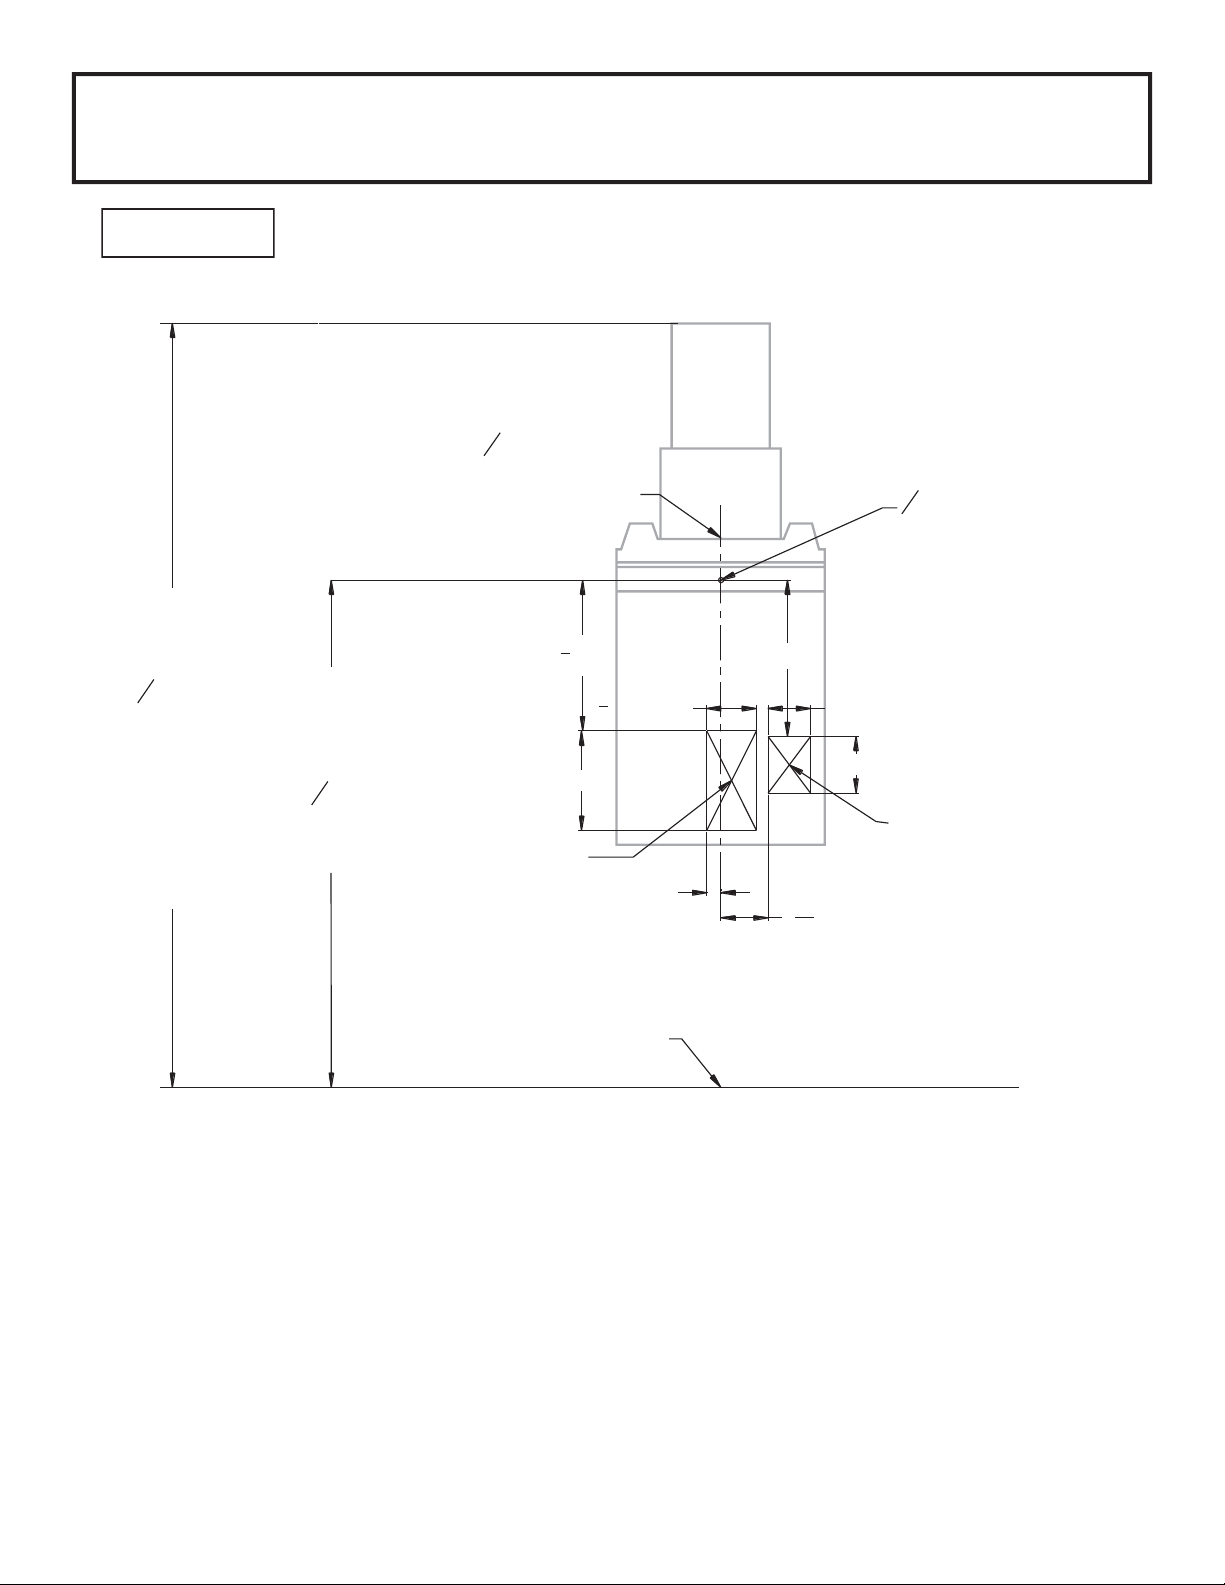
PROPER DRAINAGE FOR THE SUITMATE®UNIT
Note: Strictly follow all applicable local plumbing codes and regulations.
TO A FLOOR DRAIN
Drainage of the wastewater to a Àoor drain should be done ONL<in an area where the Àoor is normally wet.
DO NOT drain water across a Àoor where people do not expect to encounter a wet and slippery condition. The
SUITMATE®unit comes with a short Àexible drain extension tube connected with a stainless steel hose clamp
to its drain tailpiece.
WARNING!
7Ke GUDin tuEe tKDt FoPeVZitKtKe unit PuVt not Ee UePoYeGunOeVV tKe unit iV
FonneFteGto Dn DSSUoYeGZDVteZDteUoutOet oUtKe IDFtoU\VuSSOieGtuEe iV
UeSODFeGZitKDnotKeUtuEe DFFoUGinJto tKe IoOOoZinJinVtUuFtionV.
Replacing the Factory Drain Tube with a Longer Drain Tube
Use a 1-1/4 inch (31.75 mm) I.D. drain tube with a smooth interior that will not crimp or collapse. Use the
stainless steel hose clamp that is provided with the factory Àexible Àoor drain extension tube to secure the
replacement tube to the unit’s drain tailpiece. Route the drain tube so that it is never higher than the bottom of
the SUITMATE®unit and always slopes down. Secure the drain tube to the wall or Àoor with properly sized ³U”
clamps so it cannot be maneuvered to trap wastewater. Cut off the end of the drain tube on an angle to help
prevent it from being blocked by the Àoor, wall, or some other object. Upon completion of the installation,
check to make certain that there is a free Àow of water from the drain tube extension.
TO AN APPROVED SANITARY WASTE LINE
This installation should only be done in accordance with all applicable local plumbing codes and regulations.
The unit’s 1-1/4 inch (31.75 mm) O.D. drain tailpiece is designed for connection with standard compression
type plumbing ¿ttings. There is room inside of the stainless steel housing for the use of a standard ³P” type
plumbing connection. The waste outlet should be located in the wall behind the unit. The UTILITIES
LOCATION DIAGRAM (page 8) shows the appropriate location for the waste duct.
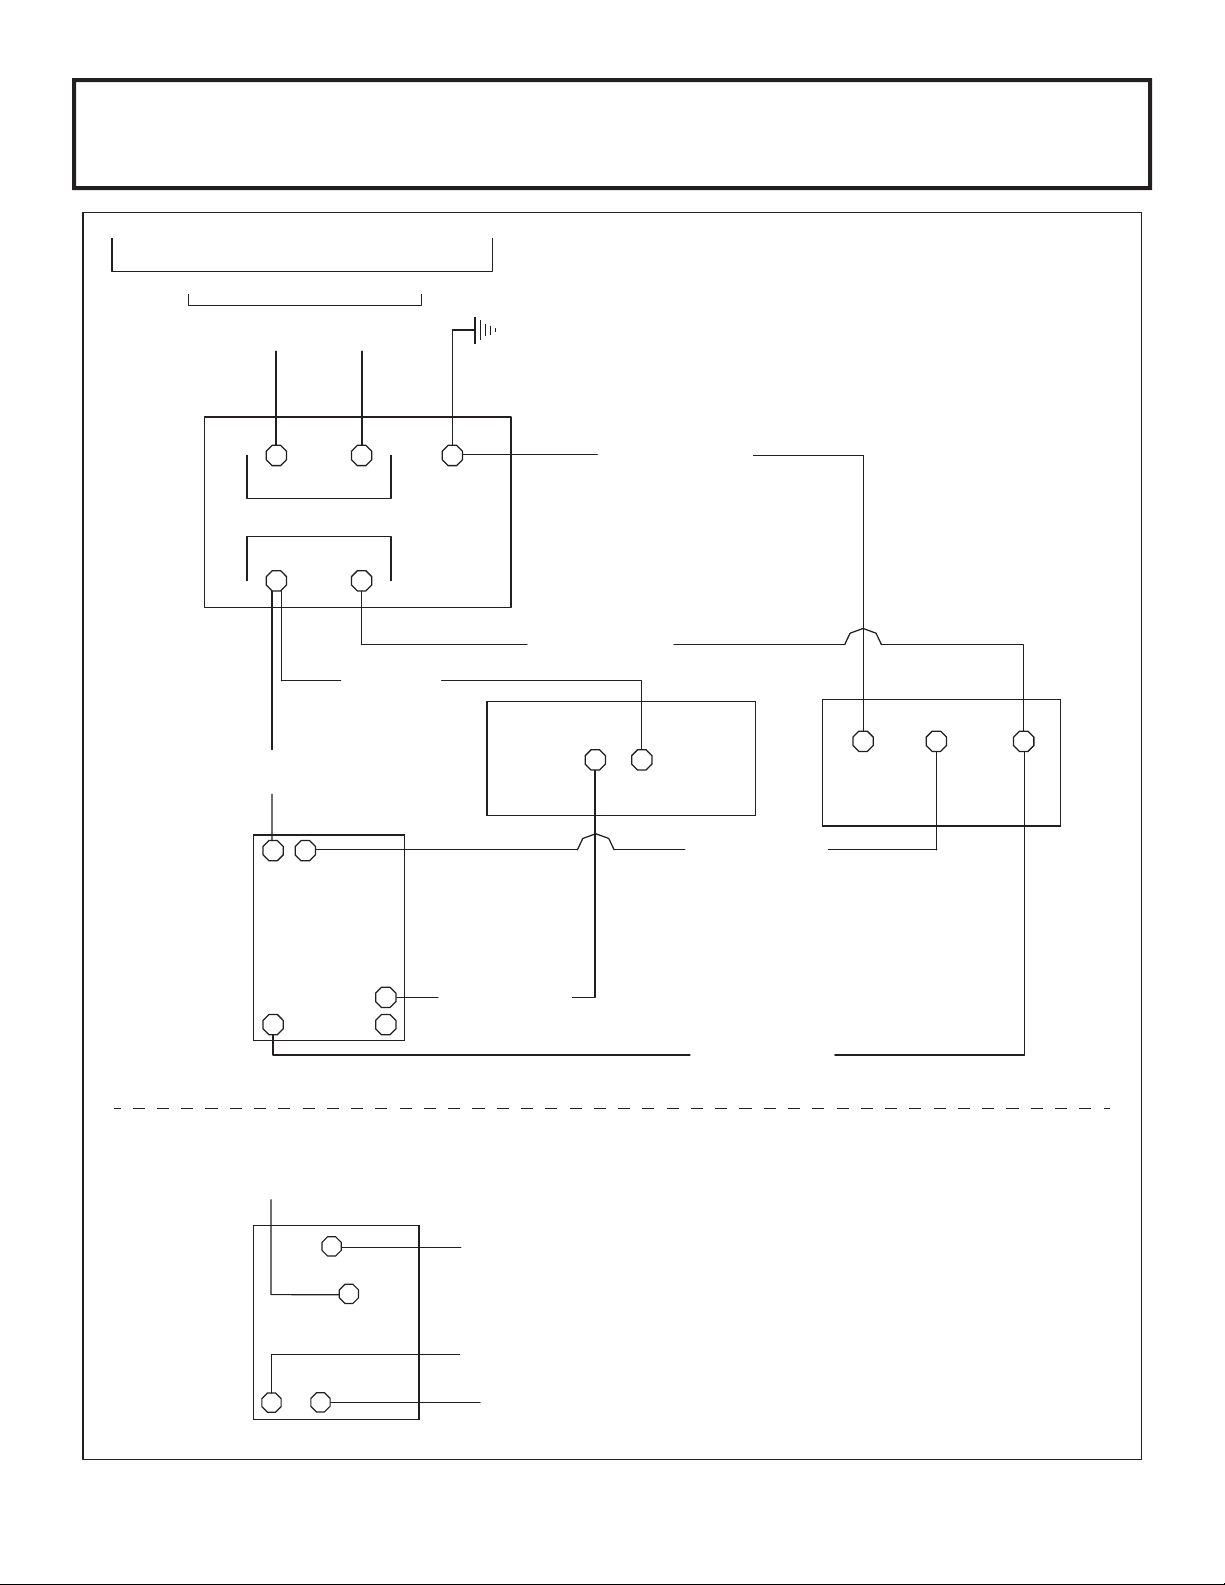
PROPER ELECTRICAL CONNECTIONS FOR THE SUITMATE®UNIT
Note: Strictly follow all applicable local electrical codes and regulations.
The SUITMATE®unit is equipped with a ground fault circuit interrupter (GFCI), that is designed to be
connected to a 115-V 20-Amp 60-Hz dedicated circuit that is protected by a fuse or circuit breaker of the
correct (20 Amp Maximum) size. A PLUG-IN INSTALLATION IS NOT ACCEPTABLE! The utilized circuit must
be run to the SUITMATE®unit’s weatherproof Junction Box that contains the GFCI. A liquid tight raceway/
Àexible conduit should be used from the circuit connection to the GFCI Junction Box. The UTILITIES
LOCATION DIAGRAM (page 8) shows the location of the suggested area behind the unit for the entrance of
the electrical raceway/Àexible conduit that does not interfere with the drainage connection.
Remove the cover of the weatherproof Junction Box, which contains the GFCI, and remove the GFCI
mounting screws. The circuit ground conductor must be connected to the green grounding screw located on
the GFCI. If no ground is available on the circuit utilized, you must provide a proper ground for the SUITMATE®
unit. The hot and neutral leads of the power circuit should be connected to the GFCI screw terminals marked
³LINE”. Connect the hot lead to the terminal marked ³HOT WIRE” and the neutral lead to the terminal marked
³WHITE WIRE”. After the correct electrical connections have been properly made, remount the GFCI using
the screws previously removed. Reinstall the weatherproof Junction Box cover previously removed. This cover
provides access to the GFCI ³TEST” and ³RESET” buttons.
WARNING!
'o not Uoute tKe UDFeZD\FonGuit ZKeUe ZDVteZDteUFDn ÀoZoUGUiSon it.

©2017 Extractor Corporation
115-V 20-Amp 60-Hz SUITMATE
®
Unit
6
CUSTOMER'S ELECTRICAL SERVICE
115-V / 20-Amp / 60-HZ
BLACK AEC1842
(From Timer To Motor)
GREEN
SCREW
GFCI IS
"GROUND FAULT CIRCUIT INTERRUPTER"
MOTOR CONTROLLER AND SWITCH
BLACK
AEC1840
WHITE AEC1841
(From Timer To Motor)
TIMER
HOT NEU GROUND
GREEN
SCREW
HOT WHITE
HOT NEU
LOAD
BLACK
AEC1815
GFCI
WHITE AEC1813
(From GFCI To Motor)
BLACK AEC1843
(From Timer To Micro Switch)
MICRO SWITCH
OPEN
GREEN or GREEN/YELLOW AEC2061
(From GFCI To Motor)
RESET BUTTON, ON
TEST BUTTON, OFF
COMMON
MOTOR
SUITMATE®UNIT
L1 L2
22
2
1
34
BLACK AEC1842
(To Motor L1)
BLACK AEC1843
BLACK AEC1840
(To GFCI Load/Hot)
WHITE AEC1841
(To Motor L2)
COM
N.O.
TIMER
(To Micro Switch Common)
3
2
ALTERNATE TIMER OPTION
SUITMATE
®
WIRING DIAGRAM
115-V 20-Amp 60-Hz SUITMATE®Unit

©2017 Extractor Corporation
115-V 20-Amp 60-Hz SUITMATE
®
Unit
7
TESTING AND OPERATION
After the mounting and all connections are complete, test the SUITMATE®unit as follows:
1) Make certain all packaging material is removed from the unit including material around the Motor.
2) Check to see that the Basket is empty and that the Lid moves freely.
3) Press down on the Lid. The unit will start and run for 8 seconds. While the unit is running it should run
smoothly and there should be no excessive vibration or noise.
4) Releasing the lid prior to the completion of the 8 second cycle causes the Basket to stop within one
(1) second.
5) Test the SUITMATE®unit by putting a wet swimsuit in the unit according to the instructions on the underside
of the Lid. If there is excessive vibration or noise it is usually caused by the improper loading of the
swimsuit. Be certain that the swimsuit is pushed to the bottom of the Basket and that all material is at least
two inches below the top of the Basket.
INSTALLATION TROUBLESHOOTING
If the SUITMATE®unit does not operate, check the following:
1) Check to see if there is power going to the unit. Check the circuit using an A.C. voltmeter set to the
appropriate rangemeasure across the ³LINE” side of the GFCI.
2) Ensure that the GFCI switch is in the ³ON” position. The ³RESET” button should be depressed and a small
green light should be illuminated.
3) Check to see if there is power from the unit. Check the unit using an A.C. voltmeter to measure across the
³LOAD” side of the GFCI.
4) Check the TROUBLESHOOTING GUIDE (page 11) in this manual for additional troubleshooting assistance.
FINISHING THE INSTALLATION
Be certain to save this SUITMATE®UNIT MANUAL for future reference. If you have any concerns about the
correct installation of the SUITMATE®unit, please contact Extractor Corporation at: (Telephone) 800-553-3353,
POSTING THE WALL SIGN
Locate the top edge of the sign 60+/- 1/16” (152.5cm +/- 2mm) above the Àoor centered over the SUITMATE®
unit. At this height the sign will not be blocked when the lid is raised. It will also serve as a stop to keep the Lid
from striking the wall behind the unit.
The sign has an adhesive foam backing. Be certain the surface that the sign is to be mounted to is clean and
dry. Without touching the sign to the wall, align the top of the sign 60+/- 1/16” (152.5cm +/- 2mm) above the
Àoor and at the center of the unit. Press the sign to the wall and rub ¿rmly over the adhesive portion of the sign.

©2017 Extractor Corporation
115-V 20-Amp 60-Hz SUITMATE
®
Unit
8
UTILITIES LOCATION DIAGRAM
115-V 20-Amp 60-Hz SUITMATE®Unit
WARNING!
7KiVGiDJUDP iVIoUUeIeUenFe onO\ ,t iVnot to Ee uVeGDV tKe VoOe UeIeUenFe
IoUinVtDOODtion oItKe 68,70$7(®unit. 7Ke inVtDOODtion inVtUuFtionVEeJinninJ
on SDJe PuVt Ee IoOOoZeGe[SOiFitO\
1) On wall locate center of 3/8” (9.5mm) hole for the upper center hole of the Wall Mount Bracket.
2) Draw a vertical line (down) from this mark to indicate the center of the lower mounting channel of the
SUITMATE®unit.
3) Use given measurements to locate either or both locations for placement of internal utilities.
4) After the SUITMATE®unit is hooked over the upper bracket, move it side to side so the center hole in the
bottom channel is over the vertical line drawn in Step 2.
Wall
Sign
Suggested location
for Internal
Connections of
Customer's
Power Source
The upper center
hole of the Wall
Mount Bracket
has to be located
38
[96.5 cm +/- 2 mm]
above the floor.
Centerline of 38
" [9.5mm] hole
Top of Wall
Sign is
located 60
[152.5cm +/-
2mm] above
floor and
centered
over
the (open)
Lid as
shown.
+/-116 inches
38
" [9.5mm] diameter
hole used to locate the
upper center hole of
the Wall Mount Bracket
Suggested location for
Internal Connection to
Customers' Waste Drain
35
16 [8.4cm]
1 [2.5cm]
Floor
11 [27.9cm]
3 [7.6cm]
105
8[27cm]
31
2[8.9cm]
7 [17.8cm] 4 [10.2cm]
locating upper center hole
of Wall Mount Bracket
+/-116 inches
"
"
"
"
""
"
"

©2017 Extractor Corporation
115-V 20-Amp 60-Hz SUITMATE
®
Unit
9
MAINTENANCE INSTRUCTIONS
115-V 20-Amp 60-Hz SUITMATE®Unit
These recommendations are designed to keep your SUITMATE®unit clean and operating properly. Extractor
Corporation recommends that these procedures be followed at the suggested frequencies.
TWICE DAILY
1) Wipe down
Use a disinfectant wipe, such as the PDI Sani-cloth®to wipe down the inside of the Basket and the
Black Plastic Top. Re-wipe the surfaces with a fresh towel and clean water.
DAILY
1) Inspection
a. Open the Lid, pull the Basket to the side and with a Àashlight, check for trapped debris such as
straps, strings, bathing caps, etc. inside of the unit. If foreign objects and/or debris are found, remove
them with a long hook or other implement.
b. Should the Basket ³Àop” to one side during this inspection, you may have a broken shock mount in
which you can contact Extractor Corporation at 800-553-3353 for further assistance.
c. Press down on the Lid and run the machine to ensure that it is operating properly. When you lift the
Lid, the Basket should stop spinning within one (1) second.
2) Hygienic Cleaning
a. Mix a disinfecting concentrate at the manufacturer’s recommended strength in a ½ gallon bucket
of water.
b. Clean the inside of the unit by spinning a small soft towel soaked in the cleaner. Repeat this
step 3 times.
c. The spun towel can then be used to wipe down the Basket and the Black Plastic Top.
d. Re-wipe the surfaces with a fresh towel and clean water.
e. Wipe down the Lid and exterior of the unit with a stainless steel cleaner.
WARNING!
NeYeUuVe ÀDPPDEOe VoOYentVin oUon tKe 68,70$7(®unit.
:Ken FOeDninJDUounGtKe unitEe FDUeIuOnot to DOOoZZDteUto VSODVK uSunGeU
tKe unit DV tKiVPD\ GDPDJe tKe PotoU.
WEEKLY
1) Flushing
a. If your unit uses a drain house or a P-trap, disconnect it from the unit’s drain tailpiece and inspect it
for any obstructions.
b. With the drain hose or P-trap removed, place an empty bucket (1-2 gallons) under the tailpiece to
catch the discharge from the Àush.
c. Mix a disinfecting cleaner by referring back to steps A and B under Hygienic Cleaning.
d. SLOWL<pour the cleaner into the top opening of the unit. If the unit’s drainage channels are open,
the full amount of cleaner solution poured into the unit should Àow into the bucket below within a few
seconds. Check the discharge water for signs of debris.
Note: If cleaner is poured in too fast it may overÀow the drain channel into the 0otor.

©2017 Extractor Corporation
115-V 20-Amp 60-Hz SUITMATE
®
Unit
10
e. Repeat step D using clean water until a free Àow of water is established and the discharge water
is clear of debris.
f. If you cannot establish a free Àow of water or the discharge water is spilling out from under the unit,
the tailpiece is plugged or the drain channels are blocked. Locate the blockage by referring back to
step A under Inspection. After removing the blockage, repeat steps C through E.
g. Reinstall the drain hose or P-trap.
MONTHLY
1) Case and Top care
a. Wipe down the Black Plastic Top with Armor All®or its equivalent.
b. Clean and polish the stainless steel Case with a stainless steel cleaner. If Àash rust or stains are
present, use a Scotch Brite®pad or medium grade steel wool to remove them. Take care to rub
stains out by going with the grain of the case (up and down – not sideways). Follow stain removal by
polishing the Case a stainless steel cleaner.
2) Testing the GFCI
a. Locate the weatherproof junction box in the bottom rear of the unit. Flip open the cover of the
junction box to expose the ³TEST” and ³RESET” buttons on the face of the GFCI.
b. Test the GFCI by depressing the ³TEST” buttonthe ³RESET” button should pop out. Depress the
³RESET” button to resume normal functioning. If the ³RESET” button does not pop out during testing
or is unable to be depressed back into place, the GFCI may be faulty; please contact Extractor
Corporation at 800-553-3353 for further assistance.
If the unit does not operate, please refer to the TROUBLESHOOTING GUIDE. If you have any questions or
problems, please contact Extractor Corporation at 800-553-3353.

©2017 Extractor Corporation
115-V 20-Amp 60-Hz SUITMATE
®
Unit
11
TROUBLESHOOTING GUIDE
115-V 20-Amp 60-Hz SUITMATE®Unit
If you are experiencing dif¿culty with your SUITMATE®unit, please read through the following pages to see if
the problem you are experiencing is described. If so, please follow the troubleshooting steps to attempt to ¿x
the problem. If further assistance is required, please contact the factory for further recommendations at:
Problem: The unit is not working. There is no sound, no hum, and no noise at all when the lid
is depressed.
• Is there power to the unit? An A.C. voltmeter set to the appropriate range can be used to check for
power by measuring across the ³LINE” side of the GFCI. The GFCI can be accessed from the bottom
of the unit.
• If there is no power, check the wire connections to the GFCI and check the power at the main
circuit breaker
• If there is power to the unit, check to see if the GFCI is tripped off. Attempt to reset the GFCI
by pressing the ³TEST” button followed by the ³RESET” button.
• If the GFCI cannot be reset, it may be faulty and need to be replaced.
• If the GFCI resets and the unit still is not working, please proceed to the next
troubleshooting steps.
• Is the Micro Switch out of adjustment? The Micro Switch is located on the backside of the unit. In
order to access it, the unit will need to be removed from the wall.
• On the backside of the unit, there is a stainless steel box. Remove the box cover. The Micro
Switch is located on the right hand side of this box and has a small wire cable attached to a
copper arm. Check if the Micro Switch is engaging properly by depressing the Lid while still
maintaining visual contact with the Micro Switch.
• Does the wire cable pull up on the arm of the Micro Switch? If the arm is moving but
does not make an audible ³click,” the Micro Switch needs to be adjusted. Please refer to
Page 49 in this manual for further instruction.
• Does the wire cable not move at all? This could indicate a broken Actuator Screw.
Please refer to Page 19 in this manual for further instruction.
• Is there power after the Timer? With the Lid depressed, use an A.C. voltmeter set to the appropriate
range to check for power at the #4 (or COM) connection on the Timer.
• If there is no power at that connection point, the Timer may be faulty and need to be replaced.
• If the Timer is functioning properly, the power reading at the #4 (or COM) connection will last
for approximately 7-8 seconds and then shut off.
Problem: The unit is humming when the Lid is depressed, but the Basket is not spinning.
• Does the Basket spin freely? With the Lid in the open and upright position, use a piece of bar stock
or a wood 2 x 4 to manually depress the two Brake Rods that come up through the Top on each side of
the opening for the Basket. Simultaneously depress both Brake Rods approximately 1/2” (13mm) and
attempt to spin the Basket. With the Brake Rods depressed, it should take very minimal force to
spin the Basket.
CAUTION!
0DNe FeUtDin tKe PDin eOeFtUiFDO SoZeUto tKe unit iVtuUneGoII ±DnGOoFNeGout
±EeIoUe EeJinninJZoUN on tKe 68,70$7(®unit.

©2017 Extractor Corporation
115-V 20-Amp 60-Hz SUITMATE
®
Unit
12
• If the Basket spins freely, the problem may be due to a loose wire or a broken motor
component. Remove the end cap from the bottom of the motor to visually inspect the motor
components for cracks, frayed wires and broken wires. If anything is found to be broken, contact
Extractor Corporation for additional assistance or replacement parts.
• If the Basket does not spin freely or at all, the problem may be due to an obstruction within
the unit or faulty motor bearings. Check for signs of an obstruction within the unit by gently
pulling the Basket aside and, with a Àash light, look down inside the unit for something wrapped
around the Basket or Brake Disc (located around the bottom of the Basket). If foreign objects
are found, try to pull them out with a long hook or other instrument. If the obstruction cannot be
removed in this manner, the Top and Sub-Top may need to be removed to fully access the
inside of the unit. Please refer to Page 15 in this manual for further instruction.
• If no signs of an obstruction can be seen, the issue may be faulty motor bearings.
Please contact Extractor Corporation for additional troubleshooting regarding this issue.
Problem: The unit is humming as soon as power is engaged and before the Lid is depressed.
This could be caused by either a faulty timer or an over-adjustment on the Micro Switch.
• To test for a faulty timer in this instance, place the Lid in the open and upright position and use an A.C.
voltmeter set to the appropriate range to check for power at the #4 (or COM) connection on the Timer.
• If there is power at the #4 (or COM) connection on the Timer with the Lid in the upright
position, the Timer is faulty and should be replaced.
• To check the adjustment on the Micro Switch, please refer to Page 49 in this manual.
Problem: The unit is leaking.
The SUITMATE®unit does not have any seals or gaskets that can wear or break down. Leaking is primarily
caused by an obstruction within the interior drain channel, drain hose, or P-trap (if applicable). The interior
drain channel is a two-inch U channel that runs around the perimeter of the interior of the unit. Check for an
obstruction by gently pulling the Basket aside and, with a Àash light, look down inside the unit for something
blocking the drain channel or drain opening. If foreign objects are found, try to pull them out with a long hook
or other instrument. If the obstruction cannot be removed in this manner, the Top and Sub-Top may need to be
removed to fully access the inside of the unit. Please refer to Page 15 in this manual for further instruction.
Problem: The GFCI is tripping off every time the unit is run.
• The SUITMATE®unit should be connected to a 115-V, 20-Amp, 60-Hz dedicated circuit. If the unit
is connected on a circuit with other items or appliances, it is possible that the initial draw of the unit
could be overloading the circuit causing the GFCI to trip off. If the SUITMATE®unit is not on a
dedicated circuit, switch it to a 115-V, 20-Amp, 60-Hz dedicated circuit and verify that the problem
is resolved.
• If the SUITMATE®unit is already on a 115V, 20-Amp, 60-Hz dedicated circuit, the GFCI may be faulty,
have a loose connection, or there may be a short within the unit.
• Verify that all wires are securely connected on both the ³LINE” and ³LOAD” sides of the GFCI.
If a loose connection is found, correct it, restore power and verify that the problem is resolved.
CAUTION!
0DNe FeUtDin tKe PDin eOeFtUiFDO SoZeUto tKe unit iVtuUneGoII ±DnGOoFNeGout
±EeIoUe EeJinninJZoUN on tKe 68,70$7(®unit.

©2017 Extractor Corporation
115-V 20-Amp 60-Hz SUITMATE
®
Unit
13
• If a loose connection is not found or the GFCI still trips off, turn off the main electrical power to the unit
and bypass the GFCI. Connect the unit direct to a ground wall circuit and see if the main circuit breaker
trips off. If the main circuit breaker does not trip, the GFCI is most likely faulty and should be replaced.
If the main circuit breaker does trip, there is probably a short within the unit. Please call Extractor
Corporation for additional troubleshooting assistance.
3UREOHP7KH*)&,LVWULSSLQJRIIDWUDQGRPWLPHVQRVSHFL¿FSDWWHUQRUUHDVRQ
• The SUITMATE®unit should be connected to a 115-V, 20-Amp, 60-Hz dedicated circuit. If the unit is
connected on a circuit with other items or appliances, it is possible that at the random time when the
unit is running at the same time as another appliance on the circuit, the circuit could become over
loaded and cause the GFCI to trip off. If the SUITMATE®unit is not on a dedicated circuit, switch it to a
115-V, 20-Amp, 60-Hz dedicated circuit and verify that the problem is resolved.
• If the SUITMATE®unit is already on a 115-V, 20-Amp, 60-Hz dedicated circuit, the GFCI may be
faulty or have a loose connection.
• Verify that all wires are securely connected on both the ³LINE” and ³LOAD” sides of the GFCI.
If a loose connection is found, correct it, restore power and verify that the problem is resolved.
Problem: The Basket is still spinning when you lift the Lid.
There is a problem with the Brakes. Please take the unit out of service immediately and contact Extractor
Corporation.
Problem: The unit will run but takes a long time to reset before being able to run again.
This may indicate a faulty Timer, a faulty Motor Thermal Breaker, or an obstruction within the unit.
• To test for a faulty Timer, please follow the instructions on Page 47 for bypassing the timer. If the unit
functions normally once the timer is bypassed, the timer should be replaced.
• If the unit takes more than 5 minutes to reset, there may be either an obstruction within the unit that is
causing friction while the unit is running or a faulty Thermal Breaker.
• Check for signs of an obstruction within the unit by gently pulling the Basket aside and, with
a Àash light, look down inside the unit for something wrapped around the Basket or the Brake
Disc (located around the bottom of the Basket). If foreign objects are found, try to pull them out
with a long hook or other instrument. If the obstruction cannot be removed in this manner, the
Top and Sub-Top may need to be removed to fully access the inside of the unit. Please refer to
Page 15 in this manual for further instruction on removing these pieces.
• If no signs of an obstruction can ben seen, the issue could be a faulty Motor Thermal Breaker.
Please contact Extractor Corporation for additional troubleshooting regarding this issue.
Problem: The unit is making excessive noise when it is running.
• The patrons may not be operating the unit correctly. Test this by putting a swimsuit in the Basket and
pushing it all the way down, making sure that it is evenly distributed in the bottom of the unit. Operate
the unit.
• If the unit is still noisy under correct operation, attempt to run it empty. If the noise remains
even with the unit being empty, it could indicate faulty motor bearings or worn out brakes.
Please contact Extractor Corporation for additional information.
If the above steps and suggestions have not resolved your problem, please contact Extractor Corporation at:
CAUTION!
0DNe FeUtDin tKe PDin eOeFtUiFDO SoZeUto tKe unit iVtuUneGoII ±DnGOoFNeGout
±EeIoUe EeJinninJZoUN on tKe 68,70$7(®unit.

©2017 Extractor Corporation
115-V 20-Amp 60-Hz SUITMATE
®
Unit
14
MECHANICAL ASSEMBLIES
115-V 20-Amp 60-Hz SUITMATE®Unit
Note: Always turn off the power at the circuit breaker – place a lockout tag on the circuit breaker panel indicating that
the breaker is not to be turned on except by authorized personnel – and disconnect the electrical connections before
doing any work on the S8IT0ATE®unit. Simply turning off a switch is NOT enough. Use only proper tools, test
eTuipment, and work practices when servicing the SUIT0ATE®unit.
If there are questions concerning proper tools, equipment or practices, please call the factory for recommendations at:
'ue to critical tolerances, use only speci¿ed replacement parts. See the SUIT0ATE®UNIT 3ARTS AN'ASSE0%/IES
/IST on page 50 of this manual.
Some disassembly and assembly procedures have not been included, as the procedures seem to be self-evident.
REMOVE SUITMATE®UNIT FROM THE WALL MOUNT BRACKET
'o 7KiV),567 prior to performing any electrical or mechanical maintenance.
• Turn off the main electrical power to the unit – place a lockout tag on the circuit breaker panel indicating that
the breaker is not to be turned on except by authorized personnel – and disconnect the unit before doing any
work on the SUITMATE®unit. Simply turning off a switch is NOT enough.
• Consult the individual sections in this manual to determine the exact parts and fasteners that will be required
for installation of mechanical components.
CAUTION!
0DNe FeUtDin tKe PDin eOeFtUiFDO SoZeUto tKe unit iVtuUneGoII ±DnGOoFNeGout
±EeIoUe EeJinninJZoUN on tKe 68,70$7(®unit.
EXTERNAL ELECTRICAL SERVICE
If the unit’s electrical service is coming into the unit from outside the unit, it will be necessary to disconnect the
incoming electrical service from the power source. Prior to disconnecting the electrical service make certain
that the power source is turned off and locked out! Disconnect the incoming liquid tight raceway or cable from
the power source. EXTERNAL PLUMBING SERVICE
If the unit’s plumbing service uses the factory supplied Drain Hose or is connected from outside the unit, it will
be necessary to disconnect the drain hose or piping from its external hookup.
INTERNAL ELECTRICAL AND PLUMBING SERVICE
If the SUITMATE®unit was installed with internally connected plumbing and electrical connections:
1) Remove the cover of the weatherproof Junction Box that contains the GFCI; remove the GFCI; disconnect
the external source ground wire and the power feed lines from the GFCI terminals marked ³Line”. Retain the
weatherproof Junction Box cover and fasteners for reinstallation.
2) Disconnect the power feed liquid tight raceway or cable from the Junction Box and the internally connected
drain hose.
3) Remove the lower fasteners anchoring the unit to the wall.
4) Remove the SUITMATE®unit from the Wall Mount Bracket by ¿rmly grasping the sides of the Case bottom
and gently lifting straight up until the unit clears the upper back lip of the Wall Mount Bracket. Take the
SUITMATE®unit to a workbench.
REINSTALL THE SUITMATE®UNIT
CAUTION!
0DNe FeUtDin tKe PDin eOeFtUiFDO SoZeUto tKe unit iVtuUneGoII ±DnGOoFNeGout
±EeIoUe EeJinninJZoUN on tKe 68,70$7(®unit.
Return the SUITMATE®unit to its proper location and reconnect the unit by reversing the procedures above.
Note: 0ake certain the unit is level. If it is not level, remove the unit, adMust the :all 0ount %racket and re-hang the
unit. A level installation is necessary to minimize vibration and insure proper drainage of wastewater.

©2017 Extractor Corporation
115-V 20-Amp 60-Hz SUITMATE
®
Unit
15
SUB-TOP ASSEMBLY
CASE ASSEMBLY
EC12
EC 6
(6) AEC 1205
WITH LID (1) EC 4
TOP ASSEMBLY
(2) AEC 1605
BLACK ALUMINUM
BLACK BRAKE TIP
POP RIVET
REMOVE THE TOP AND SUB-TOP ASSEMBLIES
'o 7KiV),567
Make certain you have all the correct parts and fasteners necessary for correct installation. Re-use any
components that are not damaged, otherwise replace them. Parts used in this process: (6) AEC1205 Black
Aluminum Pop Rivets, (2) AEC1605 Black Rubber Brake Tips, and (3) AEC1240 Aluminum Pop Rivets.
REMOVE TOP ASSEMBLY
1) Remove the SUITMATE®unit from the Wall Mount Bracket following the instructions beginning on Page 14.
2) Place the SUITMATE®unit in an upright position.
3) Lift the Lid. Remove the Black Rubber Brake Tips from the (2) Brake Rods. If damaged, they must
be replaced.
4) Remove the (6) rivets from around the outer edge of the Black Plastic Top.
a. Punch out the center of each rivet with a small drift punch.
b. Drill out each rivet.
Note: 0ake certain the drill bit does not reach a depth of more than ò-inch to avoid damaging the
%lack 3lastic /iner.
c. Gently chisel off the rivet heads. Make certain the rivets are completely removed.
5) Separate the Black Plastic Top from the unit. Remove the Top by grasping the sides and lifting straight up
while the Lid is in the upright position.
6) Be careful not to bump the Riser Cable Assembly on the Sub-Top. Set the Top Assembly aside
for reassembly.

©2017 Extractor Corporation
115-V 20-Amp 60-Hz SUITMATE
®
Unit
16
ALUMINUM POP RIVET
(3) AEC1240
SUB-TOP ASSEMBLY
EC6
TURNBUCKLE NUT
RISER SHUTTLE ASSEMBLY
EC7
RISER CABLE ASSEMBLY
EC8
(1) AEC1807
SUB-TOP GASKET
(1) AEC1352
TURNBUCKLE

©2017 Extractor Corporation
115-V 20-Amp 60-Hz SUITMATE
®
Unit
17
REMOVE SUB-TOP ASSEMBLY
1) Remove the Nut from the Turnbuckle that is attached to the Riser Cable. Set the Nut aside for reassembly.
2) Pull the Riser Cable with Turnbuckle down through the hole in the Riser Shuttle.
3) Remove the (2) rivets from around the outer edge of the Sub-Top and the (1) rivet from the top.
a. Punch out the center of each rivet with a small drift punch.
b. Drill out each rivet.
Note: 0ake certain the drill bit does not reach a depth of more than ò-inch to avoid damaging the
%lack 3lastic /iner.
c. Chisel off the rivet heads. Make certain the rivets are completely removed.
4) Separate the Sub-Top from the SUITMATE®unit. Remove the Sub-Top by grasping the sides and lifting
straight up.
5) Remove rivet debris and any other foreign objects from the Liner.
REPLACE SUB-TOP ASSEMBLY
1) Place the SUITMATE®unit in an upright position.
2) Locate the (2) Brake Rod holes in the Sub-Top gasket and align them with the Brake Rods.
3) Push the Sub-Top down over the Brake Rods.
4) Push the Riser Cable Turnbuckle up and through the hole in the Riser Shuttle.
5) Reattach the Nut (removed in step 1 above) to the Turnbuckle that is attached to the Riser Cable.
6) Align the (3) holes in the Sub-Top (one on each side and one on the top) with the respective holes
in the Case.
Note: 0ake sure that the lip of the Sub-Top is on the outside of the Case.
7) Fasten the Sub-Top to the case with (3) Aluminum Pop Rivets.
REPLACE TOP ASSEMBLY
1) Place the SUITMATE®unit in an upright position.
2) Lift the Lid on the Top Assembly and locate the (2) Brake Rod holes in the Top and align them with the
Brake Rods. Push the Top down over the Brake Rods.
3) Align the (6) holes in the outer edge of the Top with the corresponding (6) holes in the Case.
4) Fasten the Top to the Case with (6) Black Aluminum Pop Rivets.
5) Replace the (2) Black Rubber Brake Tips.
Note: Check the 0icro Switch alignment by following the 0ICRO S:ITC+A'-UST0ENT 3ROCE'URE
section (Page 47) in this manual.
6) Reattach the SUITMATE®unit to the Wall Mount Bracket. See instructions beginning on Page 14.
7) Retest the SUITMATE®unit for proper operation, refer to TESTING AND OPERATION on page 7.

©2017 Extractor Corporation
115-V 20-Amp 60-Hz SUITMATE
®
Unit
18
LID (1) CEC1402
(4) AEC1410
S.S. POP RIVET
ACORN NUT (1) AEC1803
HINGE PIN, LEFT (1) BEC1403
(1) AEC1405
S.S. ACTUATOR SCREW
BLACK O-RING (2) AEC1416
(1) AEC1704
S.S. LOCKWASHER
(1) BEC1404
HINGE PIN, RIGHT
AEC 1205 (6)
BLACK ALUMINUM RIVET
AEC1235 - TIMED UNIT
INSTRUCTIONS (1)
LID OPERATING
TOP ASSEMBLY (1) EC2
AEC1234
LABEL (1)
LIFT LID
(1) AEC1404
S.S. ACTUATOR SCREW SLEEVE
Table of contents