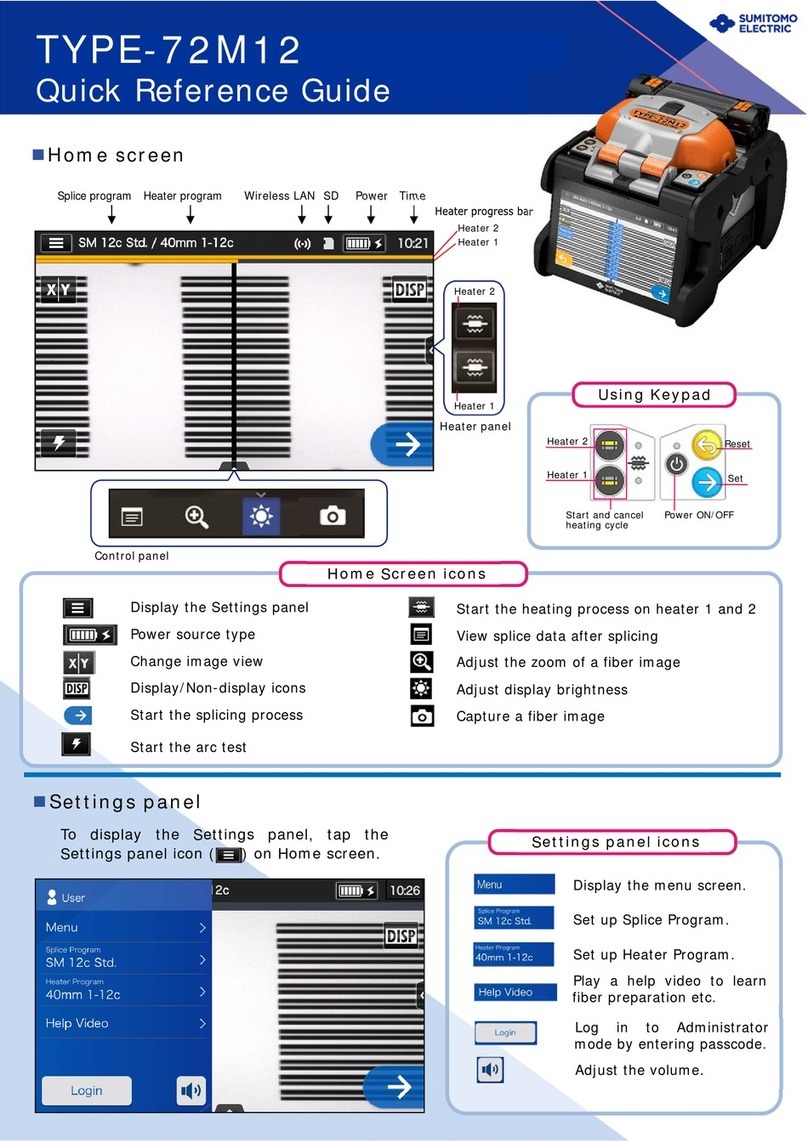
Sumitomo TYPE-66M12 User manual

This product has been designed and manufactured to assure personal
safety. Improper use can result in fire, electric shock or injury to persons.
Please read and observe all warnings instructions given in this operation
manual.
Use your splicer only for its intended purpose.
♦The meaning of these symbols
In the product and this operation manual, symbols are used to highlight warnings and cautions for
you to read so that accidents can be prevented. The meanings of these symbols are as follows:
{Symbol used in the product
This symbol, where it appears on the unit, indicates that hazardous voltage
is present inside of the splicer.
{The meaning of these symbols
This symbol indicates a warning, caution, or danger and alerts you important
instructions have been included on the product or in the manual.
This symbol indicates actions that are prohibited.
This symbol indicates actions that must be taken.
{The meaning of Warning and Caution
This symbol indicates explanations about extremely dangerous matters. If
users ignore this symbol and handle the splicer the wrong way, serious injury
such as fire or electric shock, or death could result.
This symbol indicates explanations about dangerous matters. If users ignore
this symbol and handle the splicer the wrong way, bodily injury and damage
to the equipment could result.
Caution
Warning
Be sure to read all the following warnings and cautions before use.
[Warning]
<Setting up and using splicer>
1. This fusion splicer performs an arc discharge. Do not use the splicer in a hazardous
location in which inflammable gas can generate or only electrical apparatus for
explosive gas atmosphere can be used.
2. Never use spray cleaners such as Freon or Flammable gas on the splicer.
Decomposition of arc by heat will cause toxic gas, or abnormal arc may result in
damage or fire.

3. Do not use and store the splicer out of the locations defined in a brochure and this
manual. Doing so may cause splicer malfunction or deterioration, resulting in fire or
electric shock.
4. To reduce the risk of fire, electric shock or malfunction, do not allow the splicer to be
exposed to rain and get liquid such as water or a metallic object inside the splicer.
Doing so can cause a fire, electric shock or malfunction by shorting out internal
components.
5. Never use the battery, the AC power supply and the battery charger for the machines
other than the specified splicer. Doing so may cause these items to damage,
resulting in fire or heat generation.
6. Do not make mechanical or electrical modifications to the splicer since this may
expose you to dangerous voltage or other hazards.
7. Do not touch the electrodes during and after arc discharge. Doing so may cause
personal injury or electric shock.
8. The heating plate of the heat shrink oven may be hot during heating. Do not touch
the protection sleeve directly after heating. Doing so may cause burn.
9. Avoid places with too much dust or dirt. Dirt or dust that can accumulate in the fusion
splicer causes short circuit and insufficient cooling, which may lead to splicer
malfunction or deterioration, resulting in fire or electric shock.
10. Always use the connection method as defined in this manual. Failure to do so may
cause a fire or electric shock.
11. Only use a voltage within the indicated power voltage. Failure to do so may cause a
fire or electric shock.
12. Check for condensation before operating. If necessary, dry the splicer with a hair
dryer before operation. If water or other liquid, a metallic object or other foreign
substance gets inside the splicer, immediately turn off the power and disconnect the
power plug. Contact qualified service personnel.
13. In a high location, take safety measures to prevent fall of operators. Dropping the
splicer could result in personal injury or damage to the splicer. Fix the splicer to a
worktable or a tripod with the screw on the bottom of the splicer.
14.If an abnormal condition such as unusual noise, smoke or unusual odor occurs,
immediately turn off the power and disconnect the power plug. Next, contact our
maintenance service center.
15.Be sure to turn off the splicer and unplug the power cord or remove the battery before
replacing the electrodes.
16. The heating plate of the heat shrink oven may be hot during and after heating. Avoid
touching it directly.
17. Do not operate in the rain. Doing so may cause power supply module or battery
module to be short-circuited.
18. Do not expose the splicer to extremely high temperature and high humidity or to
direct sunlight for prolonged periods.
19. Only use original Sumitomo electrodes (ER-10). Failure to do so may cause the
splicer to malfunction.

1. Do not burn the battery or throw it into a fire. Doing so may cause heat generation,
bursting and fire.
2. Do not place the battery in microwave ovens, high-pressure containers.
3. Do not let water or sea water wet or soak the battery. Safety and protective devices to
prevent danger are built in the battery. If these devices are damaged, excessive
current flow may cause abnormal chemical reaction in battery fluid, heat generation,
bursting and fire.
4. Do not throw or impact the battery. Safety and protective devices to prevent danger
are built in the battery. If these devices are damaged, excessive current flow may
cause abnormal chemical reaction in battery fluid, heat generation, bursting and fire.
5. Do not pierce the battery with nails, strike the battery with a hammer, or step on the
battery. Doing so will cause internal short circuit, heat generation, bursting and fire.
6. Do not disassemble or modify the battery. Safety and protective devices to prevent
danger are built in the battery. If these devices are damaged, excessive current flow
may cause loss of control during charging or discharging of the battery, heat
generation, bursting and fire.
7. Make sure the polarities are correctly connected. Do not attempt to connect the
battery or other equipment when you cannot do. Reversed connections may cause
abnormal chemical reaction in battery fluid, heat generation, bursting and fire.
8. Do not solder any lead wires directly to the battery. Do not directly connect the
positive and negative terminals with a conductive material such as a wire. Do not
carry or store the battery together with any personal jewelry, hairpins or other Metallic
objects. Doing so can cause an electrical short circuit. Also excessive current flow
may cause abnormal chemical reaction in battery, heat generation, bursting and fire.
9. Do not use or leave the battery under high temperature conditions such as near fire.
10. Only use a specified battery charger. Failure to do so can cause the battery to be
overcharged or excessive current flow may cause abnormal chemical reaction in
battery fluid, heat generation, bursting and fire.
11. Use the battery only for the application for which it was designed. Failure to do so will
result in a loss of performance and a shortened life expectancy. Also excessive
current flow may cause loss of control during charging or discharging of the battery,
heat generation, bursting and fire.
<Handling of battery>
<Handling of power cord and plug >
1. To reduce the risk of electric shock, do not plug/unplug the power cord or remove the
battery with wet hands.
2. Disconnect the power cord by grasping the plug, not the cord. Failure to do so may
cause damage to the power cord, resulting in fire, electric shock or malfunction.
3. Before charging the battery, make sure that the pins of the battery charge cord are
not bent or broken. Using the battery charge cord with a bent or broken pin will cause
internal short circuit, resulting in fire or electric shock.
[Caution]
<Transportation and storage>
1. The TYPE-66 is a precision instrument. When transporting the splicer, use its
specified transport case and do not shock or impact it.
2. Do not use and store the splicer out of the locations defined in a brochure and this
manual. Failure to do so may cause splicer malfunction or deterioration, resulting in
fire or electric shock.

3. Only use alcohol to clean the splicer. To prevent malfunction and damage, do not use
any other kind of chemicals.
4. Never use spray cleaners such as Freon or Flammable gas on the splicer. Heat by
arc will cause chemical reactions to occur to gas component, which will deteriorate a
microscope lens, resulting in a loss of splicing capability.
5. Avoid places with too much dust or dirt. Dirt or dust that can accumulate in the fusion
splicer causes short circuit and insufficient cooling, which may lead to splicer
malfunction or deterioration, resulting in fire or electric shock.
6. If you are not going to use the splicer for a while, remove the battery before storing it.
Failure to do so will shorten a battery life.
7. Unplug the fusion splicer or remove the battery before attempting any electrical
maintenance or if not using the splicer for a prolonged period. Failure to do so can
cause a fire.
8. We recommend your splicer to be annually over-hauled to keep it in good condition.
<Battery handling and charging>
1. Make sure the polarities are correctly connected. Do not attempt to connect the
battery or other equipment when you cannot do. Reversed connections may cause
abnormal chemical reaction in battery fluid, heat generation, bursting and fire.
2. Do not carry or store the battery together with any personal jewelry, hairpins or other
metallic objects. Doing so can cause an electrical short circuit. Also excessive current
flow may cause abnormal chemical reaction in battery, heat generation, bursting and
fire.
3. Do not miss usage of the batteries differing in capacity, type, and manufacturer.
4. The battery's optimum charging temperature range is 0 to 45˚C. Whenever possible,
place the charger in a location that is within this temperature range. Avoid charging
the battery at extremely low temperature (below 0˚C). Failure to do so may lead to
deterioration in performance and battery leakage.
5. Always turn off the power to the splicer after use. Failure to do so can cause the
battery to be overcharged and deteriorated in performance.
6. In the event the battery leaks and the fluid gets into one's eyes, do not rub the eyes.
Immediately wash them thoroughly with clean water enough from the tap and consult
a doctor urgently.
7. Unplug the fusion splicer or remove the battery before attempting any electrical
maintenance or if not using the splicer for a prolonged period. Failure to do so can
cause a fire.
8. The battery module for the TYPE-66 is heavier in weight than those for other models.
Pay attention not to drop the battery module when installing and removing it.
<Handling of optical fiber >
1. Never look into optical fibers or the end of an optical cable attached to the optical
output when the device is active. The laser radiation can seriously damage your
eyesight.
2. Wear safety glasses at all times for protection from glass fibers.

RoHS Directive (2002/95/EC)
The TYPE-66 optical fusion splicer is RoHS-compliant.
WEEE Directive (Waste Electrical and Electronic Equipment; 2002/96/EC)
The European Union has enacted a Directive 2002/96/EC on Waste
Electrical and Electronic Equipment (WEEE Directive). This directive is
applicable in the European Union member states. The crossed out
wheelie bin symbol found on our products indicates that it should not be
disposed of together with household waste.
To prevent possible harm to human health and the environment, waste
electrical equipment must be disposed of in an approved and
environmentally safe recycling process.
For further information on how to dispose of the product correctly, please
contact the product supplier, or the local authority responsible for waste
disposal in your area.

IMPORTANT : TYPE-66 SOFTWARE USER LICENSE
ATTENTION : The software installed in the TYPE-66 SPLICER (“this software”) is the property of
SUMITOMO ELECTRIC INDUSTRIES, LTD. The usage of this software is granted by a license.
CAREFULLY READ AND THIS LICENSE BEFORE USING THIS PRODUCT.
The copyright and all other rights to this software, its documentation and the writings concerning this
software (“the writings”), which contain CD-ROM, operation manual, guiding document, data tables,
command lists, writing information (photos, images, drawing, text) on appended other printed
materials, shall remain with SUMITOMO ELECTRIC INDUSTRIES, LTD. By commencing the use of
this software, you acknowledge that you have read the following license and indicate that you agree to
its terms. In case of disagreement, contact SUMITOMO ELECTRIC INDUSTRIES, LTD. or our product
supplier.
LICENSE AGREEMENT
Copyright © 2006 SUMITOMO ELECTRIC INDUSTRIES, LTD. All rights reserved.
This license is the entire agreement between SUMITOMO ELECTRIC INDUSTRIES, LTD. and you.
1. LICENSE
The following restricted rights are granted. YOU MAY :
a) use on a splicer in which this software is installed.
b) create or distribute a construction manual based on the writings on condition that you clarify
their source.
c) create an execution report of construction based on displayed information, and the writings.
d) create a document (manual or execution report) concerning the maintenance of the splicer in
which this software is installed or control its splice-quality upon displayed information and the
writings.
e) make one copy of the writings for archival or backup purpose.
2. RESTRICTIONS
The following act is forbidden on this license, except our prior written consent. YOU MAY NOT :
1) sell, distribute, rent, lease, transfer, or disclose the whole or part of the writings to the public or
unidentified parties and transfer, disclose or display the electrical format of the writings through
online media.
2) make copy of the writings except as permitted in this license.
3) reverse engineer, decompile, disassemble this software and analyze, modify or merge the
program.
3. CONTRACTING PARTIES
If you rent, lease, transfer, or resell the splicer, in which this software is installed, to a corporation or
other entity, then this agreement is formed by and between SUMITOMO ELECTRIC INDUSTRIES,
LTD. and such entity. You shall be liable for such entity to agree to the same all conditions of this
license.
4. TERM AND TERMINATION
This agreement shall continue in effect until terminated. You may terminate the agreement at
anytime by stopping the use of the splicer in which this software is installed. If you fail to comply
with any of the provision of this license, your license will be automatically terminated. Upon
termination, you shall transfer the writings to the owner of splicer (In the case that you transfer the
splicer to other corporation or entity) or return them to us, otherwise erase or destroy them by
appropriate means. You shall forever hold in confidence all trade secrets brought by this license.
Further you agree not to disclose to any third party.
5. LIMITATION OF LIABILITY
SUMITOMO ELECTRIC INDUSTRIES, LTD. and our supplier shall not be liable for consequential,
incidental or accidental damages in connection with this software or this agreement and whether
this software shall meet your special requirements, special efforts or special method beyond the
range described in the operation manual concerning this software.
6. GENERAL
If any provision of this agreement is declared by the court of competent jurisdiction to be invalid,
illegal, or unenforceable, such provision shall be severed from the agreement and the other
provisions shall remain in full force and effect.

Notification of North American patents on the TYPE-66
U.S. Patents
4,812,010
5,777,867
6,287,020
6,437,299
6,518,551
6,519,405
CANADA Patents
2,183,840
2,321,400

IMPORTANT SAFETY PRECAUTIONS
IMPORTANT: TYPE-66 SOFTWARE USER LICENSE
Table of contents
1. General •••••••••••••••••••••••••••••••••••••••••••••••••••••••••••••••••••••••••••••••••••••••••••••••••••• 1
Product overview ••••••••••••••••••••••••••••••••••••••••••••••••••••••••••••••••••••••••••••••••••••••••• 1
Optical fiber requirement ••••••••••••••••••••••••••••••••••••••••••••••••••••••••••••••••••••••••••••••• 1
Features overview •••••••••••••••••••••••••••••••••••••••••••••••••••••••••••••••••••••••••••••••••••••• 1
Standard package ••••••••••••••••••••••••••••••••••••••••••••••••••••••••••••••••••••••••••••••••••••••• 2
Optional accessories ••••••••••••••••••••••••••••••••••••••••••••••••••••••••••••••••••••••••••••••••••• 3
Consumables •••••••••••••••••••••••••••••••••••••••••••••••••••••••••••••••••••••••••••••••••••••••••••• 4
Structure •••••••••••••••••••••••••••••••••••••••••••••••••••••••••••••••••••••••••••••••••••••••••••••••••••• 5
Fusion splicer •••••••••••••••••••••••••••••••••••••••••••••••••••••••••••••••••••••••••••••••••••••••••••• 5
Keypad •••••••••••••••••••••••••••••••••••••••••••••••••••••••••••••••••••••••••••••••••••••••••••••••••••• 6
V-grooves, electrodes, other components •••••••••••••••••••••••••••••••••••••••••••••••••••••••••• 7
Heat shrink oven •••••••••••••••••••••••••••••••••••••••••••••••••••••••••••••••••••••••••••••••••••••••• 8
Input/output panel •••••••••••••••••••••••••••••••••••••••••••••••••••••••••••••••••••••••••••••••••••••• 8
2. Splice / Protection ••••••••••••••••••••••••••••••••••••••••••••••••••••••••••••••••••••••••••••••••••••• 9
Preparing power supply ••••••••••••••••••••••••••••••••••••••••••••••••••••••••••••••••••••••••••••••••• 10
AC operation ••••••••••••••••••••••••••••••••••••••••••••••••••••••••••••••••••••••••••••••••••••••••••••• 10
Battery operation •••••••••••••••••••••••••••••••••••••••••••••••••••••••••••••••••••••••••••••••••••••••• 11
Battery level check •••••••••••••••••••••••••••••••••••••••••••••••••••••••••••••••••••••••••••••••••••••• 12
Battery charging ••••••••••••••••••••••••••••••••••••••••••••••••••••••••••••••••••••••••••••••••••••••••• 13
DC operation (car battery) ••••••••••••••••••••••••••••••••••••••••••••••••••••••••••••••••••••••••••••• 14
Battery refreshing ••••••••••••••••••••••••••••••••••••••••••••••••••••••••••••••••••••••••••••••••••••••• 14
Precautions for battery module ••••••••••••••••••••••••••••••••••••••••••••••••••••••••••••••••••••••• 14
Operating procedures ••••••••••••••••••••••••••••••••••••••••••••••••••••••••••••••••••••••••••••••••••• 16
Turning on the TYPE-66 ••••••••••••••••••••••••••••••••••••••••••••••••••••••••••••••••••••••••••••••• 16
Initial screen •••••••••••••••••••••••••••••••••••••••••••••••••••••••••••••••••••••••••••••••••••••••••••••• 17
Fiber type and protection sleeve settings ••••••••••••••••••••••••••••••••••••••••••••••••••••••••••• 17
Stripping the fiber coating / Cleaning the bare fiber ••••••••••••••••••••••••••••••••••••••••••••••• 17
Cleaving the fiber •••••••••••••••••••••••••••••••••••••••••••••••••••••••••••••••••••••••••••••••••••••••• 19
Inserting fibers into the splicer •••••••••••••••••••••••••••••••••••••••••••••••••••••••••••••••••••••••• 21
Arc test procedure ••••••••••••••••••••••••••••••••••••••••••••••••••••••••••••••••••••••••••••••••••••••• 22
Fiber preparation •••••••••••••••••••••••••••••••••••••••••••••••••••••••••••••••••••••••••••••••••••••••• 24
Starting the automatic splice •••••••••••••••••••••••••••••••••••••••••••••••••••••••••••••••••••••••••• 25
Splice protection ••••••••••••••••••••••••••••••••••••••••••••••••••••••••••••••••••••••••••••••••••••••••• 29
3. Maintenance ••••••••••••••••••••••••••••••••••••••••••••••••••••••••••••••••••••••••••••••••••••••••••••• 31
Cleaning ••••••••••••••••••••••••••••••••••••••••••••••••••••••••••••••••••••••••••••••••••••••••••••••••••• 31
Names of components ••••••••••••••••••••••••••••••••••••••••••••••••••••••••••••••••••••••••••••••••• 31
Cleaning V-grooves ••••••••••••••••••••••••••••••••••••••••••••••••••••••••••••••••••••••••••••••••••••• 32
Cleaning LEDs and mirror protection glass •••••••••••••••••••••••••••••••••••••••••••••••••••••••• 32
Cleaning bare fiber pads ••••••••••••••••••••••••••••••••••••••••••••••••••••••••••••••••••••••••••••••• 33
Cleaning microscopes •••••••••••••••••••••••••••••••••••••••••••••••••••••••••••••••••••••••••••••••••• 33
Cleaning heat shrink oven ••••••••••••••••••••••••••••••••••••••••••••••••••••••••••••••••••••••••••••• 34
Cleaning fiber holders •••••••••••••••••••••••••••••••••••••••••••••••••••••••••••••••••••••••••••••••••• 34

Replacing electrodes •••••••••••••••••••••••••••••••••••••••••••••••••••••••••••••••••••••••••••••••••••• 35
Replacing monitor protection panel •••••••••••••••••••••••••••••••••••••••••••••••••••••••••••••••••• 36
Packing and storage instructions ••••••••••••••••••••••••••••••••••••••••••••••••••••••••••••••••••••• 37
4. Functions •••••••••••••••••••••••••••••••••••••••••••••••••••••••••••••••••••••••••••••••••••••••••••••••• 39
Splice and heater conditions settings ••••••••••••••••••••••••••••••••••••••••••••••••••••••••••••••• 39
Function settings •••••••••••••••••••••••••••••••••••••••••••••••••••••••••••••••••••••••••••••••••••••••• 43
Maintenance settings ••••••••••••••••••••••••••••••••••••••••••••••••••••••••••••••••••••••••••••••••••• 45
5. Other convenient functions ••••••••••••••••••••••••••••••••••••••••••••••••••••••••••••••••••••••••• 46
Back monitor type ••••••••••••••••••••••••••••••••••••••••••••••••••••••••••••••••••••••••••••••••••••••• 46
Dual heat shrink oven •••••••••••••••••••••••••••••••••••••••••••••••••••••••••••••••••••••••••••••••••• 46
Detachable/attachable bare fiber pads •••••••••••••••••••••••••••••••••••••••••••••••••••••••••••••• 47
Auto start •••••••••••••••••••••••••••••••••••••••••••••••••••••••••••••••••••••••••••••••••••••••••••••••••• 47
Splice data storage function ••••••••••••••••••••••••••••••••••••••••••••••••••••••••••••••••••••••••••• 48
Tripod fixing screws ••••••••••••••••••••••••••••••••••••••••••••••••••••••••••••••••••••••••••••••••••••• 49
6. Troubleshooting •••••••••••••••••••••••••••••••••••••••••••••••••••••••••••••••••••••••••••••••••••••••• 50
Arc problems ••••••••••••••••••••••••••••••••••••••••••••••••••••••••••••••••••••••••••••••••••••••••••••• 50
Fiber breaking •••••••••••••••••••••••••••••••••••••••••••••••••••••••••••••••••••••••••••••••••••••••••••• 50
Splicer does not power up ••••••••••••••••••••••••••••••••••••••••••••••••••••••••••••••••••••••••••••• 50
Warranty and repair service ••••••••••••••••••••••••••••••••••••••••••••••••••••••••••••••••••••••••••• 51
Error message list •••••••••••••••••••••••••••••••••••••••••••••••••••••••••••••••••••••••••••••••••••••••• 52
TYPE-66M12 specifications •••••••••••••••••••••••••••••••••••••••••••••••••••••••••••••••••••••••••••• 55

1. General
Thank you very much for purchasing the TYPE-66 Mass Fusion Splicer (hereinafter
called “the TYPE-66”).
The TYPE-66 automatically pre-inspects and aligns a pair of optical fibers with
equipped microscopes, and then fuses them together with heat from an electric arc to
form a low-loss splice. A protection sleeve is applied over the bare glass and cured in
the built-in heat shrink oven.
Before using the TYPE-66, read all instructions completely.
1
Product overview
The TYPE-66 can splice the following optical fiber types.
Material Silica grass
Profile type SMF (ITU-T G.652), MMF (ITU-T G.651)
DSF (ITU-T G.653), NZDSF (ITU-T G.655)
Fiber diameter 125μm
Fiber count 1,2,4,5,6,8,10,12
Cleave length 10mm
The TYPE-66 key features are:
• Dual heat shrink oven (For more information, see page 46.)
2 heat shrink ovens are equipped with the fusion splicer. The ovens run individually
and splicing operation can be improved more effectively.
• Auto start (For more information, see page 47.)
In addition to the function that automatically starts the splicing process when the
hood is closed, the function that automatically starts the heat¥ing cycle when fiber is
placed into the heat shrink oven is provided. These functions enable performing
fusion splice and heat shrink protection without keypad operation.
Optical fiber requirement
Features overview
Read this manual carefully in its entirety to fully understand
machine capabilities. Save this manual in a location in which you
can easily get to see.
Caution

Standard package
Here is an example of TYPE-66 standard package.
Package contents (example)
No. Description Part number Quantity
1 Fusion splicer TYPE-66 TYPE-66M12 1 pc
2 Power supply module (Battery charger) PS-66 1 pc
3 Battery module BU-66S 1 pc
4 Power cord PC-AC<X> 1 pc
5 Battery charge cord BCC-66 1 pc
6 Cooling tray - 1 pc
7 Spare electrodes ER-10 1 pair
8 Operation manual *1 OME0724004 1 pc
9 Quick reference guide *1 OME0724004-2 1 pc
10 Carrying case CC-66 1 pc
The above package is an example. The package contents vary depending on the customers’ requests.
*1: The latest version is provided.
TYPE-66
2
Power cord
Battery charge cord
Power supply module
Carrying case
Operation manual
Quick reference guide
Cooling tray
Spare electrodes
Battery module
Fiber cleaver (Optional*)
Jacket remover
(Optional*)
*Sold separately

Optional accessories
Battery
Description Part No. Remarks
Battery module BU-66S
BU-66L
Nominal capacity: 4500mAh
Nominal capacity: 9000mAh
Car battery cable PC-V66 Plugged into a car’s cigarette lighter jack to supply
electric power to splicer
Tools (Jacket remover, Fiber cleaver, and etc)
Description Part No. Remarks
FC-7M-F8
FC-7R-F
Applicable fiber: Single fiber and up to 8-fiber ribbon
Replacement blade for FC-7 and FC-6: FCP-20BL
Replacement blade for FC-7R: FCP-20BL(7R)
Fiber cleaver
FC-6M(-C) Applicable fiber: Single fiber and up to 12-fiber ribbon
Jacket remover JR-M03 Applicable fiber: Single fiber
Applicable coating diameter: 250μm, 900μm
Hot Jacket remover JR-6 Applicable fiber: single fiber and up to 12-fiber ribbon
Replacement blade for JR-6: JR-6BL
Dispenser HR-3 Dispenser for alcohol
FHS-025 For single fiber with 0.25mm coating
FHS-05 For single fiber with 0.5mm coating
FHS-09 For single fiber with 0.9mm coating
FHM-2 For 2-fiber ribbon
FHM-4 For 4-fiber ribbon
FHM-5 For 5-fiber ribbon
FHM-6 For 6-fiber ribbon
FHM-8 For 8-fiber ribbon
FHM-10 For 10-fiber ribbon
Fiber holders
FHM-12 For 12-fiber ribbon
[ FC-6M ]
The following optional accessories are provided for the TYPE-66. For further details,
please contact our sales personnel.
[ JR-6 ]
3

Consumables
Fiber protection sleeves
FPS-1
FPS-40
FPS-5
FPS-6
60mm, for single fiber (50 pcs per package)
40mm, for single fiber (50 pcs per package)
40mm, for up to 8-fiber ribbon (25 pcs per package)
40mm, for up to 12-fiber ribbon (25 pcs per package)
Battery module (BU-66S/L)
Electrodes (ER-10)
Mirror protection glass (MPG-2)
Monitor protection panel
Battery modules and electrodes are considered
consumables that degrade with time and usage and
are replaceable by a customer. Therefore they will not
be covered under warranty.
Monitor
Monitors are considered a component that degrades
and is deteriorated with time and usage. Sumitomo
maintenance service center should replace the
monitors and the parts cost for replacement is
charged. They might not be covered under warranty.
• Regarding standard equipment, consumables, or optional accessories, please order
the new item you need with the item description and part number to our sales
personnel.
• For repair, please read “Warranty and repair service” at page 51 and contact our
maintenance service center.
4

1
5
7
6
1
2
3
4
5
6
7
Main body
TYPE-66 fusion splicer
Keypad
Keys are used to turn on/off the power,
perform a splice and heat shrink
protection, and setup functions.
Monitor
Displays fiber image, splice data and
menu.
Hood
Provides protection from the
environment.
Heat shrink oven
Used to heat and shrink fiber
protection sleeves. 2 heat shrink
ovens (front and rear) are equipped.
Power module bay
Power supply or battery module is
installed.
Input/output panel
DC output terminal for hot jacket
remover and USB port
DC power can only be supplied while
AC operation is performed.
(DC power cannot be supplied while
battery operation is performed.)
Monitor protection panel
An acrylic panel protects a LCD
monitor from impact and water.
Fusion splicer
8
2
3
4
8
Caution
Structure
5

Keypad
6
Brightness control key
Adjusts monitor brightness.
Up arrow key
Used to move cursor and enter
numeric values.
Left arrow key
Used to access the menu screen
and go back to Ready screen.
Down arrow key
Used to move cursor and enter
numeric values.
Right arrow key
Used to select items and accept
changes.
Square key
Used to access the condition
screen and perform manual
re-arcing of a completed splice.
Diamond key
Used to advance to a next page
and display key guidance.
Power key / LED
Used to turn on and off the splicer.
LED illuminates while the splicer
is on.
SET key
Starts a splicing operation.
RESET key
Used to cancel a splicing
operation. Initialization
HEAT key [1] / LED
Starts/cancels the heating cycle of
the rear heat shrink oven. LED
illuminates during the heat cycle.
HEAT key [2] / LED
Starts/cancels the heating cycle of
the front heat shrink oven. LED
illuminates during the heat cycle.
LED illuminates during heating
and blinks during cooling.
Caution
Do not press the keys on the keypad with a sharp object ( e.g. a ballpoint pen,
screwdriver, or nail ) Doing so will damage the keypad.
1
2

V-grooves, electrodes, other components
7
Bare fiber pads
Hold fibers seated into the V-grooves.
Normally they are attached to the
hood.
Mirror
Reflects the illumination for a
microscope.
(Located below the mirror protection
glass.)
8
9
10 Mirror protection glass
Protects the mirrors from any dust
or dirt.
Fiber holder stage
A
fiber holder is placed on the
stage.
2
3Fiber guide
A
small green light is illuminated fo
r
easy fiber placement.
4Electrodes
Arc is generated between the
electrodes.
1V-grooves
Keep bare fibers aligned.
Electrode cover plate
Holds the electrode seated into the
retaining groove.
5
V-groove illumination
Illuminates the V-groove. Lit when the
hood is opened.
4
Microscope objective lens
Fiber is observed with the lens.
6
7

Heat shrink oven
2 1
3
2
Heat shrink oven lidHeating plate
1 3
Heats fiber protection sleeve.
2 Heat shrink oven clamps
Hold fiber straight.
Input/output panel
3
1
2
Video output terminal
Used for an external monitor.
3
DC output terminal
Used to supply DC power to a
hot jacket remover.
1
USB port
2 Used to download stored splice loss
data when connected to a PC.
8

2. Splice / Protection
[Preparation for splicing]
Before splicing, collect all of the necessary equipment.
• TYPE-66 • Pure (more than 99%) alcohol
• Optical fiber being spliced
• Jacket remover
• Fiber cleaver
• Lint-free gauze wipes
• Fiber protection sleeve
[Operating procedures]
The following is a summary of the steps required to make a splice with the fusion
splicer. For further information on each step, please see the page described below.
Turning on the TYPE-66---Page 16
Initial screen---Page 17 Starting the automatic splice---Page 25
9
Maintenance---Page 31~36
Packing and storage instructions
---Page 37~38
Splice and heater conditions settings
---Page 39~42
Stripping the fiber coating/Cleaning
the bare fiber---Page 17~18
Cleaving the fiber---Page 19
Inserting fibers into the splicer---Page 21
Arc test procedure---Page 22
Fiber preparation---Page 24
Splice protection---Page 29

Preparing power supply
The TYPE-66 operates on a power supply module, or a battery module.
AC operation
Insert the power supply module (PS-66) into the module bay.
Installation
Insert the power supply module (PS-66)
into the module bay and slide forward
until it locks into space.
Removal
<1> While pressing the release button
located on the rear of the splicer,
<2>slide the module out of the module
bay until it is free from the splicer.
Release button
<1>
<2>
10
Table of contents
Other Sumitomo Industrial Electrical manuals
Popular Industrial Electrical manuals by other brands

HEIDENHAIN
HEIDENHAIN LB 302 Mounting instructions

Eaton
Eaton Cutler-Hammer SJA instructions

Murata
Murata GCM188R71H103JA37 Series Reference sheet

Murata
Murata GRT155R61C105KE01 Series Reference sheet

Texas Instruments
Texas Instruments bq2403 Series user guide

Murata
Murata GRM188R71H393KA61 Series Reference sheet

Prince Castle
Prince Castle Bagel Saber 970 Series operating instructions

Murata
Murata GRM1885C1H5R6CA01 Series Reference sheet

Murata
Murata GRM033C71C104KE14 Series Reference sheet

OEZ
OEZ CS-BL-A021 Instructions for use

Murata
Murata GRM31CR60J476KE19 Series Reference sheet

SMC Networks
SMC Networks MXZ12 Series Operation manual