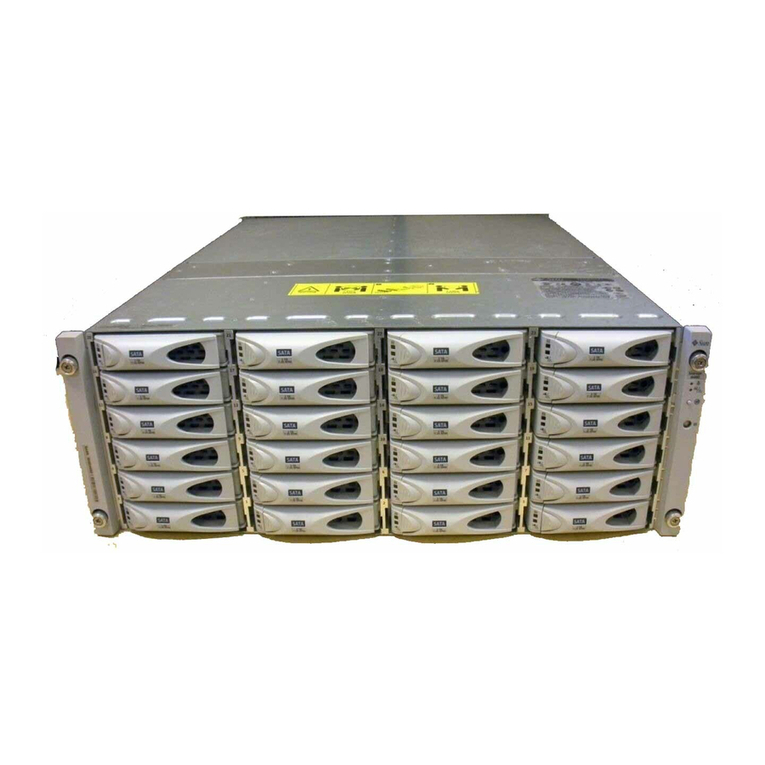
Sun Microsystems StorEdge 6130 User manual

Oracle® Solaris Cluster 3.3With Sun
StorEdge 6130 Array Manual
Part No: 821–1564–10
September 2010, Revision A

Copyright © 2000, 2010, Oracle and/or its aliates. All rights reserved.
This software and related documentation are provided under a license agreement containing restrictions on use and disclosure and are protected by intellectual
property laws. Except as expressly permitted in your license agreement or allowed by law, you may not use, copy, reproduce, translate, broadcast, modify, license,
transmit, distribute, exhibit, perform, publish, or display any part, in any form, or by any means. Reverse engineering, disassembly, or decompilation of this software,
unless required by law for interoperability, is prohibited.
The information contained herein is subject to change without notice and is not warranted to be error-free. If you nd any errors, please report them to us in writing.
If this is software or related software documentation that is delivered to the U.S. Government or anyone licensing it on behalf of the U.S. Government, the following
notice is applicable:
U.S. GOVERNMENT RIGHTS Programs, software, databases, and related documentation and technical data delivered to U.S. Government customers are
“commercial computer software” or “commercial technical data” pursuant to the applicable Federal Acquisition Regulation and agency-specic supplemental
regulations. As such, the use, duplication, disclosure, modication, and adaptation shall be subject to the restrictions and license terms set forth in the applicable
Government contract, and, to the extent applicable by the terms of the Government contract, the additional rights set forth in FAR 52.227-19, Commercial
Computer Software License (December 2007). Oracle America, Inc., 500 Oracle Parkway, Redwood City, CA 94065.
This software or hardware is developed for general use in a variety of information management applications. It is not developed or intended for use in any inherently
dangerous applications, including applications which may create a risk of personal injury. If you use this software or hardware in dangerous applications, then you
shall be responsible to take all appropriate fail-safe, backup, redundancy, and other measures to ensure its safe use. Oracle Corporation and its aliates disclaim any
liability for any damages caused by use of this software or hardware in dangerous applications.
Oracle and Java are registered trademarks of Oracle and/or its aliates. Other names may be trademarks of their respective owners.
AMD, Opteron, the AMD logo, and the AMD Opteron logo are trademarks or registered trademarks of Advanced Micro Devices. Intel and Intel Xeon are
trademarks or registered trademarks of Intel Corporation. All SPARC trademarks are used under license and are trademarks or registered trademarks of SPARC
International, Inc. UNIX is a registered trademark licensed through X/Open Company, Ltd.
This software or hardware and documentation may provide access to or information on content, products, and services from third parties. Oracle Corporation and
its aliates are not responsible for and expressly disclaim all warranties of any kind with respect to third-party content, products, and services. Oracle Corporation
and its aliates will not be responsible for any loss, costs, or damages incurred due to your access to or use of third-party content, products, or services.
110714@25097
Contents
Preface .....................................................................................................................................................5
1 Restrictions and Requirements .........................................................................................................11
Requirements ....................................................................................................................................... 11
Restrictions ........................................................................................................................................... 11
2 Installing and Conguring a Sun StorEdge 6130 Array ................................................................ 13
Installing Storage Arrays .................................................................................................................... 13
Storage Array Cabling Congurations ...................................................................................... 13
How to Install Storage Arrays in a New Cluster ....................................................................... 14
▼How to Add Storage Arrays to an Existing Cluster .................................................................. 16
Conguring Storage Arrays ............................................................................................................... 17
▼How to Create a Logical Volume ................................................................................................ 17
▼How to Remove a Logical Volume ............................................................................................. 19
3 Maintaining a Sun StorEdge 6130 Array ......................................................................................... 23
FRUs That Do Not Require Oracle Solaris Cluster Maintenance Procedures .............................. 23
Maintaining Storage Arrays ............................................................................................................... 24
▼How to Upgrade Storage Array Firmware ................................................................................ 24
▼How to Remove a Storage Array ................................................................................................ 25
Replacing a Node-to-Switch Component ................................................................................. 26
▼How to Replace a Host Adapter .................................................................................................. 28
▼How to Replace a Disk Drive ...................................................................................................... 30
Index ......................................................................................................................................................33
3

4

Preface
The Oracle Solaris Cluster 3.3 With Sun StorEdge 6130 Array Manual provides procedures that
are specic to Oracle's Sun StorEdge 6130 array that is placed in an Oracle Solaris Cluster
environment.
Use this manual with any version of Oracle Solaris Cluster 3.3 software. See the “Revision
History” on page 6 for a list of changes to this manual.
This book assumes that you are performing one or more of the following tasks:
■You want to replace an array component to prevent a failure.
■You want to replace an array component because you have an existing failure.
■You want to add (to an established cluster) or install (to a new cluster) a storage array.
Note – This Oracle Solaris Cluster release supports systems that use the SPARC and x86 families
of processor architectures: UltraSPARC, SPARC64, and AMD64. In this document, the label
x86 refers to systems that use the AMD64 family of processor architectures.
The information in this document pertains to both platforms unless otherwise specied in a
special chapter, section, note, bulleted item, gure, table, or example.
Who Should Use This Book
This book is for Oracle representatives who are performing the initial installation of an Oracle
Solaris Clusterconguration and for system administrators who are responsible for
maintaining the system.
This document is intended for experienced system administrators with extensive knowledge of
Oracle software and hardware. Do not use this document as a planning or presales guide. You
should have already determined your system requirements and purchased the appropriate
equipment and software before reading this document.
5

HowThis Book Is Organized
This book contains the following chapters:
■Chapter 1, “Restrictions and Requirements,” lists limitations of your use of Sun StorEdge
6130 storage arrays in an Oracle Solaris Cluster environment.
■Chapter 2, “Installing and Conguring a Sun StorEdge 6130 Array,” discusses how to install
Sun StorEdge 6130 storage arrays and how to congure logical units on them.
■Chapter 3, “Maintaining a Sun StorEdge 6130 Array,” describes how to maintain Sun
StorEdge 6130 storage arrays in a running cluster.
Revision History
The following table lists the information that has been revised or added since the initial release
of this documentation. The table also lists the revision date for these changes.
TABLE P–1 Oracle Solaris Cluster 3.3 With Sun StorEdge 6130 Array Manual
Revision Date New Information
January 2009 Updated links in the Preface to lead to dierent versions of Sun Cluster
documentation.
September 2010 Updated book for new product name and removed old CLI commands and
procedures.
Related Documentation
The following books provide conceptual information or procedures to administer hardware
and applications. If you plan to use this documentation in a hardcopy format, ensure that you
have these books available for your reference.
The following books support the Oracle Solaris Cluster 3.3 release. You can also access the
documentation for the Sun Cluster 3.1 and 3.2 releases. All Sun Cluster and Oracle Solaris
Cluster documentation is available at http://docs.sun.com. Documentation that is not available
at http://docs.sun.com is listed with the appropriate URL.
TABLE P–2 Hardware Documentation
Title Part Number
Sun StorEdge 6130 Array Getting Started Guide 817–0032
Sun StorEdge 6130 Array Site Preparation Guide 819–0033
Preface
Oracle Solaris Cluster 3.3 With Sun StorEdge 6130 Array Manual • September 2010, Revision A6

TABLE P–2 Hardware Documentation (Continued)
Title Part Number
Sun StorEdge 6130 Regulatory and Safety Compliance Manual 819–0035
Sun StorEdge 6130 Array Release Notes 819–0034
Sun StorEdge Expansion Cabinet Installation and Service Manual 805–3067
Sun Rack Installation Guide 816–6386
Sun Fire Cabinet Installation and Reference Manual 806–2942
Solaris Fibre Channel Storage Conguration and Multipathing Support Guide 819–0139
TABLE P–3 Oracle Solaris Cluster and Sun Cluster Documentation
Documentation
Oracle Solaris Cluster 3.3
Sun Cluster 3.2
Sun Cluster 3.1
Using UNIX Commands
This document contains information about commands that are used to install, congure, or
upgrade an Oracle Solaris Cluster conguration. This document might not contain complete
information about basic UNIX commands and procedures such as shutting down the system,
booting the system, and conguring devices.
See one or more of the following sources for this information:
■Online documentation for the Oracle Solaris Operating System (Oracle Solaris OS)
■Other software documentation that you received with your system
■Oracle Solaris Operating System man pages
Getting Help
If you have problems installing or using Oracle Solaris Cluster, contact your service provider
and provide the following information.
■Your name and email address (if available)
■Your company name, address, and phone number
■The model number and serial number of your systems
■The release number of the operating environment (for example, Oracle Solaris 10)
Preface
7

■The release number of Oracle Solaris Cluster (for example, Oracle Solaris Cluster 3.3)
Use the following commands to gather information about your system for your service
provider.
Command Function
prtconf -v Displays the size of the system memory and reports information
about peripheral devices
psrinfo -v Displays information about processors
showrev -p Reports which patches are installed
prtdiag -v Displays system diagnostic information
/usr/cluster/bin/clnode show-rev Displays Oracle Solaris Cluster release and package version
information for each node
Also have available the contents of the /var/adm/messages le.
Documentation, Support, and Training
See the following web sites for additional resources:
■Documentation (http://docs.sun.com)
■Support (http://www.oracle.com/us/support/systems/index.html)
■Training (http://education.oracle.com)– Click the Sun link in the left navigation bar.
Oracle Welcomes Your Comments
Oracle welcomes your comments and suggestions on the quality and usefulness of its
documentation. If you nd any errors or have any other suggestions for improvement, go to
http://docs.sun.com and click Feedback. Indicate the title and part number of the
documentation along with the chapter, section, and page number, if available. Please let us
know if you want a reply.
Oracle Technology Network (http://www.oracle.com/technetwork/index.html)oers a
range of resources related to Oracle software:
■Discuss technical problems and solutions on the Discussion Forums
(http://forums.oracle.com).
■Get hands-on step-by-step tutorials with Oracle By Example (http://www.oracle.com/
technology/obe/start/index.html).
■Download Sample Code (http://www.oracle.com/technology/sample_code/
index.html).
Preface
Oracle Solaris Cluster 3.3 With Sun StorEdge 6130 Array Manual • September 2010, Revision A8

Typographic Conventions
The following table describes the typographic conventions that are used in this book.
TABLE P–4 Typographic Conventions
Typeface Meaning Example
AaBbCc123 The names of commands, les, and directories,
and onscreen computer output
Edit your .login le.
Use ls -a to list all les.
machine_name% you have mail.
AaBbCc123 What you type, contrasted with onscreen
computer output
machine_name% su
Password:
aabbcc123 Placeholder: replace with a real name or value The command to remove a le is rm
lename.
AaBbCc123 Book titles, new terms, and terms to be
emphasized
Read Chapter 6 in the User's Guide.
Acache is a copy that is stored
locally.
Do not save the le.
Note: Some emphasized items
appear bold online.
Shell Prompts in Command Examples
The following table shows the default UNIX system prompt and superuser prompt for shells
that are included in the Oracle Solaris OS. Note that the default system prompt that is displayed
in command examples varies, depending on the Oracle Solaris release.
TABLE P–5 Shell Prompts
Shell Prompt
Bash shell, Korn shell, and Bourne shell $
Bash shell, Korn shell, and Bourne shell for superuser #
C shell machine_name%
C shell for superuser machine_name#
Preface
9

10

Restrictions and Requirements
This chapter includes only restrictions and requirements that have a direct impact on the
procedures in this book. The Oracle Solaris Cluster 3.x Conguration Guide lists all restrictions
and support information. This manual is not directly available to customers. However, your
Oracle service provider has access to this manual. For general support information, contact
your Oracle service provider.
Requirements
Storage devices that support logical unit number (LUN) masking must implement the LUN
masking so that LUNs are not visible to the Sun StorEdge 6130 storage system.
Restrictions
When using storage-based replication, do not congure a replicated volume as a quorum
device. Locate any quorum devices on an unreplicated volume. See “Using Storage-Based Data
Replication Within a Cluster” in Oracle Solaris Cluster System Administration Guide for more
information on storage-based replication.
1
CHAPTER 1
11

12

Installing and Conguring a Sun StorEdge 6130
Array
This chapter contains the procedures about how to install and congure a Sun StorEdge 6130
array. These procedures are specic to an Oracle Solaris Cluster environment.
This chapter contains the following main topics:
■“Installing Storage Arrays” on page 13
■“Conguring Storage Arrays” on page 17
For detailed information about storage array architecture, features, conguration utilities, and
installation, see the Sun StorEdge 6130 Array Getting Started Guide.
For a URL to this storage documentation, see “Related Documentation” on page 6.
Installing Storage Arrays
This section contains the procedures listed in Table 2–1.
TABLE 2–1 Task Map: Installing Storage Arrays
Task Information
Install a storage array in a new cluster, before the OS
and Oracle Solaris Cluster software are installed.
“How to Install Storage Arrays in a New Cluster” on
page 14
Add a storage array to an existing cluster. “How to Add Storage Arrays to an Existing Cluster”
on page 16
Storage Array Cabling Congurations
You can install your storage array in several dierent congurations: Figure 2–1 and Figure 2–2
are two examples.
2
CHAPTER 2
13

How to Install Storage Arrays in a New Cluster
Use this procedure to install a storage array in a new cluster. To add a storage array to an
existing cluster, use the procedure in “How to Add Storage Arrays to an Existing Cluster” on
page 16.
This procedure relies on the following assumptions:
■You have not installed the Oracle Solaris Operating System.
■You have not installed the Oracle Solaris Cluster software.
FIGURE 2–1 Direct-Connect Conguration
Node 1 Node 2
Controller module
FIGURE 2–2 Switch Conguration
Node 1 Node 2
Switch Switch
Controller module
Expansion tray
Installing Storage Arrays
Oracle Solaris Cluster 3.3 With Sun StorEdge 6130 Array Manual • September 2010, Revision A14

■Your cluster has not been established.
■You have enough host adapters to connect the nodes and the storage array to the service
processor panel.
If you need to install host adapters, see “How to Replace a Host Adapter” on page 28. When
this procedure asks you to replace the failed host adapter, simply install the new host adapter
instead.
▼Install and Cable the Hardware
Unpack, place, and level the storage array.
For instructions, see the Sun StorEdge 6130 Array Getting Started Guide. For a list of StorEdge
documentation, see Table P–2.
(Optional) Install the Fibre Channel (FC) switch for the storage array if you do not have a switch
installed.
For the procedure about how to install an FC switch, see the documentation that shipped with
your FC switch hardware.
Connect the nodes to the service processor panel.
■(SAN Conguration) Connect the FC switches to the service processor panel.
■(Direct-Attached Conguration) Connect each node to the host ports on the array.
For instructions, see the Sun StorEdge 6130 Array Getting Started Guide.
Install the storage array.
For instructions, see the Sun StorEdge 6130 Array Getting Started Guide.
Power on the storage array and the nodes.
For instructions, see the Sun StorEdge 6130 Array Getting Started Guide.
▼Install the Oracle Solaris Operating System and Congure Multipathing
On all nodes, install the Oracle Solaris operating system and apply the required Solaris patches
for Oracle Solaris Cluster software and storage array support.
For the procedure about how to install the Oracle Solaris operating environment, see “How to
Install Solaris Software” in Oracle Solaris Cluster Software Installation Guide.
■To create a logical volume, see “How to Create a Logical Volume” on page 17.
1
2
3
4
5
●
See Also
Installing Storage Arrays
Chapter 2 • Installing and Conguring a Sun StorEdge 6130 Array 15

■To continue with Oracle Solaris Cluster software installation tasks, see your Oracle Solaris
Cluster software installation documentation.
▼How to Add Storage Arrays to an Existing Cluster
Use this procedure to add a new storage array to a running cluster. To install a new storage array
in a Oracle Solaris Cluster conguration that is not running, use the procedure in “How to
Install Storage Arrays in a New Cluster” on page 14.
This procedure relies on the following assumptions:
■(Veritas Volume Manager Only) You have a version of Veritas Volume Manager that
includes Array Support Library (ASL). For more information on this requirement, see
“Requirements” on page 11.
■You have enough host adapters to connect the nodes and the storage array to the service
processor panel.
If you need to install host adapters, see “How to Replace a Host Adapter” on page 28. When
this procedure asks you to replace the failed host adapter, simply install the new host adapter
instead.
■You do not need to install a new node in your cluster.
If you need to add a node to your cluster, see your Oracle Solaris Cluster system
administration documentation. Ensure that you install the required Oracle Solaris patches
for storage array support.
Unpack, place, and level the storage array.
For instructions, see the Sun StorEdge 6130 Array Getting Started Guide. For a list of StorEdge
documentation, see Table P–2.
(Optional) Install the Fibre Channel (FC) switch for the storage array if you do not have a switch
installed.
For the procedure about how to install an FC switch, see the documentation that shipped with
your FC switch hardware.
Connect the nodes to the service processor panel.
■(SAN Conguration) Connect the FC switches to the service processor panel.
■(Direct-Attached Conguration) Connect each node to the host ports on the array.
For instructions, see the Sun StorEdge 6130 Array Getting Started Guide.
Before You Begin
1
2
3
Installing Storage Arrays
Oracle Solaris Cluster 3.3 With Sun StorEdge 6130 Array Manual • September 2010, Revision A16

Install the storage array.
For instructions, see the Sun StorEdge 6130 Array Getting Started Guide.
Power on the storage array and the nodes.
For instructions, see the Sun StorEdge 6130 Array Getting Started Guide.
■To create a logical volume, see “How to Create a Logical Volume” on page 17.
■If you added a new node, perform the steps in “Install the Oracle Solaris Operating System
and Congure Multipathing” on page 15 as appropriate. Apply the correct patches for
storage array support enable multipathing.
Conguring Storage Arrays
This section contains the procedures about how to congure a storage array in a running
cluster. Table 2–2 lists these procedures.
TABLE 2–2 Task Map: Conguring a Storage Array
Task Information
Create a logical volume. “How to Create a Logical Volume” on
page 17
Remove a logical volume. “How to Remove a Logical Volume” on
page 19
The following is a list of administrative tasks that require no cluster-specic procedures. See the
storage array's online help for the following procedures.
■Creating a storage pool
■Removing a storage pool
■Creating a volume group
■Removing a volume group
■Creating an initiator group
■Adding an initiator group
■Removing an initiator group
▼How to Create a Logical Volume
Use this procedure to create a logical volume from unassigned storage capacity.
4
5
See Also
Conguring Storage Arrays
Chapter 2 • Installing and Conguring a Sun StorEdge 6130 Array 17

Note – Oracle's Sun storage documentation uses the following terms:
■Logical volume
■Logical device
■Logical unit number (LUN)
This manual uses logical volume to refer to all such logical constructs.
This procedure relies on the following prerequisites and assumptions.
■All nodes are booted in cluster mode and attached to the storage device.
■The storage device is installed and congured. If you are using multipathing, the storage
device is congured as described in the installation procedure.
■If you are using Solaris I/O multipathing (MPxIO) for the Oracle Solaris 10 OS, previously
called Sun StorEdge Trac Manager in the Solaris 9 OS, verify that the paths to the storage
device are functioning. To congure multipathing, see the Solaris Fibre Channel Storage
Conguration and Multipathing Support Guide.
This procedure provides the long forms of the Oracle Solaris Cluster commands. Most
commands also have short forms. Except for the forms of the command names, the commands
are identical.
Become superuser or assume a role that provides solaris.cluster.modify role-based access
control (RBAC) authorization.
Follow the instructions in your storage device's documentation to create and map the logical
volume. For a URL to this storage documentation, see “Related Documentation”on page 6.
■Completely set up the logical volume. When you are nished, the volume must be created,
mapped, mounted, and initialized.
■If necessary, partition the volume.
■To allow multiple clusters and nonclustered nodes to access the storage device, create
initiator groups by using LUN masking.
If you are not using multipathing, skip to Step 5.
If you are using multipathing, and if any devices that are associated with the volume you
created are at an unconfigured state, congure the multipathing paths on each node that is
connected to the storage device.
To determine whether any devices that are associated with the volume you created are at an
unconfigured state, use the following command.
#cfgadm -al | grep disk
Before You Begin
1
2
3
4
Conguring Storage Arrays
Oracle Solaris Cluster 3.3 With Sun StorEdge 6130 Array Manual • September 2010, Revision A18

Note – To congure the Oracle Solaris I/O multipathing paths on each node that is connected to
the storage device, use the following command.
#cfgadm -o force_update -c configure controllerinstance
To congure multipathing, see the Solaris Fibre Channel Storage Conguration and
Multipathing Support Guide.
On one node that is connected to the storage device, use the format command to label the new
logical volume.
From any node in the cluster, update the global device namespace.
#cldevice populate
Note – You might have a volume management daemon such as vold running on your node, and
have a DVD drive connected to the node. Under these conditions, a device busy error might
be returned even if no disk is inserted in the drive. This error is expected behavior. You can
safely ignore this error message.
To manage this volume with volume management software, use SolarisVolume Manager or
VeritasVolume Manager commands to update the list of devices on all nodes that are attached
to the new volume that you created.
For more information, see your Solaris Volume Manager or Veritas Volume Manager
documentation.
■To congure a logical volume as a quorum device, see Chapter 6, “Administering Quorum,”
in Oracle Solaris Cluster System Administration Guide.
■To create a new resource or congure a running resource to use the new logical volume, see
Chapter 2, “Administering Data Service Resources,” in Oracle Solaris Cluster Data Services
Planning and Administration Guide.
▼How to Remove a Logical Volume
Use this procedure to remove a logical volume. This procedure denes Node A as the node with
which you begin working.
5
6
7
See Also
Conguring Storage Arrays
Chapter 2 • Installing and Conguring a Sun StorEdge 6130 Array 19

Note – Sun storage documentation uses the following terms:
■Logical volume
■Logical device
■Logical unit number (LUN)
This manual uses logical volume to refer to all such logical constructs.
This procedure relies on the following prerequisites and assumptions.
■All nodes are booted in cluster mode and attached to the storage device.
■The logical volume and the path between the nodes and the storage device are both
operational.
This procedure provides the long forms of the Oracle Solaris Cluster commands. Most
commands also have short forms. Except for the forms of the command names, the commands
are identical.
Become superuser or assume a role that provides solaris.cluster.read and
solaris.cluster.modify RBAC authorization.
Identify the logical volume that you are removing.
Refer to your Solaris Volume Manager or Veritas Volume Manager documentation for more
information.
(Optional) Migrate all data o the logical volume that you are removing. Alternatively, back up
that data.
If the LUN that you are removing is congured as a quorum device, choose and congure
another device as the quorum device. Then remove the old quorum device.
To determine whether the LUN is congured as a quorum device, use the following command.
#clquorum show
For procedures about how to add and remove quorum devices, see Chapter 6, “Administering
Quorum,” in Oracle Solaris Cluster System Administration Guide.
If you are using volume management software, use that software to update the list of devices
on all nodes that are attached to the logical volume that you are removing.
For instructions about how to update the list of devices, see your Solaris Volume Manager or
Veritas Volume Manager documentation.
Before You Begin
1
2
3
4
5
Conguring Storage Arrays
Oracle Solaris Cluster 3.3 With Sun StorEdge 6130 Array Manual • September 2010, Revision A20
Other manuals for StorEdge 6130
1
Table of contents
Other Sun Microsystems Speakers System manuals

Sun Microsystems
Sun Microsystems Sun Storage J4400 Operating instructions

Sun Microsystems
Sun Microsystems StorageTek 6140 Instruction Manual

Sun Microsystems
Sun Microsystems Sun StorEdge T3 Setup guide

Sun Microsystems
Sun Microsystems StorageTek 2500 Series Manual

Sun Microsystems
Sun Microsystems StorEdge T3+ Manual

Sun Microsystems
Sun Microsystems StorageTek 2500 Series Manual

Sun Microsystems
Sun Microsystems Sun StorEdge A1000 User manual

Sun Microsystems
Sun Microsystems J4500 User guide