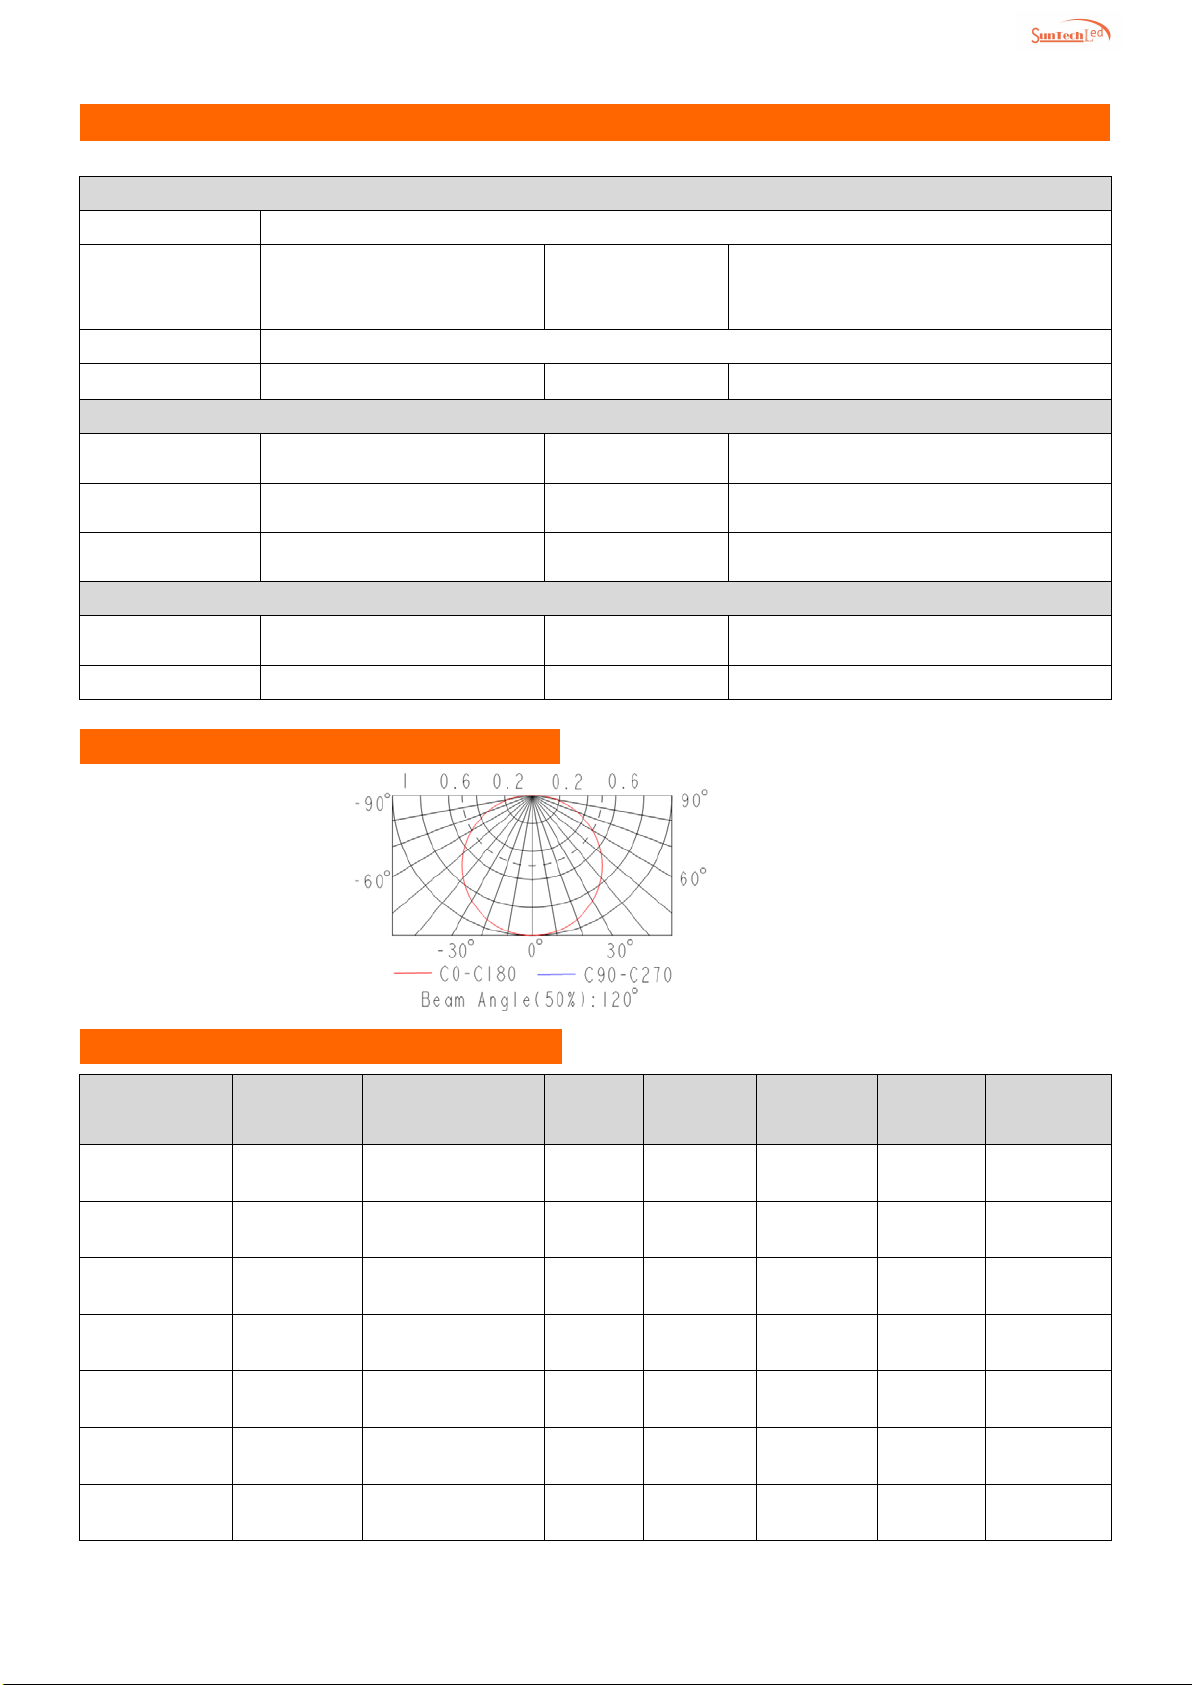
Focus on customized architectural lighting
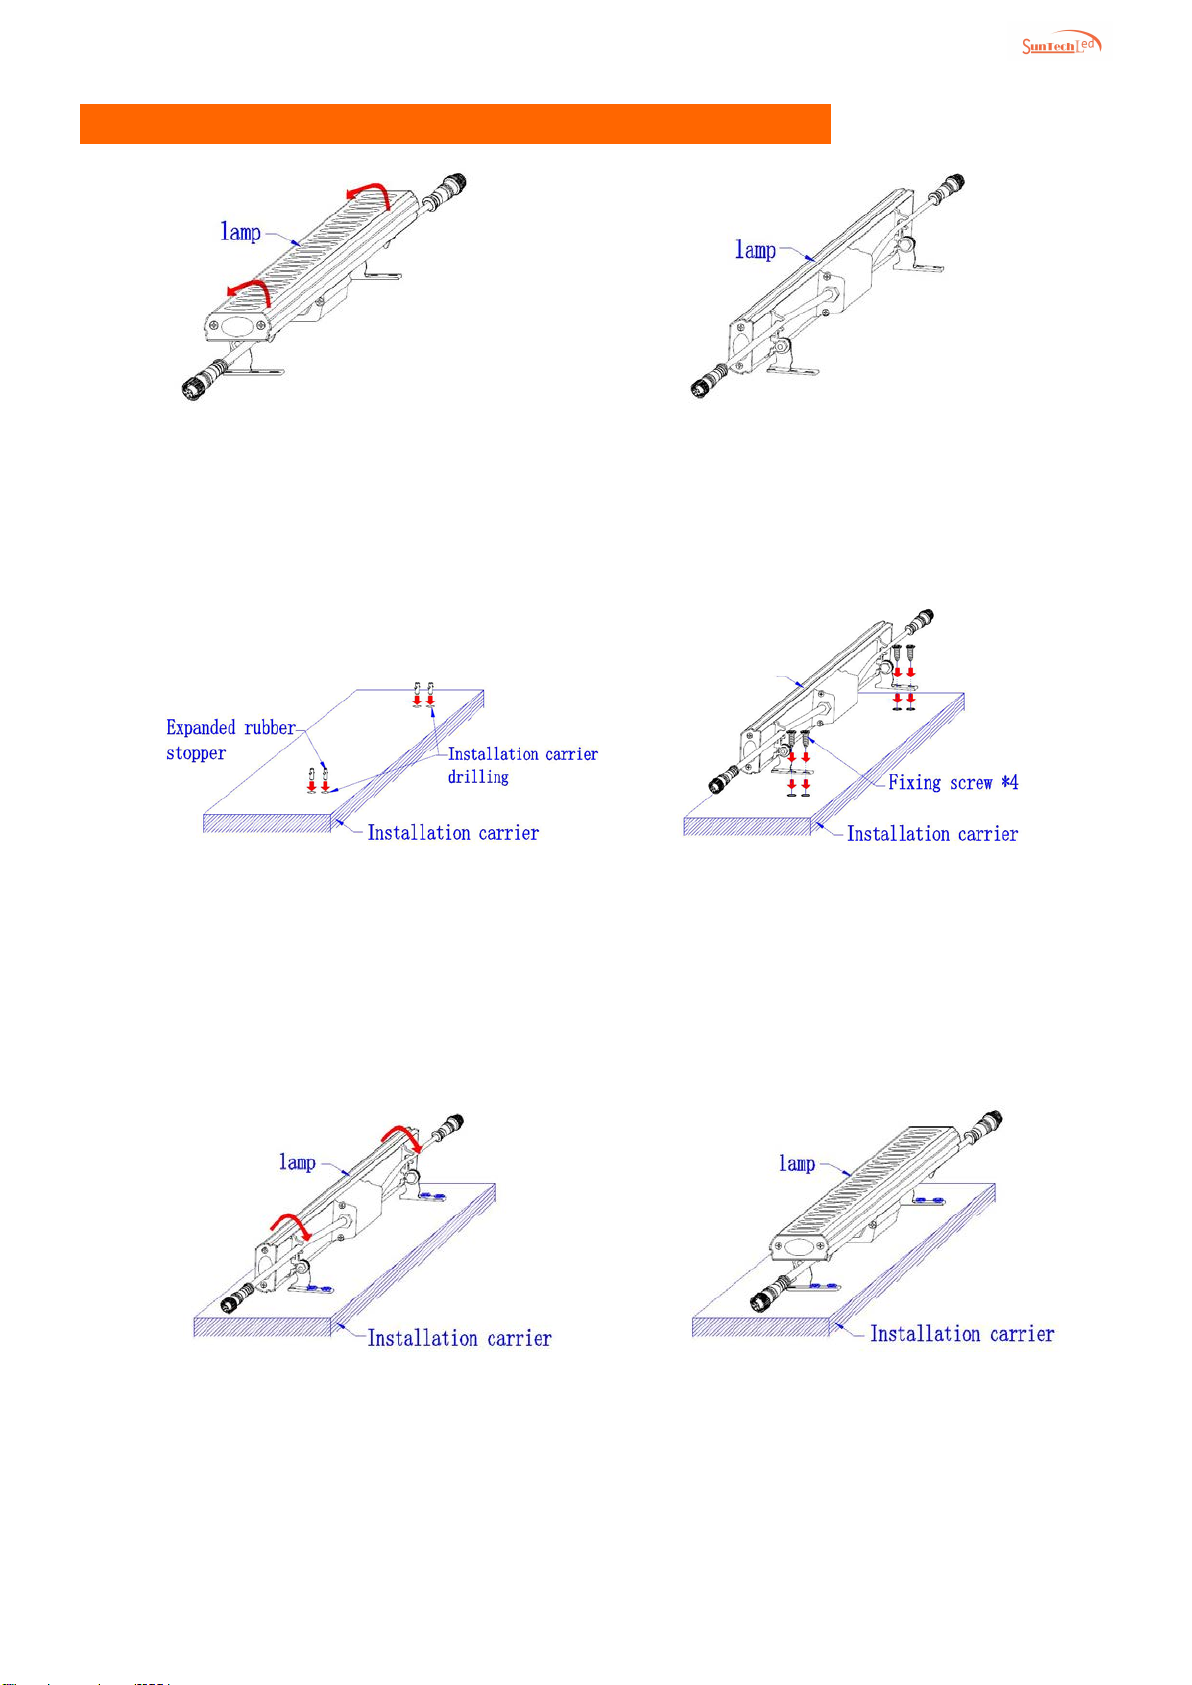
Angle adjustable mounting bracket installation:
①
Loose lamp bracket screw and angle
rotation:
Take out the lamp and loosen the angle
adjustment screw on the lamp bracket, then
rotate the lamp body to the other side of the
mounting hole to facilitate the installation of the
②Rotate the lamp body:
Loosen the angle adjustment screw and
rotate the lamp after the lamp body (as
shown), and wait for th
e subsequent
installation work;
③Drill the holes on the carrier and install
the expansion rubber plug:
Mark the hole on the carrier according to the
mounting hole of the lamp and drill it (6mm drill
bit is recommended); in the drilling position,
knock the expansion rubber plug into the carrier
bore with a hammer (Note: the rubber plug
should not be loose);
④Fixing the fixture:
Align the mounting holes of the lamp
with the mounting hole of the mounting
carrier, and lock the lamp with screws.
The lamp bracket should not be loose;
⑤The lamp adjusts the angle as required:
After the lamp is installed and fixed, adjust the
angle of the lamp to the best angle required by
the project, and tighten the angle adjustment
screw, the lamp body and the lamp should not
⑥The installation is completed:
Fix the fixtures and check that they are
securely installed. Waiting for cable
connecting. as the picture shows:
Focus on customized architectural lighting