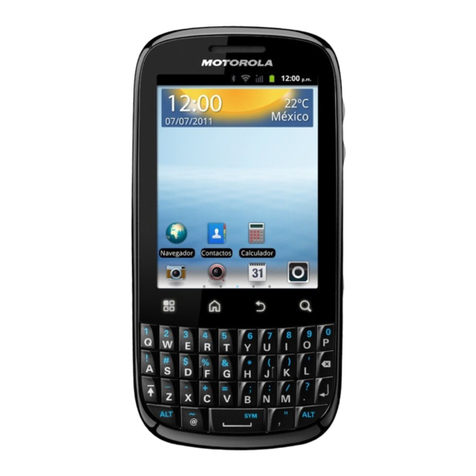
Sunbeam F1 User manual

User Manual
Sunbeam F1

1

2
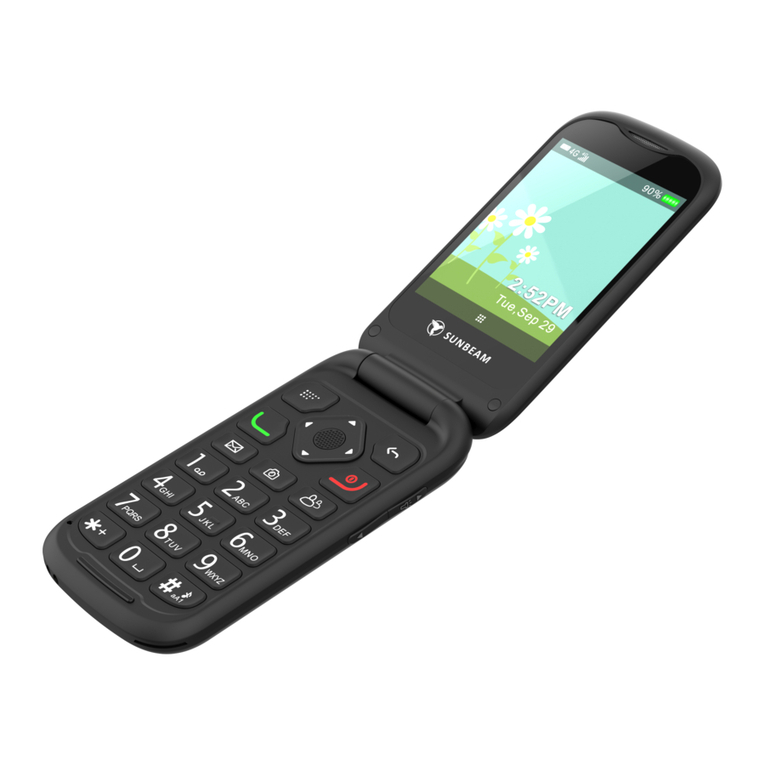
Physical Description
1. Earpiece
3. Menu key
2. Directional keys with center Select key 5. Messages
4. Call key
7. Voice mail
6. Camera/Calculator key
9. + Volume key/Flashlight key
8. Back key
11. - Volume key
10. End call key/Power on/Power off
13. Ringer vibrate mode / Input mode
12. Contacts
14. Red charging LED indicator
15. New message LED indicator 17. Missed call LED indicator
16. Loudspeaker 19. Flashlight
18. External display
21. SOS button
20. Rear-facing camera
22. Audio jack
24. Battery cover
23/26. USB charging socket
25/27. Charging cradle socket

3
User Manual Contents
Unboxing Instructions………..………… 8
Power Up the Phone………………….....9
Charge the Phone………………………….9
Home Screen……………………………….11
Setting up Shortcuts…………………….13
Entering Text ………………...………….. 14
Voice to Text input ………………………15
Phone Volume Controls……………....17
Select Ring Tones………………..….……18
Voicemail……………………………………..18
Visual Voicemail……………………………19
Call Log…………………………………..….…20
Messaging……………………………….…...24
Recording a Voice Message……..……27
Alarm Clock………………..………….……..27
Calendar………………………………..……..29
Voice Reminder……………….……….…..30

4
Calculator……………………………………31
Notes………………………………………....32
Flashlight…………………………………….33
Camera………………………..……………..33
Gallery…………………………..……………34
Sound Recorder…………..……………..35
Music………………………….….…………..36
Navigation…………………..………..……36
Weather…………………………….…...….39
Sync…………………………………………...40
Wallpaper…………………………….…….41
SOS……………………………………….……42
Emergency Alerts………………....……43
Phone Settings……………….…..….….46
Call Settings…………………….…...……47
Audio Settings……………….…...……..47
Connectivity……………………....……..47
Safety Information………….………...48
FCC/IC Statement………..….…….…..52

5
Installation
IMPORTANT
Turn off the phone and disconnect the charger before removing the battery cover.
Installing the SIM card
1. Insert the SIM Card into the SIM card slot.
(Make sure the SIM card’s contacts are facing inwards.)
2. Always turn off the phone before removing the SIM card.

6

7
Installing the battery
Remove the battery cover, insert the battery into the battery compartment, and replace
the battery cover.

8
Sunbeam F1 User Guide
Welcome!
•Thank you for purchasing a Sunbeam Wireless cellular phone. We trust that this
device will provide you with reliable service for years to come. To make the best
use of your device, we recommend keeping this manual handy as you get
acquainted with your phone.
Unboxing instructions:
•As supplied, the device package should include the following:
oSunbeam F1 phone
oBattery

9
oCharger cord
oCharging base
oUser manual and warranty information
To power up the phone:
•Long press the [end call key/power on/power off] key until the phone
powers on. This will generally require holding the key for three to five seconds.
Using the same procedure will power down your device off.
To charge the device:
•The Sunbeam phone is supplied with a charging base. To use the charging base,
insert the small end of the USB cable charger into the port located on the back of

10
the charging base and connect the larger end of the USB cable to a suitable power
supply. Simply place the device in the charging base to begin charging.
•A flashing red light on the front of the device indicates that the device is being
charged. When the red light is on but no longer flashing, the device has received a
full charge.
•To charge the device without using the charging base, insert the small end of the
charging cable into the charging port located on the left side of the phone, and
connect the charger to a suitable power source.
Introduction:
•Pressing the center button allows you to open the various options featured in your
model. Pressing the [directional arrow] keys will allow you to scroll from option to
option.

11
•Pressing the [Back] key will move to the previous screen.
•Pressing the [End] key from any menu in the phone will return the user to
the Home screen and end any current calls.
•In any menu with a numbered prefix, pressing that number on your keypad will
directly perform that function without requiring you to scroll to and select it.
•Not all features mentioned in this guide are available on all models. Please refer to
the feature list for your device to determine what is available.
Home Screen:
•The Home Screen displays the date and time. Options for both date and time are
found under [System] [Settings] [Phone Settings] [Date and Time].

12
•The Home Screen also provides a drop-down menu that is accessed by swiping
down from the top portion of the display. In models without touch screen
capability, this action can be performed from the [Menu] key. This menu
displays the phone carrier name, the current battery capacity and provides access
to other functions such as Wi-Fi, Bluetooth, Do Not Disturb settings, Flashlight and
Airplane Mode. Pressing the [down arrow] will allow the user to access
additional options related to the features displayed in the drop-down menu
including the options to adjust the screen brightness using the touch enabled slider
located at the top of the display.
•Pressing the [select] key from the Home Screen will display the Main Menu,
which lists all phone functions. The lower portion of the Home Screen then displays
an icon in the lower left that will toggle the menu display between list and grid
views to suit your preference.

13
•From the Home Screen, you may simply begin to dial a number at any time to call a
number, search for a contact, or access a speed dial.
Setting up Shortcuts:
•The Sunbeam phone comes with several function shortcuts preset. Pressing the
[directional arrow] keys allows the user to access these functions quickly.
Pressing the [up arrow] displays the Alarm function. Pressing the [down arrow]
displays the Calendar function. Pressing the [right arrow] accesses the Notes
function. Pressing the [left arrow] displays the Calculator.
•Function shortcuts can be reassigned to other functions by long pressing the
[directional arrow] in any of the four directions. This will display a list of
functionality options. Scroll to the preferred option and use the [select] key to
choose the desired function.

14
Entering Text:
These instructions are to help the user understand the keyboard functionality. It is
possible to access these instructions from the Keyboard settings menu on the device.
These instructions are applicable anywhere that text input could be needed.
Mode Switching:
•To switch between input modes, press and hold the Star [*] key and choose the
mode from the menu.
•It is possible to switch to the on-screen QWERTY keyboard simply by tapping a text
box on the screen. Note that this option only exists on models with touch screen.
•While in QWERTY mode, pressing the Menu key will toggle to a landscape layout
for a larger keyboard, if desired.
•To switch back to the last-used T9/Abc mode, simply start typing using the physical
keys again.

15
•You can use the [Back] key to hide the on-screen QWERTY keyboard any time it is
showing.
Capitalization:
•To change the capitalization in the T9 and Abc modes, press the Star [*] key.
Voice to Text input:
•While entering text in any text box, the user may press and hold the Message
key to dictate a message and have it transcribed to text. Note that this
function requires a Premium subscription and is only available on select models.

16
Space and Next keys:
•By default, when using T9 mode, the Zero [0] key inserts a space, and the Pound [#]
key selects the next word suggestion. It is possible to switch this function to match
the functionality of a previous phone, if desired, by going to Keyboard settings.
Enter new line:
•In T9 and Abc modes, press and hold the Pound [#] key to enter a new line of text.
Symbols:
•In T9 and Abc modes, press the One [1] key to insert commonly used symbols.
Press and hold the Star [*] key and choose the Symbols option to insert more
symbols.

17
Emoji:
•Press and hold the Star [*] key and choose the Emoji option to insert emoji.
Phone Volume Controls:
Volume controls for the device consist of two buttons located on the right-hand side of
the handset. These controls only adjust the volume when the phone is open. The phone
volume or the ring volume cannot be adjusted with the phone closed. If the phone is
not on a call, the ring volume is adjusted by moving the external volume buttons up or
down. If the phone is on an active call, the same action will adjust the voice volume on
the call. Volumes for media, alarms, and ringers can be adjusted individually by
navigating to [Settings], [Audio settings], [Tones and volume], and moving the sliding
controls for each selection.

18
Select Ring Tones:
The Sunbeam phone comes with a variety of available ringtones. To select a ringtone,
navigate to [Settings], [Audio settings], [Tones and volume], and scroll down to Phone
ringtone. Pressing the [select] key will apply the selected ring tone. Use the
[directional arrow] keys to navigate through the ringtone choices. Click the
desired ringtone to select it.
Voicemail:
Voice mail must be set up in the phone prior to use. To access voice mail, press and hold
the [1] key. To retrieve voice messages left on the phone, navigate to the voice message
application, or press and hold the [1] key.

19
Visual Voicemail:
1. Open the Visual Voicemail list by pressing the [Call] key and then navigating to the
right. And alternate way is to open the Main Menu and then choose “Voicemail”
from the list.
2. Select the desired voice mail message by using the [directional arrow] keys .
Press the [select] key to play the desired message. Pressing the [delete
message] button will delete the selected message. Selecting the [SMS] button will
provide the option to reply to the voice mail via SMS. Pressing the [menu] button
will produce a drop-down list of options related to the voice mail message and
other associated functions.
3. Visual Voice Mail – Please note, you may need to contact your cellular service
provider and direct them to enable visual voice mail on your account. Visual voice
mail allows the user to:
Other manuals for F1
2
Table of contents
Other Sunbeam Cell Phone manuals
