manuals.online logo
Brands
  1. Home
  2. •
  3. Brands
  4. •
  5. Sunbeam
  6. •
  7. Iron
  8. •
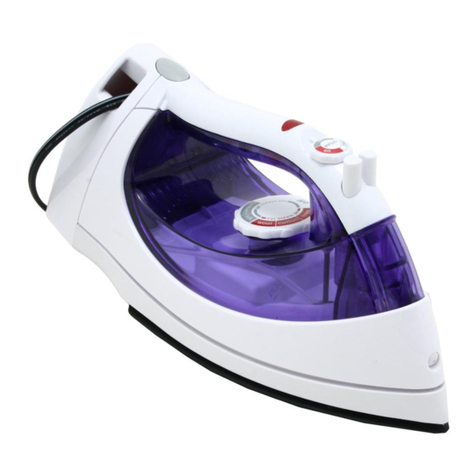
  9. Sunbeam PRO SRS2000 User manual

Sunbeam PRO SRS2000 User manual

Other Sunbeam Iron manuals

Sunbeam 3945 User manual

Sunbeam

Sunbeam 3945 User manual

Sunbeam STEAMMASTER 4049 User manual

Sunbeam

Sunbeam STEAMMASTER 4049 User manual

Sunbeam 3016 User manual

Sunbeam

Sunbeam 3016 User manual

Sunbeam 3017 User manual

Sunbeam

Sunbeam 3017 User manual

Sunbeam Pro Steam SR4100 User manual

Sunbeam

Sunbeam Pro Steam SR4100 User manual

Sunbeam 3964 User manual

Sunbeam

Sunbeam 3964 User manual

Sunbeam Verve SR6585 User manual

Sunbeam

Sunbeam Verve SR6585 User manual

Sunbeam 3932 User manual

Sunbeam

Sunbeam 3932 User manual

Sunbeam Steam Pro Compact SR8200 User manual

Sunbeam

Sunbeam Steam Pro Compact SR8200 User manual

Sunbeam 32610075 User manual

Sunbeam

Sunbeam 32610075 User manual

Sunbeam PRO STEAM SR4400 User manual

Sunbeam

Sunbeam PRO STEAM SR4400 User manual

Sunbeam GCSBCL-212 User manual

Sunbeam

Sunbeam GCSBCL-212 User manual

Sunbeam 3956 User manual

Sunbeam

Sunbeam 3956 User manual

Sunbeam 32610041 User manual

Sunbeam

Sunbeam 32610041 User manual

Sunbeam 3964-099 User manual

Sunbeam

Sunbeam 3964-099 User manual

Sunbeam 4267-33 User manual

Sunbeam

Sunbeam 4267-33 User manual

Sunbeam 3985 User manual

Sunbeam

Sunbeam 3985 User manual

Sunbeam VERVE Resilium SR6805 User manual

Sunbeam

Sunbeam VERVE Resilium SR6805 User manual

Sunbeam Series 6 User manual

Sunbeam

Sunbeam Series 6 User manual

Sunbeam Verve SR6650 User manual

Sunbeam

Sunbeam Verve SR6650 User manual

Sunbeam 4237 User manual

Sunbeam

Sunbeam 4237 User manual

Sunbeam 2631-33 User manual

Sunbeam

Sunbeam 2631-33 User manual

Sunbeam GCSBDG User manual

Sunbeam

Sunbeam GCSBDG User manual

Sunbeam SR8700 User manual

Sunbeam

Sunbeam SR8700 User manual

Popular Iron manuals by other brands

Lelit PG024N manual

Lelit

Lelit PG024N manual

Imetec INTELLIVAPOR K1 operating instructions

Imetec

Imetec INTELLIVAPOR K1 operating instructions

Hoyer DB 1750 C3 operating instructions

Hoyer

Hoyer DB 1750 C3 operating instructions

Singer SteamLogic instruction manual

Singer

Singer SteamLogic instruction manual

Russell Hobbs RHI007 Instructions and warranty

Russell Hobbs

Russell Hobbs RHI007 Instructions and warranty

Philips GC2900 series user manual

Philips

Philips GC2900 series user manual

Clatronic DB 3703 instruction manual

Clatronic

Clatronic DB 3703 instruction manual

TEFAL FV4093Z0 manual

TEFAL

TEFAL FV4093Z0 manual

Gorenje SIH 2200 BS instruction manual

Gorenje

Gorenje SIH 2200 BS instruction manual

Maxwell MW-3010 Manual instruction

Maxwell

Maxwell MW-3010 Manual instruction

Primula Vapormat instruction manual

Primula

Primula Vapormat instruction manual

Magio MG-541 manual

Magio

Magio MG-541 manual

Bosch Sensixx B22L manual

Bosch

Bosch Sensixx B22L manual

Philips GC651 Specifications

Philips

Philips GC651 Specifications

Vitek VT-1247 VT Manual instruction

Vitek

Vitek VT-1247 VT Manual instruction

Cleanmaxx 3397 instruction manual

Cleanmaxx

Cleanmaxx 3397 instruction manual

Philips GC800 user manual

Philips

Philips GC800 user manual

dyras ESI-2400AC instruction manual

dyras

dyras ESI-2400AC instruction manual

manuals.online logo
manuals.online logoBrands
  • About & Mission
  • Contact us
  • Privacy Policy
  • Terms and Conditions

Copyright 2025 Manuals.Online. All Rights Reserved.

PRO STEAM COMPACT IRON
User Guide
SRS2000
1
Sunbeam’s Safety Precautions 1
Features of your Sunbeam Pro Steam Compact Iron 2
Before using for the first time 3
Important 3
Steam Ironing 4
Dry Ironing 5
Care And Cleaning 5
Storage 5
Ironing Tips 5
Warranty 6
Contents
SAFETY PRECAUTIONS FOR YOUR IRON
•Do not leave a hot iron within reach of
children. If they come into contact with a hot
iron it could lead to serious burns.
•Iron only on an ironing board.
•An iron takes approximately 30 minutes to
cool down. Allow the iron to cool completely
before storing.
•Do not wind the cord around the soleplate
while the iron is still hot.
•Do not leave the iron unattended while it is
plugged into the power outlet.
•Always unplug the iron from the power outlet
before filling or emptying the water tank.
•The iron must be used and rested on a stable
surface.
•The iron is not to be used if it has been
dropped, if there are visible signs of damage
or if it is leaking
• Read carefully all instructions before use.
• Always turn the power off at the power outlet
before you insert or remove a plug. Remove by
grasping the plug – do not pull on the cord.
• Turn the power off and remove the plug when
the appliance is not in use and before cleaning.
• Do not use your appliance with an extension
cord unless this cord has been checked and
tested by a qualified technician or service
person.
• Always use your appliance from a power
outlet of the voltage (A.C. only) marked on the
appliance.
• This appliance is not intended for use by
persons (including children) with reduced
physical, sensory or mental capabilities, or
lack of experience and knowledge, unless they
have been given supervision or instruction
concerning use of the appliance by a person
responsible for their safety.
• Children should be supervised to ensure that
they do not play with the appliance.
• The temperature of accessible surfaces may be
high when the appliance is operating.
• Never leave an appliance unattended while in
use.
• Do not use an appliance for any purpose other
than its intended use. Injury could occur from
misuse.
• Do not place an appliance on or near a hot gas
flame, electric element or on a heated oven.
• Do not place on top of any other appliance.
• Do not let the power cord of an appliance hang
over the edge of a table or bench top or touch
any hot surface.
• Do not operate any electrical appliance with
a damaged cord or after the appliance has
been damaged in any manner. If damage
is suspected, return the appliance to the
nearest Sunbeam Appointed Service Centre for
examination, repair or adjustment.
• For additional protection, Sunbeam recommend
the use of a residual current device (RCD)
with a tripping current not exceeding 30mA in
the electrical circuit supplying power to your
appliances.
• Do not immerse the appliance in water or any
other liquid unless recommended.
• Appliances are not intended to be operated by
means of an external timer or separate remote
control system.
• This appliance is intended to be used in
household and similar applications such
as: staff kitchen areas in shops, offices and
other working environments; farm houses; by
clients in hotels, motels and other residential
type environments; bed and breakfast type
environments.
• Heating element surface is subject to residual
heat after use
Sunbeam is very safety conscious when designing and manufacturing consumer products,
but it is essential that the product user also exercise care when using an electrical appliance.
Listed below are precautions which are essential for the safe use of an electrical appliance:
Sunbeam’s Safety Precautions
If you have any concerns regarding the performance and use of your appliance,
please visit www.sunbeam.com.au or contact the Sunbeam Consumer Service Line.
Ensure the above safety precautions are understood.
Important Instructions - Retain For Future Use
2 3
Features of your Sunbeam Pro Steam Compact Iron
1. Shot of steam button
2. Water inlet
3. Folding button
4. Water Tank
5. Handle
6. Power light
7. Voltage selector
8. Temperature dial
9. Steam button
10. Stainless Steel soleplate
12
3
45
6
7
8
9
10
Before using for the first time
WARNING: Remove all packaging including
any soleplate protection before operating your
iron.
When using the iron for the first time, you may
notice a slight emission of smoke and hear
some sounds made by the expanding plastics.
This is normal and it stops after a short time.
We also recommend passing the iron over an
ordinary cloth before using it for the first time.
Important
GARMENT
LABEL
FABRIC
TYPE
THERMOSTAT REGULA-
TION
synthetic low temperature
silk - wool medium temperature
cotton - linen high temperature
Fabric not to be ironed
Soft the laundry to be ironed according to the international symbols on the garment label, or if this
is missing, according to the type of fabric.
Start ironing the garments requiring a low temperature.
This reduces the waiting times (the iron takes less time to heat up than to cool down) and
eliminates the risk of scorching the fabric.
4 5
Filling the water tank
WARNING: Make sure that the iron voltage
(see name plate ) and the mains voltage
match.. [Fig. 6] .
Damage resulting from incorrect voltage
selection will not be covered by warranty.
• Pull the handle to the high position directly,
no need to press the button;
• Check that the plug is disconnected from the
socket.
• Turn the temperature dial to “ ” [Fig. 1].
• Open the water inlet (2).
• Raise the tip of the iron to help the water
enter the opening without overflowing.
• Slowly pour the water into the reservoir using
the special measure and taking care not to
overfill the water tank (about 35 ml) [Fig. 2}.
• Close the lid (2).
Selecting the temperature
• Put the iron in a vertical position.
• Cut the plug in the socket.
• The iron soleplate temperature is increased
by turning the temperature dial in any set you
want.
• Wait a moment until the light goes off, then
the iron is heating [Fig. 1].
Selecting Shot of steam
Press the shot of steam button (1) to generate a
powerful burst of steam that can penetrate the
fabrics and smooth the most difficult and tough
creases. Wait for a few seconds before pressing
again.
Warning: the shot of steam function can
only be used at high temperatures. Stop the
emission when the plate temperature control
light (6) comes on, then start ironing again only
after the light has gone off.
Steam Ironing
Care And Cleaning
Please note: before cleaning the iron in any
way, make sure that the appliance plug is not
connected to the socket.
Any deposits, starch residue or size left on the
plate can be removed using a damp cloth or an
unabrasive liquid detergent.
Avoid scratching the plate with steel wool or
metallic objects.
The plastic parts can be cleaned with a damp
cloth then wiped over with a dry cloth.
mp cloth and wipe dry.
Dry Ironing
To iron without steam.
Warning: for delicate fabrics, we recommend moistening the fabric beforehand putting a damp
cloth between the iron and the fabric. To avoid staining.
Storage
• Disconnect the plug of the iron from the
socket.
• Empty the reservoir by turning the iron upside
down and gently shaking it. [Fig. 3]
• Leave the iron to cool down completely.
• Roll up the power cord
• Press the folding button (3) and turn the
handle to the low position.[Fig. 5].
• Always put the iron away in a vertical position.
Ironing Tips
We recommend using the lowest temperatures
with fabrics that have unusual finishes
(sequins, embroidery, flush, etc.).
If the fabric is mixed (e.g. 40% cotton 60%
synthetics), set the thermostat to the
temperature of the fibre requiring the lower
temperature.
If you don’t know the composition of the fabric,
determine the suitable temperature by testing
on a hidden corner of the garment. Start with a
low temperature and increase it gradually until
it reaches the ideal temperature.
Never iron areas with traces of perspiration
or other marks: the heat of the plate fixes the
stains on the fabric, making them irremovable.
The size is more effective if you use a dry
iron at a moderate temperature: excess heat
scorches it with the risk of forming a yellow
mark.
To avoid marking silk, woolen or synthetic
garments shiny, iron them inside out.
To avoid marking velvet garments shiny, iron
in one direction (following the fibre) and do not
press down on the iron.
The heavier the washing machine is loaded,
the more garments come out creased. This
also happens when the spin-drying revolutions
are very high.
Many fabrics are easier to iron if they are not
completely dry.
For example, silk should always be ironed
damp.
6
Warranty
Australia
www.sunbeam.com.au
1300 881 861
Suite 1, Level 1,
13 Lord Street,
Botany NSW 2019
Australia
New Zealand
www.sunbeam.co.nz
0800 786 232
Level 6, Building 5,
Central Park,
660-670 Great South Road,
Greenlane, Auckland
New Zealand
Year
1 year
2 years
1
Newell Australia Pty Ltd | ABN 68 075 071 233
Due to continued product improvements,
product illustrations and photographs in this User Guide
may differ slightly from the actual product.
Printed in China
MADE IN CHINA TO
SUNBEAM’S
SPECIFICATION
AUTHORITIES
ELECTRICAL REGULATORY
APPROPRIATE
APPROVED BY
Need help with your appliance?
Contact our Customer Care Team or
visit our website for information and tips
on getting the most from your appliance.
AUSTRALIA
Visit:
Phone:
Mail:
NEW ZEALAND
Visit:
Phone:
Mail:
www.sunbeam.com.au
1300 881 861
Suite 1, Level 1, 13 Lord Street,
Botany NSW 2019
www.sunbeam.co.nz
0800 786 232
Level 6, Building 5, Central Park,
660–670 Great South Road,
Greenlane, Auckland