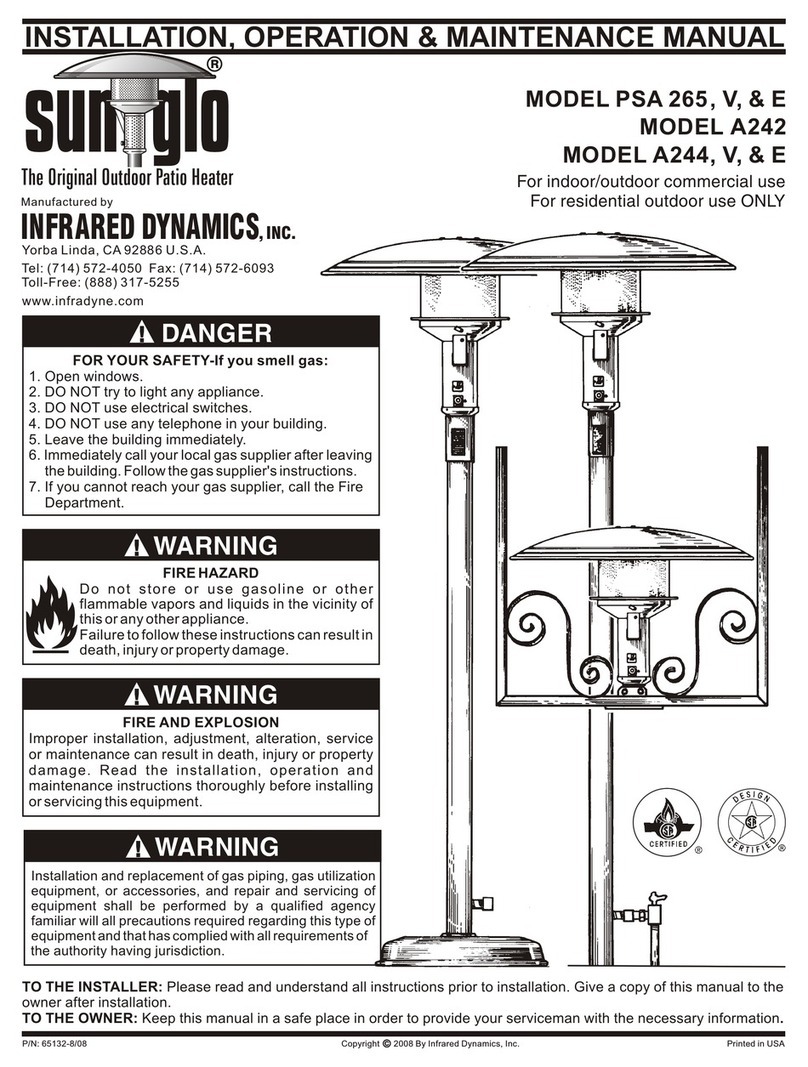
SunGlo PSA 265 Owner's manual

IN
0
Manufactured
by
INFRARED
DYNAMICS,
INC.
Yorba
Linda, CA 92886 U.S.A.
Tel:
(714) 572-4050
Fax:
(714) 572-6093
Toll-Free: (888) 317-5255
www.infradyne.com
A DANGER
FOR YOUR SAFETY-If
you
smell
gas:
1. Open windows.
2. DO NOT try to light any appliance.
3. DO NOT use electrical switches.
4. DO NOT use any telephone
in
your building.
5.
Leave the building immediately.
6.
Immediatelycall your local gas supplierafter leaving
the building. Followthegassupplier's instructions.
7.
Ifyou cannot reach your gas supplier, call the Fire
Department.
A WARNING
FIRE HAZARD
A
Do
not
store
or
use
gasoline
or
other
flammable vapors and liquids in the vicinity of
thisoranyotherappliance.
Failureto followthese instructionscan resultin
-death, injuryorpropertydamage.
A WARNING
FIRE AND EXPLOSION
Improper installation, adjustment, alteration, service
or
maintenance can result
in
death, injury
or
property
damage.
Read
the
installation,
operation
and
maintenance instructions thoroughly before installing
orservicingthisequipment.
A WARNING
Installation
and
replacement of gas piping, gas utilization
equipment, or accessories,
and
repair
and
servicing of
equipment shall
be
performed
by
a qualified agency
familiarwill
all
precautions required regarding this type of
MAINTENAN
MODEL
PSA
265,
V,
& E
MODEL A242
MODEL A244,
V,
& E
For indoor/outdoor commercial use
For residential outdoor use ONLY
equipment
and
that
has
complied with
all
requirements of
~"5i~~~~~~
....
the authority having jurisdiction.
TO THE INSTALLER: Please read and understand all instructions prior to installation. Give a copy
of
this manual to the
owner after installation.
TO THE OWNER: Keep this manual in a safe place
in
order to provide your serviceman with the necessary information.
P/N: 65132-1/13
Copyright©
2013 By Infrared Dynamics, Inc. Printed
in
USA

SUNGLd"
INFRARED
HEATERS
TABLE OF CONTENTS
Section
1.
For Your Safety ......................................................................................................3
Warning Symbols.............................................................................................................3
Applications .....................................................................................................................3
Hazards............................................................................................................................3
Section 2. Owner's Manuai......................................................................................................
S
Before Starting Your Heater ............................................................................................5
Starting and Shutting Down your Heater.........................................................................5
Performing Routine Maintenance....................................................................................5
Warning Labels
Stainless Steel Care ........................................................................................................5
Before
You
Remodel........................................................................................................5
Basic Lighting Instruction ................................................................................................6
Section 3. Heater Layout and Design ....................................................................................
z
Effective Coverage ..........................................................................................................7
Where to Locate Patio Heaters .......................................................................................7
Using Multiple heaters.....................................................................................................7
Section 4. Installation ..............................................................................................................8
Receiving Equipment.......................................................................................................8
Code Requirements.........................................................................................................8
Gas Supply.......................................................................................................................8
Clearance Requirements.................................................................................................8
Fire Sprinklers..................................................................................................................9
Electrical ..........................................................................................................................9
Ventilation ........................................................................................................................9
Gas Piping........................................................................................................................9
Initial Start-Up ..................................................................................................................9
Section
5.
Heater Models ......................................................................................................10
PSA65 and PSA265V....................................................................................................10
A242 Post and Base ......................................................................................................13
A244 and A244V............................................................................................................15
PSA265E and A244E ('E' Series)..................................................................................17
Section
6.
Maintenance and Trouble Shooting...................................................................19
Sunglo Head Assembly .................................................................................................19
DSIIgnition System .......................................................................................................20
Basic Heater Disassembly ............................................................................................
21
Service Check List.........................................................................................................22
Trouble Shooting Guide.................................................................................................23
2

SUNGLd"
INFRARED
HEATERS
Application
This
is
not
an
explosion
proof
heater.
Consult
your
local
Fire
Marshall,
insurance
carrier
and
other
authorities
for
approval
of
the
proposed
installation.
Sunglo
TM
heaters
are
designed
and
certified
for
commercial
indoor/outdoor
and
residential
outdoor
applications
and
are NOT
approved
for
use
in
any
indoor
residential
application.
This
includes,
but
not
limited
to,
attached
garages,
living
quarters,
solarium,
etc.
Consult
the
local
Fire
Marshall
and/or
insurance
provider
if
unsure
of
your
application.
Warning
Symbols
Safety is the most important consideration with installing, operating, and maintaining this gas
appliance.
You
will see the following symbols and signal words when there is a hazard related to
safety
or
propertydamage.
I A DANGER
A WARNING
A CAUTION
DANGER indicates there
is
an immediate threat
which
if
notavoided could result
in
deathorinjury.
WARNING indicates a potential hazardous
situation which,
if
not avoided, could resulted
in
deathorinjury
CAUTION
indicates
a potential
hazardous
situation which,
if
notavoided, could result in minor
ormoderate injury
A.
WARNING
Not
For
Indoor
Residential
Use.
Installation
of
an
infrared
heater
system
in
residential
indoor
spaces
may
result
in
death,
serious
injury
or
property
damage.ln
residential
applications
this
heater
may
only
be
used
outdoors.
3

4
SUNGLd"
INFRARED
HEATERS
A WARNING
Improper connected gas lines may result
in
death orserious injury, explosion, poisonous fumes, toxic
gases, asphyxiation. Connectgas lines
in
accordanceto national, state, provincial and local codes
Placement
of
explosive objects, flammable objects, liquid and vapors close to the heatermay result
in
explosion, fire, property damage, serious injury or death. DO NOTstore, or use, explosive objectives,
liquidsandvapor
in
thevicinity oftheheater.
Failure to complywith published clearanceto combustiblescould result
in
death, injuryand/orproperty
damage.
In
locations used for the storage of combustible materials, signs must be posted to specify the
maximum permissible stacking height to maintain the required clearances from the heater to the
combustible, Signs must either be posted adjacent to the heater switch orother off/on control orother
conspicuouslocation.
HazardsInclude:
For maximum safety the building must be evaluated for hazards before installing the heater system
includingthefollowing:
• Gas and electrical lines • Vehicle parking area
• Combustible and explosive materials • Vehicles with lifts or cranes
• Chemical storage areas • Storage areas with stacked materials
• Areas of high chemical fume concentrations • Lights
• Provisions for accessibility to heater • Sprinkler heads
• Adequate clearance around air openings • Overhead doors and tracks
• Combustion and ventilating air supply • Dirty, contaminated environment
A critical safety factor to consider before installation is the clearance to combustibles materials.
Clearanceto combustible is defined as the minimum distanceyou musthave between the heatercasing
and the combustible items. Consideration must also be made for moving objects around the infrared
heater. Thefollowing isapartial list
of
itemsto maintain clearancesfrom:
Combustible
Items:
Moving
Objects
• Wood • Umbrellas
• Paper • Awnings
• Fabric • Movable Partitions
• Chemicals • Stage Components
• Wall or Roof Insulation • Sprinkler heads
• Drywall • All Heat Sensitive Objects
When installing infrared heating systems, the minimum clearance from combustible materials must
be
maintained. These distances are shown
in
page 8 and
on
the minimum clearance to combustibles label
found
on
the heater. If you are unsure
of
the potential hazards, consult your local Fire Marshall, fire
insurance carrieror otherqualified authorities
on
the installation ofgas-fired infrared heaterforapproval
of
the proposed installation.
PROP. 65 CARBON MONOXIDE WARNING!!!
If
not
installed,
operated
and
maintained
in
accordance
with
manufacturer's
instructions,
this
product
could
expose
you
to
substances
in
the
fuel
or
from
combustion,
including
Carbon
Monoxide,
which
can
cause
death
or
serious
illness,
and
which
are
known
to
the
State
of
California
to
cause
cancer,
birth
defects
or
reproductive
harm.

SUNGLd"
INFRARED
HEATERS
OWNER'S MANUAL
BeforeStartingYourHeater
Before you start your heater examine the heater
installation to determinethat:
• Areas immediately around the heater including
the air inlet and flue areas are free from
obstructions.
• Physical support
of
the heateris sound.
• Thereis noobviousdeterioration
of
the heater.
• Portable type heaters mustbe placed on level and
adequatefooting.
Startingand
Shutting
DownYourHeater
Sunglo heaters can utilize a variety of gas control
systems. With some models it is necessary to light a
pilot while other models have a fully automatic ignition
system. Identify the model ofyour heater on the Basic
Lighting Instructions chart on page 6 and follow the
lighting instructions. If heater fails to light or does not
heatproperly discontinue use
of
the heaterand contact
yourlocal distributor, orqualified service agency.
PerformingRoutine Maintenance
Overtime, particularlyduring long periods
of
disuse, the
heater can accumulate dirt and debris
in
and around
the pilot and the burner. Routine maintenance should
be performed atleastonce a yearbya qualified service
agencyto insure the heateris operating properly. More
frequent service may
be
required for heaters located
nearwaterfronts.
Warning Labels
It is important that warning labels including the lighting
instruction are not removed from the heater. If labels
are damaged, replacement labels are available from
yourlocal dealerorthe factory.
StainlessSteel Care
Stainless steel does not "rust"; however air pollution
can leave brown deposits on heaters. We recommend
washing the stainless steel post and base only with a
mild detergentsolution and wiping it drywith asoftcloth
to bring backthe original shine. The stainless steel may
be expected to permanently darken around the top
of
the heater.
BeforeYou Remodel
Should you plan to make any changes to the patio
or
building structure after heaters have been installed,
yourheaterinstallation must be reviewed bya qualified
agency to insure that clearances from combustible
material and ventilation requirements are maintained
afteralterations are complete. When plasticcurtains or
drops are used to enclose a patio you must take steps
to insure that all Sunglo
TM
heaters have the required
permanent access to outside air. If a patio
is
to be
partially enclosed a qualified agency familiar with this
type
of
heating equipment must be consulted to insure
the safe operation ofthisequipment.
Basic
Lighting
with
Sunglo
TM Manual
Control
(See
lighting
instructions
pertaining
to
your
heater
model
on
page 6.)
A WARNING
PROP. 65 CARBON MONOXIDE WARNING!
If
not
installed,
operated
and
maintained
in
accordance
with
manufacturer's
instructions,
this
product
could
expose
you
to
substances
in
the
fuel
or
from
combustion,
including
Carbon
Monoxide,
which
can
cause
death
or
serious
illness,
and
which
are
known
to
the
State
of
California
to
cause
cancer,
birth
defects
or
reproductive
harm.
5

6
SUNGLd"
INFRARED
HEATERS
BASIC LIGHTING INSTRUCTIONS
PSA265, A242, A244
PSA265, A242, A244
WITH DSI
Lighting
Instructions
Control
Description
To
Light
Pilot:
Rotate
control
knob
to
"Pilot'
position.
Firmly
depress
knob
for
30
seconds
while
lighting
pilot
through
Y:!
diameter
lighting
hole
above
control.
Pilot
should
remain
lit.
To
Turn
Heater
ON:
Rotate
control
knob
to
"ON"
position.
To
Turn
Heater
and
Pilot
OFF:
Rotate
control
knob
to
Pilot"
position,
depress
slightly
and
turn
to
"OFF"
position.
Wait
5
minutes
alter
complete
shutdown
of
heater
before
relighting
pilot.
To
Light
Pilot:
Rotate
control
knob
to
"Pilot'
position.
Firmly
depress
knob
for
30
seconds
while
pressing
the
red
button
on
the
side
of
the
heater.
Pilot
should
remain
lit.
To
Turn
Heater
ON:
Rotate
control
knob
to
"ON"
position.
To
Turn
Heater
and
Pilot
OFF:
Rotate
control
knob
to
Pilot"
position,
depress
slightly
and
turn
to
"OFF"
position.
Wait
5
minutes
alter
complete
shutdown
of
heater
before
relighting
pilot.
To
Light
Pilot:
Rotate
control
knob
to
"Pilot'
position.
Firmly
depress
knob
for
30
seconds
while
lighting
pilot
through
Y:!
diameter
lighting
hole
above
control.
Pilot
should
remain
lit.
To
Turn
Heater
ON:
Rotate
control
knob
to
"ON"
position
and
turn
on
24
VAC
electrical
power
to
heater.
To
Turn
Heater
and
Pilot
OFF:
Rotate
control
knob
to
Pilot"
position,
depress
slightly
and
turn
to
"OFF"
position.
Wait
5
minutes
alter
complete
shutdown
of
heater
before
relighting
pilot.
To
Turn
Heater
ON:
1.
Turn
the
gas
valve
"ON".
2.Turn
"ON"
Electrical
Switch
(24
VAC
only)
To
Turn
Heater
OFF:
1.Turn
the
electrical
power
"OFF".
2.Turn
the
gas
valve
"OFF".
Warning:
If
burner
fails
to
ignite,
shut
OFF
electrical
power
and
wait
(5)
minutes
before
repeating
lighting
process.
Warning:
DO
NOT
attempt
to
light
this
heater
manually.
MANUAL CONTROL
This heater utilizes a standing pilot
with thermocouple safety shutoff.
This heater can be either lit with a
match or a long stem lighter.
The manual control allows you to
regulate the heat.
MANUAL CONTROL WITH
DSI
This heater utilizes a standing pilot
with thermocouple safety shutoff.
This heater
is
equipped with a
battery operated spark ignition to
light the pilot
This heater can
be
either lit with a
match or a long stem lighter.
The manual control allows you to
regulate the heat.
MANUAL CONTROL WITH
24 VAC ACTUATOR
This heater utilizes a standing pilot
with thermocouple safety shutoff.
This heater can be either lit with a
match or a long stem lighter.
The 24 VAC Actuator allows you
to turn ON/OFF the main burner
with a switch.
ELECTRONIC CONTROL
(DO NOT MATCH LIGHT)
This heater utilizes a electronic
ignition and flame monitoring thru
flame rectification.
This heater requires 24 VAC
in
order to operate.

SUNGLd"
INFRARED
HEATERS
HEATER LAYOUT AND PATIO DESIGN
There are a number
of
considerations in determining the
type and numberheaters
to
be
used
and
their location on your
outdoorpatio.
Concept
of
Patio Heating: Hot air is
not
an
option for heating
an
outdoor
patio so a patio heater uses radiant
heatlikewe receive from the sun.
Radiant Heat:
Is
the type
of
heat you
receive from a fireplace, potbelly
stove, orthe sun. Itis
an
infrared wave
length that heats objects without first
heating the intervening air. Unlike
ultra violet light there is no sunburn or
sun tanning affect. Infrared will not
attractinsects.
Patio Heater:
Is
an
unvented gas-
fired infrared
heater
designed
to
concentrate radiant heat
in
outdoor
areas.
Definition
of
Outdoors
(For
the
purposes
of
these instructions).
An
appliance
is
considered
to
be
outdoors
if
installed with shelter no
more inclusivethan:
1.
With walls
on
all sides, but with no
overhead cover.
2.
Within a partial enclosure which
includes an overhead cover and no
more than two side walls. These
side walls may
be
parallel,
as
in
a
breeze
way,
or at right angles to
each other.
3.
Within a partial enclosure which
includes an overhead cover and
three side walls, as long as 30
percent or more
of
the horizontal
periphery
of
the
enclosure
is
permanentlyopen.
EFFECTIVE RANGE
(COVERAGE):
The comforting warmth from a single
Sunglo™ Heaterwill covera 12' to 20'
circle. The Sunglo™ is a "comfort"
heater," and the coverage is the area
in
which
people
will
received
a
comforting amount
of
warmth. Some
people
will
require
more
or
less
warmth than others to
be
comfortable
and will either turn the heater up or
down, or move closer or farther away
astheydesire.
WHERE TO LOCATE PATIO
HEATERS:
Sunglo™ Heaters naturally attract
people to their infrared warm glow.
Locate heaters where people can
readily gather, sit orstand comfortably,
and where furnishings
can
easily
be
moved to best accommodate the
radiating warmth.
DECK
~
' -
/
PATIO HEATER
-HOUSE-
GENERAL RULES FOR
LOCATING HEATERS:
v
.....
j
A Sunglo™ Patio Heater can operate
effectivelyto maintain comfort even
in
completely exposed areas, although
weather
protected
areas
are
desirable.
Weather
and
wind
protection allows the surrounding air
to
be
warmed to enhance the direct
radiantwarming effect.
BreezyConditions:
Sunglo™ heaters are designed to
work well under a variety of outdoor
conditions, however under certain
conditions
they
work
better
than
others and under some conditions
they should not
be
operated atall. The
heater can
be
operated under breezy
conditions when the cross wind
is
0-
10
mph. Ifheaters are mounted
on
the
edge
of
a precipice or sea cliff where
wind is directed upwards into the
reflector hood, damage to the heater
can occur. Upward thrusts
of
wind can
also
be
cause
by
wind
walls
or
architectural
elements
near
the
heater. The patio must
be
designed to
protectagainstthistype
of
condition.
WHEN MULTIPLE
HEATERS ARE USED:
When more than one heateris used
in
an
area, it is generally preferable to
locate them close together. Multiple
heaters located
on
8'
to 15' centers
give
overlapping
heat
patterns
increasing
the
overall
effective
coverageforeach heater.
CONTROL SYSTEMS:
Sunglo™heaters are available with a
variety
of
control
systems
from
manual
controls
requiring
no
electrical connections to a 24 VAC
fully automatic ignition and control
system
(see
Basic
Lighting
Instructions
on
page
6).
It
is
recommended
that
when multiple
heaters are used, that the electrical
circuitry
be
arranged so heaters can
be
switched individually or
in
groups
to provide maximum flexibility for
heatingthe patio.
SUGGESTED
SPACING
WHEN
MULTIPLE
HEATERS
ARE
USED:
t15Ft. T15Ft. t
,,...
.....
,
,,..
......
,
,.,...
.....
,
/
)(
)(
\
(
@(J@(J@)
\
)\ )\
/
,
___
; ,
___
; ,
___
;
Spacing
For:
WELL
PROTECTED
AREAS
AND
MILD
CLIMATIC
CONDITIONS
Spacing
For:
SEMI
EXPOSED
AREAS
WITH
AVERAGE
WEATHER
CONDITIONS
Spacing
For:
COMPLETELY
EXPOSED
AREAS
WITH
SEVERE
WEATHER
CONDITIONS
7

8
SUNGLO~
INFRARED
HEATERS
INSTALLATION AND SERVICE INSTRUCTIONS
Receiving
Equipment
On receipt of equipment it is suggested that a visual
inspection be made for external damage to the carton. If
the carton is damaged, a note should be made on the Bill
of
Lading when signing for the equipment. Remove the
heater form the carton. If there
is
damage, report the
damagetothecarrierimmediately.
Each SungloTM heater
is
carefully tested and adjusted at
the factory. Before attempting to install this equipment a
thorough inspection is required to insure the heaters are
in
the original condition from the factory. Check for any
loose parts or damage such as dents or parts that may
affect the operation
of
the heater. Ifthere
is
any question
in
regards to the condition
of
the equipment contact the
factory.
INSTALLATIONINSTRUCTIONS
Important
Notice
These instructions are intended for qualified personnel,
specifically trained and experienced
in
the installation
of
this type
of
equipment and related system components.
Some states orprovinces require installation and service
personnel to be licensed. Ifyourstate orprovince is such,
be sure your contractor bears the appropriate license.
Persons not qualified shall not attempt to install this
equipmentnorattemptrepairs.
Code
Requirements
Installation must be
in
accordance with local codes, or
in
the absence
of
local codes, with the latest edition of the
National Fuel Gas Code, NFPA 54/ANSI Z223.1 and
NationalElectrical CodeANSI/NFPA70, and forCanada,
the latest edition of CAN/CGA-B149.1 and B149.2 and
Canadian Code, CSAC22.1 Part1and Part2.
• Heaters to be installed
in
Aircraft hangars must be
installed
in
accordance with the American National
StandardforAircraftHangars,ANSI/NFPANo. 409.
• Heaters to be installed
in
Public Garages must be
installed
in
accordance
with
NFPA
No.
88A,
StandardsforParkingStructures.
•
Heaters
must
be
installed
so
that
minimum
clearances marked
on
the heater will be maintained
from vehicles parked belowthe heater.
• Each
heater
must
be
electrically
grounded
in
accordance
with
the
National
Electrical
Code
ANSI/NFPA70, when
an
external electrical source is
utilized.
In
Canada, the
GSA
Canadian Electrical
Code, C22.1 Part1applies.
Gas
Supply
The gas inlet supply pressure and manifold pressure
required for each heater are listed below. Forgas supply
line
pressures
in
excess
of
Y:z
psig,
consult
your
representativeorthefactory.
Gas
Inlet
Pressure
Maximum Pressure
Minimum Pressure
Manifold Pressure
NatGas
Y:z
psig
6"W.C.
5"W.C.
Propane
11"W.C.
11"W.C.
11"W.C.
It is important that the gas piping system be adequately
sized forall thegasappliancesitserves.
Clearance
Requirements
Each heater must be installed such that the following
"Minimum Clearances to Combustible Materials" are
maintained.
Combustible materials includewood, compressed paper,
plant fibers, plastics, Plexiglas® or other materials
capable of being ignited or burned. Such materials shall
be considered combustible even though flame-proof, fire
retardant treated or plastered. Additional clearance may
be required for vinyl siding, glass, painted surfaces and
other materials that may be damaged by radiant or
convection heat.
The
stated
clearance
to
combustible
materials
represents a surface temperature
of
90°F (32°C) above
room temperature. Building materials with low heat
tolerance may be
subject
to
degradation
at
lower
temperatures. It
is
the installer's responsibility to assure
thatadjacentmaterialsarenotsubjecttodegradation.
In
locations used for storage of combustible materials
signs shall be posted to specifythe maximum permissible
stacking heightto maintain required clearances from the
heaterto combustible materials.
Clearance
from
combustibles
Top
18 inches
Side 24 inches
Below 84inches
Fire
Sprinklers
46cm
61cm
214cm
Fire Sprinklers
must
be located at an appropriate
distance from each heater to avoid accidental activation
ofthe sprinkler. Ethylene glycol or propylene glycol must
never be used
in
fire sprinkle systems where heaters are
present as these substances may become flammable
when heated. A fire sprinkler professional must be
consulted when heaters are installed to insure heaters
and fire sprinklers are properly integrated. Specific
guidelines for fire sprinkler can be found
in
NFPA 13,
Installation
of
Fire SprinklerSystems.
Electrical ('V" and 'E'model only)
These heaters require 24 VAC to operate. The installer
must provide a NEC Class 2 transformer. Each heater
requires 20VAor0.8 amperes. When multiple heatersare
connected to one transformer, the transformer must be
sized
to
accommodatethe entireload.
Control wire used to electrically connect one or more
heaters together must have adequate capacity and
insulation temperature rating forthe total connected load.
Use at least 18 GA wire up to 50 feet from heater to
transformer orwall switch. Use a minimum
of
16
GAwire
forover50feetdistance
Ifanyofthe original wire supplied with the appliance must
be replaced, it must
be
replaced with wiring material
having atemperature rating
of
atleast 105°centigrade.
Ventilation
1.1t
is
required that areas above and below the heater
be properlyvented to allowfornecessarycombustion
airand removal
of
combustion gases.
2.Heater shall be provided with natural or mechanical
means to supplyand exhaust at least4 cfm per 1,000
BTU per hour of heater input. Exhaust opening for
removing the flue products shall be above the level
of
the heaters.
3.Heater ventilation must comply with state and local
codes.
Gas Piping
1.A
minimum pipe size of
Y:z''
is required for inlet piping.
A
Y:z''
Ieaver handled shut-off gas cock must be
installed within 6 feet of the appliance for servicing
the unit.
2.
Gas lines must be adequately sized to carry the total
connected gas load. Check with local and state
plumbing and heating codes regarding sizing of gas
lines
3.AII gas pipe connections to the heater(s) must be
sealed with a gas pipe compound resistant to
liquefied petroleumgases.
4.1nstallation ofa drip leg
in
the gas supply line going to
each heater is required to minimize the possibility of
any loose scale ordirtwithin the gas supply line from
entering the heater'scontrol system.
5.
When checking for gas leaks, do not use
an
open
flame. Useasoapand watersolution.
6.
For gas supply line pressures
in
excess
of~
psig,
consultthefactoryoryourlocal representative.
?.Installation
of
a
1/8"
N.P.T.
plugged
tapping
accessible for test gage connections
is
required
upstream
ofthe
gassupplyconnections to the heater.
SUNGLd"
INFRARED
HEATERS
Figure 1. Normal Flame Position
Initial Start-Up Procedure
1.
Make sure that gas lines are completly purged
of
air
beforeattempting to lightheater.
2.
Follow lighting instructions on page 6 for your
particularmodel.
3.
Check all gas connections for leaks using soapy
water.
4. Flame should travel completely around the inside of
theemittergrid.
5.
Emitter grid should become RED within 5 minutes
(this may
be
difficulttosee
in
brightsunlight.
NOTE: Some white smoke may appear during or just
after the initial start-up
of
the heater. White smoke will
dissipatewith proceeding use.
Servicing Instructions
Service checks on these heater should be performed at
least annually or more frequently depending
on
their use
to verify the properoperation
of
these heaters. Ifthe pilot
fails to light or the heater does not heat properly the
heater must be repaired before being put back into
service.
1.
Turn off gas and electrical before attempting any
serviceto this appliance.
2.
Remove reflector and emitter assembly from heater
as shown
on
page
21
.
3.
Using low pressure air (maximum
of
30 psig) clear
burner
and
pilot
of
any
dirt
or
debris. NOTE:
Appropriateeye protection mustbe worn.
4. Using a metal brush remove any accumulated dirt
from the inside
of
the emittergrid.
5.
Reassemble heaterand observe whether heaterhas
been restored to properoperation.
6.1f
heater
does
not
operate
properly
it
maybe
necessaryto remove burnerand orificeforcleaning.
?.Anycorroded ordeteriorated parts mustbe replaced.
9

10
93"
2362mm
111"
2820mm
SUNGLd"
INFRARED
HEATERS
HEATER MODELS
Clearance
Keep Greasy
12" jHands
OH
...
r--
84"
2134
mm
Use Pipe Wrench
_.
Here on Heater
to
Tighten
on
Gas Pipings.
DO
NOTTwist
Heater Body
on
Pipe
as
This May
Loosen Internal Parts.
'Ia"
Pipe
Extends 1
'14'
Above
Top
of
3"
Post
Ground Level
33/a"
86mm
MODEL
PSA
265
GAS-FIRED INFRARED HEATER
For
Indoor/Outdoor
Operation
Reflector
100%
Safety ShutoH Control
Heater Head Base
Slip Collar -Slide on Post
Before Installing Heater
3"
Dla. Steel Post
'lzlnternal Piping
WARNING
All
external
plumbing
must
be
properly
protected
against
trip
hazards.
t
1/a" 90° Elbow
Make Final Connection at Union
'12'
Dla Min Inlet Gas Pipe
Line
for
50,000
BTU/Hr
12" 305 mm Min
l..)l::::::=:::=====::z~L
Concrete
r

SUNGLd"
INFRARED
HEATERS
Minimum Clearance from Combustibles
MODEL
PSA
265V
GAS-FIRED INFRARED HEATER
For
Indoor/Outdoor
Operation
--.----
/
''
ii/i
i
ji
///,·
//J,·i
t//i
i
,·;/;~~
18".
457mm
111"
2820mm
93"
2362mm
TopC+
~
34W'
876::__
Reflector
24"
610mm
Side Clearance I
4
•·
12"
...
r
Keep Greasy
Hands Off
Heater Head
24
Volt Wires
Connection to
Heater
84"
2134
mm
Drill 7
/e" Dla Hole
Through Post
for
Vz''
Electrical Connector
U.L.
or
C.S.A. Certified
Waterproof Outdoor
Use
Junction Box
to
be
Supplied by Electrician
33
/a"
86mm
'h PVC Plastic
Tubing
...
0 Q 0
100%
Safety Shutoff Control
Heater Head Base
Slip Collar
'h
Internal Piping
NEC
Class2
24VAC Transformer-20VA
(Supplied
by
Installer)
.............
~~E
24VAC
If
any
of
the
original
wire
as
supplied
with
the
appliance
must
be replaced,
it
must
be
replaced
with
wiring
material
having
a
temperature
rating
of
at
least
105degreesCentigrade.
Electrical
Hookup
'12'
90° Elbow
Make Final Connection
at This Union
I
'!." Dia
Min
Inlet Gas Pipe
Line
for
50,000
BTU/Hr
12" 305
mm
Min
1 Wall
\ Switch
(Installer
Supplied)
WARNING
0 0 0 ¢
p"".
a" All external
plumbing
must
:<:
o0
"o
..
J.~
Concrete be
properly
protected
l.)l::::::=====::::r,L
~
against
trip
hazards.
-------~---------
11

Item
1
2
3
4
5
6
7
8
9
10
12
SUNGLd"
INFRARED
HEATERS
MODEL PSA
265V
Replacement Parts List
Part No.
Description
30257-1 Collar,
PH
Black Slip
70026 Screw, #8 x 3/8" SWHSMS
80008 Pipe, 1/2" x 62 1/4" Blk
30266 Post, A265 Blk-84" L
80023 Elbow, 1/2" Blk
80078 Elbow, 1/2" Street Blk
80054 Nipple, 1/2" X 1 1/2" Blk
80024-2 Union, 1/2" Blk
80003 Nipple, 1/2" x Close
90063 Valve, JamarT205 1/2"
'
'

SUNGLO-INFRARED
HEATERS
Minimum
C'-rance
from Combustible Materials
MODELA242
GAS-FIRED INFRARED HEATER
For
Indoor/Outdoor
Operation
Step
1.
a.
Insert
3"
dia. post squarely into base socket.
b.
Tighten nut on bolt to secure post until
Y.!''
of
thread
is
exposed. Slight indent
of
post
should occur. Install cap nut.
STEP1
Step
2.
a.
Thread 62" long internal pipe nipple into base
of
heater head as shown below. If teflon tape
is not provided. gas pipe joint compound must
be used at this joint.
STEPS
STEP2
Step
3.
a.
Slide assembled gas pipe and heater head
into post.
b.
Turn heater head so pipe elbow fitting lines
up
with hole at the bottom
of
the post.
Step4.
a.
Screw 'k nipple into elbow using gas pipe joint
compound as shown below.
111"
2120
.....
;··
13"
2:162
.....
....
:.
··:
24"
610mm
Sk141
Cle.,anc:e
t
14"
2134mm
34V."I75mmDia.~
Relleclot
·--· -
·:::·
STEP4
PilolllghtinQ
Hole
1CIO"I.
Salely
Shulofl
Conlrol
Healer
Head
Base
SHp Collar
3"
Dia. Steel Post
v.
InternalPlplnQ
WARNING
All
external-plumbing
must
be properly protected
against
trip
hazards.
V."!IO"
Elbow
/
Use
pipe
joint
compound
Floor Clamp Kit (Item No.
27020) should be used
to
secure heater base
to
deck.
See
page 14
for
details
Step
5.
a.
Secure heater slip collar with
four
(4) screws
provided.
b. Attach reflector
to
top
of
heater with stainless
steel nuts provided.
c.
Secure heater base
to
deck using
Floor
Oamp
using Floor Clamp
Kit (Item No. 27020) provided.
13

14
SUNGLO-
INFRARED
HEATERS
MODELA242
Replacement Parts List
Item
Part
No. Description
1 30257-1 Collar,
PH
Black Slip
2 70026 Screw, #8 x 3/8" SWHSMS, ZN
3 80008 Pipe, 1/2" x 62 1/4"
Blk
4 30264 Post, A242 Blk-68 1/2" L
5 80023 Elbow, 1/2"
6 10264-3 Assy, A242 Base
7 80054 Nipple, 1/2" X
11/2"
Blk
8 80019 Coupling, 1/2"
Blk
9 27027 PKG, A242 Post Bolt
-·
··-
10* 27020 Floor Clamp
Kit
...
*The purpose
of
the
Floor Clamp Kit
is
to
provide supplementary safety
and stability
for
our
portable
heaters. Floor Clamps should be
used
to
secure portable patio
heaters
to
help prevent
tip
over.
Floor Clamp Kits are provided
with
each
heater.
If
for
some reason
the Floor Clamp Kit
is
missing
it
is
available from
the
factory at no
charge. For questions regarding
the
Floor Clamp Kit contact
Infrared Dynamics, Inc. toll free at
(888} 317-5255.
.
-

1
24VoH
Electrical
Inlet_,.
411f•"
1048
mm
Gas
Inlet-.,.
~~~~~~~
lrt.ll::'l"'t"l
__
.,
NEC Class 2
24VAC Transformer-20VA
(Supplied
by
Installer)
-............11,..----,
~
24VAC
Wall
Switch
(lnslllller
Supplied)
~~~~~~~~~~~
1
18"
457mm
34'h"
Topl"'l
m
~Dk
24""
61Dmm
Side
Clearance
t
'12'
EL" Condulet
(Supplied
by
Installer)
If
any
of
the
original
wire
as
supplied
with
the
appliance
must
be
replaced,
it
must
be
replaced
with
wiring
material
having
a
temperature
rating
of
at
least
105
degrees
Centigrade.
Maintain
clearances
shown
for
adequate
clearance
around
air
openings
into
the
combustion
chamber
and
for
accessibility
as
well
as
for
combustion
and
ventilating
air
supply.
Refleclor
Pilot
Lighllng
Hole
100%
Satety ShuloH
Control
SUNGLd"
INFRARED
HEATERS
MODELA244
&A244V
Installation
Instructions
1. Hanging Frame
Mounting:
Before attaching
the heater to the
U"
shaped hanging frame,
mount the frame
in
position to the overhead
building structure. Use 1/2 inch diameter or
larger bolts
on
each side leg. Position the
frame to facilitate the connection
of
gas supply
piping, and on models equipped with an
electricalvalve, the electrical supplywiring.
2.
Gas
Supply
Piping: The piping provided with
the heater is assembled to nestle
in
the
channel
of
the hanging frame. Connect
an
additional length of 1/2 inch pipe long enough
to clearthe top ofthe frame.
Screw the heater onto the 1/2" NPT x 1 inch
long nipple at the outlet end
of
the piping. The
heater should be turned to allow the control
handletoface
in
the desired direction.
Note: A 1/8 inch
NPT
plugged
tapping,
accessible for test gauge connection, must
be
installed immediately upstream
of
the gas
supply connection to the heater. Use asuitable
pipethread sealant
on
all gasconnections.
3.
Heater
Mounting:
Set the heater (less ref
lector) with the piping assembly attached into
the suspended hanging frame. The piping will
nestle
in
the hanging bracket channel. Install
and tighten the two (2) 3/8 inch bolts supplied
with the frame and firmlysecure the base ofthe
heater
in
place.
Electrical
Supply:
On
the A244V 24 volt
model, the electrical inlet
is
provided
on
the
right side
of
the heater opposite the gas inlet
piping.
The
electrician
should
supply
a
connection box
as
shown adjacent to the
heater
electrical
inlet
and run W'
rigid
waterproofconduit
up
to the rightjustinsidethe
frame channel.
WARNING:
The
minimum
fire
hazard
clearance marked
on
the heater must be
maintained from vehicles parked below the
heater.
The electrical input required to the heater
is
0.550 Amps at 24V (rated at 8 Watts). A
40VA
transformerwill service
up
to three (3)heaters.
A NEC Class
2,
24
volt transformer (20
VA
rating) circuit must be supplied to the heater.
The transformer
is
to
be
installed
in
thejunction
box or
in
accordance with local codes, but
in
no
case closerthan three (3) feettothe reflector.
4.
Piping Hook-up: Connect the additional gas
supply piping. Leak test all piping joints with a
soap-water solution.
Do
NOT use a match to
testforgas leaks.
5.
Reflector
Mounting:
Attach the reflector by
means
of
the three (3) stainless steel wingnuts
atthetop ofthe heater.
6.
Heater
Start-up:
Follow the lighting and
operating instructions on the rating plate
attachedto the hanging frame.
15

16
"L"
Bracket
Cliiii!!!===5\il-- {Supplied by
Installer)
'lz"
"EL" Condulet
(Supplied by
Installer)
SUNGLd"
INFRARED
HEATERS
MODELA242
Replacement Parts List
Item Part No.
1 35031
2 80023
3 80036
4 8003
5 70036
6 70055
7 70059
'lz"
Electric
Conduit (Supplied
by Installer)
Description
Frame,
PH
Hanging
Elbow, 1/2"
Nipple, 1/2" X 16 1/2"
Nipple, 1/2" X Close
Bolt, 3/8" X 2 1/2"-Hex
Washer, 3/8" SAE Zn
Nut, 3/8"-16 Hex-Zn

The Sunglo™ E Series heaters have a new fully
automatic 24 volt ignition and flame monitoring
system.
TheE
Series head is adirectreplacement
for
Models
A244V
and
PSA265V.
Use
the
installation instructionsprovided forthose heaters
for
theE
Series.
Once the Sunglo
rM
E Series heater is properly
installed and wired to
an
appropriate24 volt power
source, followthe lighting instructionsbelow.
To
Turn
"ON"
Heater:
1.Turnthe gas valve "ON".
2.Turn the electrical power"ON".
To Turn
"OFF"
Heater:
1.
Turn the electrical power"OFF".
2.Turnthe gasvalve "OFF".
A CAUTION
If burner fails to ignite, shut OFF electrical
power and wait (5) five minutes to repeat the
lighting process. ·
DO NOT
attempt
to
light
this
heater
manually.
Bocly
-
Grouncl
Robertshnw
2CHL
-2
Pilot
Ignition
Module
Cho.nnel
P~ts
MQrk
IODX
-24V
SUNGLd"
INFRARED
HEATERS
MODEL E
Series
GAS-FIRED INFRARED HEATER
For
Indoor/Outdoor
Operation
NOTE: Both Switch and
Transformer are to be
supplied by the installer.
It is recommended that multiple units be placed
on individual switches to provide more flexibilty
in
heating, and, to allow for easy reset of a
single unit.
Wiring Diagram
Models: A244E & PSA265E
Internal to Heater External from Heater
I
Mo,.entQry
Switch
N.C.
1
Reset
Switch
llnly
I
I
Switch
TrQnsforl'ler
-
CLQss
2
1 r
__
...,
24
vAc
-
20
VA
Blue
24
VAC
(+):t-~~-~-~8
1 24
VACI
I 120
VAC
Green
1 I I
24
VAC
<->
I
__
Current
Drnw
I
TrQnsforl'ler
Clnd
switch
to
.78 AMP/18.7
VA
I
be
supplied
by
lnst<lller
I
I
17

90078-2
10302 Kit, A244E Micro Module

SUNGLd"
INFRARED
HEATERS
MAINTENANCE AND TROUBLESHOOTING
I
---~
12
HEATER HEAD ASSEMBLY
Replacement Parts List
Item Part No. Description
1 70017 Nut,
Y..
-20 Hex SS
2 70024 Washer,
Y..
SAE SS
3 10261 Reflector,
PH
4 70006 bolt,
Y..
x % Hex SS
5 70033 Washer,
Y..
Inter SS
6 27006 Assy,
PH
Emitter Grid
7 70025-2 Clip, Stainless Steel
8 30225 Shield,
PH
Head
9 30202 Pan,
PH
Head
10
70005 Screw, #8
x%
SP SS
11
30204-1 Cylinder,
PH
Perf (7000)
12 27007 Assy,
PH
Burner Pltd
13 70030 Clamp,
1"
14
35001-31 Orifice,
#31
DS
(Nat)
35001-49 Orifice, #49
DS
(Propane)
15
35012 Adapter, Orifice %
16
90002-3 Control, 7000 MRLC Nat
90003-3 Control, 7000 ERLC Nat-24V
90004-3 Control, 7000 MLC-Propane
17
80005 Nipple, % x
2Ys
Blk
20 27018-1 Assy,
PH
H Base
27018-2 Assy, 24V
PH
Head Base
21
90031 Thermocouple T46518
22 80031 Tubing,
AL-Y..
x 14L
23 90021 Pilot, Natural #27919
90022 Pilot, Propane 327920
24 90015 Natural Pilot Orifice
90016 Propane Pilot Orifice
25 30258
PH
Pilot Shield
26 27025 Assy, 7000 Handle
27 30213 Channel,
PH
Pilot
28 70020 Screw,
#1
0 x 1
Y..
SS
29 30299 Cover,
PH
Pilot Hole
30 80026 Tubing Fastener-%"
19

9
20
SUNGLd"
INFRARED
HEATERS
No. Part No.
1 90065-2
2 70037
3 70038
4 30623-3
5 70072
6 30623
7* 30629
8 90072
9 90071
10* 70066
11
30204-5
*Item not shown
DSI
OPTIONAL
SPARK IGNITION
SYSTEM
Description
Electrode with lead
Screw, #8-32 x 3/8
Nut, #8-32
Ignitor Cover
Screw, #8-32x 1/288
Bracket, A270 Ignitor
Plate, Ignitor Ground
Battery, AA 1.5 Volt
Ignitor, BP-E1
Screw,
#1
0-24x .250L
Cylinder,
PH
Perf SS
Other manuals for PSA 265
5
This manual suits for next models
6
Table of contents
Other SunGlo Patio Heater manuals

SunGlo
SunGlo PSA 265 User manual

SunGlo
SunGlo A270 User manual

SunGlo
SunGlo PSA 265 Assembly instructions

SunGlo
SunGlo A242 General instructions

SunGlo
SunGlo A270 Manual

SunGlo
SunGlo PSA 265 Instruction manual

SunGlo
SunGlo PSA 265 Instruction manual

SunGlo
SunGlo PSA 265 Instruction manual

SunGlo
SunGlo A270-SS User manual

SunGlo
SunGlo A270 User manual