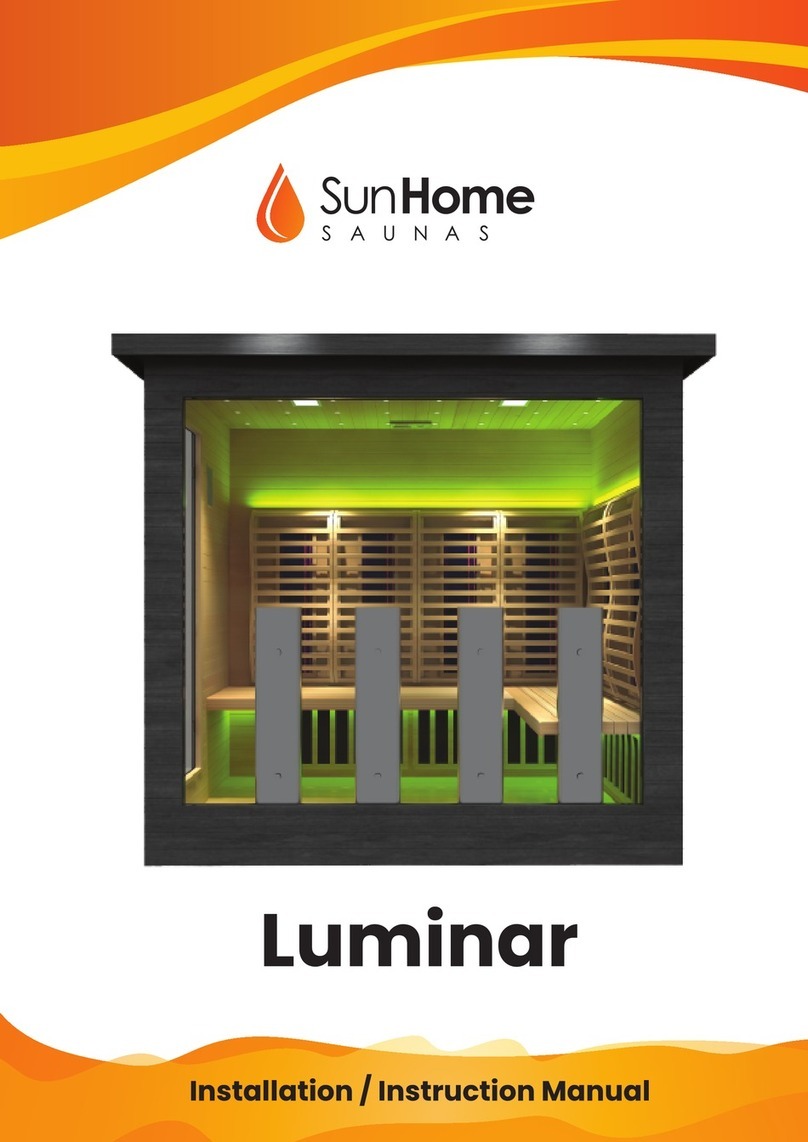
SunHome Luminar 2 Service manual

Luminar Outdoor Full-Spectrum
Infrared Saunas
Installation / Instruction Manual

1
Contents
1.0 Installation Information and Precautions ................................................................... 3
2.0 Sauna Parts List........................................................................................................ 4
3.0 Required Tools.......................................................................................................... 5
4.0 Installation Procedure................................................................................................ 5
4.1 Frame and Heater Assembly ................................................................................. 5
4.2 Installing Accessories .......................................................................................... 11
5.0 Operating Cautions ................................................................................................. 12
6.0 Using the Control Panel .......................................................................................... 14
6.1 Using the Physical Control Panel......................................................................... 14
6.2 Using the Control Panel Apps.............................................................................. 15
7.0 Maximizing the Enjoyment of your Sauna ............................................................... 18
8.0 Safety Precautions .................................................................................................. 18
9.0 Electrical Specifications........................................................................................... 19
10.0 Troubleshooting..................................................................................................... 20
11.0 Maintenance.......................................................................................................... 20
12.0 Limited Residual Warranty .................................................................................... 21

2
Please watch our videos and read these directions carefully before
assembling and using your sauna.
https://youtu.be/gKiAvQfAGJg?si=gBOcq1LhA-2XF4zk
Follow assembly instructions and keep them for future reference.
The installation of the sauna requires a minimum of 2 people.
You should NOT try to install the sauna without help!

3
1.0 Installation Information and Precautions
1. Overall assembled external dimensions are 57” W x 51.5” D x 82.7” H.
2. A 6-inch space is required between the back of the sauna and the wall outlet.
3. A 12-inch space is required between the top of the sauna and the ceiling.
4. Provide enough access space to the wall plug and outlet so that the sauna can
be easily unplugged if necessary.
5. No plumbing or plumbing fixtures should be placed in the sauna.
6. Do not allow children inside the sauna while it is turned on.
7. Do not touch the heaters while your sauna is turned on, as they are very hot and
may cause burns.
8. Keep all liquids away from the heating panels.
9. Install the sauna in an area that is dry.
10.Flammable objects and corrosive chemical substances should be kept far away
from the sauna.
11.Place your sauna on a level surface that will not flood. The saunas are very
heavy so a solid foundation is recommended. Luminar saunas are designed to
be placed outside. Selecting a location without excessive rain and wind is highly
recommended.
12.The outdoor infrared saunas are not designed to withstand more than one foot of
snow. Remove snow from the base and roof of the sauna as appropriate. Not
doing this may void your Warranty.
13.The sauna must be placed where there is never standing water, so building it
directly over dirt or grass is not recommended. An elevated concrete or wood
base if preferable. Not doing this may void your Warranty.
14.A protective cover or structure, such as a gazebo is advised for locations that
receive a lot of rain. Be aware that sideways rain can get into the sauna and
damage the electronics. Avoid placing your sauna where it could be exposed to
periods of heavy rain. Please ensure the sauna remains covered and protected
during weather conditions such as rain or snow. Not doing this may void your
Warranty.
15.The supplied cover should be used at all times if the sauna is not protected from
the elements by a structure, gazebo, or other cover. Failure to not use the cover
when the sauna is exposed outdoors voids the warranty. Sun Home does not
warranty against water damage.

4
16.The infrared heaters will have trouble reaching optimal temperatures when the
outside ambient temperature is 400F or lower. We recommend not using the
sauna when the outside temperature is lower than 250F.
17.Any electrical service for your sauna must be performed by a qualified and
licensed electrician with complete knowledge of local codes and regulations.
18.Please ensure your sauna plugs into a 240 V outlet with a GFCI, installed by a
licensed electrician.
19.This product may cause excessive happiness - proceed with caution.
2.0 Sauna Parts List
Protective Cover Bench Support (4)
Bolt B for red light
therapy (4)
Book holder
Cup holder (2)
Oxygen Ionizer
Bolt A (8)
Screw A for ionizer (2) Screw B universal (20)
Screw C for seat
support (12)
Screw D for back rest
(30)
Screw E (30)
Screw F for outer roof
(50)
Screw covers
Plastic plugs

5
3.0 Required Tools
●Glass suction cups (optional)
●Phillips head long drill bit
●Drill or impact driver
●Clear silicone-based caulking (optional)
●Caulking gun (optional)
●Lifting straps (optional)
●Ladder (optional)
4.0 Installation Procedure
4.1 Frame and Heater Assembly
The following pictures are used for your reference. Don’t worry if your sauna is
slightly different from the pictures, just follow the steps.
1. Open the sauna packages in a large area. Place the Floor Panel at the
desired location.
2. Raise the Side Panels.
3. Before assembling the panels, use silicone-based caulk and a caulking gun to
apply caulk to the seam on the vertical ends of panels from the top to the
bottom where the panels attach to each other. This weather-proofs the
sauna.

6
4. Use the screws in the “sauna room assembly” bag. Screw these into the pre-
drilled holes in the sides of the panels. This secures the side panels to the
back panel. Use care to make the seams as tight as possible.
5. Attach the Front Panel, caulking the seams as was done on the back panel,
then screwing the panel to the side panels.
6. Attach the Door Panel in the same way.
7. If there are wires and cables in the notches at the top of the walls, lift them
out.

7
8. Lower the Ceiling Panel onto the ledge near the top of the walls. The side
with the wires and connectors faces up to the sky. Place the ceiling panel so
the side with the long wire coming from the back is the back side of the
sauna.
9. After the ceiling panel is in place, connect the electrical wires that were
originally in the notches in the wall panels to the wires mounted to the fixtures
in the ceiling panel (male to female connectors).
10.There are two black metal electrical boxes on the top of the ceiling panel. On
the box nearest the corner of the panel, find the connections labeled “HT3C”
and “HT2B.” Plug the cable from “HT2B” into the cable that passes through
the wall opening nearest the box. Plug the cable from “HT3C” into the other
cable.
11.Connect the two thin blue wires from the LED lights in the ceiling.

8
12.The thick black cable connects the sauna to the power source. Pass in
through and out the notch in the wall panel.
13.Connect the blue ethernet cable to the “CP” terminal on the same black
electrical box.
14.The connector with the red and black wires will be connected to the roof
lighting later. The white box is a circuit breaker for the sauna power.
15.Using the pre-drilled holes along the perimeter of the wall panels, screw the
walls to the ceiling panel.
16.After testing all electrical power and lights, it's time to place the roof panel
over the ceiling panel.
17.Plug The connector with the red and black wires into the connector wire
connector that's coming from the roof panel.
18.Using the “outside top wood” screws, attach the trim strips along the seam
between the wall panels and the roof, securing the roof to the entire
structure.
19.Make the last electrical connections for the heaters by plugging the black
cables by the floor into the outlets above them.

9
20.Take rectangular pieces with the slats and place them in the channels
between each pair of blocks on the floor.
21.Take the seat panels and place them against the walls so that the LED lights
in the curved edge of the bench are in the front. Push the bench flush against
the walls. Open the plastic bag labeled “for support under seat.” Screw two of
them vertically into each end of the benches.
22.Connect the wires coming from the back of the sauna to the connectors in the
front of the benches.

10
23.Next install the backrests. Place the backrests against the wall and the sides
aligned with the holes in the wall. Connect wire from the top of the backrests
to the wire that comes through the wall for the LED lights. Use the screws for
the backrest to attach the backrest to the wall using the pre-drilled holes in
the backrests.
24.The next step is attaching the front heaters. Using the bolts, slide the rubber
washer on one side of the bolt. Feed the bolt through the hole in the glass
and put a washer on the other side, so that the glass is sandwiched between
the two washers, protecting the glass and providing a weather-tight seal.
25.Screw the bolt into the back of the heater, attaching the heater to the glass.

11
26.Plug the heaters into the outlets.
27.Attach the cup holder and other accessories to a wall using a screw.
4.2 Installing Accessories
Although there are small pre-drilled holes for the placement of these items, the
Towel Rack, Magazine Holder, and Cup Holder can be placed wherever you
prefer as long as you do not damage the wood. If installing in a different location,
it would be a good idea to pre-drill the holes before you tighten the screws. The
Oxygen Ionizer should be installed in the upper left of the Back Panel, where
there is a small wire that should be fed from the Top Panel.
Oxygen Ionizer
Speaker
Chromotherapy Light
Cup Holder
Towel Rack
Magazine Holder
Congratulations! The Installation is Complete!

12
5.0 Operating Cautions
•Check all the circuitry and the plug connections carefully.
•Do not share the outlet with other electrical appliances to avoid danger.
•Do not use the sauna room if under the influence of alcohol, drugs or
medications.
•Pregnant women or persons with poor health should consult their physicians
before use.
•Minors should be supervised in order to prevent injury.
•Allow up to 30 minutes heat-up time.
•Do not use the room for dying clothes, bathing suits, etc.
•Do not put animals in the room.
•After 2 hours of continuous use, shut the sauna down for one hour.
•When installing and using this electrical equipment, basic safety precautions
should always be followed.
•It's normal for the heaters to turn off temporarily during the session once the
sauna reaches the desired temperature. It's important to not manually keep the
heaters on the entire time or they will overheat and face reduced lifespan. Please
the desired temperature and then do not touch the heater controls for the rest of
the session.
•Do not use the sauna immediately following strenuous exercise. Wait at least 15
minutes to allow the body to cool down completely.
•Excessive temperatures have a high potential for causing fetal damage during
the early months of pregnancy. Pregnant or possibly pregnant women should
contact their physician prior to using the sauna.
•Hyperthermia Danger: Prolonged exposure to hot air will induce hyperthermia.
Hyperthermia occurs when the internal temperature of the body reaches a level
several degrees above the normal body temperature of 98.6F (37C). While
hyperthermia has many health benefits, it is important not to allow your body’s
core temperature to rise above 103F (39.5C). Symptoms of excessive
hyperthermia include dizziness, lethargy, drowsiness, and fainting. The effects of
excessive hyperthermia may include failure to perceive heat, failure to recognize
the need to exit, unawareness of impending hazard, fetal damage in pregnant
women, physical inability to exit the sauna, and unconsciousness.

13
•Persons suffering from obesity or with a medical history of heart disease, low or
high blood pressure, circulatory system problems, or diabetes should consult a
physician prior to using the sauna.
•Persons using medications should consult a physician before using the sauna
since some medications may induce drowsiness while others may affect heart
rate, blood pressure, and circulation.
•Exercise care when entering or exiting the sauna.
•Never sleep inside the sauna while the unit is in full operation.
•Do not use any type of cleaning agents on the interior of the sauna.
•Do not stack or store any objects on top of or inside the sauna.
•If the power supply cord becomes damaged, it must immediately be replaced by
the manufacturer or its agent or a similarly qualified person to avoid a hazard.
•Do not use the unit during an electrical storm, as there is a remote risk of shock.
•Altering or tampering of any electrical connections on the power supply will void
the manufacturer’s warranty.
•Dry your hands before handling electrical controls. Never unplug the power cord
or adjust the controls with wet hands or when you have wet bare feet. A danger
of electrical shock exists.
•To safeguard against burns, do not touch heaters or lamps directly
•Do not attempt any repair without consulting the manufacturer first. Unauthorized
repair attempts will void the manufacturer’s warranty.
•The sauna must use a GROUND FAULT CIRCUIT INTERRUPTER (GFCI) on
the electrical circuit.

14
6.0 Using the Control Panel
6.1 Using the Physical Control Panel
1. Temperature, Previous song, Change channel – Press the 10 key to turn on
the infrared heaters. Press the 1 key to raise the temperature setting. Press the 2
key to lower the temperature setting. Press the 5or 6key to enter music mode.
In music mode, press the 1 key to play the previous song. In radio mode, press
the 1 or 2key to change the channel.
2. Convert Celsius into Fahrenheit – Press and hold the 10 key.
3. Time, Volume – In infrared mode, press the 3key to increase the time setting.
In music mode, pressing the 3key increases the volume for music and radio
mode. Pressing the Bluetooth 6key then the 3 key increases the volume.
In infrared mode, press the 4key to decrease the time setting. In music mode,
pressing the 4key decreases the volume for music and radio mode. Pressing the
Bluetooth 6key then the 4 key decreases the volume.
5. FM Radio – Press the 5key to enter the radio mode. Press the 1key or the 2
key to search the station. Five seconds later, the control will automatically jump

15
to the infrared mode. Press the 5key to display radio status and again to disable
the radio function.
6. Bluetooth / USB – Press the 6key for 5 seconds to enter Bluetooth mode,
then press again to display Bluetooth status. Press to turn off Bluetooth function.
After connecting Bluetooth with a mobile phone, Bluetooth music can be played
on the device. Hold the 6key for 5 seconds to enter USB mode, then this key will
automatically jump to infrared mode. Hold the 6key to display the USB status
and press again to turn off the USB function. You can play MP3 music through
the USB port.
7. Color lights on key – The order is RGB > R > G > B > RG > RB > GB > Turn
off the mood lights light > automatic cycle. (nine modes)
8. Internal light control key – Press the 8key to turn on or turn off the internal
lights.
9. External light control key – Press the 7key to turn on or turn off the external
lights.
11.Power – Press key 11 to turn power on or off.
12. USB/Bluetooth – Press key 6to enable USB or Bluetooth.
6.2 Using the Control Panel Apps
To download the Control Panel App to your mobile phone:
1. Open your browser or camera, scan the appropriate QR code below.
Android
iPhone

16
2. Download and install the App.
1Power button – Press the 1key to power up the lights and heaters.
2 / 3 Temperature, Previous song, Manual search – In infrared mode,
these keys change the temperature setting. In music mode, they change
the song. In radio mode, they change the channel.
4Time, Volume – In infrared mode pressing the key increases the time
setting. In music and radio mode it increases volume.
5Time, Volume – In infrared mode pressing the key decreases the time
setting. In music and radio mode it decreases volume.

17
6Color lights on key – The order is RGB > R > G > B > RG > RB > GB
> Turn off the mood light > automatic cycle. (nine modes)
7Brightness of screen – Press the key to change the screen
brightness.
8Internal light control key – Press the key to turn on or turn off the
internal lights.
9External light control key – Press the key to turn on or turn off the
external lights.
10 FM Radio – Press the 10 key to turn on the radio mode. Press the 3
or 4 key to search the station. Five seconds later, the control will
automatically jump back to infrared mode. Press to display radio status
and press to disable the radio function.
11 Bluetooth /USB function key – Press the 11 key and hold for five
seconds to enter Bluetooth mode. Press this key to display Bluetooth
status. Press again to turn the Bluetooth function off. After connecting
Bluetooth with a mobile phone, Bluetooth music can be played.
Long press the 14 key to enter USB mode for 5 seconds. Long press this
key to display the USB status. Press again to turn off the USB function.
You can play MP3 music after connecting to the USB
12 Infrared function switch key – Short press this key to open the
infrared heating body. Press again to close.
14 USB/MP3 – Press to enable USB or MP3.
15 0C/0F – Press to convert temperature reading to Fahrenheit or
Celsius.

18
7.0 Maximizing the Enjoyment of your Sauna
Unlike a traditional sauna, infrared heats the body directly. Air temperature in the sauna
is not as important as the type and quality of the infrared being received. We
recommend the following protocol:
Turn the sauna on for 10-15 minutes to allow the heaters to come up to optimal
temperature and for the cabin to warm to a comfortable temperature.
When you enter the sauna, set the time to the desired session time and turn the
thermostat up to 149 degrees. This will keep the heaters on the entire time to ensure
that you are receiving constant infrared heat. During a 30-minute sauna session, the air
temperature will reach between 115 – 125 F.
8.0 Safety Precautions
READ INSTRUCTIONS – All safety and operating instructions should be read before
the sauna is installed & operated.
RETAIN INSTRUCTIONS – The safety and operating instructions should be retained for
future reference.
HEED WARNINGS – All warnings on the sauna should be adhered to.
FOLLOW INSTRUCTIONS – All operating and usage instructions should be followed at
all times.
CLEANING – Unplug the sauna from the wall outlet before cleaning. Do not use liquid
cleaners or aerosol cleansers inside the sauna. Use a damp cloth for cleaning.
ATTACHMENTS – Do not use attachments that are not recommended by the
manufacturer as they may cause a hazard.
WATER OR MOISTURE – Do not use this product near water-for example near a
bathtub, in a wet basement, or near a swimming pool or similar area.
GROUNDING OR POLARIZATION – This sauna is intended for use with a 3-wire
properly grounded power socket Do not defeat the safety purpose of the supplied line
cord and plug.
POWER SOURCES – This product should be operated only from the required type of
power source indicated on the marking label. If you are not sure of the type of power
supplied to your home, consult your local power company.

19
POWER-CORD PROTECTION – Power supply cords should be routed so they are not
likely to be walked on or pinched.
LIGHTNING – For added protection for this product during a lightning storm, or when it
is left unattended and unused for long periods of time, unplug it from the wall outlet.
OVERLOADING – Do not overload wall outlets and extension cords as this can result in
a risk of fire or electrical shock.
SERVICING – Always unplug this product from the wall outlet before servicing the
product.
POWER SUPPLY – Do not remove power supply covers. No user-serviceable parts are
located inside the power supply.
REPLACEMENT PARTS – When replacement parts are required, only use parts
specified by the manufacturer. Unauthorized substitutes could result in fire, electrical
shock or other hazards.
SAFETY CHECK – Upon completion of any service or repairs to this product by a
service technician, ask the technician to perform safety checks to make certain that the
product is in proper operating condition.
9.0 Electrical Specifications
Luminar 2
Luminar 5
Voltage, 50-60 Hz
(dedicated circuit)
240 V
240 V
Current (amps)
20 A
30 A
Wattage
4800 W
7200 W
Plug
NEMA L6-20
NEMA L6-30
If a dedicated electrical outlet is required, it should be installed with a GFCI by a
licensed electrician. Failure to do this will void the warranty.
This manual suits for next models
1
Table of contents
Other SunHome Plumbing Product manuals
Popular Plumbing Product manuals by other brands

Axor
Axor Terrano 37135XX1 parts list

Sanipex
Sanipex BAGNODESIGN BDM-MEZ-307-B Series installation guide

Toto
Toto RUFICE TTMR307 Installation

Delta 52001
Delta 52001 52001 Series installation instructions

Geberit
Geberit 50 Maintenance manual

Signature Hardware
Signature Hardware CIERRA 946495 quick start guide