sunjoe SBJ603E User manual

© 2021 by Snow Joe®, LLC
All rights reserved. Original instructions. SAVE THESE INSTRUCTIONS
1
EN
A Division of Snow Joe®, LLC
R
OPERATOR’S MANUAL
Model SBJ603E Form No. SJ-SBJ603E-880E-MR7
ELECTRIC BLOWER +
VACUUM + MULCHER
13-AMP | 17:1 MULCHING RATIO
IMPORTANT!
Safety Instructions
All Operators Must Read These
Instructions Before Use
Any electrical appliance can be dangerous if used incorrectly.
Some of the safety precautions given in this manual apply
generally to many appliances. Other warnings are specic to
the use of this electric blower vac.
Always follow these safety guidelines. Failure to do so may
result in serious bodily injury or death.
mDANGER! This indicates a hazardous situation, which,
if not followed, will result in serious injury or death.
mWARNING! This indicates a hazardous situation, which,
if not avoided, could result in serious injury or death.
mCAUTION! This indicates a hazardous situation, which,
if not avoided, could result in minor or moderate injury.
General Safety
FOR HOUSEHOLD USE ONLY
Before using, be sure that everyone using this tool reads
and understands all safety instructions and other information
contained in this manual. Save this manual and review it
frequently prior to using this tool and when instructing
others on the proper operating procedures.
mCAUTION! Wear appropriate hearing protection during
use. After long periods of extended use, the noise generated
from this appliance may cause hearing loss if your ears are
not properly protected.
mWARNING! When using electric yard tools, basic safety
precautions should always be followed to reduce the risk of
re, electric shock and personal injury, including the following:
1. Keep work area clean and well-lit – Cluttered, dark
areas invite accidents.
2. Replacement parts – When servicing this unit, use only
identical replacement parts. Replace or repair damaged
cords immediately.
3. Keep children, bystanders and pets away – All
spectators, including pets, should be kept a safe distance
away from the work area.
4. Dress properly – Do not wear loose clothing or jewelry as
such articles can become caught in moving parts. Wear
a protective covering to contain long hair. Wearing rubber
gloves and substantial non-slip footwear is recommended
when working outdoors.
5. Extension cords – To prevent electric shock, use only
with an extension cord suitable for outdoor use.
6. Avoid accidental starting – Do not carry the blower vac
with your nger on the switch. Make sure the switch is o
before plugging in the unit.
mDANGER! Do not manually place objects into the
vacuum tube while operating the unit as this can seriously
damage the unit and/or harm the operator. Keep both hands
on the handles while the power is on.
DO NOT ATTEMPT to remove material or hold material to be
vacuumed when the blower vac is on. Make sure the blower
vac is o when clearing jammed material from the vacuum
tube. Do not pick up the blower vac by the tube or attempt to
carry the unit by the tube.
mCAUTION! Moving parts will continue to run for several
seconds after turning o the machine.
7. Do not abuse the cord – Never carry the blower vac
by the cord or yank the cord to disconnect it from the
receptacle. Keep the cord away from heat, oil and sharp
edges.
8. Moving parts – Keep hands and feet away from moving
parts. Keep guards in place and in proper working order.
9. Do not force the tool – It will perform better with less
likelihood of personal or mechanical injury if it is used at
the rate for which it was designed.
10. Wear personal protective equipment – When using this
tool, wear safety glasses with side shields or goggles to
provide necessary eye protection. Wear ear defenders to
prevent hearing damage. Use a face or dust mask if the
work environment is dusty.
11. Disconnect the tool – Disconnect the blower vac from
the power supply when it is not in use, before servicing
it, when changing accessories and when performing any
other maintenance task.
12. Store idle tool indoors – When not in use, the blower vac
should be stored indoors in a dry and high or locked-up
place out of the reach of children.

2
13. Maintain the blower vac with care – Keep the blower
tube and the fan area clear and clean for optimal
performance and to reduce the risk of injury. Inspect the
extension cord periodically and immediately replace it
if damaged. Keep the handles dry, clean and free from
oil and grease. Follow the additional recommendations
described in the maintenance section of this manual.
14. Ground fault circuit interrupter (GFCI) protection should
be provided on the circuit(s) or outlet(s) that are to be used
for the blower vac. Receptacles are available having built-
in GFCI protection and may be used for this measure of
safety.
15. Use the right tool – Do not use the tool for any job except
that for which it is intended.
16. Double insulation – Double insulation eliminates the use
of the usual three-wire grounded power cords, thereby
providing a measure of safety during the operation of
electric power tools. In a double insulated appliance,
all exposed metal parts are isolated from the internal metal
motor components with protecting insulation. Double
insulation tools do not need to be grounded.
NOTE: The double insulated system is intended to protect
the user from shock resulting from a break in the tool's
internal insulation. Observe all normal safety precautions
to avoid electrical shock.
17. Avoid dangerous environments – Do not use the blower
vac in rain, damp or wet locations. Do not operate the
blower vac in gaseous or explosive atmospheres or use
the blower vac to pick up ammable or combustible
liquids. Motors in these tools normally spark, and the
sparks might ignite fumes.
18. Stay alert – Watch what you are doing. Use common
sense. Do not operate the blower vac when you are
tired or under the inuence of drugs, alcohol or other
medication.
Additional Safety Instructions
• Use extra care when cleaning on stairs.
• Keep rm footing and maintain good balance at all times.
Do not overreach. Overreaching can result in loss of
balance.
• Turn o all controls before unplugging the tool.
• Do not use the tool if the power switch does not turn it ON
or OFF. Any tool that cannot be controlled with the switch is
dangerous and must be repaired.
• Do not use the tool with a damaged plug. If the tool is not
working as it should or has been dropped, damaged,
left outdoors or dropped into water, return it to an
authorized Snow Joe®+ Sun Joe®dealer or contact the
Snow Joe®+ Sun Joe®customer service department at
1-866-SNOWJOE (1-866-766-9563).
• Do not pick up anything that is burning or smoking, such as
cigarettes, matches or hot ashes.
• Do not use without the dust bag and/or lters in place.
• Carefully inspect your appliance prior to use and follow all
label and marking instructions.
• Keep the end of the blower tube away from your face and
body.
• Always unplug this appliance before connecting or
disconnecting the vacuum hose.
• Do not use for wet material.
• Keep all parts of your body away from any moving parts
and all hot surfaces of the unit.
• Do not put any object into the tool's openings. Do not use
the tool with any opening blocked; keep openings free of
dust, lint, hair or any other object that may reduce air ow.
• Check the work area before each use. Remove all objects
such as rocks, broken glass, nails, wire or string which can
be thrown or become entangled in the machine.
• Service on the product must be performed by qualied
repair personnel only. Service or maintenance performed
by unqualied personnel could result in injury to the user or
damage to the product.
• This blower vac is intended for residential use only.
Commercial use of this product is prohibited and will void
the manufacturer's warranty.
• Never run the unit without the proper equipment attached.
Always ensure the blower tubes are properly installed.
Specic Safety Rules
For Blower Vacs
• This tool has been designed for blowing/collecting as well
as vacuuming/shredding dry leaves and other dry garden
rubbish, such as grass and twigs.
• When operating the unit as a blower, never point the blower
nozzle in the direction of people or pets or in the direction
of windows. Use extra caution when blowing debris near
solid objects, such as trees, automobiles and walls.
• Be sure to secure the unit when transporting it.
• Never douse or squirt the unit with water or any other liquid.
Clean the unit after each use as described in the cleaning
and storage section.
Electrical Safety
1. Ground fault circuit interrupter (GFCI) protection should
be provided on the circuit(s) or outlet(s) to be used for
this electric blower vac. Receptacles are available having
built-in GFCI protection and may be used for this
measure of safety.
2. Make sure that the mains voltage matches that listed on
the unit's rating label. Using the improper voltage can
damage the motor and injure the user.
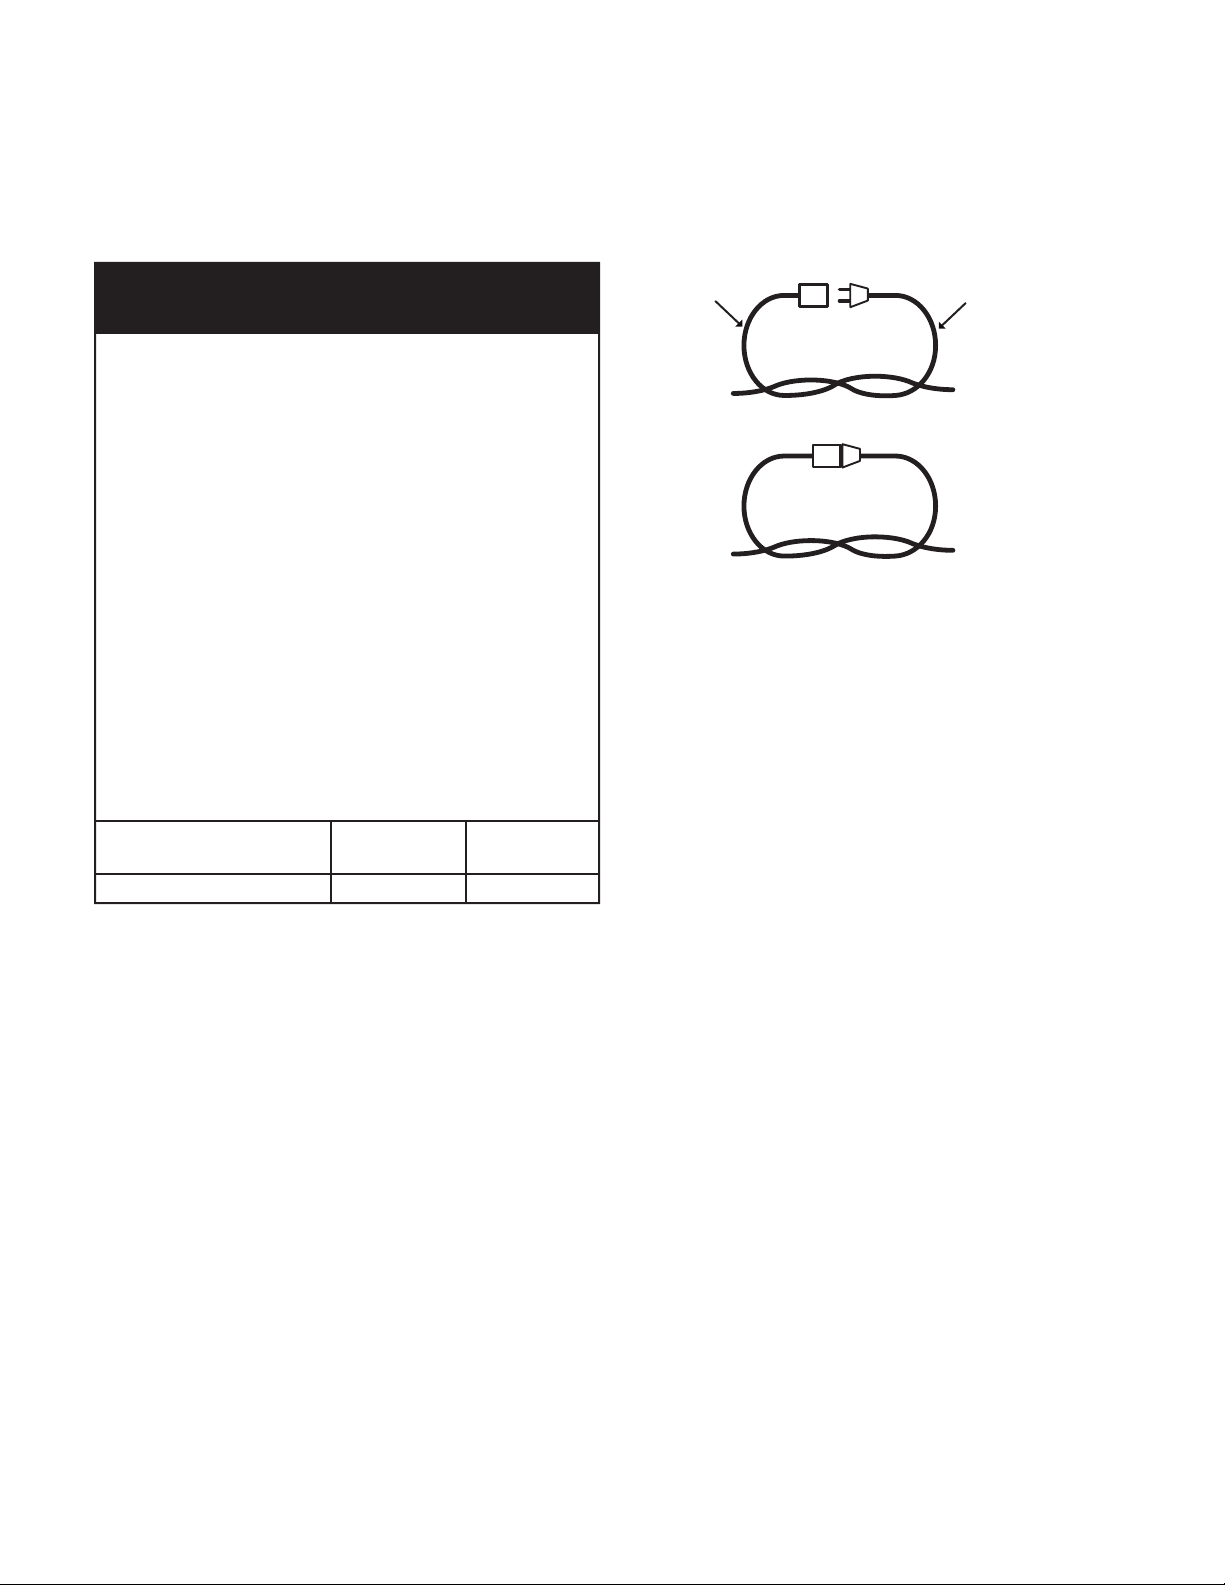
3. To prevent electric shock, use only with an extension cord
suitable for outdoor use, such as SW-A, SOW-A, STW-A,
STOW-A, SJW-A, SJOW-A, SJTW-A, or SJTOW-A.

3
Before use, check that the extension cord is in good
condition. When using an extension cord, make sure to
use one heavy enough to carry the current your product
will draw. An undersized cord will cause a drop in line
voltage resulting in loss of power and overheating.
4. To reduce the risk of electric shock, this appliance has a
polarized plug (i.e. one blade is wider than the other).
Use this appliance only with a polarized UL-,
CSA- or ETL-listed extension cord recommended for
outdoor, all-weather use, such as the Snow Joe®+
Sun Joe®SJTW-A 14-gauge 50-foot extension cord
with lighted end (Model PJEXT50-B). Visit sunjoe.com to
purchase this extension cord online or, to order by phone,
call 1-866-SNOWJOE (1-866-766-9563).
The appliance plug will t into a polarized extension
cord only one way. If the appliance plug does not t
fully into the extension cord, reverse the plug. If the plug
still does not t, obtain a correct polarized extension
cord. A polarized extension cord will require the use of a
polarized wall outlet. The extension cord plug will t into
the polarized wall outlet only one way. If the plug does
not t fully into the wall outlet, reverse the plug. If the plug
still does not t, contact a qualied electrician to install
the proper wall outlet. Do not modify the appliance plug,
extension cord receptacle or extension cord plug in any
way.
5. To prevent the appliance cord from disconnecting from the
extension cord during operation, make a knot with the two
cords as shown in Table 1.
6. Do not abuse the cord. Never pull the blower vac by the
cord or yank the cord to disconnect it from the receptacle.
Keep the cord away from heat, oil and sharp edges.
Extension Cord
Length
Wire Gauge (A.W.G.):
Up to 50 ft
(15 m)
+50 ft - 100 ft
(+15 m - 30 m)
14 12
mWARNING m
Electric shock may cause SEVERE INJURY or
DEATH. Heed these warnings:
• Do not allow any part of the electric blower vac to
make contact with water while it is in operation. If the
appliance becomes wet while turned o, wipe dry
before starting.
• Use only a UL-, CSA- or ETL-rated extension cord
for outdoor, all-weather use, such as the Snow Joe®+
Sun Joe®SJTW-A 14-gauge 50-foot extension cord
with lighted end (Model PJEXT50-B). Visit
sunjoe.com to purchase this extension cord online or,
to order by phone, call 1-866-SNOWJOE
(1-866-766-9563).
• Do not use an extension cord over 100 ft (30 m).
• Do not touch the appliance or its plug with wet hands
or while standing in water. Wearing rubber boots
oers some protection.
EXTENSION CORD CHART
(B) Connect plug and receptacle
Cord set Appliance cord
(A) Tie cord as shown
Table 1. Method of Securing Extension Cord

4
Double-Insulated Appliances
In a double-insulated appliance, two systems of insulation
are provided instead of grounding. No grounding means is
provided on a double-insulated appliance, nor should a means
for grounding be added to the appliance. Servicing a
double-insulated appliance requires extreme care and
knowledge of the system, and should be performed only by
qualied service personnel at an authorized Snow Joe®+
Sun Joe®dealer. Replacement parts for a double-insulated
appliance must be identical to the parts they replace.
A double-insulated appliance is marked with the words
“Double Insulation” or “Double Insulated.” The symbol
(square within a square) may also be marked on the appliance.
DOUBLE-INSULATED: GROUNDING NOT
REQUIRED. WHEN SERVICING, USE ONLY
IDENTICAL REPLACEMENT PARTS.
This electric blower vac is double-insulated, eliminating the
need for a separate grounding system. Use only identical
replacement parts. Read the instructions before servicing
double-insulated appliances. Use this blower vac only as
described in this manual.

5
Safety Symbols
The following table depicts and describes safety symbols that may appear on this product. Read, understand and follow all
instructions on the machine before attempting to assemble and operate.
READ THE OPERATOR'S
MANUAL(S) – Read,
understand and follow all
instructions in the user
manual(s) before attempting to
assemble and operate.
SAFETY ALERT – Indicates
a precaution, a warning or
a danger.
Immediately remove the plug
from the mains if the power
cable is damaged, frayed or
entangled. Always keep the
power cable away from heat,
oil and sharp edges.
DOUBLE INSULATION –
When servicing, use only
identical replacement parts.
WARNING! Do not expose the
unit to rain or wet conditions.
Wear hearing protection.
Wear eye protection.
Wear breathing protection.
Keep bystanders and children
a safe distance away.
Symbols SymbolsDescriptions Descriptions
DANGER! Rotating blades
pose a serious risk of injury.
Keep hair, clothing, and all
body parts away from the
air intake or any openings.
Secure hair above shoulders
and behind head. Do not
let your hair or clothing get
drawn into the appliance.
Failure to keep hair, clothing,
or body parts away from
air intake could result in
personal injury.
The rotating part will continuously
run for several seconds after you
turn o the machine.
Beware of ying objects
and debris.
WARNING! Turn the machine
OFF and disconnect it from the
power supply before inspecting,
cleaning, changing accessories
or conducting any other
maintenance task.

6
Know Your Electric Blower + Vacuum + Mulcher
Read the owner’s manual and safety instructions carefully before operating the electric blower + vacuum + mulcher.
Compare the illustration below to the electric blowe + vacuum + mulcher in order to familiarize yourself with the location of the
various controls and adjustments. Save this manual for future reference.
1. Variable blower speed control (speed settings 1 to 6)
2. Cord retainer
3. Appliance cord
4. Vacuum + mulcher inlet cover
5. Vacuum + mulcher inlet cover lock button
6. Rear vacuum + mulcher tube
7. Front vacuum + mulcher tube
8. Strap holder
9. Collection bag
10. Handle
11. ON/OFF switch
12. Auxiliary handle
13. Tube release button
14. Blower tube
15. Blower concentrator nozzle
Technical Data
Rated Voltage........................................................120V ~ 60 Hz
Power ...................................................................................13A
No Load Speed ........................................... 10000 – 16000 rpm
Impeller........................................................... Heavy-duty nylon
Air Speed Max ......................................... 240 mph (386 km/hr)
Blower Air Flow Max ................................ 300 cfm (8.5 m3/min)
Vacuum Air Flow Max .............................421 cfm (11.9 m3/min)
Variable Speed Settings .......................................................... 6
Mulching Ratio .................................................................... 17:1
Mode Conversion........................................................Blower to
Vacuum + Mulcher
Bag Capacity...........................................................12 gal (45 L)
Blower Weight .................................................... 6.4 lbs (2.9 kg)
Vaccum + Mulcher Weight .................................... 8.8 lbs (4 kg)
R
1110 12
13
14
15
4
6
7
23
5
1
8
9

7
Unpacking
Carton Contents
• Electric blower + vacuum + mulcher
• Blower tube
• Blower concentrator nozzle
• Front vacuum + mulcher tube
• Rear vacuum + mulcher tube
• Collection bag
• Manual with registration card
1. Carefully remove the electric blower + vacuum + mulcher
and check to see that all of the above items are supplied.
2. Inspect the product carefully to make sure no breakage or
damage occurred during shipping. If you nd damaged or
missing parts, DO NOT return the unit to the store.
Please call the Snow Joe®+ Sun Joe®customer service
center at 1-866-SNOWJOE (1-866-766-9563).
NOTE: Do not discard the shipping carton and packaging
material until you are ready to use the electric blower +
vacuum + mulcher. The packaging is made of recyclable
materials. Properly dispose of these materials in
accordance with local regulations.
IMPORTANT! The equipment and packaging material are
not toys. Do not let children play with plastic bags, foils
or small parts. These items can be swallowed and pose a
suocation risk!
Assembly
mWARNING! To avoid serious personal injury, read and
understand all safety instructions provided.
mWARNING! Do not connect to power supply until
assembly is complete. Failure to comply could result in
accidental starting and possible serious personal injury.
mWARNING! Before performing any maintenance,
make sure the tool is unplugged from the power supply.
Failure to heed this warning could result in serious personal
injury.
mWARNING! To prevent serious personal injury,
make sure the switch is in the OFF (O) position, the unit is
unplugged and the impeller has come to a complete stop
before attaching or removing tubes.
Assemble as a Blower
1. Slide the blower tube forward until the notched area on
the blower housing clicks into the slot on the blower tube
(Fig. 1).
2. Insert the concentrator nozzle onto the end of the blower
tube until it locks into position (Fig. 1).
NOTE: The concentrator nozzle is used to increase
air ow in tight areas (i.e around ower beds,
under decks, etc.).
3. Before using the blower function, securely fasten the inlet
cover over the air inlet by closing the inlet cover until the
lock button snaps into the locked position (Fig. 2).
4. To remove the blower tube, turn the ON/OFF power switch
to the OFF (O) position and disconnect the tool from the
power supply.
5. Press the tube release button and remove the blower tube
(Fig. 3).
Fig. 1
Notched
area
Slot
Blower tube
Air outlet Concentrator
nozzle
Fig. 2
Inlet cover
lock button
Inlet
cover
Fig. 3
Tube release button
Blower tube
ON/OFF switch

8
Assemble as a Vacuum + Mulcher
1. Slide the front and rear vacuum + mulcher tubes together
until the lock button engages (Fig. 4).
2. Slide the inlet cover lock button forward to disengage the
inlet cover. Hold the cover open (Fig. 5).
3. With the blower tube removed, insert the "hooked" side
end of the mulcher tube into the rear clip on the unit.
Securely fasten the mulcher tube by pushing the "wedged"
side end of the mulcher tube up until the lock button snaps
into the locked position (Fig. 6).
4. Insert the collection bag adaptor into the blower air outlet
until the collection bag is securely fastened (Fig. 7),
then clip the bag to the strap holder. Simply press the tube
release button to remove the bag (Fig. 8).
5. To remove the vacuum + mulcher tube assembly, slide the
inlet cover lock button to unlock, then remove the tube
assembly from its housing (Fig. 9).
NOTE: It may be necessary to remove the blower tube
or vacuum + mulcher tubes to clear a blocked tube or
impeller. Make sure to disconnect the unit from the power
supply before attempting to clear any obstructions.
Fig. 4
Rear tube Front tube
Fig. 5
Inlet cover
lock button
Inlet cover
Fig. 6
Rear clip +
Hook side
Wedged side
R
Fig. 7
Collection bag
Air outlet
Collection
bag adaptor
R
Fig. 8
Tube release
button
Fig. 9
Inlet cover
lock button

9
Operation
Connecting to a Power Source
1. Secure the extension cord to the motor housing using the
cord retainer located at the rear of the blower. Securing the
extension cord in this manner prevents accidental removal
of the electrical cord during operation (Fig. 10).
2. Plug the female end of the electrical cord into the
receptacle at the back of the unit.
Starting and Stopping
1. To start the electric blower + vacuum + mulcher, slide the
ON/OFF switch to position (I) (Fig. 11).
2. To stop the unit, slide the ON/OFF switch to position (O)
(Fig. 11).
Speed Control
This unit is equipped with six variable speed settings (1 to 6)
(Fig. 12).
• Turn the speed dial to position “1” or “2” for LOW speeds.
• Turn the speed dial to position “3” or “4” for
MEDIUM speeds.
• Turn the speed dial to position “5” or “6” for
HIGH speeds.
Operating Tips
mWARNING! Use the blower + vacuum + mulcher only in
daylight or good articial light.
• When using the blower vac, plant your feet rmly on the
ground and place one hand on the unit handle and the
other hand on the auxiliary handle.
• Wear personal protective equipment during your work
session. This includes boots, safety glasses/goggles,
ear defenders, long pants and a long-sleeve shirt.
• When using the unit as mulcher, make sure the bag is
properly installed and zipped closed.
• Make sure the blower tube nozzle is not directed at
anybody or any loose debris before starting the unit.
• Verify that the unit is in good working condition. Make sure
the tubes and guards are in place and secure.
• Ensure that the vacuum + mulcher inlet cover is
completely closed and locked.
• Keep a rm grip on both the front and rear handle or grips.
• To reduce the risk of hearing loss associated with sound
level(s), hearing protection is required.
• Use the shoulder strap when using the unit as a mulcher.
• Operate power equipment only at reasonable hours—not
early in the morning or late at night when people might be
disturbed. Comply with times listed in local ordinances.
Usual recommendations are 9:00 am to 5:00 pm,
Monday through Saturday.
• To reduce noise levels, limit the number of pieces of
power equipment used at any one time and operate power
blowers at the lowest possible speed setting necessary to
do the job.
• Use rakes and brooms to loosen debris before blowing.
• In dusty conditions, slightly dampen surfaces.
Fig. 10
Cord retainer
Extension
cord
Fig. 11
ON (I) OFF (O)
Fig. 12
6 5 4 3 2 1 Variable blower
speed control

10
• Conserve water by using power blowers instead of hoses
for many lawn and garden applications, including areas
such as gutters, screens, patios, grills, porches and
gardens.
• Blow debris into a safe, open area away from children,
pets, open windows or freshly washed cars.
• Clean up after using leaf blowers and other lawn
equipment. Dispose of debris appropriately.
mWARNING! To avoid serious personal injury,
wear ear defenders, goggles or safety glasses at all times
when operating this unit. Wear a face mask or dust mask in
dusty locations.
mWARNING! To prevent serious personal injury or
damage to the unit, make sure the blower tube or the mulcher
tubes and the bag are in place before operating the unit.
Air Vents
Never cover air vents. Keep them free from obstructions
and debris. They must always remain clear for proper motor
cooling.
mWARNING! To avoid serious personal injury, do not
wear loose tting clothing or articles such as scarves, strings,
chains, ties, etc., that could get drawn into the air vents.
To make sure long hair does not get drawn into the air vents,
tie back long hair.
Blower Mode
• Hold the blower rmly with one hand on the main handle
and the other hand on the auxiliary handle. Sweep from
side to side with the nozzle several inches above the
ground or oor (Fig. 13).
• Slowly advance the unit, keeping the accumulated pile
of debris in front of you. Most dry blowing operations are
better suited to low speeds rather than high speeds.
High speed blowing is best for moving heavier items like
large debris or gravel.
Vacuum + Mulcher Mode
• Once you have blown the debris/leaves into a pile,
you can convert to vacuum mode to collect the debris.
• With a rm hold on the vac, tilt the mulcher tubes
2 in – 4 in. (5 cm – 10 cm) from the ground and use a
sweeping action to collect light debris. The debris will ow
into the bag. Items such as small leaves and twigs will be
mulched as they pass through the fan housing.
For longer bag life and increased performance, empty the
bag frequently
(Fig. 14).
• As the bag lls, suction power will decrease. When this
happens, turn the power switch to the OFF (O) position
and unplug the unit from the power supply. Remove the
bag and empty the debris.
• To remove the bag, press the tube release button
(Fig. 8). To empty, hold the plastic handle and grab the
nylon handle on the underside of the bag. Turn the bag
upside down and shake out any debris and leaves.
mWARNING! Never remove the collection bag without
rst turning the power switch to the OFF (O) position and
unplugging the unit from the main power source.
mWARNING! Do not use in vacuum + mulcher mode
without the vacuum tubes and collection bag in place.
Clearing a Blocked Tube/Impeller
mWARNING! To avoid serious personal injury, be sure
the unit is OFF and unplugged before clearing the impeller.
mWARNING! To avoid serious personal injury,
always wear gloves to protect yourself from the impeller
blades or other sharp objects.
Fig. 13
R
Fig. 14

11
During the vacuuming process, certain objects such as cloth,
rope or large diameter sticks may obstruct the fan and block
the motor. A thermal protection device, which is built into the
blower vac, will cut o the electricity to the motor to prevent
damage from overheating.
In the event an obstruction occurs and power is curtailed:
1. Slide the ON/OFF switch down to the OFF (O) position
until the unit comes to a complete stop.
2. Unplug the unit.
3. Remove the blower tube or vacuum + mulcher tubes and
the bag.
4. Using protective gloves, carefully remove the material
blocking the tube or impeller. Inspect the blades to ensure
no damage has occurred. Rotate the impeller blades by
hand to ensure the blockage is completely cleared.
5. Reinstall the blower tube or vacuum + mulcher tubes and
the bag.
6. Wait 3 minutes for the motor to cool.
7. Plug the unit back into the power supply and turn the ON/
OFF switch to ON (I). The blower vac will resume normal
function.
Maintenance
To order genuine replacement parts or accessories for the
Sun Joe®SBJ603E electric blower + vacuum + mulcher,
please visit sunjoe.com or contact the Snow Joe®+ Sun Joe®
customer service center at 1-866-SNOWJOE
(1-866-766-9563).
mWARNING! Disconnect the extension cord before
performing any maintenance task.
If the extension cord is plugged into the appliance,
someone could accidentally turn on the unit while you are
performing maintenance on it, which could result in serious
personal injury.
Cleaning the Unit
mWARNING! To avoid serious personal injury,
always turn the unit o and unplug it before cleaning or
servicing.
Use a small brush to clean the outside of the unit. Do not use
strong detergents, household cleaners that contain aromatic
oils (e.g. pine and lemon) or harsh solvents such as kerosene
as these substances can damage the plastic housing or the
handles. Wipe o any moisture with a soft, dry cloth.
1. Empty the bag after each use to avoid deterioration and
obstructing air ow, which will reduce the performance of
the mulcher.
2. Wear eye protection and a dust mask. Clean the bag as
needed. Turn the bag inside out after initial emptying and
vigorously shake out dust and debris.
3. Wash the bag once a year, or more often if needed.
Follow the steps below:
i. Remove the bag.
ii. Turn the bag inside out.
iii. Hang it up.
iv. Hose it down thoroughly.
v. Leave it hanging to dry.
vi. Turn the bag right-side up and reinstall.
Storage
1. Examine the electric blower + vacuum + mulcher
thoroughly for worn, loose or damaged parts. Should you
need to repair or replace a part, contact an authorized
Snow Joe®+ Sun Joe®dealer or call the Snow Joe®+
Sun Joe®customer service center at 1-866-SNOWJOE
(1-866-766-9563) for assistance.
2. Examine the extension cord thoroughly for signs of excess
wear or damage. If it is worn or damaged, replace it
immediately.
3. Disconnect the extension cord from the electric blower +
vacuum + mulcher before storing.
4. Store the cord with the electric blower + vacuum +
mulcher indoors in a clean, dry and locked location out of
the reach of children and animals.
NOTE: Devices for retaining extension cords are
commercially available should you wish to purchase one.
Service and Support
If your Sun Joe®SBJ603E 3-in-1 electric blower + vacuum +
mulcher requires service or maintenance, please call the
Snow Joe®+ Sun Joe®customer service center at
1-866-SNOWJOE (1-866-766-9563).
Model and Serial Numbers
When contacting the company, reordering parts or arranging
service from an authorized dealer, you will need to provide the
model and serial numbers, which can be found on the decal
located on the housing of the unit. Copy these numbers into
the space provided below.
Record the following numbers from the housing or handle of your
new product: Model #:
Serial #:
S B J 6 0 3 E

12
Troubleshooting
mWARNING! Always unplug the power cord before performing any adjustments, maintenance or repairs to your
electric blower vac.
Unit will not blow
or mulch
Unit will not start
1. Bag full
2. Blocked tube
3. Blocked impeller
4. Dirty bag
5. Torn bag
6. Bag unzipped
7. Unit unplugged
1. Unit is unplugged.
2. Power/speed switch is in the OFF (O) position.
3. Defective power switch.
4. Vac tubes are not correctly installed.
5. Intake gate/cover is not closed.
6. House circuit may have tripped.
1. Empty the bag.
2. Clear the blockage.
3. Clear the blockage.
4. Clean the bag.
5. Replace the bag.
6. Zip up the bag.
7. Plug into an outlet or an extension cord.
1. Check cord to make sure it is plugged into an electrical
outlet.
2. Slide the power switch to the ON (I) position and
select your desired speed setting with the speed
control switch.
3. Call the Snow Joe®+ Sun Joe®customer service center
at 1-866-SNOWJOE (1-866-766-9563).
4. Check vac tubes and ensure that they are correctly
installed to allow the switch to be engaged.
5. Ensure that gate/cover is fully closed and locked.
6. Check wall circuit breaker panel and reset if necessary.
Problem Possible Cause Solution
Other manuals for SBJ603E
1
Table of contents
Other sunjoe Blower manuals

sunjoe
sunjoe SBJ601E User manual

sunjoe
sunjoe 4V-TB-LTE User manual

sunjoe
sunjoe 24V-TB-LTE User manual

sunjoe
sunjoe SBJ605E-RM User manual

sunjoe
sunjoe 20ViONLT-BLW User manual

sunjoe
sunjoe SBJ604E-RM User manual

sunjoe
sunjoe iONBV User manual

sunjoe
sunjoe SBJ597E User manual

sunjoe
sunjoe SBJ803E-RM User manual

sunjoe
sunjoe SBJ606E-GA User manual

sunjoe
sunjoe 24V-JB-LTE User manual

sunjoe
sunjoe JB450E User manual

sunjoe
sunjoe SBJ601E-RM User manual

sunjoe
sunjoe SBJ601E User manual

sunjoe
sunjoe SBJ597E User manual

sunjoe
sunjoe 24V-JB-LTE User manual

sunjoe
sunjoe SBJ702E User manual

sunjoe
sunjoe SBJ806E-RM User manual

sunjoe
sunjoe 24V-BBQ-CT User manual

sunjoe
sunjoe SBJ597E User manual