3.1 Location
As the majority of system installations vary greatly, only general comments can be made as to location.
Prior to installing the system, it is suggested to make a system layout plan. During the system layout, take
into consideration any potential shading of the solar electric modules, wire runs, wire size, conduit runs,
trenching, controller accessibility, tank location, pump head and etc.. There is no substitute for a good
plan!
The PCA series controllers can either be mounted indoors or outdoors. Locate all system equipment as
close as possible to each other. Generally the controller is mounted on the north side of a pole which has
solar electric modules mounted on top of it. The pole should be located close to the well (bore hole). This
general physical layout is conducive to clean installation aesthetically and electrically.
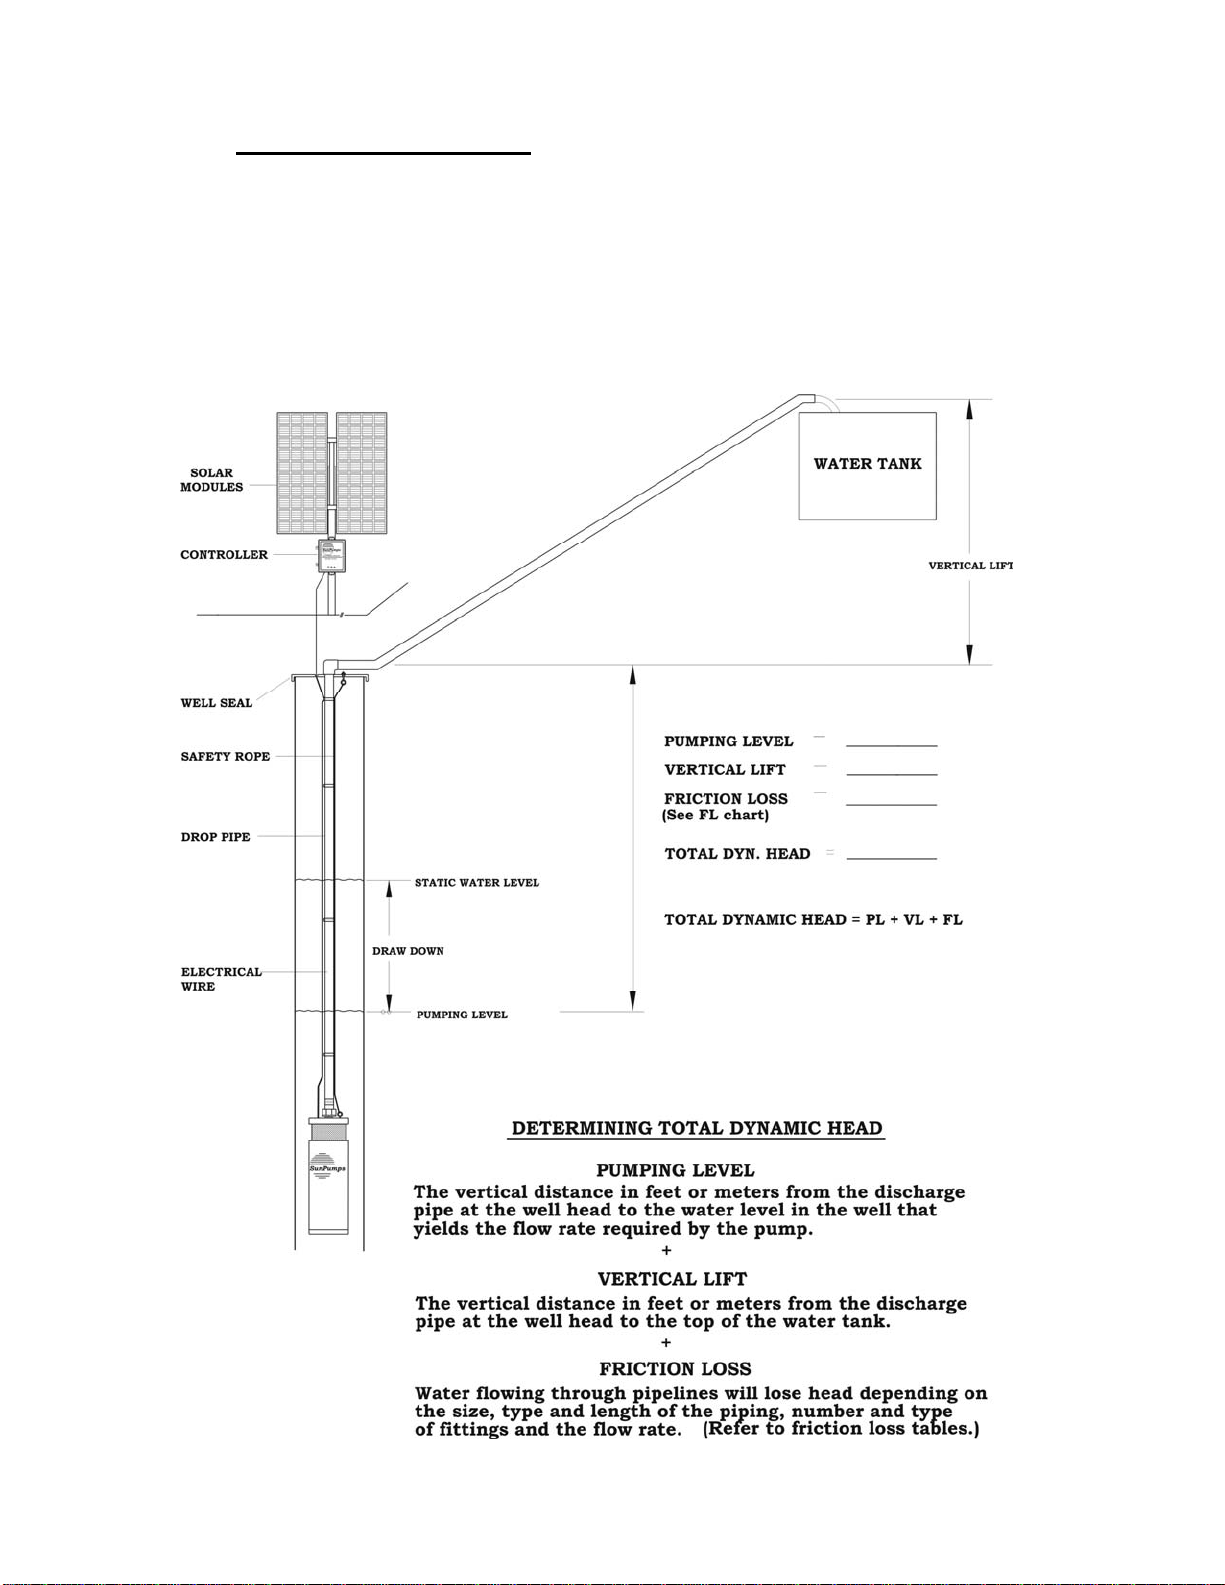
3.2 System Design Basics (Read carefully before installation)
1. For optimum pump performance make sure that the wire is sized properly for the length of run
between the pump and the solar modules. Wire sized too small will cause a decreased output
from the pump. Keep the distance from the solar modules to the pump as short as possible.
2. Make sure the discharge pipe is sized properly for the length of run. Friction loss in a pipeline
over a long distance will add head to the pump and thus reduce the flow rate. Consult your
SunPumps distributor if there is any question.
3. Never rest the pump on the bottom of the well (bore hole). This can cause the pump to fill with
mud and damage the diaphragm. Suspend the pump five feet (1.5 meters) or more above the
bottom of the well (bore hole). If possible mount the pump above the well casing perforations.
This will allow any sand intrusion to settle below the pump.
4. Use no larger than ½” drop pipe for SDS-D series pumps and ¾” drop pipe for SDS-Q series
pumps. Because of the low flow rates of the SDS series pumps, the water velocity is not fast
enough to carry any sand and sediment to the surface. These small particles may settle inside
the pump as well as the drop pipe causing pump damage. If there is a known sand problem, a
sand shroud or a screen is required. The minimum casing diameter for an SDS-D series pump
with a sand shroud is 5” (12.7 cm) and for and SDS-Q series pump it is 6” (15 cm). Sand
damage to an SDS series pump is not covered under warranty. It is therefore highly
recommended that sand shrouds be installed on all SDS series pumps in an unproven well (bore
hole).
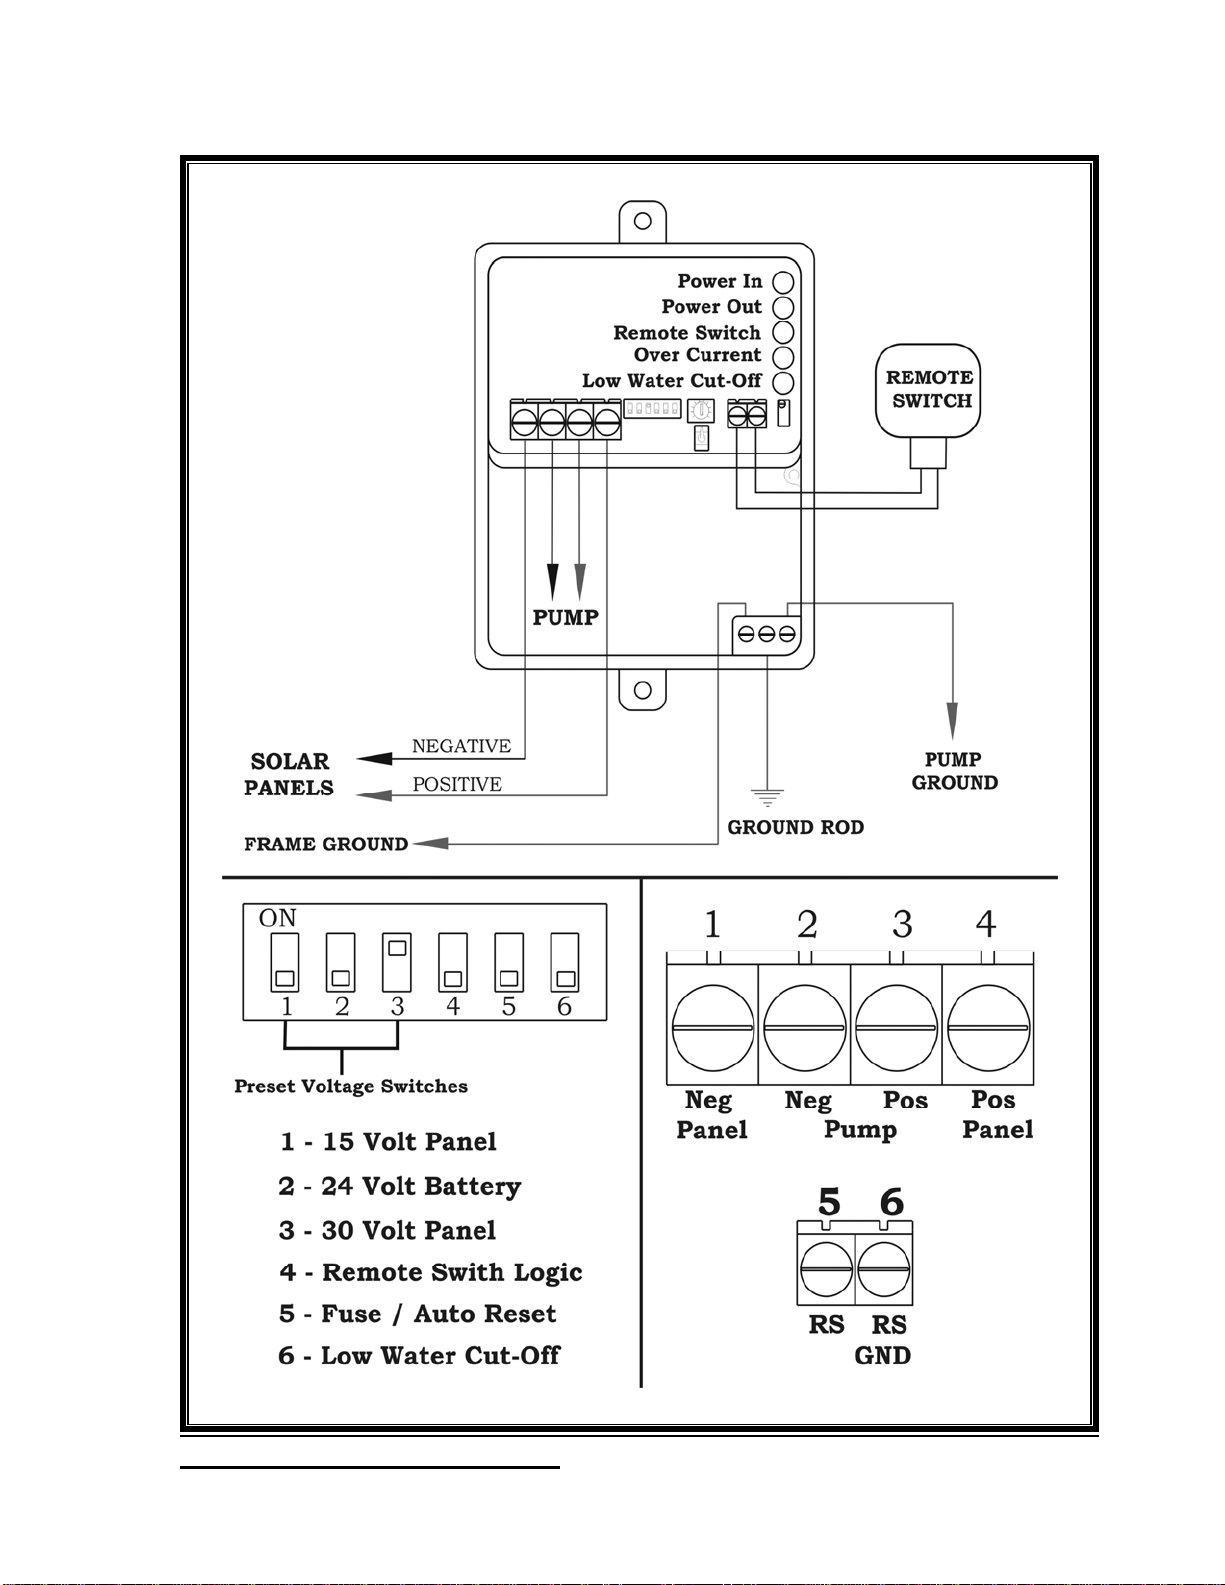
5. Due to the aggressive action of DC power, it is essential the wire splice at the pump be made
correctly. This splice must be watertight. Improper sealing of the splice will cause poor pump
performance and may cause damage to the system. A SunPumps splice kit S-703 is
recommended for this watertight connection.
6. Never install the pump over 50 feet (15 meters) under the static water level. Excessive water
pressure on the pump housing may cause seal damage and allow water to enter the motor
housing.
7. Never chlorinate a well while the pump is installed. Heavy concentrations of chlorine will
damage the diaphragm and seals.
8. Never install the pump in a well that has or has had an oil-lubricated line shaft turbine in it. Any
drip oil remaining in the water may damage the diaphragm and seals.
9. If the pump is used in a well over 100 feet (30 meters) deep, install a check valve above the
pump. This will help relieve some of the pressure on the internal check valves and will keep
any sediment from entering back into the pump.