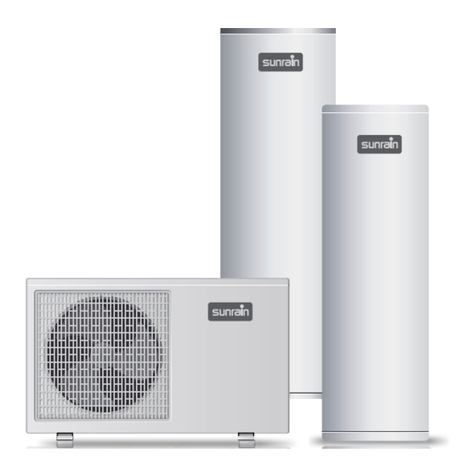
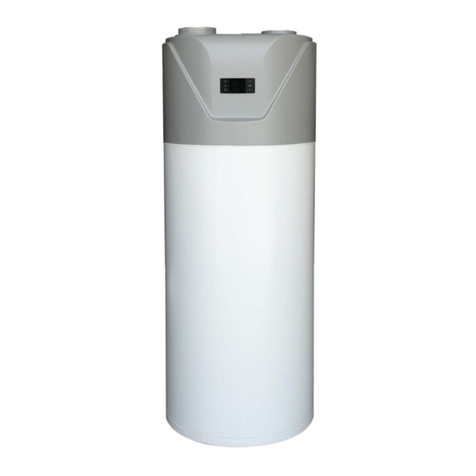
Sunrain YT-300TB1 User manual

All In One Heat Pump For Domestic Hot Water
Installation & Operation Manual
All-In-One Type
Air Source Heat Pump Water Heater
Model: YT-300TB1
Thank you very much for purchasing our product, please keep this installation manual
carefully and read this manual carefully before you install heat pump.

All In One Heat Pump For Domestic Hot Water
NOTES
Dear customers,
Thank you for selecting our products!
The manual is aim to let you learn more installation, operation and maintenance of
heat pump and provides some important safe information for you. It’s quite required
to carefully read the whole contents shown in this manual before you install and use
heat pump, and please keep this installation manual carefully for purpose of future
reference.
CONTENT
Safety Precautions...........................................................................1
General Information.........................................................................2
Part Names.......................................................................................6
Installation of Heat Pump................................................................6
Pipe line Connection.....................................................................10
Connection of Electric...................................................................14
Method of Application....................................................................17
Instruction of Operation.................................................................18
Pilot run of Heat Pump...................................................................31
Maintenance and Solution.............................................................31
After-sale Service...........................................................................33

All In One Heat Pump For Domestic Hot Water
- 1 -
Safety Precautions
Please make sure you have read at least one chapter of safety precautions
shown in the manual. This part provides quite important safe points for you and
please operate it based on safety precautions.
Warning
1. Household Appliances must have a reliable ground connection;
2. Household
Appliances must install
leakage protection device;
3. Do not dismantle any permanent instruction, label or parameter plate attached on
the outside cover or all kinds of internal plate of heat pump;
4. Please entrust dealer or professional personnel to install the device; Installer must
have professional knowledge, any improper operation by yourself may cause a fire,
electric shock, injured or leakage etc.;
5. Purchased from the local market must select specified product by our company;
6. Please obey the local regulations issued by electric company to connect power
supply;
7. When needed remove or re-install heat pump, please entrust dealer or
professional personnel to operate it;
8. Any self-transformation or repair is forbidden, improper repair may cause a fire,
electric shock, injured or leakage etc., must entrust dealer or professional personnel
to repair it;
9. Earthing pole of outlet must be reliable to connect, and rated current value should
be not less than 10A, outlet and power plug must keep dry to prevent leakage, and
make sure outlet and power plug are well matched.
10. Place or wall which the water source may spatter into, the installation height of
power plug is not less than 1.8m and make water source and power plug keep a
certain distance, meanwhile make sure children are out of touch;
11. One way valve specified by our company must be installed near to cold water
outlet;
12. In the state of energization and heating.

All In One Heat Pump For Domestic Hot Water
- 2 -
General Information
I. Measurement
Model
Weight(kg)
Dimension(mm,D×H)
Power supply
YT-300TB1
130
Φ620×2038
220V/ 60Hz/ 1
phase
II. External Appearance

All In One Heat Pump For Domestic Hot Water
- 3 -
III. Features
All in one heat pump for sanitary hot water :
1. Has complete isolation between water and electricity, without electric shock
problem, more safety;
2. No fuel tubes and storage, no potential danger from oil leakage, fire, explosion,
and so on;
3. No cross contamination potential, the condenser coil is wrapped around the
stainless tank, it is external coil, do not come in contact with water directly, more
safety and healthy;
4. The maximum outlet water temperature: 60ºC. The system makes the water be
heated stably and quickly with innovative heating methods of combination the
electric heating and heat pump heating properly;
5. Flexible installation achieved by long air inlet and outlet duct;
6. Automatic start-up and shutdown, automatic defrosting by revising refrigerant
cycle to save the extra operation;
7. According to the heat pump principle, the unit absorbs heat from outdoor air and
produce heat water thermal efficiency can be approximately 4.16 (Under the
condition A20/15ºC W15/55 ºC);
8. Within the temperature range from -7 ºC to 43 ºC, the unit will not be affected by
night, cloudy sky, rain even snow weather;

All In One Heat Pump For Domestic Hot Water
- 4 -
IV. Refrigerant circuit
Compressor: R134A, supplied by GMCC.
Evaporator: Copper tube and aluminum fin type heat ex-changer.
EXV: Electronic expansion valve, the opening is regulated according to the
discharge air temperature of compressor.
Fan: Centrifugal fan with three speeds.
High Pressure Switch: When the discharge pressure of compressor is 2.76Mpa or
higher, the protection switch will be triggered, and if the discharge pressure is down
to 2.07MPa, the protection switch will be recovered.

All In One Heat Pump For Domestic Hot Water
- 5 -
V. Specifications
Model No.
YT-300TB1
Heating Capacity at Air 20℃/15℃, Water Temperature from 15℃ to 55℃
Heating Capacity(kW)
2.5
Power Input(kW)
0.6
COP
4.16
Max Power Input(W)
3000
Rated Current(A)
3.0
Max Current(A)
15
Power Supply
220V~60Hz
Backup Electric Heater(W)
2000
Refrigerant
R134a/1050g
Net Dimension(mm)
Φ620×2038
Package Dimension(mm)
700×700×2090
Net Weight(Kg)
130
Gross Weight(Kg)
140
Noise(dB)
48
Water tank volume(L)
300
Working temperature range(℃)
-7~43

All In One Heat Pump For Domestic Hot Water
- 6 -
Parts Names
NOTE
All the pictures in this manual are for explanation purpose only. They may be slightly
different from the heat pump water heater you purchased ( depend on the model ).
Please refer to the real sample instead of the pictures of this manual.
Installation of Heat Pump
I. Choose a place
1. Do not install this equipment indoor. If installed indoor, may cause overflow, noise
or indoor temperature drop which can influence your normal life, please do
preventive measures in advance;
2. The place where must have enough space for installation and maintenance;
3. Inlet or outlet wind must have no obstacle and keep strong wind off;
4. Drying and ventilated place is suitable;
5. Support surface must be flat(horizontal angle must not be more than2°), and can
bear heat pump’s weight and easy to install vertically, in addition, the surface will not
increase any noise or shock;

All In One Heat Pump For Domestic Hot Water
- 7 -
6. The noise and exhausting air don’t influence neighbors’ normal life;
7. The place has no combustible air to leak;
8. Easy to install connection pipe and electrical parts;
9. If heat pump installed in those metal parts of the building, electrical insulation
must be done well and must comply with technical standard on electrical equipment.
NOTE
In the region which the temperature is below 0 ºC, the heat pump must be
installed indoor or others position where will not be frozen for purpose of protecting
connection pipe and keeping your normal life;
If used for those regions which the temperature is below 0 ºC, you can take
suitable measures to protect pipes in case the heat pump is installed outdoors for
purpose of protecting connection pipe and keeping your normal life;
The place where is high temperature or long-term exposure is prohibited, or
may decrease lifetime of products.
Notes: Installed the following places may cause machine errors. If
unavoidable, please consult your local authorized service points;
a. The place containing mineral oil such as cutting oil;
b. The place containing salty such as seaside;
c. The place containing corrosive smell such as spa where has sulfur gas;
d. The place where voltage and current wave frequently;
e. The place where has strong shake such as car or cabin;
f. The place existing strong electromagnetic wave;
g. The place where is full of oil gas and oil bloom such as kitchen;
h. The place existing the evaporation of acid or alkaline gas;
i. Others place where has special conditions.
II. The Movement of Heat Pump
1. This heat pump is heavy and need at least two people to move and install it;
2. Please move the equipment according to the state of leaving factory, and any self
transformation is prohibited;
3. Please install protection plate in which heat pump is easier to touch hard objects

All In One Heat Pump For Domestic Hot Water
- 8 -
for purpose of avoiding scratch and deformation;
4. Do not touch fan with your hands or other objects;
5. Do not move the heat pump at the angle of 75°.
III. The Installation of Heat Pump
1. Please leave enough space to install and maintain.
≥200mm
≥200mm
≥ 80 0m m
Air OutletBarrier
Control Panel
Air Inlet

All In One Heat Pump For Domestic Hot Water
- 9 -
2. If heat pump installed in the basement, indoor or other airtight space, please note
exhausting or intake circulation between surrounding air and outdoor air; The air
duct total length should be equal or less than 6 meters, and the duct diameter should
be equal or more than 150 mm.
IV. Products External Dimension
≥200mm
≥00mm2
≥500mm

All In One Heat Pump For Domestic Hot Water
- 10 -
Size
Model
A
B
YT-300TB1
2038
1413
Pipe Line Connection
I. Pipe Line Connection Diagram

All In One Heat Pump For Domestic Hot Water
- 11 -
Remark: According to actual needs, solar coils can be connected to
solar heat panels
、
floor heating
、
deicing
、
hot-tube
、
and so on.
II. Water Pipe Installation Instructions
1. Please don’t use iron pipe connect to heat pump, please use CPVC pipe, PPR pipe
or PB pipe;
2. Please according to the drawing shows to install the water pipes, connectors etc,
if the ambient temperature is below 0
℃
, proper insulation must be taken for the
water pipes;
3. Water inlet/outlet size is G3/4’’, external thread;
4. The water pipe’s work life should not less than heat pump’s work life;
5. Relief valve is G1/2’’, 0.8 MPa, after installation, must sure that the drainage pipe
which connect with the relief valve, is not blocked;
NOTE
The relief valve need to be pulled one time every six months for purpose of
taking calcium carbonate out and ensuring no obstacle, outlet temperature of
drainage port may be high, please be careful;

All In One Heat Pump For Domestic Hot Water
- 12 -
Drainage pipe must be taken measures to keep temperature to prevent pipe
from freezing to cause accident.
Danger
Do not hold down the handle of safety valve;
Do not knock down safety valve;
Do not plug the drainage port;
Excretion pipe must be connected with a open drainage port.
6. After finished all pipeline, open up the valve controlled cold water inlet and the
valve controlled hot water outlet to fill water into tank, you can stop when you find
water overflows from water outlet, then inspect all pipeline and make sure have no
water leakage. If found leakage, you need require it well and fill water into tank again;
7. When intake pressure is below 0.15MPa, a booster pump needed to be installed to
connect with inlet water pipe for purpose of obtaining larger water capacity, which
can make sure intake pressure is less than 0.15MPa; When intake pressure is greater
0.65MPa, the relief valve needed to be installed to connect with inlet water pipe for
purpose of keeping your water tank into a long-term working state;
8. During heat pump running, condensed water droplets may be formed, drainage
water port may be unexpectedly blocked, which can make surface of equipment drop
water out, to ensure your normal life and yourself equipment, we suggest water tray,
please take reference to the below chart.
Diameter is at least larger
50mm than heat pump
Max.
Explosion Danger

All In One Heat Pump For Domestic Hot Water
- 13 -
NOTE
When used for the place where the temperature is below 0
℃,
If installed the heat
pump outdoor, please take measures to protect water pipe according to local
minimum temperature to prevent frozen or damage water pipe.
III. Air Duct Installation Instructions
1. Scheme
②
It is recommended to install unit by this way in the winter where there
is other heat source in the room. ( The heat pump is installed in room)
2. Scheme
③
It is recommended to install unit by this way in summer that could
charge fresh cold air into room. ( The heat pump is installed in room)
3. It is recommended installing the unit by only air outlet with duct (Scheme
②
) in
summer that could charge fresh cold air into room. ( The heat pump is installed
outdoor );
4. It is recommended installing the unit by only air inlet with duct Scheme
③
in
winter where there is other heat source in the room. ( The heat pump is installed
outdoor );
①Air inlet and outlet with duct
(A+B ≤6m)
B A
C C
Air inlet Air outlet
②Only air outlet with duct
(A≤6m)
A
C
Air inlet Air outlet
③Only air inlet with duct
(B≤6m)
B
C
Air inlet Air outlet

All In One Heat Pump For Domestic Hot Water
- 14 -
5. Duct description:
Duct description
Round duct
Rectangle duct
Other shaped duct
Dimension (mm)
Ф150
150×150
Refer to
above data
Straight-line pressure drop (Pa/m)
≤2
≤2
Straight-line length (m)
≤6
≤6
Bent pressure drop (Pa)
≤2
≤2
Bent’s quantity
≤4
≤4
6. The resistance of duct will decrease air-flow-rate, which will lead to capacity of
unit decreased, the duct total length should be no more than 6m or the maximum
static pressure should within 20Pa, and the quantity bending should be no more than
3;
8. For unit air outlet with duct, when unit operating, condensate will be generated
around outside of duct, please pay attention to the drainage work, we suggest to
wrap the thermal insulated layer around outside if the duct;
9. It is recommended to install the unit in the indoor space. It is not allowed to install
the unit at outdoor or exposed to rain;
10. In terms of the main unit connect with canvas reaching to outdoor, a reliable
water-resistant measure must be conduct on the duct, resist water drop into internal
of the main unit;
11. Filter should be installed at the unit inlet, if the air inlet is not connected with duct.
In terms of the unit with duct, filter should be put on the position of duct inlet.
Weather shed
Rain
Unit
Unit
Rain

All In One Heat Pump For Domestic Hot Water
- 15 -
Connection of Electric
Electrical wire assembly
NOTE
The equipment must be applied specific power supply, supply voltage must
comply with rated voltage;
Power supply circuit must be fitted with ground wire, and ground wire of power
supply must be reliably connected with external ground wire;
The operation must be worked by professional personnel based on circuit
diagram;
Set up leakage protection device well according to the National Technical
Standard for electrical equipment;
1. Power Specification
Remark: Please directly connect power supply wire with user’s plug when use the heat
pump.
Item
Model
Power
supply
The finest wire diameter
(mm2)
Manual switch
(A)
Leakage
protection
device
YT-300TB1
220V/60Hz
Size
(continuous
length ≤ 30m)
Ground
wire
Capacity
Fuse
Below 30mA
0.1sec
≥2.5
≥Φ1.0mm
≥20
20

All In One Heat Pump For Domestic Hot Water
- 16 -
2. Leakage Protection
Leakage protection
device
Manual switch
Power Supply
L
N
Ground Wire
The external power supply box must be installed leakage protection
device based on above figure for purpose of your safe;
The equipment can be used unless you have confirmed ground wire
reliably;
WARNING

All In One Heat Pump For Domestic Hot Water
- 17 -
3. Electric Wiring Diagram

All In One Heat Pump For Domestic Hot Water
- 18 -
Method of Application
When using the unit, please operate to the following order:
1. Feeding water: when use the unit for the first time (or reuse it after the tank is
empty ), before connect the unit with power, please make sure the tank is full of water.
Water feeding method (as below picture)
Feeding water
2. Plug in to connect the unit with power. Then the screen is brighten which shows
that the unit is connected with power. The user can realize different models by
clicking the relative button on the screen ( see next page);
3. Water draining: before cleaning or moving the unit, please drain out the water in
the water heater. The draining method as below picture:
Draining water
Open the cold water inlet valve
and hot water outlet valve
Cold water inlet Hot water outlet
When there is water flowing out from
the outlet, the tank is full with water.
Close the hot water outlet valve and
the water feeding is finished.
Hot water outlet
cold water inlet hot water outlet
Operation without water in water tank may result
in the damage of auxiliary E-heater. Due to such
damage, manufacturer will not be liable for any
damages caused by this issue.
Close the inlet valve Open the outlet valve
Open the draining valve
Water temperature over 50℃ can cause severe burns
instantly or death from scalds. Children, disabled and
elderly are at highest risk of being scalded.
Feel water before bathing or showering. Water
temperature limiting valves are recommended
After the draining , please screw
the nut of the drainage outlet; the
water draining is finished.
Table of contents
Other Sunrain Water Heater manuals