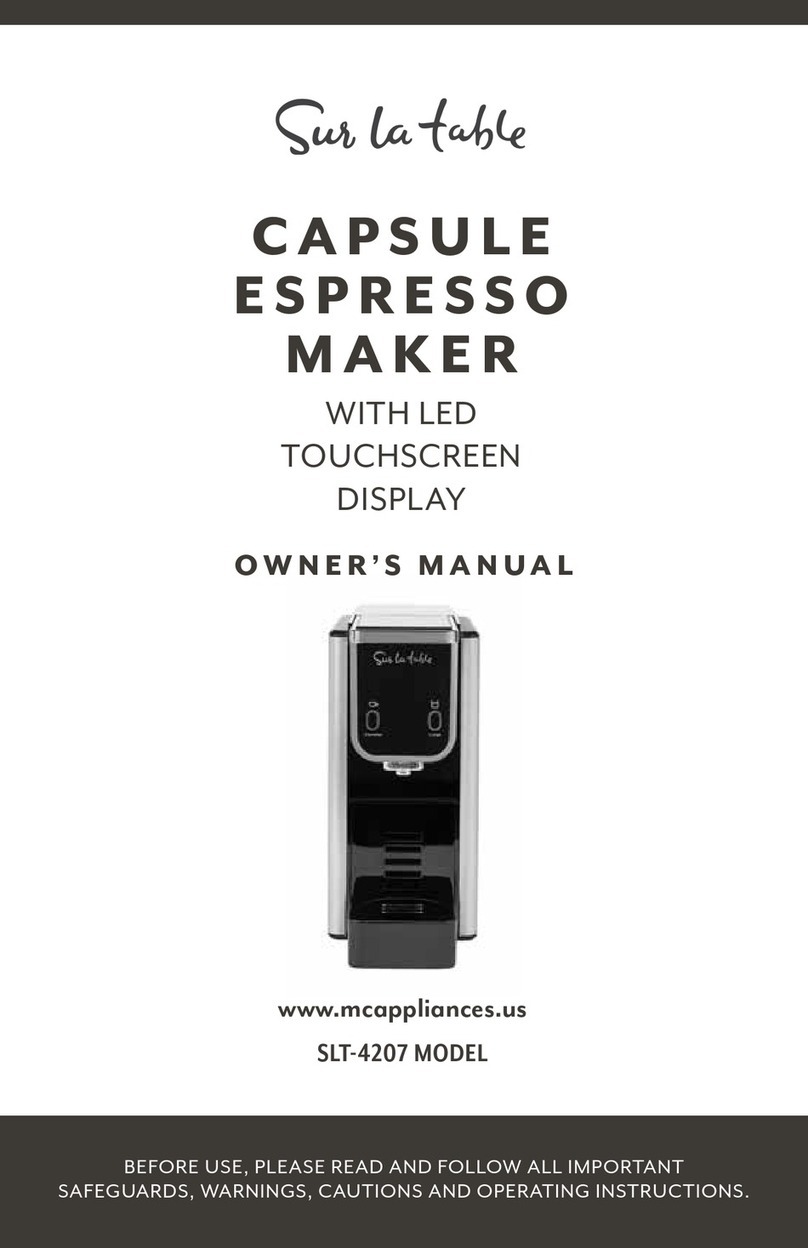
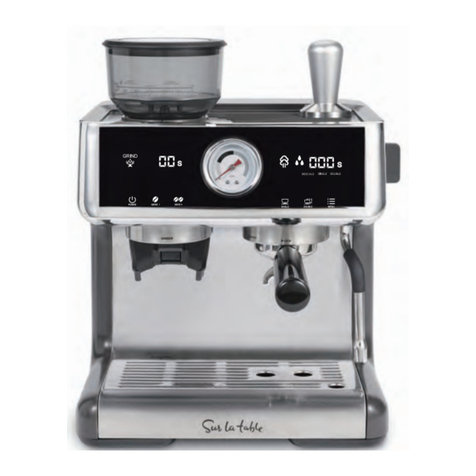
Sur la table SLT-4209 User manual

BEFORE USE, PLEASE READ AND FOLLOW ALL IMPORTANT
SAFEGUARDS, WARNINGS, CAUTIONS AND OPERATING INSTRUCTIONS.
ESPRESSO
COFFEE MACHINE
USER MANUAL
www.mcappliances.us
SLT-4209 MODEL

Congratulations!
Congratulations! You now own an
incredibly versatile, convenient and
powerful espresso machine.
To get the most out of your espresso
machine, please read the manual carefully
before use, and keep this manual for easy
reference.
Enjoy!
Enjoy!
*This manual is only applicable to SLT 4209. All the contents in the manual are for
reference only during the user’s use and maintenance.
The pictures are for reference only.
*All the contents in the manual have been carefully checked. If there are any printing errors
or misunderstandings in the contents, the company reserves the right to interpret.
3

When using electrical appliances, basic safety precautions should always be followed
including the following:
1. Read all instructions before use.
2. Remove all packaging material before using espresso machine for the first time.
3. Place espresso machine on a sturdy and stable surface. Do not let the cord hang
over the edge of the table or counter top.
4. Do not operate espresso machine with a damaged cord or plug, or if appliance is
damaged in any manner.
5. This appliance is not intended for use by children or by persons with reduced
physical, sensory, or mental capabilities, or lack of experience. Close supervision is
necessary when any appliance is used near children. Children should be supervised
to ensure that they do not play with the appliance. Keep the appliance and its cord
out of reach of children.
6. Unplug from outlet when not in use and before cleaning. Allow to cool before putting
on or taking off parts, and before cleaning the appliance. To unplug, grasp the plug
and pull from the outlet. Never pull from the power cord.
7. Do not use outdoors.
8. Do not operate espresso machine in the presence of explosives and/or flammable
fumes.
9. Always operate the espresso machine from a power source of the same voltage,
frequency, and rating as indicated on the product rating plate.
10. Do not leave espresso machine unattended during use.
11. Use caution when using the descale feature.
12. This appliance is recommended for household use only.
13. Do not let cord hang over edge of table or counter, or touch hot surfaces.
14. Do not place on or near a hot gas or electrical burner, or in a heated oven.
15. To disconnect, turn any control to “off,” then remove plug from wall outlet.
16. Avoid contacting moving parts. Do not attempt to defeat any safety interlock
mechanisms.
17. Check bean hopper for presence of foreign objects before using.
WARNING: Risk of Fire or Electric Shock. Do not remove this cover. No user serviceable
parts inside. Repair should be done by authorized service personnel only.
SAVE THESE INSTRUCTIONS
HOUSEHOLD USE ONLY
IMPORTANT SAFEGUARDS
Power Cord Instructions:
A short power-supply cord (or detachable power-supply cord) may be provided to
reduce risks resulting from becoming entangled in or tripping over a longer cord. Longer
detachable power-supply cords or extension cords are available and may be used if
care is exercised in their use. If a long detachable power-supply cord or extension cord
is used:
a. The marked electrical rating of the cord set or extension cord should be at least as
great as the electrical rating of the appliance;
b. If the appliance is of the grounded type, the extension cord should be a grounding
type 3-wire cord.
c. The longer cord should be arranged so that it will not drape over the counter top or
table top where it can be pulled on by children or tripped over unintentionally.
Do not pull, twist or otherwise abuse the power cord.
PRODUCT NOTICES:
1. Place the appliance on a hard, flat, level surface to avoid interruption of airflow
underneath the espresso maker.
2. Do not operate the appliance with an empty water tank.
3. Keep the area above the appliance clear during use, as hot steam will escape the
appliance.
GROUNDED PLUG
To reduce the risk of electric shock, this appliance has a
grounding type cord and plug that has a third grounding
pin (3-prong plug). The plug must be plugged into
an outlet that is properly installed and grounded in
DFFRUGDQFHZLWKDOOORFDOFRGHVDQGRUGLQDQFHV,IWKHSOXJGRHVQRWƓWLQWRWKHRXWOHW
RULILQGRXEWDVWRZKHWKHUWKHRXWOHWLVSURSHUO\JURXQGHGFRQWDFWDTXDOLƓHG
electrician to install the proper outlet. Do not alter the plug in any way.
54

WHAT’S IN THE BOX
A Removable Bean Hopper
BGrind Area
CGrinding Cradle
DAccessories Storage Space
ERemovable Drip Tray, Grill and Grind Bin
FWarming Plate and Tamper Storage
GRemovable Water Tank
HGroup Head
IPortafilter
JSteam and Hot Water Wand
15 oz. Frothing Pitcher
Filter Baskets (One Cup & Two Cup)
Cleaning Brush
Cleaning Pin
REMOVABLE BEAN HOPPER The removable bean hopper offers a 250 g capacity to store
your favorite coffee beans. It also features 30 adjustable grind settings, from coarse to fine,
so you can brew espresso just the way you like it!
GRIND DISPENSER Once you have made your grind shot selection, the conical burr grinder
will dispense the right amount of coffee grinds through the grind dispenser.
GRINDING CRADLE The grinding cradle holds the portafilter, so that the coffee grinds fall
directly from the grind dispenser to the portafilter for an easy and seamless experience.
ACCESSORIES STORAGE SPACE Behind the drip tray, an accessory storage compartment
was designed to store a filter basket, the cleaning pin, and the cleaning brush.
REMOVABLE DRIP TRAY The removable drip tray collects all the drips to prevent messes
and the convenient water-level indicator floats to the surface to indicate when the drip tray
needs to be emptied.
TAMPER STORAGE Place the tamper on top of the espresso machine to store.
REMOVABLE WATER TANK The removable water tank offers a 95 oz. capacity.
It has a built-in handle to make the refilling process a breeze.
GROUP HEAD This espresso machine features a commercial size group head, 58 mm,
which allows for optimal extraction to obtain the best flavors from your coffee.
PORTAFILTER This commercial size portafilter, 58 mm, provides more space for the coffee
grinds to be spread out evenly and release the best flavors from the coffee.
STEAM & HOT WATER WAND Use to heat or froth milk. The steam wand and hot water
dispenser is managed using the dial on the side of the espresso machine. The silicone cover
on the steam and hot water wand should be gripped when changing the position of the
steam wand to prevent burns.
15 OZ. FROTHING PITCHER Use the frothing pitcher to steam milk to your desired
texture preference.
FILTER BASKETS (ONE CUP & TWO CUPS) Use the one cup filter basket to brew one shot of
espresso or use the two cups filter to brew a double shot of espresso.
CLEANING BRUSH Use the cleaning brush to remove coffee grounds that get stuck. Refer to
the cleaning section for more details.
CLEANING PIN Use the cleaning pin to clean the steam wand or the filter baskets. Refer to
the cleaning section for more details.
Product may vary slightly from illustration.
A
B
C
D
E
F
G
H
I
J
K
L
M
N
K
L
M
N
76
B
F
G
K
J
L
D
E
A
I
C
H
M
N

1 Power Button
2Display One:
• Grind Icon
• Grinder Count-Down Timer
3Grinder Shot Selection
• Single Shot
• Double Shot
4Pressure Gauge
5Display Two:
•Steam Light
• Hot Water Light
• Brew Count-Up Timer
6Espresso Extraction Selection
• Single Shot
• Double Shot
7Menu Selection
8Dial
• Standby
• Steam
• Hot Water
9Removable Top Burr
Product may vary slightly from illustration.
Power Button ( )
Press the power button to turn ON/OFF the espresso machine. When the espresso machine is turned
on the display will illuminate. Once the espresso machine has heated up, the espresso extraction
selection buttons will illuminate. The espresso machine will shut off after 15 min of inactivity.
DISPLAY ONE indicates the grinding process.
Grind Icon ( )illuminates when coffee is grinding.
Grinder Count-Down Timer indicates the grinding time.
GRINDER SHOT SELECTION
Single shot ( ): Dispenses one shot of espresso and automatically stops.
Double shot ( ): Dispenses two shots of espresso and automatically stops.
Note: You can customize amount of espresso you would like each option to dispense.
See the Customize Grinder Settings section on page 12.
PRESSURE GAUGE
DISPLAY TWO
Steam Light ( ):
When flashing, it indicates that the dial is turned to steam and the steam
wand is on.
Hot Water Light ( ): When flashing, it indicates that the dial is turned to hot water and hot
water is dispensing.
Brew Count-Up Timer indicates the length of time to dispense the espresso shot.
ESPRESSO EXTRACTION SELECTION
Single Shot ( ): Brews one shot of espresso and automatically stops.
Double Shot ( ): Brews two shots of espresso and automatically stops.
Note: You can customize how long you want each espresso shot to run for. See the Customize
Espresso Extraction settings on page 12 to learn more.
Menu Selection ( ): This button used in combination with the grinder shot selection or
espresso extraction selection provides you with the flexibility to customize these settings.
See the Customize Grinder Settings and Customize Espresso Extraction settings on page 12
to learn more.
DIAL
Standby ( ): When the dial is on the vertical position it is on the standby position. In this
position, the steam and hot water wand are OFF.
Steam ( ): When the dial is turn to the LEFT Position, the steam function is turned on.
Hot Water ( ):
When the dial is turned to the RIGHT Position, the hot water function is turned on.
Removable Top Burr The top burr removes easily using the handle and turning left.
Remove when cleaning the grinder.
GETTING TO KNOW YOUR
ESPRESSO COFFEE MACHINE
1
2
3
4
5
6
7
8
9
98
1
28
76
45
3
9

BEFORE FIRST USE OPERATION INSTRUCTIONS
1. Remove all packaging.
2. Place espresso machine on a stable, and sturdy surface.
3. Wash and dry all removable parts with warm water and mild detergent.
4. Insert the top burr into the grinder collar and using the handle, lock it into place.
5. Place the bean hopper over the grinder interlock and turn clockwise to lock.
• Continue turning clockwise to set the grinder to the desired grind setting.
6. Prime machine.
A. Fill the water reservoir with cold tap water.
B. Place the water reservoir into position and close the lid.
C. Ensure that the dial is on the standby position ( ).
D. Plug in the espresso machine into a 120V AC power outlet
and press the power button ( ).
NOTE: As the machine is heating up, the espresso extraction
selection buttons will not be illuminated. Once the machine
has heated up, the espresso extraction buttons will illuminate.
E. Insert the portafilter.
1. Place the two cup filter basket into the portafilter
2. Align the portafilter with the insert mark located on the
group head. Then, insert the portafilter.
3. Turn the portafilter to the right to the locked position.
NOTE: Locking the portafilter may be tight the first few
times.
F. Place a cup under the portafilter.
G. Press the double shot button ( ). Water will start flowing from the
portafilter to the cup. Allow the machine to run through the entire cycle.
H. When the cycle is complete, position the steam wand over the
steam wand opening on the drip tray.
I. Turn the dial to hot water ( ).
J. Allow hot water to run through the steam wand for 20 seconds.
K. Turn the dial to the standby position ( ).
L. Your espresso machine is ready to use!
Setting up espresso machine:
1. Fill the water tank to the max marking.
2. Add coffee beans to the bean hopper.
TIP: To obtain the best flavor, use filtered water and fresh coffee beans.
3. Press the power button ( ).
4. Allow the espresso machine to heat up. Once the machine is ready, the full display
will illuminate.
Grinding Coffee:
1. Select the filter basket and insert into the portafilter.
2. Place the portafilter in the grinding cradle.
3. Adjust the bean hopper to the grind settings desired by turning the bean hopper left or right.
4. Select single ( ) or double ( ) grind.
5. Once the grinding process has been completed, carefully remove the portafilter.
6. Use the tamper to evenly press the coffee grinds.
7. Wipe excess grinds.
Brewing Espresso:
1. Insert the portafilter into the group head and lock into place.
2. Place cup beneath the portafilter.
3. Press the espresso extraction shot of choice: single ( )or double ( ). Coffee will begin
brewing and automatically stop when cycle ends.
4. Carefully remove the cup.
5. Remove the portafilter by turning left and lowering it.
6. Remove the espresso puck from the portafilter.
Frothing Milk:
1. Fill the milk pitcher with cold milk right below the bottom of the spout.
2. Point the steam wand over the steam opening on the drip tray.
3. Turn the dial to steam ( ). Some water may come out of the steam wand.
4. Turn the dial back to standby
( )
and insert the steam wand into the milk pitcher. Make sure
to insert the tip of the steam wand right below the surface of the milk.
5. Turn the dial back to steam ( ).
6. Froth the milk. Lower the pitcher to keep the tip right below the surface of the milk as the milk
level rises.
7. When desired texture is reached, turn the dial back to the standby position ( ) and remove
the steam wand from the pitcher.
8. Point the steam wand to the steam wand opening on the drip tray.
9. Turn the dial to hot water ( ) for 5 seconds.
10. Return dial to the standby position ( ).
11. Wipe the steam wand with a damp cloth.
1110

Customize your Espresso Shot:
1. Press and hold the single ( ) or double shot ( ) button for the length of time you want
the shot to last using the brew count-up timer to guide you.
NOTE: The menu button ( ) will flash throughout this process.
2. Once the brew cycle reaches your desired brew length, release the button.
3. Next time you press that button (single or double shot), the espresso machine will remember
your customized programming!
Customize the Grinding Length:
1. Press and hold the single ( ) or double ( ) grind button for the length of time you want
the grinding cycle to last using the grinding timer to guide you.
NOTE: The menu button ( ) will flash throughout this process.
2. Once the grinding cycle reaches your desired grinding length, release the button.
3. Next time you press that button (single or double grind), the espresso machine will
remember your customized programming!
Customize Brewing Temperature:
Adjust the temperature the espresso machine heats up to:
1. Press the Menu button ( ) for 3 seconds, until the buzzer sounds.
2. Select the temperature you want your espresso machine to heat up to by pressing the
button that matches the temperature desired:
A. Single shot grind ( ) = 194 F / 90 C
B. Double shot grind ( ) = 198 F / 92 C
C. Single shot ( )= 201 F / 94 C
D. Double shot ( )= 205 F / 96 C
3. Press the Menu button ( ) to save the new temperature selection.
Restore to Factory Settings:
1. Press and hold the power button ( ), the single grinder shot selection button ( ), single
shot extraction button ( ), and double shot extraction button( )at the same time.
2. Once the four buttons begin flashing, release the buttons.
OPERATION INSTRUCTIONS
(CONT.)
DESCALING
Descaling is the process of cleaning your espresso machine to remove any build up of mineral
deposits. Descaling is recommended around every 4-6 months. Your espresso machine will
remind you when it is time to descale.
Descaling Operation:
Total duration: ~10 minutes.
Descaling Preparation:
1. Fill water tank with 4 cups of warm water.
2. Add either:
1.
One Espresso Machine Descaling Tablet. Allow for the tablet to fully dissolve.
2. Half a cap full of Liquid Descaler. Mix thoroughly.
3. 1 ½ tablespoons of white vinegar. Mix thoroughly.
3. Place water tank into position.
4. Place a 4 cup container under the group head and a 4 cup container under the steam wand.
Descaling Process:
Part 1:
1. Press the single shot extraction ( ), double shot extraction ( )and menu button ( ) at
the same time for 3 seconds.
2. Turn the knob to the steam position ( ).
3. Hot water will be dispensed from the group head and steam wand.
NOTE: During this process, the pump will make different noises. This is normal.
4.
When the group head and steam wand stop dispensing hot water, this step is complete.
5. Turn the knob to the standby position ( ).
NOTE: Buttons will shut off and DESCALE will flash on the display.
NOTE: Let the entire descale cycle run its course. If the cycle is interrupted at any point, you will
have to restart the descaling process from the beginning.
Part 2:
After the descaling process, the espresso machine needs to purge to remove the
descaling solution.
1. Remove the water tank and wash with warm water and soap.
2. Fill the water tank with water.
3. Place water tank into position.
4. Turn the knob to the hot water position ( ).
5. Hot water will be dispensed from the group head and steam wand.
NOTE: During this process, the pump will make different noises. This is normal.
6. When the group head and steam wand stop dispensing hot water, this step is complete.
7. Turn the knob to the standby position ( ). The descaling cycle is complete.
1312

Unblocking the Filter Basket:
• If the filter basket gets clogged, insert the filter cleaning pin
in the exit hole to remove blockage. (Figure B)
• Place the filter basket into the portafilter (without coffee)
and insert into the group head.
• Press the one shot extraction button
• Allow water to run through it until it stops. Repeat if necessary.
Cleaning Grinding Cradle and Grounding Outlet
• Recommended to clean weekly
• Using the cleaning brush, remove any excess coffee grinds from the grinding cradle and
grinding outlet (Figure C). Then, wipe with a damp cloth and wipe dry.
Cleaning the Bean Hopper
• Recommended every 2-3 months
• Make sure the espresso machine is turned off and unplugged.
• Remove the bean hopper and store any remaining coffee beans
• Wash the bean hopper in warm water with a light detergent. Then, rinse and dry.
Cleaning the Grinder
When cleaning the grinder, please make sure the espresso machine is turned off and unplugged
and that there are no coffee beans in the bean hopper.
1. Remove the bean hopper by turning it clockwise.
2. Using the handle, remove the top burr by turning it counterclockwise.
3. Wash the top burr in warm soapy water. Then, rinse and dry.
4. Using the cleaning brush, clean out the coffee grinds that are stuck.
5. Use a damp cloth to carefully wipe the inside of the bottom burr.
6. Allow it to air dry.
7. Insert the cleaning brush up into the grinding outlet from below and brush the sides
to remove any coffee grinds that may be stuck. (Figure D)
8. Lock the top burr back into position ensuring that it lays flat. When positioned correctly in
place, the top burr will be flush with the grinder collar.
9. Place the bean hopper back into position by aligning the arrow on the bean hopper
with the hopper guide. Then, firmly push the bean hopper down and turn clockwise
to lock into place.
Figure B
Cleaning and maintenance
WARNING: please unplug before cleaning and let the coffee machine cool sufficiently to prevent
scalding. Do not immerse the coffee machine or power cord plug in water or other liquids to
avoid danger.
After Each Use:
Clean parts in warm water with a mild detergent, rinse, and dry.
Cleaning the Exterior:
Wipe with a soft damp cloth.
NOTE: Do not use alcohol and do not immerse the machine in water for cleaning.
Cleaning Portafilter and Filter Basket:
After each use, wash with warm water and dry with a soft towel.
Cleaning Group Head:
• Run water through the group head after brewing espresso.
• Use the cleaning brush to remove any coffee grinds that may be stuck around the
group head inside the rim and silicone seal.
• Wipe the shower head with a damp cloth.
Cleaning Steam Wand:
• After each use, turn the knob to the hot water position
and dispense hot water for 1-2 seconds.
• Then, carefully wipe the steam wand with a damp cloth.
Unblocking the Steam Wand:
• If the tip of the steam wand gets clogged, use the cleaning pin accessories
to remove any blockage from the steam
wand tip. (Figure A)
• Then, run hot water through the steam wand for 40 seconds.
• If that doesn’t work:
• Unscrew the steam wand tip and soak the tip over night
with warm water and one espresso machine cleaning tablet.
• Rinse the steam wand tip under running warm water to remove all the solution.
• Screw the steam wand tip back into the steam wand arm.
• Run hot water through the steam wand for 40 seconds
Cleaning Filter Basket:
• After each use, wash with warm water and dry with a soft towel.
• Every 2-3 months, soak the filter basket(s) over night in warm water
with one espresso machine cleaning tablet.
• The next day, rinse the filter basket(s) under running water to remove all the solution.
CLEAN AND CARE CLEAN AND CARE
Figure A
Figure C Figure D
1514

TROUBLESHOOTING
THE FAULT
PHENOMENON
The display does not
turn on.
The indicator light on the front
panel of the machine is red.
There are marks of water at
the bottom of the machine.
After starting the machine,
you can hear a ticking
sound and a hissing sound
after making coffee.
No espresso dispenses from
the group head.
Espresso doesn’t have any
crema, or crema is very thin.
No steam dispenses from
the steam wand.
After the steam comes out,
you can’t make coffee or hot
water immediately, and the
machine will pump water
automatically.
SOLUTION
Plug in the power plug and make sure the
power key is pressed.
Place the bean hopper
into position and lock in place.
Ensure that the water tank is positioned
correctly into place.
If the water tank is positioned correctly, then
the drip tray needs to be emptied.
If problem persists and the water tank is
positioned correctly, contact customer service.
Fill the water tank.
Change to a coarser grind setting.
Pack fewer coffee grinds in the
filter basket.
Use less force when tamping
coffee grinds.
See Care & Cleaning section.
Use freshly roasted coffee beans.
Change the grind settings to a finer setting.
Add more coffee grinds to the filter basket.
Add more pressure when tamping coffee
grinds in the filter basket.
Add water to the water tank and
position correctly.
The steam nozzle needs to be cleaned with a
cleaning needle. See the clean & care section.
Descale the espresso machine.
See the descaling section.
It takes 20-30s for pressure relief and
cooling. After pressure relief and cooling,
coffee or hot water can be dispensed only
after the indicator on the panel is displayed
normally.
CAUSE
Check whether the espresso
machine is plugged in.
Check whether you have pressed
the power button.
Bean hopper is not locked
into place.
Water tank is not positioned
properly, or the drip tray is full.
This is a normal. This sound
is generated by the normal
operation of the pressure
control valve.
There is no water in the water reservoir.
Coffee grind is too fine.
Too much coffee is packed into the
filter blocked.
Coffee grinds are tamped too
hard in the filter basket.
The filter basket is blocked.
The group head is dirty.
The group head is blocked.
Coffee beans are old or dry.
Coffee grinds are too coarse.
Not enough coffee grinds are used.
Grinds aren’t tamped tightly
enough.
No water in the water tank.
The steam nozzle is blocked.
Espresso machine needs to be
descaled.
After the steam is pumped, it
needs to be depressurized and
cooled. At this time, no other
operation can be carried out. The
purpose of pumping water is to
quickly cool the heater.
1 YEAR
LIMITED WARRANTY
Customer Service:
(877) 246-0990
1716

MOCHA LATTE
RECIPE LEVEL: 5 Minutes - Easy
INGREDIENTS
• 1 shot of espresso
• 8 oz milk (whole or oat froths best)
• 1 oz (2 tbsp) chocolate syrup
• Shaved chocolate
• Whipped cream
WHAT YOU NEED
• Latte Cup
• Frothing Pitcher
• Spoon
• Grater
BARISTA TIPS & TRICKS
To get the perfect foam, always start with milk that’s as cold as possible — it takes air better, and
gives you more time to work it.
INSTRUCTIONS
1. Prepare espresso and pour into cup.
2. Combine milk and chocolate in frothing pitcher and stir.
3. Steam milk until its heated and frothed to perfection.
4. Slowly pour milk into cup.
5. Add whipped cream and shaved chocolate to top.
DIRTY VANILLA CHAI LATTE
RECIPE LEVEL: 5 Minutes - Easy
INGREDIENTS
• 1 bag of chai tea or chai concentrate 3 tbsp boiling water
• 1 shot of espresso
• ⅔ cup milk (whole or oat froths best) 1-2 tsp honey or maple syrup
WHAT YOU NEED
• Latte Cup
• Frothing Pitcher
BARISTA TIPS & TRICKS
2-3 tbsp of Chai powder may be used in place of a tea bag or you can easily make your own chai
concentrate at home. Visit our website for our delicious homemade Chai recipe.
INSTRUCTIONS
1. Place tea bag into mug. Bring hot water to a boil and pour 3 tbsp of boiling water over the
teabag in mug. Cover mug to trap heat in while tea steeps.
2. When the tea is done steeping squeeze out the teabag and set it to the side. Make sure to
extract as much flavor as possible.
3. Prepare espresso shot and pour into mug. Add 1-2 teaspoons of honey or maple
syrup to taste.
4. Add milk to frothing pitcher and steam until light and foamy.
5. Pour milk over tea and espresso and enjoy!
1918

TIRAMISU CAPPUCCINO
RECIPE LEVEL: 8 Minutes - Easy
INGREDIENTS
• 1 shot of espresso
• 1 tsp amaretto liqueur or syrup
• ½ cup of milk (half and half / whole or oat milk froths best)
• 1 tbsp vanilla syrup
• Chocolate Flakes
• 1 Biscotti Cookie
• Whipped Cream (optional)
• ¼ cut heavy whipping cream
• 1 tbsp mascarpone cheese
• ½ tsp vanilla extract
• 1 tsp powdered sugar
WHAT YOU NEED
• Latte Cup
• Mixing Bowl
• Whisk
BARISTA TIPS & TRICKS
Using classic Italian espresso roast coffee beans for this recipe will make it more authentic.
INSTRUCTIONS
1. Combine milk, amaretto and vanilla syrup in frothing pitcher, steam until light and foamy..
2. Pour espresso into cup and pour the milk over it.
3. Combine heavy whipping cream, mascarpone, vanilla extract, and powdered sugar in a
medium mixing bowl. Mix until firm peaks form.
4. Place a dollop of whipped cream on top of the espresso and sprinkle chocolate shavings or
cocoa powder on top.
5. Add a biscotti cookie to the side and enjoy!
ICED CARAMEL BRÛLÉE
MACCHIATO
RECIPE LEVEL: 5 Minutes - Easy
INGREDIENTS
• 2 shots of espresso
• 1-2 tbsp vanilla syrup
• 1 cup of ice
• Drizzle Caramel Sauce
• 12 oz milk (whole or oat froths best)
WHAT YOU NEED
• 16oz Glass Cup
BARISTA TIPS & TRICKS
You can easily make your own vanilla syrup at home with water, sugar and vanilla extract with
a 1:1 ratio.
1. Mix 1 cup of sugar and 1 cup of water in a saucepan.
Slowly heat on a stove, stirring often until completely dissolved
2. Add in 3 tsp of vanilla extract. Remove from heat after 1 minute.
3. Allow the vanilla syrup to cool before bottling
4. Store in the refrigerator and enjoy with your favorite espresso recipes!
INSTRUCTIONS
1. Add vanilla syrup into glass cup.
2. Fill cup with ice.
3. Pour milk over ice.
4. Prepare 2 shots of espresso
5. Slowly pour espresso into cup on an ice cube to create a layer of espresso
on top of the milk.
6. Drizzle caramel sauce on top.
2120

ESPRESSO MARTINI
RECIPE LEVEL: 5 Minutes - Easy
INGREDIENTS
• 2 oz Espresso
• ½ oz Baileys Irish Cream
• 1 oz Vodka or Tequila Reposado
• ½ oz Frangelico Liqueur
• 1 tbsp Cinnamon Simple Syrup
• Ice
• Garnish (optional)
• Coffee bean
WHAT YOU NEED
• Martini glass
• Cocktail Shaker
BARISTA TIPS & TRICKS
Kahlua or a creamy coffee liqueur can also be used in place of Baileys. Tequila Reposado is a
sweeter tequila and helps enhance the flavor profile of the espresso martini. You can easily
make your own cinnamon simple syrup at home with sugar, cinnamon sticks, pure vanilla
extract and water with a 1:1 ratio
Mix 1 cup of sugar and 1 cup of water in saucepan. Slowly heat until completely dissolved.
Add cinnamon sticks, cover and simmer for 5 minutes.
Remove pan from heat, keep covered and allow syrup to cool down. The longer the steep the
more flavor you will extract from the cinnamon sticks. Remove the cinnamon sticks and stir in the
vanilla extract. Store and refrigerate.
INSTRUCTIONS
1. Prepare 2 shots of espresso and let cool to room temp.
2. Add Baileys, Frangelico, cinnamon simple syrup, tequila and espresso to cocktail shaker.
3. Fill cocktail shaker at least ½ full with ice.
4. Shake well and then strain into martini glass.
5. Garnish with 3 coffee beans and enjoy!
AFFOGATO
RECIPE LEVEL: 5 Minutes - Easy
INGREDIENTS
• 1 double shot (2 oz) espresso
• 1 to 2 scoops vanilla gelato
WHAT YOU NEED
• Glass Cup
BARISTA TIPS & TRICKS
The classic Affogato ratio is made 2:1 (2 scoops of ice cream to 1 shot of espresso ) but can be
tailored to your preference at home. You can also use flavored ice cream in place of vanilla to
satisfy your cravings.
INSTRUCTIONS
1. Prepare 1 shot of espresso
2. Add 1-2 scoops of vanilla ice cream to a glass cup.
3. Slowly pour the espresso over the ice cream and enjoy!
2322
Other manuals for SLT-4209
2
Table of contents
Other Sur la table Coffee Maker manuals